
Subscribe to Our Youtube Channel
Related Manuals for Iskratel SI2000 CALLISTO821+

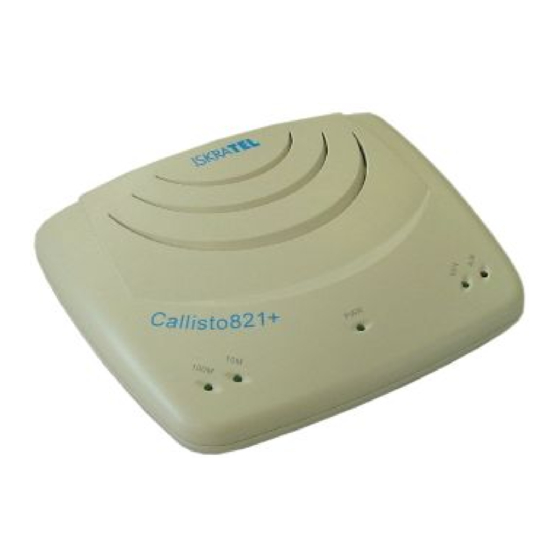
Summary of Contents for Iskratel SI2000 CALLISTO821+
- Page 1 SI2000 CALLISTO821+ ROUTER USER GUIDE © Copyright 2005 Iskratel, Ltd. All rights reserved.
-
Page 2: Table Of Contents
SI2000 Callisto821+ Router User Guide Index: SI2000 CALLISTO821+ ROUTER Features of SI2000 Callisto821+ Router Using SI2000 Callisto821+ Router 1.2.1 Internet access 1.2.2 Security Package contents GETTING STARTED Installation of hardware 2.1.1 Ports RES (Reset button) Ethernet 10Base-T/100Base-T port AC power socket 2.1.2 Light indicators 2.1.3... - Page 3 SI2000 Callisto821+ Router User Guide 3.2.2 Status page Status Advanced Diagnostics Port Connection Status WAN Status LAN Status Hardware Status Defined Interfaces 3.2.3 Quick Start page Creating a login using DHCP 3.2.4 System page Event Log Remote Access Firmware Update Backup / Restore Restart Router 3.2.5...
- Page 4 SI2000 Callisto821+ Router User Guide ROUTED CONNECTIONS About routed configurations PPPoE routed 5.2.1 Computer configuration 5.2.2 Creating connection 5.2.3 Modifying connection RFC1483 routed PPPoA routed IPoA routed PPPoE over Ethernet/Bridge routed QUALITY OF SERVICE ATM Quality of Service Ethernet based Quality of Service 6.2.1 Configuring Scheduler Listing current scheduler profiles...
- Page 5 SI2000 Callisto821+ Router User Guide Triggers Intrusion Detection 8.3.1 Firewall policies Configuring Firewall policies Configuring Portfilters Configuring Validators 8.3.2 Triggers Configuring Triggers 8.3.3 Intrusion Detection Settings Configuring Intrusion Detection Settings TROUBLESHOOTING Recovery mode 9.1.1 Flash memory Main flash memory Recovery flash memory 9.1.2 Updating main flash memory Configuring LAN interface on PC...
- Page 6 SI2000 Callisto821+ Router User Guide 1 SI2000 CALLISTO821+ ROUTER 1.1 Features of SI2000 Callisto821+ Router Your SI2000 Callisto821+ Router router features: high speed data transmission on single twisted copper pair for Internet access full rate operations up to 24 Mbit/s in downstream 10/100BaseT Ethernet port for LAN or PC connection PPPoE (RFC2516) connection support for accessing the Internet PPP over CHAP or PAP...
-
Page 7: Security
SI2000 Callisto821+ Router User Guide ethernet cable internet DSL line DSLAM Figure 1: Example of Internet access connection 1.2.2 Security Connecting your computer to the Internet exposes it to a wide range of risks. The SI2000 Callisto821+ Router comes with security functions to safeguard your system and data. Three types of interfaces can be controlled by the Firewall: Internal (LAN), external (WAN) and DMZ (DeMilitarized Zone). -
Page 8: Getting Started
SI2000 Callisto821+ Router User Guide 2 GETTING STARTED 2.1 Installation of hardware 2.1.1 Ports The following figure shows the rear panel of your SI2000 Callisto821+ Router. Figure 2: The rear panel of the SI2000 Callisto821+ Router This port is used for connecting the ADSL cable to your phone jack. Connect the SI2000 Callisto821+ Router to the ADSL port to access the Internet. -
Page 9: Light Indicators
SI2000 Callisto821+ Router User Guide 2.1.2 Light indicators Figure 3: The front panel of the SI2000 Callisto821+ Router The following figure shows the front panel of your SI2000 Callisto821+ Router. There are five LEDs on the front panel of the router that indicate the status of your SI2000 Callisto821+ Router. -
Page 10: Ethernet (Utp) Cables
SI2000 Callisto821+ Router User Guide 2.1.3 Ethernet (UTP) cables You should use a straight-through Ethernet cable to connect your SI2000 Callisto821+ Router to a computer directly or use a crossover cable to connect to an external hub. The explanation on what does that mean follows. -
Page 11: Preliminary Setup
SI2000 Callisto821+ Router User Guide 2.2 Preliminary setup 2.2.1 LAN and TCP/IP setup This section of the manual provides important information to keep in mind when setting up the first connection between your computer and SI2000 Callisto821+ Router. The factory default settings of the SI2000 Callisto821+ Router have values listed bellow: Local IP address: 192.168.1.1 Subnet mask:... -
Page 12: Obtain An Ip Automatically
SI2000 Callisto821+ Router User Guide Obtain an IP automatically If you enable DHCP server in Callisto821+, is the easiest way to set up a connection to configure the LAN adapter on your system to obtain an IP automatically. This can be done in your operational system by managing the Local Area Connection Properties. - Page 13 SI2000 Callisto821+ Router User Guide Figure 8: The initial screen of the CLI window in Telnet Client To login to the system for the first time, at Login prompt, enter the following user name and password: Login: admin Password: admin To change Local IP address of the router, do next: Type in the CLI prompt: ip set interface iplan ipaddress <ipaddress>...
-
Page 14: Web Management Connection
SI2000 Callisto821+ Router User Guide 2.2.3 WEB management connection SI2000 Callisto821+ Router has embedded WEB server included in the firmware. This section of the document describes the basic principles on how to manage the settings of the SI2000 Callisto821+ Router using WEB management connection with any web browser. - Page 15 SI2000 Callisto821+ Router User Guide Click on LAN Settings below Status line in the Status page. The default IP address is not shown in the table that appears. You can edit default IP address by using the Change default LAN port IP address button below.
-
Page 16: Managing Si2000 Callisto821+ Router
SI2000 Callisto821+ Router User Guide 3 MANAGING SI2000 CALLISTO821+ ROUTER 3.1 Telnet management Telnet Client uses the Telnet Protocol, part of the TCP/IP suite of protocols, to connect to a remote computer over a network. In order to set up the Telnet Client connection, the router and the computer must be parts of the same IP network (e.g. -
Page 17: Object
SI2000 Callisto821+ Router User Guide Object An object is anything that you can create and manipulate as a single entity, for example interfaces, transports, static routes and NAT rules. List Objects are numbered entries in a list. For example if you have created more than one IP interface, the following command: ip list interfaces produces a list of numbered interface objects. -
Page 18: Cli Command Groups
SI2000 Callisto821+ Router User Guide 3.1.2 CLI command groups Your SI2000 Callisto821+ Router has an associated group of commands available in the CLI for configuring the device over Telnet Client. Each command in the group starts with the same command string, e.g. all router configuration commands start with ip. -
Page 19: Cli Conventions
SI2000 Callisto821+ Router User Guide security / Security configuration Used for: enable the security module, create, configure and remove security interfaces and create or configure triggers. nat / NAT configuration Used for: enable/ disable NAT (Network Address Translation) objects, create, configure and remove global address pools and reserve mappings. -
Page 20: Clear
SI2000 Callisto821+ Router User Guide clear The clear command deletes all named entities that belong to an object, for example the following command: firewall clear policies deletes all of the policy objects that belong to the Firewall. You should use the clear command with caution, as the above example also deletes all validators and portfilters that belong to the policies. -
Page 21: Help With Completing Cli Commands
SI2000 Callisto821+ Router User Guide 3.1.4 Help with completing CLI commands You can tab-complete unique keywords in CLI commands. For example, if you type the first few characters of a keyword in a command, then press [Tab] key: bridge s [Tab] and the keyword is automatically completed: bridge show If you type a command keyword and want to find out what the next syntax options are, type ‘[Spacebar]?’. -
Page 22: User Accounts
SI2000 Callisto821+ Router User Guide 3.1.5 User accounts Admin is the only user account which is set up on the system by default. An admin user has super-user level access, so you can create new user accounts and access permissions from this account. To login to the system using admin username do as follows: Login: admin Password: admin... -
Page 23: User Passwords
SI2000 Callisto821+ Router User Guide User passwords To change the password for the user you are currently logged in as, use the command: user password and then enter the new password twice as the figure shows: figure 16: Changing user account password. To change the password for a different user, enter the command: user change <name>... -
Page 24: Web Management
SI2000 Callisto821+ Router User Guide 3.2 WEB management Configuring your SI2000 Callisto821+ Router using WEB management has the same effect as configuring it using Telnet Client with CLI but on many occasions it is much easier to do that using WEB management. Throughout this chapter, you will see references to the Command Line Interface (CLI) commands that provide the same functionality as the WEB management. -
Page 25: Status Page
SI2000 Callisto821+ Router User Guide Status Offers information about the current setup and status of the system. Quick start Allows you to set up some authentication and login details which may be required by your ISP. System Offers information about the system hardware and options or how to upgrade the firmware and restart the system. -
Page 26: Port Connection Status
Version. Information about the firmware release version which has been used to build the image running on your SI2000 Callisto821+ Router. Vendor. Displays the name of the Vendor supplying your SI2000 Callisto821+ Router. The Vendor is IskraTEL. KSS5320A2-ATE-010 26/109... -
Page 27: Defined Interfaces
SI2000 Callisto821+ Router User Guide Defined Interfaces The Defined Interfaces section lists LAN and WAN interfaces that have been defined on your SI2000 Callisto821+ Router. Each interface listed has a Show Statistics hyperlink associated with it. Click on this for detailed information about some/all of the following (depending on the interface type and configuration): •... -
Page 28: Creating A Login Using Dhcp
SI2000 Callisto821+ Router User Guide Creating a login using DHCP To create a login connection using DHCP, you need to: 1. From the Login Type section, click on the No Login/DHCP radio button. The DHCP Login Options form is displayed, shown in Figure 15. 2. - Page 29 SI2000 Callisto821+ Router User Guide Creating a PPPoE login To create a PPPoE login connection you need to: 1. From the Login Type section, click on the PPPoE Login radio button. Then click on Apply. The PPPoE Login Setup form is displayed. Attention! In order to set up a proper PPPoE login connection, the ATM channel VPI and VCI settings must...
-
Page 30: System Page
SI2000 Callisto821+ Router User Guide 2. Once you have configured the PPPoE login options, click on Apply. The Quick Start page is refreshed, and the following confirmation message appears near the top of the page: Settings successfully changed These actions have the same effect as typing the following CLI commands (with the correct values added): pppoe set transport username pppoe set transport password pppoe set transport servicename... -
Page 31: Remote Access
SI2000 Callisto821+ Router User Guide On the page there is a table displayed, containing all configuration errors experienced by your SI2000 Callisto821+ Router during a current session. The table also tells you: • when the error occurred (in seconds since your system was restarted). •... -
Page 32: Firmware Update
SI2000 Callisto821+ Router User Guide Firmware Update This option allows you to upload firmware images to the SI2000 Callisto821+ Router using HTTP. An .tar archive is uploaded to the RAM of your SI2000 Callisto821+ Router. The archive is unpacked automatically, files are validated and then written to Flash memory. -
Page 33: Configuration Page
SI2000 Callisto821+ Router User Guide 3.2.5 Configuration page The Configuration menu contains options for configuring features on SI2000 Callisto821+ Router including basic LAN and WAN connections and DHCP and DNS settings. Attention! Most of the features contain sensible default settings. You are unlikely to have to reconfigure every feature included in the Configuration menu. -
Page 34: Authentication
SI2000 Callisto821+ Router User Guide Authentication This option allows you to administer accounts for users who access the SI2000 Callisto821+ Router. To access the Authentication option, click on the Authentication from the Configuration menu. The following page is displayed: figure 23: The Authentication page. KSS5320A2-ATE-010 34/109... - Page 35 SI2000 Callisto821+ Router User Guide To create a new login account: 1. Click on the Create a new user button. The following page is displayed: figure 24: The Create user page. 2. Type details for the new user into the username, password and comment text boxes, and select a May login? option: •...
- Page 36 SI2000 Callisto821+ Router User Guide To edit / delete a login account: • The Authentication page table contains an Edit user hyperlink for each user account entry. Click on a link. The following page is displayed: figure 25: The Edit user page. This page allows you to: update details for a specific user account.
-
Page 37: Lan Connections
SI2000 Callisto821+ Router User Guide LAN Connections This option allows you to configure the IP address and subnet of the default LAN connection to the SI2000 Callisto821+ Router, configure a secondary IP address on the same subnet as the primary IP address and create virtual interfaces;... - Page 38 SI2000 Callisto821+ Router User Guide To configure primary and secondary LAN connection click on LAN connections from the Configuration menu and then click on the Change default LAN port IP address button. The following page will display: figure 27: The LAN Connections Default LAN Ports page. 1.
-
Page 39: Wan Connections
SI2000 Callisto821+ Router User Guide To create Virtual Interfaces: 1. Click on the Create a new virtual interface... hyperlink at the bottom of the LAN connections Default LAN Port page. On the Create virtual interface page, type the IP address and netmask of the virtual interface, then click on the Apply button. - Page 40 SI2000 Callisto821+ Router User Guide To create a WAN service: 1. Click on Create a new service. A page is displayed containing a list of WAN service options: figure 29: The WAN Connection: create service page. 2. Select an option, then click on Configure. You need to add detailed configuration information about the WAN service that you are creating.
- Page 41 SI2000 Callisto821+ Router User Guide To edit a WAN service: • Click on the Edit link for a specific service. The WAN connection edit page is displayed: figure 30: The WAN Connection: edit service page. • Change the values for the existing service. If you want to carry out advanced editing, click on the links at the top off the edit page.
- Page 42 SI2000 Callisto821+ Router User Guide To create a virtual interface (routed services only): 1. Click on the Virtual I / f link for a specific service. The Virtual interface page is displayed. 2. Click on the Create a new virtual interface... hyperlink. On the Create virtual interface page, type the IP address and netmask of the virtual interface, then click on the Apply button.
-
Page 43: Security
SI2000 Callisto821+ Router User Guide Security This option allows you to configure Security, NAT and Firewall as follows. The detailed options are described in the Chapter 5, Security settings. The quick overview of the Security options follows. Your SI2000 Callisto821+ Router allows you to use: 1. -
Page 44: Zipb
SI2000 Callisto821+ Router User Guide ZIPB Click on the ZIPB link on the navigation bar. ZIPB stands for "Zero Installation PPP Bridge". It is a way to ensure that a home user can be assigned a public IP address through the modem, and can then access the Internet without having to configure NAT on the modem, or install PPP software on the home computer. - Page 45 SI2000 Callisto821+ Router User Guide ZIPB advanced configuration consists of following parameters you can change: • LAN interface: Select a LAN interface from the drop-down list. • WAN interface: Select a WAN interface from the drop-down list. • LAN IP address spoof method: Select an option from the drop-down list. When ZIPB becomes active, a public IP address will be assigned to the PC on the LAN.
-
Page 46: Ip Routes
SI2000 Callisto821+ Router User Guide IP Routes This option allows you to create static IP routes to destination addresses via an IP interface name or a Gateway address. From the Configuration menu, click on IP routes. The Edit Routes page is displayed: figure 31: The Edti Routes page. - Page 47 SI2000 Callisto821+ Router User Guide To edit a route: 1. To edit the destination, gateway and netmask address of a route, click in the relevant text box, update the information then click on Apply. This has the same effect as entering the following CLI command (with the correct values added): ip set route destination ip set route gateway 2.
-
Page 48: Dhcp Server
SI2000 Callisto821+ Router User Guide 2. Complete the Create Ip V4 Route form in order to configure the route. Adding a route has the same effect as entering the following CLI command (with the correct values added): ip add route and you can use the following CLI commands to set the properties of the route (with the correct values added): ip set route destination... - Page 49 SI2000 Callisto821+ Router User Guide Attention! If DHCP relay is enabled, DHCP server will be disabled by default. You can not enable DHCP server unless you disable DHCP relay. To enable / disable the DHCP server: • Click on the Enable/Disable button at the top of the page. •...
- Page 50 SI2000 Callisto821+ Router User Guide 4. Set the DHCP address range (or use a default range of 20 addresses). This has the same effect as entering the following CLI commands (with the correct values added): dhcpserver add subnet dhcpserver subnet add iprange 5.
- Page 51 SI2000 Callisto821+ Router User Guide 3. Click on the Option name drop-down list and select a name. Type a value that matches the selected option name in the Option value text box. Click on OK. This has the same effect as entering the following CLI command (with the correct values added): dhcpserver subnet add option 4.
-
Page 52: Dhcp Relay
SI2000 Callisto821+ Router User Guide This has the same effect as typing the following CLI commands (with the correct values added): dhcpserver set fixedhost ipaddress dhcpserver set fixedhost macaddress dhcpserver set fixedhost maxleasetime dhcpserver delete fixedhost DHCP relay This option allows you to enable/disable the DHCP relay, to add DHCP servers to the DHCP relay list and to configure or delete server entries on the DHCP relay list. - Page 53 SI2000 Callisto821+ Router User Guide To add a DHCP server to the DHCP relay list: 1. In the Add new DHCP server section, type an address in the NewDHCP server IP address text box. 2. Click on Apply. The address is displayed in the Edit DHCP serverlist section. To edit / delete entries in the DHCP relay list:: •...
-
Page 54: Dns Client
SI2000 Callisto821+ Router User Guide DNS client This option allows you to create a list of server addresses. This enables you to retrieve a domain name for a given IP address. DNS client option also allows you to create a domain search list. DNS client uses this list when a user asks for the IP address list for an incomplete domain name. -
Page 55: Dns Relay
SI2000 Callisto821+ Router User Guide DNS relay This option allows you to create, configure and delete DNS relay’s primary and secondary DNS servers. DNS relay can forward DNS queries to the DNS servers on this list. From the Configuration menu, click on DNS Relay. -
Page 56: Ports
SI2000 Callisto821+ Router User Guide 3.3 Ports This section allows you to configure different ports of your Callisto821+ router. Click on the port you want to configure in the navigation bar on left side of the window. KSS5320A2-ATE-010 56/109... -
Page 57: Adsl Port
SI2000 Callisto821+ Router User Guide 3.3.1 ADSL Port Using ADSL port parameters you can monitor the state of you ADSL line. Although there are several parameters which can be changed it is advisable not to change anything. Automatic configuration of ADSL parameters is selected as default configuration for ADSL port. -
Page 58: System (Backup, Restore, Reset)
SI2000 Callisto821+ Router User Guide 3.4 System (backup, restore, reset) 3.4.1 Backup / Restore This option allows you to backup the configuration on your SI2000 Callisto821+ Router to the computer and then restore it from the same place. Backup configuration To backup the configuration of the Callisto821+ do as follows: 1. -
Page 59: Restore Configuration
SI2000 Callisto821+ Router User Guide Restore configuration To restore the configuration to the Callisto821+ do as follows: 1. From the System menu, click on Backup/restore. 2. In the Restore Configuration section, click in the Configuration File text box and type the network path of the file that you wish to restore. -
Page 60: Restart
SI2000 Callisto821+ Router User Guide 3.4.2 Restart This option allows you to restart your SI2000 Callisto821+ Router. Restart To restart your Callisto821+ do as follows: • From the System menu, click on Restart. The following page is displayed: figure 43: The Restart page. •... -
Page 61: Firmware Upgrade
SI2000 Callisto821+ Router User Guide 3.5 Firmware upgrade Attention! Be sure that the SI2000 Callisto821+ Router always has power supply during the Update in progress. Interruptions of power supply during Update may severely damage your Callisto821+ and you will have to contact your Dealer or Product service. See 10.1Recovery mode for troubleshooting in case of malfunctions. -
Page 62: Bridged Configurations
SI2000 Callisto821+ Router User Guide 4 BRIDGED CONFIGURATIONS SI2000 Callisto821+ Router can be configured to operate in bridged mode. This allows Callisto821+ to be used as a simple modem instead of more complex router device. Such configuration is suitable for large deployments where no device configuration is expected. - Page 63 SI2000 Callisto821+ Router User Guide The option used depends on the configuration of your DSLAM, however LLC/SNAP should be used in IskraTEL environment. After you clicked Apply button, the newly created connection is seen under WAN connections: KSS5320A2-ATE-010 63/109...
-
Page 64: Changing Atm Qos Parameters Of The Connection
SI2000 Callisto821+ Router User Guide 4.2 Changing ATM QoS parameters of the connection Once you have created a connection you can change it's ATM QoS parameters in order to achieve correct quality of service behavior. You can do this by clicking Edit link in WAN connections section. Click Edit ATM link. -
Page 65: Changing Scheduler Profile
SI2000 Callisto821+ Router User Guide 4.3 Changing scheduler profile You can associate scheduler profile with your bridged connection if you want to use 802.1p traffic priority mechanism. Enter the name of scheduler profile into Sch Profile field and press Change. After associating scheduler profile with your connection you must save configuration and restart the router. -
Page 66: Changing Bridge Interface Settings
SI2000 Callisto821+ Router User Guide 4.4 Changing bridge interface settings In Edit bridge interface section you can configure various bridge parameters for this connection. Name Description Ether Filter Type This option is used to select which packets will be sent over this connection and which not. -
Page 67: Bridge Settings
SI2000 Callisto821+ Router User Guide 4.5 Bridge settings This chapter describes bridge operation inside Callisto821+. Bridge is a software process which forwards Ethernet packets from one interface to another. Interface can be physical Ethernet or virtual ATM connection with appropriate encapsulation method as described in previous chapters. Bridge can be configured from main bridge configuration page in Configuration section. -
Page 68: Interface Configuration
SI2000 Callisto821+ Router User Guide 4.6 Interface configuration This page displays all interfaces attached to the bridge. Usually there are WAN connections created by user as described in 4.3.1Creating new bridged connection and permanent LAN connections. Options available to change are the same as described in 4.3.4Changing bridge interface settings. -
Page 69: Creating New Vlan
SI2000 Callisto821+ Router User Guide 4.7.1 Creating new VLAN Click Create new VLAN link at the bottom of VLAN main page. Enter a descriptive name of your VLAN into Name field. For Vlan Id select a number smaller than 4096 but not equal to 1 if you are not creating DefaultVlan for untagged traffic. - Page 70 SI2000 Callisto821+ Router User Guide Untagged port is used when you do not want to transport VLAN tags over RFC1483 connection. If interface is added to VLAN as untagged, bridge will remove VLAN tag when transmitting to this interface and add default port VLAN ID Pvid when receiving frames from this interface.
-
Page 71: Forward All/Unregistered Configuration
SI2000 Callisto821+ Router User Guide 4.8 Forward All/Unregistered Configuration This section allows you to change multicast traffic settings. By default the bridge in Callisto821+ will not allow any multicast traffic. If you want to transport multicast frames over bridged connection, you must enable it by adding appropriate ports into Forward All/Unregistred Configuration section. -
Page 72: Routed Connections
SI2000 Callisto821+ Router User Guide 5 ROUTED CONNECTIONS 5.1 About routed configurations This chapter will describe to you how to configure your SI2000 Callisto821+ Router in different routed configurations to establish LAN to WAN connection. All of the configurations in this section use the SI2000 Callisto821+ Router ip module to route between Ethernet and an ATM protocol. -
Page 73: Creating Connection
SI2000 Callisto821+ Router User Guide 5.2.2 Creating connection In the navigation bar on the left side click WAN Connections link. By default there should be one bridged connection in the system. It is most likely you will want to delete this connection as you will not need it. Select Create a new service link. - Page 74 SI2000 Callisto821+ Router User Guide Select PPPoE Routed and click Configure button to proceed. In this section you must configure required settings for establishing PPPoE connection. Description: Enter a descriptive name for your connection. This value is for your reference only. KSS5320A2-ATE-010 74/109...
- Page 75 SI2000 Callisto821+ Router User Guide VPI: ATM VPI (Virtual Path Identifier) is a number representing ATM path. You should get this number from you Service provider. VCI: ATM VCI (Virtual Channel Identifier) is a number representing ATM channel. You should get this number from you Service provider.
-
Page 76: Modifying Connection
SI2000 Callisto821+ Router User Guide 5.2.3 Modifying connection If you click on Edit link of your connection you can change various parameters. In Edit PPPoE section you can change parameters you have previously entered during connection creation. Sections Edit Atm Channel and Edit Scheduler are the same as for bridged connections. Please refer to 4.3Changing ATM QoS parameters of the connection 4.4Changing scheduler profile for more... -
Page 77: Rfc1483 Routed
SI2000 Callisto821+ Router User Guide 5.3 RFC1483 routed If you service provider uses RFC1483 in routed configuration you must create RFC1483 routed connection instead of PPPoE connection. Select RFC 1483 routed when creating new WAN connection. KSS5320A2-ATE-010 77/109... - Page 78 SI2000 Callisto821+ Router User Guide You will get the following page: Description: Enter the name of this connection. This name is for your reference only. VPI: ATM VPI (Virtual Path Identifier) is a number representing ATM path. You should get this number from you Service provider.
-
Page 79: Pppoa Routed
SI2000 Callisto821+ Router User Guide 5.4 PPPoA routed When you want to use PPP over ATM as a protocol for your routed connection select PPPoA Routed when creating new connection. KSS5320A2-ATE-010 79/109... - Page 80 SI2000 Callisto821+ Router User Guide You will need to enter the following settings: PPPoA is similar to PPPoE so also the parameters are almost the same. Basically PPPoA differs from PPPoE in the protocol used to transport PPP frames. In case of PPPoE it is Ethernet, but in case of PPPoA it is ATM directly.
-
Page 81: Ipoa Routed
SI2000 Callisto821+ Router User Guide 5.5 IPoA routed IP over ATM is even less complex protocol than any others. You can easily connect two devices because this protocol is not master/slave oriented. When creating new WAN Connection select IPoA routed: You need to enter only very basic parameters for IPoA connection. - Page 82 SI2000 Callisto821+ Router User Guide Description: Enter the name of this connection. This name is for your reference only. VPI: ATM VPI (Virtual Path Identifier) is a number representing ATM path. You should get this number from you Service provider. VCI: ATM VCI (Virtual Channel Identifier) is a number representing ATM channel.
-
Page 83: Pppoe Over Ethernet/Bridge Routed
SI2000 Callisto821+ Router User Guide 5.6 PPPoE over Ethernet/Bridge routed This connection type is very useful when you want your SI2000 Callisto821+ Router to operate in mixed bridge-router mode. It is quite often the case your service provider can offer you certain services (video services, VoIP telephony, ...) only when your DSL CPE is configured as bridge. - Page 84 SI2000 Callisto821+ Router User Guide You will see almost the same parameters as in the case of creating normal PPPoE connection. Instead of ATM VPI/VCI settings there is a port name to choose from drop-down list. This name represents the transport used for transporting PPPoE frames. In most cases this transport would be previously created bridged connection.
-
Page 85: Quality Of Service
SI2000 Callisto821+ Router User Guide 6 QUALITY OF SERVICE SI2000 Callisto821+ Router Is capable of providing quality of service on two layers: ATM layer using different QoS traffic classes – Ethernet layer using IEEE 802.1p mechanism – 6.1 ATM Quality of Service ATM QoS parameters can easily be set for each ATM virtual connection under WAN Connections section as described in 5.2Changing ATM QoS parameters of the... -
Page 86: Configuring Scheduler
SI2000 Callisto821+ Router User Guide Vo IP Vid e o In t e rn e t Q u e u e Q u e u e Qu e u e Vo IP Vid e o In t e rn e t Q u e u e Q u e u e Q u e u e... -
Page 87: Creating New Scheduler Profile
SI2000 Callisto821+ Router User Guide Creating new scheduler profile To create new scheduler profile type scheduler add profile <ProfileName> priority to create priority based scheduling profile where <ProfileName> is the name of scheduler profile. --> scheduler add profile defwan priority To create weighted fair queuing scheduler profile type scheduler add profile <ProfileName>... -
Page 88: Internet Access
SI2000 Callisto821+ Router User Guide 7 INTERNET ACCESS This chapter will describe to you how to configure the LAN and WAN parameters of your SI2000 Callisto821+ Router to access the internet. Assume that the following network is setup: ethernet cable internet DSL line DSLAM... -
Page 89: Encapsulation
SI2000 Callisto821+ Router User Guide 7.1.1 Encapsulation Be sure to use the same encapsulation method required by your ISP. SI2000 Callisto821+ Router supports the methods that are listed bellow: IPoA SI2000 Callisto821+ Router allows users of IP traffic to migrate to ATM as an underlying data transport while continuing to use existing system applications designed for legacy IP systems. -
Page 90: Vpi And Vci
SI2000 Callisto821+ Router User Guide 7.1.2 VPI and VCI When you are setting up a configuration, no mater what the encapsulation is, on the WAN side of your Callisto821+, the VPI (Virtual Path Identifier) and VCI (Virtual Channel Identifier) values that you type in must be the same as required by your ISP. -
Page 91: Multiplexing
SI2000 Callisto821+ Router User Guide 7.1.3 Multiplexing There are two conventions to identify what protocols the virtual circuit (VC) is carrying. Be sure to use the multiplexing method required by your ISP. VC-based multiplexing In this case, by prior mutual agreement, each protocol is assigned to a specific virtual circuit, for example, VC1 carries IP, etc. -
Page 92: Security Options
SI2000 Callisto821+ Router User Guide 8 SECURITY OPTIONS 8.1 Security This chapter will describe how to manage the security settings on your SI2000 Callisto821+ Router. The Callisto821+ security software helps the user setup and enforce security policies. These policies define which kind of traffic is allowed to pass through a gateway and from whom the traffic is allowed. -
Page 93: Enabling Security
SI2000 Callisto821+ Router User Guide 8.1.1 Enabling security Enabling security You must enable Security before you can enable Firewall and/or Intrusion Detection. In the Security State section: 1. Click on the Security Enabled button. 2. Click on Change State to update the Security State section. This has the same effect as typing the following CLI commands: security enable security status... -
Page 94: Configuring Security Interfaces
SI2000 Callisto821+ Router User Guide 8.1.2 Configuring security interfaces Configuring security interfaces Security interfaces are based on existing LAN and WAN services. You must create a LAN or WAN service for every security interface that you want to configure. 1. From the Security Interfaces section, click on Add Interface. The Firewall: Add Interface page is displayed: figure 72: The Security: Add interface page. -
Page 95: Nat
SI2000 Callisto821+ Router User Guide 8.2 NAT Network Address Translation is a feature that keeps private network addresses private when accessing a public network. You should be familiar with the next terms when using NAT features: Global IP Address Pools A Global Address Pool is a pool of addresses seen from the outside network. -
Page 96: Configuring Nat
SI2000 Callisto821+ Router User Guide 8.2.1 Configuring NAT Configuring NAT To configure NAT, you need to: 1. Enable Security. 2. Create at least two different security interface types based on existing LAN or WAN services. 3. Once you have created more than one security interface, the NAT column in the Security Interfaces table tells you that you can enable NAT between the existing security interface and a network interface type. -
Page 97: Nat Global Address
SI2000 Callisto821+ Router User Guide 8.2.2 NAT Global Address Global address pools allow you to create a pool of outside network addresses that is visible outside your network. Before you can configure global addresses, you need to configure NAT. Configuring NAT global addresses To set up a global address pool on your existing NAT enabled interfaces: 1. - Page 98 SI2000 Callisto821+ Router User Guide 2. Click on Add Global Address Pool The following page is displayed: figure 75: The NAT Add Global Address Pool page. 3. This page allows you to create a pool of network IP addresses that are visible outside your network. Add values for the following table entries: •...
-
Page 99: Nat Reserved Mapping
SI2000 Callisto821+ Router User Guide 8.2.3 NAT Reserved Mapping Reserved mapping allows you to map an outside security interface or an IP address from a global pool to an individual IP address inside the network. Mapping is based on transport type and port number. Before you can configure reserved mapping, you need to configure NAT. -
Page 100: Firewall
SI2000 Callisto821+ Router User Guide These actions have the same effect as typing the following CLI commands: nat add resvmap globalip nat add resvmap interfacename nat list resvmaps nat delete resvmap Click on Return to Interface List to display the Security Interface Configuration page. 8.3 Firewall You should be familiar with the next terms when using Firewall features: Port Filtering... -
Page 101: Firewall Policies
SI2000 Callisto821+ Router User Guide 8.3.1 Firewall policies Configuring Firewall policies A policy is the collective term for the rules that apply to incoming and outgoing traffic between two interface types. Before you can create a Firewall policy, you need to enable Firewall. 1. -
Page 102: Configuring Portfilters
SI2000 Callisto821+ Router User Guide Configuring Portfilters A portfilter is an individual rule that determines what kind of traffic can pass between two interfaces specified in an existing policy..To configure a portfilter: • From the Current Security Policies table, click on the Port Filters link for the policy that you want to configure. - Page 103 SI2000 Callisto821+ Router User Guide • For a non-TCP/UDP portfilter click on Add Raw IP Filter. The following page is displayed: figure 80: The Add Raw IP Filter page. Specify the protocol number in the Transport Type text box, for example, for IGMP, enter protocol number more...
-
Page 104: Configuring Validators
SI2000 Callisto821+ Router User Guide Configuring Validators A validator allows/blocks traffic based on the source/destination IP address and netmask. Traffic will be allowed or blocked depending on the validator configuration specified when the policy was created. To configure a validator: 1. -
Page 105: Triggers
SI2000 Callisto821+ Router User Guide 8.3.2 Triggers Configuring Triggers A trigger allows an application to open a secondary port in order to transport packets. The most common applications that require secondary ports are FTP and NetMeeting. To configure a trigger: 1. - Page 106 SI2000 Callisto821+ Router User Guide • Enable UDP Session Chaining; select Allow or Block depending on whether you want to allow multi-level UDP and TCP session chaining. You must set Enable Session Chaining to Allow if you want this to work. •...
-
Page 107: Intrusion Detection Settings
SI2000 Callisto821+ Router User Guide 8.3.3 Intrusion Detection Settings Configuring Intrusion Detection Settings Intrusion Detection settings allow you to protect your network from intrusions such as denial of service (DOS) attacks, port scanning and web spoofing. To configure Intrusion Detection settings: 1. -
Page 108: Troubleshooting
SI2000 Callisto821+ Router User Guide 9 TROUBLESHOOTING 9.1 Recovery mode You will now that the SI2000 Callisto821+ Router is running in recovery mode when both WAN and ALM LEDs are blinking fast. 9.1.1 Flash memory Main flash memory The flash memory in your Callisto821+ is divided into two parts. The first part contains data that is necessary for normal functioning of your Callisto821+, the main flash partition. -
Page 109: Updating Flash Memory
SI2000 Callisto821+ Router User Guide Updating flash memory Move to the folder where the .tar file is. For updating the flash memory, write the following command in Linux/Unix terminal or Windows Command prompt: recovery <name of tar file> While updating in progress, the ALM LED will be blinking. When the blinking stops, the procedure is finished and the router will be rebooted with new software.
Need help?
Do you have a question about the SI2000 CALLISTO821+ and is the answer not in the manual?
Questions and answers