Table of Contents
Advertisement
Available languages
Available languages
Warning: This is an unvented, electric appliance.
DO NOT attempt to burn wood or manufactured
firelogs in or on this appliance or grate.
REV-0
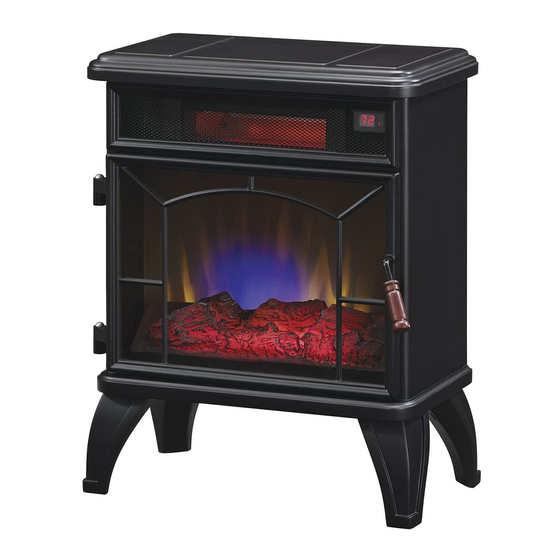
MODEL/ MODELE/ MODELO:
DFI-550-0
www.tsicustomerservice.com
Distributed by • Distribuido por • Distribué par • Twin-Star International, Inc; Delray Beach, FL 33445
Made in China • Printed in China • Fabricado en China • Impreso en China • Fabriqué en China • Imprimé en Chine
Advertencia: Este es un aparato eléctrico sin
ventilación. NO intente quemar leños fabricados ni
madera dentro o sobre este aparato o su parrilla.
Avertissement : Il s'agit d'un appareil électrique
non ventilé. NE PAS tenter de faire brûler du bois
ou des bûches fabriquées dans l'appareil ou sur
la grille.
1
Español P.12
www.tsicustomerservice.com
Advertisement
Table of Contents

Summary of Contents for Duraflame DFI-550-0
- Page 1 MODEL/ MODELE/ MODELO: DFI-550-0 Español P.12 www.tsicustomerservice.com Distributed by • Distribuido por • Distribué par • Twin-Star International, Inc; Delray Beach, FL 33445 Made in China • Printed in China • Fabricado en China • Impreso en China • Fabriqué en China • Imprimé en Chine Warning: This is an unvented, electric appliance.
-
Page 2: Important Instructions
IMPORTANT INSTRUCTIONS When using electrical appliances, basic precautions should always be followed to reduce the risk of fire, electrical shock, and injury to persons including the following: 1. Read all instructions before using this appliance. 2. This appliance is hot when in use. To avoid burns, do not let bare skin touch hot surfaces. If provided, use handles when moving this appliance. -
Page 3: Getting Started
SN #: SQLA00000X Date Code/ Code de Date/ Código Fecha: 2. Go to www.tsicustomerservice.com for product warranty registration. For registration use the MODEL NUMBER: DFI-550-0. If you are unable to complete registration save your proof of purchase for warranty purposes. PRODUCT SPECIFICATIONS... -
Page 4: Installation Instructions
INSTALLATION INSTRUCTIONS Tools Required for Assembly Phillips Head Screwdriver Leg Assembly Align the 2 mounting tabs into the Slide the legs outward to lock in Fasten the legs to the base using bracket. place. When locked in position the included screws,1 per leg the screw hole from step 3 will be aligned. -
Page 5: Care And Maintenance
INSTALLATION INSTRUCTIONS Mounting The Handle Insert the handle into the front hole in the door, insert the screw into the interior hole and tighten. CARE AND MAINTENANCE Clearance To Combustibles Keep electrical cords, drapery, furniture and other combustibles at least 3 ft (0.9 m) from the front of the heater and away from the sides. -
Page 6: Operation Instructions
OPERATION INSTRUCTIONS Indicator Control Panel Location When a function is changed from the control panel or remote there will be a corresponding indicator. The indicator shows the function changed and the level selected. When the function is turned off, the corresponding indicator will flash several times then fade off. - Page 7 OPERATION INSTRUCTIONS Function Icon Description Use the power button to turn on or off the stove from the POWER remote or control panel. To adjust the flame brightness press the FLAME button. FLAME The current flame brightness setting will be flashing on the indicator, use the UP and DOWN arrow to adjust the brightness.
-
Page 8: Troubleshooting Guide
TROUBLESHOOTING GUIDE Problem Root Cause Corrective Action 1. No power 1a. Power cord was not plugged into 1a. Check that unit is plugged directly into a standard 120 volt outlet. the outlet. 1b. Contact Customer Service for a replacement main PCBA. 1b. -
Page 9: Exploded View
EXPLODED VIEW Part Part Name Blue Flame PCBA Red Flame PCBA Flame Generator Drive Motor Flame Generator/Spinner Emberbed with Log Legs Heater/Blower Assembly Main PCBA Control panel PCBA Door Pull Remote control Note, the scale and size of your parts may be different depending on your exact model REV-0 www.tsicustomerservice.com... -
Page 10: Fcc/Ic Information
FCC/IC INFORMATION NOTE: This equipment has been tested and found to comply with the limits for Class B digital device, pursuant to part 15 of the FCC Rules. These limits are designed to provide reasonable protection against harmful interference in a residential installation. This equipment generates, uses, and can radiate radio frequency energy and, if not installed and used in accordance with the instructions, may cause harmful interference to radio or television reception, which can be determined by turning the equipment off and on, the user is encouraged to try to correct the interference by one or more of the following measures:... -
Page 11: Year Limited Warranty
1-YEAR LIMITED WARRANTY The manufacturer warrants that your new Electric Stove is free from manufacturing and material defects for a period of one year from date of puchase, subject to the following conditions and limitations. 1. Install and operate this appliance in accordance with the installation and operating instructions furnished with the product at all times. -
Page 12: Instrucciones Importantes
INSTRUCCIONES IMPORTANTES Al utilizar aparatos eléctricos, siempre deberán tomarse precauciones básicas para reducir el riesgo de incendio, descarga eléctrica y lesiones a personas. Éstas incluyen: 1. Lea todas las instrucciones antes de usar este aparato. 2. Este aparato se calienta cuando está en uso. Para evitar quemaduras, no permita que la piel sin protección entre en contacto con superficies calientes. -
Page 13: Para Empezar
Date Code/ Code de Date/ Código Fecha: 2. Visitar www.tsicustomerservice.com para el registro de la garantía del producto. Para inscribirse use el NÚMERO DE MODELO: DFI-550-0. Si usted no puede completar el registro guarde el comprobante de compra para hacer válida la garantía. -
Page 14: Instrucciones De Instalación
INSTRUCCIONES DE INSTALACIÓN Herramientas requeridas para el ensamblado Destornillador de cabezal Phillips Leg Asamblea Alinee las 2 pestañas de montaje en Deslice las patas hacia fuera para Fije las patas en la base al utilizar el soporte. que encajen en su lugar. Cuando los tornillos incluidos, 1 por pata esté... -
Page 15: Cuidado Y Mantenimiento
INSTRUCCIONES DE INSTALACIÓN Montaje del mango CUIDADO Y MANTENIMIENTO • Limpie la moldura metálica con un paño suave humedecido con un producto a base de aceite cítrico y púlalo con un paño suave y limpio. • NO utilice productos de limpieza domésticos ni limpiametales, ya que estos productos dañarán la moldura metálica. Los productos a base de aceite cítrico pueden conseguirse en supermercados o ferreterías. - Page 16 Indicador Localización del panel de control Cuando una función se cambia desde el panel de control o el control remoto, habrá un indicador correspondi- ente. El indicador muestra que la función ha cambiado y al nivel seleccionado. Cuando la función se desactiva, el indicador correspondiente parpadea varias veces y luego desaparecerá.
-
Page 17: Instrucciones De Operación
INSTRUCCIONES DE OPERACIÓN FUNCIÓN ICONO DESCRIPCIÓN Utilice el botón de encendido para encender o apagar la estufa ENCENDIDO desde el control remoto o desde el panel de control. Para ajustar el brillo de la llama pulse el botón FLAME. El LLAMA ajuste de la luminosidad de la llama actual parpadeará... -
Page 18: Solución De Problemas
SOLUCIÓN DE PROBLEMAS Problema Causa Medidas correctivas 1. No hay 1a. El cable de alimentación no estaba 1a. Compruebe que la unidad esté enchufada directamente a una toma alimentación enchufado en la toma de corente. de corriente estándar de 120V. 1b. - Page 19 VISTA DESPLEGADA Pieza Parte Nombre PCBA de llama azul PCBA de llama roja Motor de generación de llama Generador/rotador de llama Incrustado con troncos Patas Montaje del Calentador/Soplador PCBA principal Panel de control del PCBA Tirador de puerta Control remoto Tome en cuenta que la escala y el tamaño de sus partes pueden ser diferentes dependiendo de su modelo exacto REV-0 www.tsicustomerservice.com...
-
Page 20: Reemplazo De Batería
INFORMACIÓN DE FCC/IC NOTA: Este equipo ha sido probado y se ha verificado que cumple con los límites para un dispositivo digital clase B, conforme a la sección 15 de las regulaciones de la FCC. Estos límites están diseñados para proporcionar protección razonable contra interferencia perjudicial en una instalación residencial. -
Page 21: Garantía Limitada De 1 Año
GARANTÍA LIMITADA DE 1 AÑO El fabricante garantiza que su nueva estufa eléctrica no presentará defectos de fabricación ni materiales durante un período de un año a partir de la fecha de compra, siempre y cuando se cumplan las siguientes condiciones y limitaciones. 1.
Need help?
Do you have a question about the DFI-550-0 and is the answer not in the manual?
Questions and answers
Heater has stopped. Control knob on front seems to be mechanically opening and closing ok. No broken or disconnected wires or terminals. Can I get a replacement for the knob mechanism behind the front cover. Also, what is the name of the electro-mechanical part here in case I have to order one elsewhere. Thank you for your assistance. It is a Duraflame model 550-0 unit.
The electro-mechanical part behind the front cover is the Flame Generator/Spinner shaft. The document does not provide information about the availability of a replacement for the knob mechanism.
This answer is automatically generated