Table of Contents
Advertisement
Quick Links
Advertisement
Table of Contents

Related Manuals for inXtron Hydra eSATA


Summary of Contents for inXtron Hydra eSATA
- Page 1 Hydra eSATA 4-Bay RAID Storage Enclosure User Manual January 16, 2009 - v1.0...
-
Page 2: Table Of Contents
Table of Contents Introduction ..........................1 System Requirements ....................... 1 1.1.1 PC Requirements ...................... 1 1.1.2 Mac Requirements ....................1 1.1.3 Supported Hard Drives ....................1 Package Contents ......................1 About this Manual......................1 Trademarks ........................1 Detailed View ........................2 1.5.1 Alarm ......................... -
Page 3: Introduction
System need to have the capacity to support large volumes (e.g.: WinVista 32bit/64bit or Mac OS 10.4 and above) 1.2 Package Contents Package content may vary depending on vendor & version. • Hydra eSATA (no hard drives included) • Power cord • eSATA cable • Manual 1.3 About this Manual... -
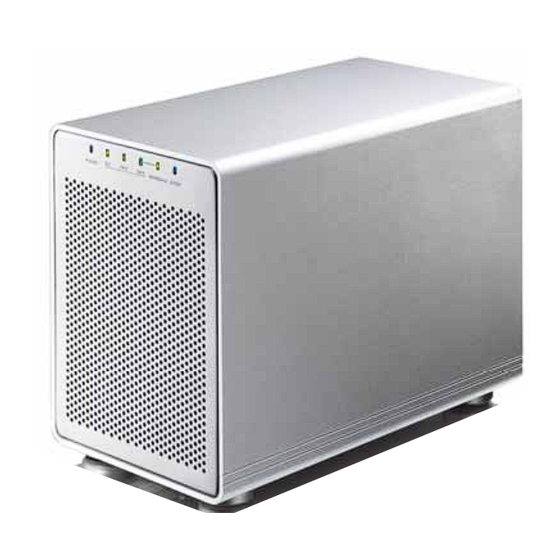
Page 4: Detailed View
Hydra eSATA Introduction 1.5 Detailed View LED indication and buttons as seen behind the front panel of the Hydra eSATA. LED or Button Status or Function POWER Blue = Power on Yellow = BIG mode active (JBOD spanning) FAST Amber = FAST mode active (RAID 0 striping) -
Page 5: Changing The Raid Mode
Hydra eSATA Introduction 1.5.3 Changing the RAID Mode The RAID mode should be set after installing the drives and before first formatting the drives. Also, when adding more drives at a later point, the RAID mode has to be re-selected and confirmed again in order for the new drives to be added to the RAID array. -
Page 6: Raid 0 - Disk Striping (Fast)
Hydra eSATA Introduction 1.6.3 RAID 0 - Disk Striping (FAST) The drives are shown as one large single volume but the total size will depend on the drive with the smallest capacity. This setting is used where speed is the primary objective but RAID Level 0 (also called striping) is not redundant. -
Page 7: System Setup
Hydra eSATA System Setup 2 System Setup 2.1 Hard Drive Assembly The drives can be installed at any position, there is no specific order required. 1. Unlock the switch at the bottom of the case and push the inner chassis from the back until the front panel is out of the housing. -
Page 8: Replacing Hard Drives
Hydra eSATA System Setup 2.2 Replacing Hard Drives When one of the drives fails, the Error LED will light up red, the alarm will go off and the corresponding HDD LED (A-D) will be off instead of the normal green. If only one drive is defective... -
Page 9: Appendix
Hydra eSATA Appendix 3 Appendix 3.1 Precautions 3.1.1 Power on/off precautions It is highly recommended to switch the unit off when not in use. When re-locating the device or when not in use for an extended period of time, we strongly recommend unplugging the unit.
Need help?
Do you have a question about the Hydra eSATA and is the answer not in the manual?
Questions and answers