Table of Contents
Advertisement
Advertisement
Table of Contents

Related Manuals for Craftex CX605

Summary of Contents for Craftex CX605
- Page 1 CX605 MINI MILLING MACHINE User Manual...
-
Page 2: Table Of Contents
TABLE OF CONTENTS General Safety Instructions for Machines ............... 3 Specific Safety Instructions ..................4 CX605 Features...................... 5 Physical Features ....................6 Proper Grounding ....................7 Setup ........................8 Un-Packing ......................8 Mounting to a Workbench or Stand................. 9 Assembly ........................ 9 Control Panel ...................... -
Page 3: General Safety Instructions For Machines
GENERAL SAFETY INSTRUCTIONS FOR MACHINES Extreme caution should be used when operating all power tools. Know your power tool, be familiar with its operation, read through the owner’s manual, and practice safe usage procedures at all times. ALWAYS read and understand the NEVER leave a tool unattended while it user manual before operating the is in operation. -
Page 4: Specific Safety Instructions
CX605 – MINI MILLING MACHINE SPECIFIC SAFETY INSTRUCTIONS READ AND UNDERSTAND the user SELECT PROPER SPINDLE manual before operating SPEED for the type of work and material milling/drilling machine. you are cutting. Let the spindle reach to its full speed before beginning a cut. -
Page 5: Cx605 Features
CX605, a Mini Milling Machine with Variable Speed. By following the instructions and procedures laid out in this user manual, you will receive years of excellent service and satisfaction. The CX605 is a professional tool and like all power tools, proper care and safety procedures should be adhered to. -
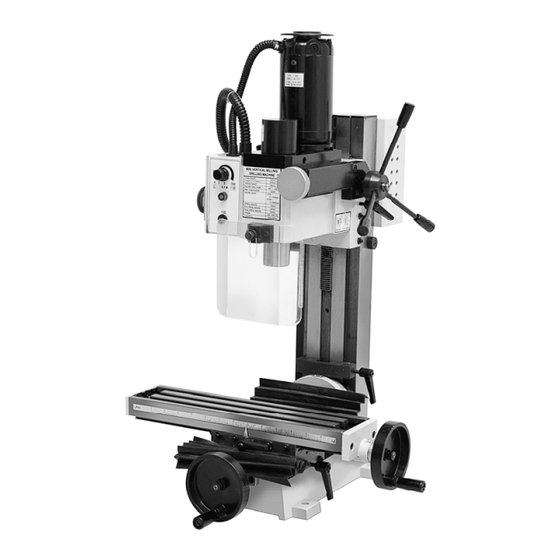
Page 6: Physical Features
CX605 MINI MILLING MACHINE PHYSICAL FEATURES... -
Page 7: Proper Grounding
Improper connection of the equipment- grounding conductor can result in a risk CX605 is for use on a normal 110 volt of electric shock. Check with a qualified circuit. Make sure that the machine is electrician if you are in doubt as to connected to an outlet having the same whether the outlet is properly grounded. -
Page 8: Setup
WARNING! (weight of CX605). The stand or workbench must be level so that the machine is CX605 is a heavy machine, do not over- mounted in a stable position. exert yourself. Use a fork truck or get the help of an assistant for safe moving. -
Page 9: Assembly
The hand wheels on your CX605 come This section provides information on the installed and you will need to install only the CX605 control panel. It is good to get handles on the hand wheels. familiar with your machine's control panel before operation. -
Page 10: Test Run
ON. high speed. 6. Now, push the Emergency Stop Button TO TEST RUN THE CX605: in, it should turn the machine OFF. 1. Shift the speed range lever to LOW 7. Reset the ON & Speed Control Knob by position. -
Page 11: Down Feed Controls
DOWN FEED CONTROLS LIMIT BLOCK The CX605 features two down feed The limit block allows to limit the amount of methods; rapid down feed and fine down head travel while down feeding. This feed. feature is used when drilling repeated holes. -
Page 12: Tilting The Column
TABLE TRAVEL TILTING THE COLUMN The CX605 is designed so that the table The column can be tilted up to 45° either to travels in X and Y axis and the travels is the right or to the left on vertical axis and controlled by two hand wheels. -
Page 13: R8 Collets
R8 COLLETS Locate the hole on the side of the head and insert the spindle locking pin into the hole. The CX605 comes with an R8 spindle taper See figure-10. and accepts only R8 collets. TO INSTALL THE COLLET: Make sure the machine is OFF and the cord is disconnected from the power source. -
Page 14: Spindle Rpm
The CX605 features Low (0-1100 RPM) and High (0-2500 RPM) speed ranges. To 1. Treat your machine with care, keep it select between the high and low speed clean and grease and lubricate it regularly. -
Page 15: Gibs Adjustment
GIBS ADJUSTMENT REPLACING MOTOR BRUSHES After a period of time, movement of the work table and the head over the slide ways After sometimes the carbon brushes on the will cause normal wear that needs to be DC motor will need to be replaced. adjusted. -
Page 16: Fuse Replacement
FUSE REPLACEMENT LUBRICATION The CX605 features a 4.5 Amp fuse located Apply three to four drops of ISO 68 or on the control panel. similar oil directly to the areas shown in figure-15. TO REPLACE THE FUSE: Make sure the machine is OFF the cord is disconnected from the power source. -
Page 17: Parts Diagram & Parts List
CX605 PARTS DIAGRAM... - Page 20 CX605 PARTS DIAGRAM PART DESCRIPTION Y-axis wedge Base X-axis screw nut Cross leadscrew Cap screw M6 x 25 Key 4 x 16 Column support Dial 39―1 Shaft Hand wheel 39―2 Handle sleeve Spring insert Screw M8 x 55 40―1 Washer...
- Page 21 Limit block Double head bolt M8 x 70 Wedge Warning label Ruler Electric box cover Column Electric box Electric box Shaft (1) Lock nut M24 key 4 x 45 Washer Spacing ring Connecting strut Spacing ring Screw Spindle nut Spindle key 5 x 18 Support block Cap srew M5 x 12...
- Page 22 Self-tapping Screw ST2.9 Screw Fixed sleeve H/L label Washer Motor cover Shaft Warming lable R8 Taper-shank PC board Lock sleeve Rotor shaft Key 4 x 8 Spring support Torsion spring Cover Prop Supporting shank Screw Washer Washer Cover Top cover Spindle gear II Set collar Spindle gear I...
-
Page 23: Warranty
This warranty shall not apply to consumable products such as blades, bits, belts, cutters, chisels, punches etceteras. Craftex shall in no event be liable for injuries, accidental or otherwise, death to persons or damage to property or for incidental contingent, special, or consequential damages arising from the use of our products.
Need help?
Do you have a question about the CX605 and is the answer not in the manual?
Questions and answers