Table of Contents
Advertisement
Integrated Fridge Freezer
Focal Point Fires plc.
Christchurch, Dorset BH23 2BT
Tel: 01202 499330 Option 5
Fax: 01202 499326
www.focalpointfires.co.uk
e : sales@focalpointfires.co.uk
Please note: Except where otherwise stated, all rights,
including copyright in the text, images and layout of this
booklet is owned by Focal Point Fires plc. You are not
permitted to copy or adapt any of the content without
the prior written permission of Focal Point Fires plc.
Owner's Instructions
MODELS COVERED BY THESE INSTRUCTIONS
RD-270REU Integrated Fridge Freezer
1
RD-270REU
All instructions must be handed to the user for
safekeeping.
Revision C - 09/13
GB IE
©
2013 Focal Point Fires plc.
Advertisement
Table of Contents

Summary of Contents for Focal Point RD-270REU
- Page 1 Please note: Except where otherwise stated, all rights, including copyright in the text, images and layout of this booklet is owned by Focal Point Fires plc. You are not All instructions must be handed to the user for permitted to copy or adapt any of the content without safekeeping.
-
Page 2: Table Of Contents
Appliance description Installation Appliance features Electrical connection Control Panel Positioning Using your appliance Reversing the RD-270REU doors Turning on the appliances and Aperture & ventilation requirements setting the thermostat Installing your fridge freezer Storing food in the fridge & freezer Troubleshooting... -
Page 3: Important Safety Information
Do not place electrical devices inside of the appliance such as mixers. Service You should not attempt to repair the appliance yourself, as this could cause injury or a more serious malfunction. If you require a service call then please contact the manufacturer. © 2013 Focal Point Fires plc. -
Page 4: Rd-270Reu Specification
Cubic capacities Gross Capacity: Litres Net Capacity (fridge/freezer) 198/67 Litres Energy efficiency class Energy class: A+ *Please refer to the installation instructions for more specific information on the size of aperture that you will require. © 2013 Focal Point Fires plc. -
Page 5: Appliance Description
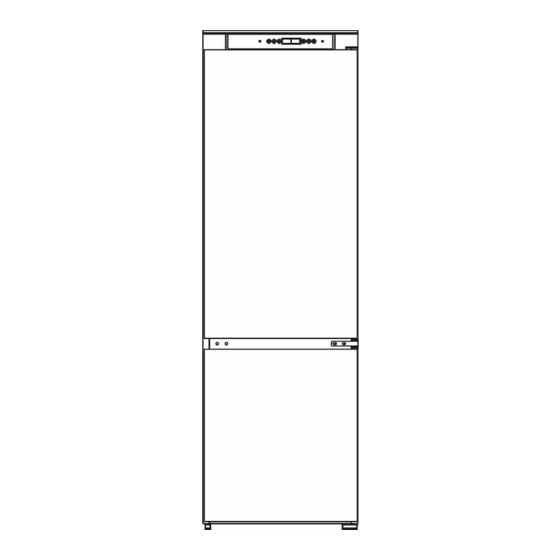
In order to find out the climate class of the appliance you should check the rating plate.The rating plate is located on the inside of the freezer, its climate class is SN,N,ST. Control Panel Fridge Light Safety Glass Shelves (x3) Salad Crisper Drawer Cover (x2) Salad Crisper Drawers (x3) Freezer Drawers (x3) Fridge Door Shelves (x4) © 2013 Focal Point Fires plc. -
Page 6: Appliance Features
7. The light on the right hand side (7) will intermittently turn green to indicate when the compressor is working.The compressor light comes on as and when required to bring the fridge/freezer down to the required temperature. © 2013 Focal Point Fires plc. -
Page 7: Using Your Appliance
IMPORTANT: if you run the appliance with the temperature controls on lower settings for prolonged periods, the defrost drain hole will freeze. It may also cause the appliance to overwork and the fridge and freezer sections to freeze over. © 2013 Focal Point Fires plc. -
Page 8: Storing Food In The Fridge & Freezer
If power is cut to the appliance then the food inside of it will be safe for a maximum of 24 hours.You should minimise the number of times that you open the doors of the appliance during this period of time. © 2013 Focal Point Fires plc. -
Page 9: Freezer Tips
Press the super frost on/off button and the freezer will start to run continuously at its maximum setting The green super frost indicator neon will light when the super frost on/off button has neon switched on. © 2013 Focal Point Fires plc. -
Page 10: Saving Energy When Using The Fridge Freezer
In the freezer compartment, food packages should be scattered and never grouped or stacked together until they are completely frozen. If you are going away for a long period of time, turn off the appliance, empty and clean it then leave the door ajar. © 2013 Focal Point Fires plc. -
Page 11: Cleaning And Maintenance
DO NOT PLACE FOOD BACK IN THE FREEZER COMPARTMENT THAT HAS STARTED TO THAW. © 2013 Focal Point Fires plc. -
Page 12: Replacing The Led Panel
Your refrigerator comes supplied with a 13 amp plug fitted. If in future you need to change the fuse in the plug then a 13 amp ASTA approved (BS 1362) fuse must be fitted. © 2013 Focal Point Fires plc. -
Page 13: Electrical Connection
Check whether there is an electrical socket available, which will be accessible after the appliance is installed. 8.3 REVERSING THE RD-270REU DOORS The doors of the Fridge/freezer can be set to open from the left or the right. If you want the doors to be hinged on the left hand side and opening from the right hand side you will need to follow the door reversal process. -
Page 14: Tools Required
8.3 REVERSING THE RD-270REU DOORS GB IE - CONTINUED Tools Required 1. Grip Pliers 2. Bladed Screwdriver 3. Phillips Cross Headed Screwdriver A) Remove the upper support plate by removing the screws from the top Figure 10 and sliding the support plate forward. As shown in Figure 10. - Page 15 8.3 REVERSING THE RD-270REU DOORS GB IE - CONTINUED E) Unscrew the two screws and remove the central hinge. As shown in Figure 14. F) Remove the freezer door by lifting it upwards and away from the lower Figure 15 hinge As shown in Figure 15.
- Page 16 8.3 REVERSING THE RD-270REU DOORS GB IE - CONTINUED I) Remove the screw hole covers. As shown in Figure 18. IMPORTANT: the screw cap and screw hole covers should be retained for use on the opposite side of the appliance.
- Page 17 8.3 REVERSING THE RD-270REU DOORS GB IE - CONTINUED M) Refit the upper support bracket along with the hinge cover. As shown in Figure 22. IMPORTANT: Check that both the upper and lower doors open and shut correctly without fouling after you have completed the door reversal process.
-
Page 18: Aperture & Ventilation Requirements
Please see figure 28.Without the required ventilation the fridge/freezer will not function properly. The minimum amount of ventilation that is required. As shown in Figure min 200 cm min 200 cm © 2013 Focal Point Fires plc. -
Page 19: Installing Your Fridge Freezer
D) Fix the appliance into position. As shown in Figure 32. E) Trim the side gasket to an approximate size and then insert it into the 5mm gap that you left on step A. As shown in Figure 33. © 2013 Focal Point Fires plc. - Page 20 As shown in Figure 37. k) Installation is now complete. © 2013 Focal Point Fires plc.
-
Page 21: Troubleshooting
This includes situations where appliances have been tiled in, sealed in with sealant, have wooden obstructions placed in front of the appliance like plinths or any installation other than the one specified by FOCALPOINT has been completed. © 2013 Focal Point Fires plc.
Need help?
Do you have a question about the RD-270REU and is the answer not in the manual?
Questions and answers
My fridge freezer in our static van has power going into it but the temperature is not going down
The Focal Point RD-270REU fridge freezer may not be cooling despite having power due to one or more of the following reasons:
1. Improper Thermostat Setting: The thermostat may not be set correctly. It must be adjusted to the desired cooling temperature after the appliance is connected to the mains supply.
2. Restart Timing: If the unit was recently switched off or unplugged, it must remain off for at least 5 minutes before restarting. Restarting it too soon can prevent proper cooling.
3. Ambient and Load Conditions: High room temperature, warm food, large food load, or frequent door opening can prevent the appliance from reaching the set temperature.
4. Ice Build-up: Excessive frost (more than 5mm thick) in the freezer can reduce cooling efficiency. The freezer should be defrosted regularly.
5. Ventilation Issues: Poor ventilation around the appliance can increase energy consumption and reduce cooling performance.
6. Dirty Condenser Coils: Dusty coils at the back of the unit can lower efficiency. These should be cleaned occasionally.
7. Door Gasket Seal: A damaged or dirty door gasket can cause cold air to escape, reducing cooling efficiency.
8. Incorrect Initial Use After Defrost: After defrosting, the appliance must be set to maximum or super frost for 24 hours before freezing fresh food. Failing to do this can prevent proper cooling.
This answer is automatically generated