
Subscribe to Our Youtube Channel
Related Manuals for L7 Networks L7-NR2000

Summary of Contents for L7 Networks L7-NR2000
- Page 1 Wireless N Router L7-NR2000 L7 Wireless N Router – L7-NR2000...
- Page 2 Agenda Product Overview • Package Content • Hardware Overview • Features of L7-NR2000/TM • Factory Default Settings Setting up of Devices • Quick Setup Wizard (Easy) • Setup Internet • Setup Wireless Page 2...
- Page 3 Agenda Setting up of Devices • Setup SharePort Network USB Utility Troubleshooting Questions and Answers Questions and Answers Page 3...
- Page 4 – The L7-NR2000 provides up to 300Mbps wireless connection with other 802.11n wireless clients. • Compatible with 802.11b and 802.11g Devices – The L7-NR2000 is still fully compatible with the IEEE 802.11b and IEEE 802.11g standard. • Advanced Firewall Features –...
- Page 5 L7-NR2000 Package Content • 1 x D-Link L7- • 1 x QIG NR2000 Wireless Router • 3 x Ethernet Cable (Red, Yellow & Blue) • 1 x Power adapter • 1 x Error Check List • 1 x Manual CD •...
-
Page 6: Hardware Overview
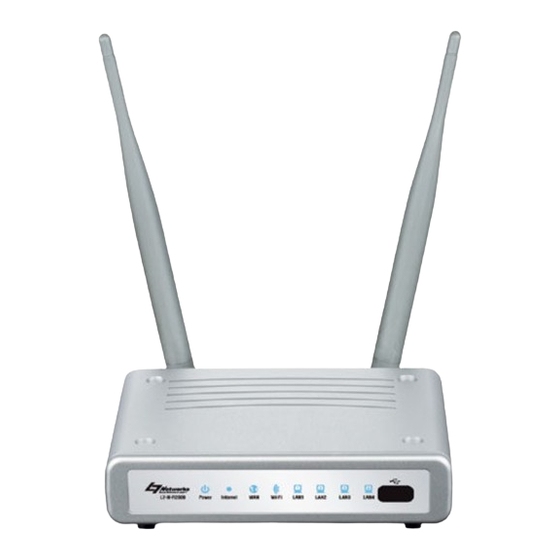
Hardware Overview • The L7-NR2000 creates a wireless network using 802.11n technology with multiple antennas to maximize wireless speed and range, and share Internet access with computers, game consoles, computers, game consoles, and media players. Page 6... - Page 7 Hardware Overview – Front View Color Status Description No Power Supply Power Green Power on Properly PPP Not connected Internet Green PPP Connected WAN Cable Disconnected Green WAN Cable Connected Blinking WAN Data transmitting Page 7...
- Page 8 Hardware Overview – Front View Color Status Description Wireless Off (Default) Wireless Off (Default) Wireless Green Wireless On Blinking Wireless is transmitting Cable disconnected Green Cable Connected Blinking Data is transmitting WPS not in progress Blue Blinking WPS in Progress (Max 120 Seconds) WPS session success (Steady 5 Seconds) None None...
- Page 9 Hardware Overview – Rear View Description Description Usage Usage IPTV Port - (Red) Connect the Red Ethernet cable to the Set-Top-Box (STB) High Speed Internet Connect the Blue Ethernet cables to Ethernet devices (HSI) Ports - (Blue) WAN Port – (Yellow) Connect the Yellow Ethernet cable for VDSL/Fiber Home connection Power Connector Receptor for power adapter...
- Page 10 Features of L7-NR2000 • 4 x LAN ports + 1 x WAN port (10/100Mbps) • 1 x USB SharePort • 2 x 5dBi Detachable Omni-Directional antennas • 2.4GHz wireless b/g/n (1~13) channels • Wireless speed of 300Mbps • WEP/WPA/WPA2 - Personal •...
- Page 11 Features of L7-NR2000 – cont’d • Firewall/NAT/DMZ • Parental Control • Virtual Server/Port forwarding/Port triggering • TR-069, TR-111 ready • Network/Website filtering • WAN management • DDNS Page 11...
-
Page 12: Factory Default Settings
Factory Default Settings • IP address: 192.168.0.1 • DHCP Server: Enabled • Login User Name: admin • Login Password: *blank* • Wireless SSID: TMHSBB (default not enabled) • Wireless Auto Channel: On • Firewall: default Disabled • Remote Management: default Disabled Page 12... - Page 13 Hardware Connections Example Laptop (Wireless) Power Adapter Power Ethernet Cable (Red) Ethernet Cable (Yellow ) Ethernet Cable Telephone Cable Set-Top-Box (STB) (Blue) Telephone Wall Socket Broadband Desktop (Wired) Termination Unit Page 13...
-
Page 14: Quick Setup Wizard
Quick Setup Wizard Page 14... - Page 15 Quick Setup of L7-NR2000 Page 15...
- Page 16 Quick Setup of L7-NR2000 Page 16...
- Page 17 Quick Setup of L7-NR2000 Page 17...
- Page 18 Quick Setup of L7-NR2000 – Dynamic IP username@unifi password password Page 18...
- Page 19 Quick Setup of L7-NR2000 – Static IP 202.111.222.1 255.255.255.248/252 202.111.222.2 202.111.222.6/2 username@unifi password password Page 19...
- Page 20 Quick Setup of L7-NR2000 Page 20...
- Page 21 Quick Setup of L7-NR2000 Very Very Long Password Page 21...
- Page 22 Quick Setup of L7-NR2000 Page 22...
- Page 23 Setting up of L7-NR2000 Internet (Manually) (Manually) Page 23...
- Page 24 Setting up of L7-NR2000 Internet Page 24...
- Page 25 Setting up of L7-NR2000 Internet Page 25...
- Page 26 Setting up of L7-NR2000 Internet - Dyn IP username@unifi password password Page 26...
- Page 27 Setting up of L7-NR2000 Internet- Static IP 202.111.222.1 255.255.255.248/252 202.111.222.2 202.111.222.2 202.111.222.6/2 username@unifbizi password password Page 27...
- Page 28 Setting up of L7-NR2000 manually Page 28...
- Page 29 Setting up of L7-NR2000 Internet Page 29...
- Page 30 Setting up of L7-NR2000 Wireless Page 30...
- Page 31 Setting up of L7-NR2000 Wireless Page 31...
- Page 32 Setting up of L7-NR2000 Wireless Page 32...
- Page 33 Setting up of L7-NR2000 Wireless This is a very long wireless password Page 33...
- Page 34 Setting up of L7-NR2000 Wireless Page 34...
- Page 35 Setting up of L7-NR2000 Wireless Page 35...
- Page 36 SharePort™ Using Network USB Utility Page 36...
- Page 37 SharePort™ Using Network USB Utility • The D-Link SharePort technology will allow you to connect a multi- function printer (MFP), scanner, or USB storage device* to your router and share the device with multiple computers**. Only these devices will be supported. •...
- Page 38 SharePort™ Using Network USB Utility • Step 1: Run the SharePort™ installation program and follow the on- screen instruction. Choose a language and click “OK”. • Step 2: Click “Next” to start the installation • Step 2: Click “Next” to start the installation Page 38...
- Page 39 SharePort™ Using Network USB Utility • Step 3: Choose another destination folder to install or click “Next” to continue. • Step 4: Wait for the installation to complete Page 39...
- Page 40 SharePort™ Using Network USB Utility • Step 5: Click “Finish” to complete the installation. • Once installation completes, the SharePort™ icon will appear in the system tray at the bottom right corner of the screen. Page 40...
- Page 41 SharePort™ Using Network USB Utility • Step 6: Right-click on in the icon, a window pops up to display the router with the respective IP address. Select “Enable” to activate SharePort™ service for the PC from the router. • The icon will turn from once the router automatically detects any USB device is plugged into the USB SharePort.
- Page 42 SharePort™ Using Network USB Utility • Step 7: Double-click on the icon to open the D-Link Network USB Utility. Showing the detected USB device. • Step 8: Click on the device, and click “Connect” to connect to that USB device. Page 42...
- Page 43 SharePort™ Using Network USB Utility • Step 9: Once connected, it will be reflected as “In used by (PC name)”. Drivers for the USB device will be installed like how it is when plugging the USB device directly to the PC. •...
- Page 44 SharePort™ Using Network USB Utility • Step 11: If another user has connected to the USB device, it will be reflected as “In used by (PC name)”. • Click on the device, and click “Request to use” Page 44...
- Page 45 SharePort™ Using Network USB Utility • A Window will pop up at the other computer’s side to inform the user that another user is requesting to use the USB device. • The user will have to disconnect the USB device before any other users can connect to it again.
- Page 46 SharePort™ Using Network USB Utility • Step 12: To disconnect the USB device, click on the device that is currently connected, and click “Disconnect”. • Now the USB device is ready to be connected by another user. Page 46...
- Page 47 Error Check List Page 47...
-
Page 48: Error Check List
Error Check List Page 48 Network Storage - DNS-323... - Page 49 Troubleshooting Page 49...
-
Page 50: Troubleshooting
Troubleshooting • Recommended sequence of troubleshooting – LED status – Power connector – Physical cabling connector – PC’s configuration – Router’s status/log – Router’s status/log – LAN (Ethernet) connection – Wi-Fi connection – WAN connection – USB SharePort Utility – WPS Page 50... - Page 51 Troubleshooting • Step 1: Verify physical connectivity by checking the LED lights status on the device. If you do not get a solid link light, try using a different cable or connect to a different port on the device if possible. If the computer is turned off, the link light should not be on.
- Page 52 Troubleshooting • Step 2: If no light is on, please check the power adapter’s connection and the power source. Switch off the power, wait for 5-10 seconds before switching it on again. • Step 3: Please use wired connection for any configuration purpose. Check that the Ethernet LED is active for the PC connecting to the router directly.
- Page 53 Troubleshooting • Step 6: Access the web management. Open your web browser and enter the IP address of your D-Link router in the address bar. This should open the login page for your the web management. Verify that the settings are correct. •...
- Page 54 Troubleshooting • Step 9: Login to the router, go to “Status” tab, check that all router is able to receive a public IP address. • If router still unable to obtain IP address, please check again the address, please check again the username and password issued by ISP and re-enter it at the Internet setup page.
- Page 55 Troubleshooting • Step 10: Login to the router. Go to “Status” tab, “Log” sub-tab. Check for any error messages generated by the router. Page 55...
- Page 56 Troubleshooting • Step 11: Check that the LAN connectivity is OK. Connect 2 or more PC’s to the router, do a “ping” command from 1 PC to another, or to the router, check that all pings are successful. • Go to “Start Menu”, “Run…”, and type “cmd” (without the colons), to open the Command Prompt.
- Page 57 Troubleshooting • Type “ping 192.168.0.1” in the Command Prompt window to send ping requests to the router. • Check that the pings should be replied successfully, 0% loss • You may change the IP address to another PC in the network. •...
- Page 58 Troubleshooting • Step 12: Wireless Installation Considerations • Minimize the number of walls and ceilings between the router and adapter • Try to position access points, wireless routers, and computers so that the signal passes through drywall or open doorways. Materials and objects such as glass, steel, metal, walls with insulation, mirrors, will objects such as glass, steel, metal, walls with insulation, mirrors, will degrade your wireless signal.
- Page 59 Troubleshooting • Wireless Installation Considerations (cont’d) • Make sure you place the router/access point in a centralized location within your network for the best performance • Try to place the router/access point as high as possible in the room, so the signal gets dispersed throughout your home.
- Page 60 Troubleshooting • Wireless Installation Considerations (cont’d) • Recommended solution for placement of router and antennas positioning Horizontal Layout Vertical Layout 2 Antennas Page 60...
- Page 61 Troubleshooting • Step 13: Connect a PC wirelessly to the router, check that the PC can connect successfully and can obtain the respective speed (raw data rate). • Place wireless PC about 5 meters away from router with no obstruction in between to check the speed more accurately.
- Page 62 Troubleshooting • Please note that actual throughput may differ from speed shown. Result varies due to factors as discussed earlier in “ Wireless Installation Considerations”. • Ensure that the following fields are configured properly to enjoy the benefits of wireless N speed –...
- Page 63 Troubleshooting • Please note that in a wireless network, if there is a mixture of wireless N and wireless G clients exist, the network’s throughput will step down to wireless G’s speed (54Mbps) • If the wireless network is configured with WEP security, the wireless speed will be reduced to 54Mbps, since WEP is a proprietary wireless G security.
- Page 64 • Step 15: If you are unable to access the internet even the router obtained an public IP address, you can try to the following ping test :- i. Ping DNS IP address, 202.188.0.133 from PG (L7-NR2000) ii. Ping DNS IP address, 202.188.0.133 from desktop.
- Page 65 Troubleshooting • Do another Ping test to public IP address 216.239.61.104 (www.google.com) or 98.137.149.56 (www.yahoo.com) from PC & PG. • If both ping test on DNS IP and public IP address replied successfully (from both PG & PC), there might be a chance that the DNS server is under maintenance.
- Page 66 Troubleshooting • Step 15: Do a internet speed test using TM’s speed test utility to test your home’s internet connection speed is up to the speed subscribed • http://speedtest.tm.net.my • Please note that actual throughput may differ slightly from expected results due to signal loss during transmission through distance and results due to signal loss during transmission through distance and intermediate devices.
- Page 67 Troubleshooting • Step 16: To save the current router’s configuration, go to “Tools” tab, “System” sub-tab. • Step 17: Click on “Save” to save the settings to the local PC. • Step 17: Click on “Save” to save the settings to the local PC. Page 67...
- Page 68 Troubleshooting • Step 18: To restore the router to factory default settings, click on “Restore Device” • The router will reboot with the default settings • The router will reboot with the default settings • Alternatively, this can be done by using a pointed object to push and hold on to the physical reset button for 10 seconds.
- Page 69 Troubleshooting • Step 19: To upload the previous configuration, click on “Browse” to search for the configuration file in the local PC. Click on “Upload Settings”. • The router will reboot to the previous configuration settings Page 69...
-
Page 70: Frequently Asked Questions
Frequently Asked Questions Q : What can I do if I am having wireless connection problems? • Signal strength drop or fluctuation are common causes of RF interference. Try these basic troubleshooting steps: • Change the channel on your access point or wireless router. •... - Page 71 Frequently Asked Questions • What is 20/40Mhz? 20 MHz 40 MHz above 40 MHz below Primary Channel blocks Sec. Ch. center blocks Sec. Ch. center blocks Not Available Not Available Not Available 2-10 2-10 Not Available Not Available 3-11 4-12 5-13 6-10 6-13...
Need help?
Do you have a question about the L7-NR2000 and is the answer not in the manual?
Questions and answers