Table of Contents
Advertisement
Advertisement
Table of Contents

Subscribe to Our Youtube Channel
Related Manuals for Lloyd L22ND


Summary of Contents for Lloyd L22ND
- Page 1 22" FHD LED TV Model No.: L22ND...
- Page 3 Dear Customer Congratulations on being the proud owner of Lloyd LED TV. Your LED TV comes with Lloyd Guarantee of Quality. Lloyd takes great pride in...
-
Page 4: Table Of Contents
Contents Caution Safety Information Accessories Technical Specification Product Introduction Front View Connections Rear View Remote Control Basic Operation OSD Menu 9-15 1. CHANNEL menu 9-10 2. PICTURE menu 3. SOUND menu 4. TIME menu 5. OPTION menu 6. SCREEN menu Multimedia Operation 16-18 Simple Troubleshooting... -
Page 5: Caution
Caution The lightning flash with arrowhead symbol, within an equilateral triangle is intended to alert the user to the presence of un-insulated “dangerous voltage” within the products enclosure that may be of sufficient magnitude to constitute a risk of electric shock to the persons. The exclamation point within an equilateral triangle is intend to alert the user to the presence of important operating and maintenance (servicing) instructions in the literature accompanying the appliance. -
Page 6: Safety Information
Safety Information To ensure reliable and safe operation of this equipment, please read carefully all the instructions in this user guide, especially the safety information below . Electrical safety To prevent overload, don't share the same mains supply socket with too many other items of equipment. -
Page 7: Accessories
Accessories INPUT SOUND SLEEP AUTO MUTE TV/TXT HOLD NICAM INDEX SUBPAGE REVEAL SIZE ROOT GOTO REPEAT ASPECT FAV- FAV+ Batteries for Adapter User’s Manual Remote control Remote Control * Note: The configuration of the components may look different from the following illustration Technical Specification - TV-System PAL BG/DK/I SECAM BG/DK... -
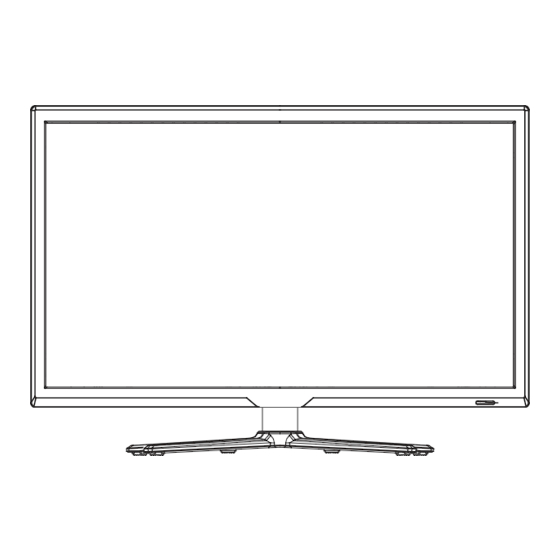
Page 8: Product Introduction
Product Introduction Front View Led Indicator & Remote Control window (Keep clear) 1). (IR) Infrared Receiver: Receives IR signals from the remote control. (Power on/Standby)LED Indicator: Press POWER to turn on and off. Indicator on(Blue) Standby mode Indicator on(Null) Power on mode 2).The functions of the buttons are described as bellows: INPUT: Press to display the input source menu. -
Page 9: Connections
Connections Rear View Audio out POWER Video R in L in HDMI Video PC Audio in POWER: Connect to the mains adaptor. Video: Connect it to video output of video device. R/L in: Connect them to audio output of video device. Video out: Connect it to the video device. -
Page 10: Remote Control
Remote Control The remote control is using Infra-Red (IR). Point it towards the front of the LED TV. The remote control may not work correctly if it is operated out of range or out of angle. POWER: Turn the TV on/standby. INPUT INPUT: Press to display the input source menu. -
Page 11: Remote Control
Remote Control INPUT SOUND SLEEP AUTO Buttons for USB Operating : Play/Pause program. : Stop program. : Fast reverse. : Fast forward. : Previous chapter. : Next chapter. MUTE TV/TXT: Teletext on/off. HOLD : Hold or carry on the current subpage. INDEX: Direct recall of page 100. -
Page 12: Basic Operation
Basic Operation Power on/off 1. Connect to the power supply with the adaptor. 2. -To turn on the TV Press POWER button on the TV or remote control. -To turn off the TV Press POWER button on the TV or remote controlx Input Source select INPUT button on the TV set or on the remote control to display the input source menu, and use CH+/-button on the TV set or /v... -
Page 13: Osd Menu
OSD Menu 1. CHANNEL menu Auto Tuning Press OK button to start auto tuning. You could press MENU/EXIT button to exit the process of tuning, there will be a hint on the screen, and you should press button to confirm, or press button to cancel the operation. - Page 14 OSD Menu Programme Edit Press OK button to enter the Programme Edit menu as the following picture. Delete: Select a channel and press RED button to delete. Rename: Select an ATV channel and press the GREEN button to change the name of the channel by buttons.
-
Page 15: Picture Menu
OSD Menu 2. PICTURE menu Picture Mode: Choose from Standard, Dynamic, User and Mild. Contrast: Controls the difference between the brightest and darkest regions of the picture. Brightness: Controls the overall brightness of the picture. Color: Control the color. Sharpness: Increase this setting to see crisp edges in the picture; decrease it for soft edges. Tint: Controls the tint ( NTSC mode only). -
Page 16: Sound Menu
OSD Menu 3. SOUND menu SPDIF MODE Description Sound Mode: Allows you to select among: Standard, Music, Movie, Sports and User. Treble: (Can be adjusted when the sound mode is User): Controls the relative intensity of higher pitched sounds. Bass: (Can be adjusted when the sound mode is set to User): Controls the relative intensity of lower pitched sounds. -
Page 17: Time Menu
OSD Menu 4. TIME menu Sleep Timer: Allows you to setup the sleep timer among: 10min, 20min, 30min, 60min, 90min, 120min,180min, 240min and off. Auto Sleep : Turn on/off the auto standby function when where’s no signal. OSD Timer: Allows you to select the time for OSD menu displays on the screen. -
Page 18: Option Menu
OSD Menu 5. OPTION menu Description OSD Language: Allows you to select menu language. TT Language: Seclet the Teletext language. Aspect Ratio: Choose from 4:3, 16:9, Zoom1, Zoom2 and PointToPoint. Blue Screen: Turn on/off the blue screen function when there’s no signal. Key Lock: Turn on the function, and the buttons on the TV will be invalid. -
Page 19: Screen Menu
OSD Menu SCREEN menu (in PC mode) Auto Adjust: Press button to setup the parameter of the screen automatically. H/V Position: Adjust the transverse/vertical position of the screen. Clock: Adjust the pixel clock frequency, until the image size is maximized for the screen. Phase: Adjust the phase of the ADC sampling clock relative to the sync signal, until a stable image is obtained. -
Page 20: Multimedia Operation
Multimedia Operation Basic Operation 1). Press the INPUT button on the remote control to display the input source menu, select Media source by the buttons, and press OK button to enter the Multimedia menu seen below. 2). Select the file type (main menu) you want to view, and insert USB device, you will find the name of the device display on the screen. - Page 21 Multimedia Operation 1. Photo Photo viewing Press button to select the option on the menu, and press OK button to change. Pause: Play/pause the photo view. Prev./Next: View the previous/next photo. Stop: Stop the photo view. Repeat: Select the repeat mode from Repeat All, Repeat 1, Repeat None. Music: Play/Pause the music.
- Page 22 Multimedia Operation 3. Movie Play the movie Press button to select the option on the menu, and press OK button to change. Pause: Play/pause the music. FB/FF: Fast backward/fast forward. Prev./Next: Play the previous/next file. Stop: Stop the music. Repeat: Select the repeat mode from Repeat All, Repeat 1, Repeat None. Set A-B: Select and play the preferable part of the file by setting A and B at the beginning and end.
-
Page 23: Simple Troubleshooting
Simple Troubleshooting If the display fails or performance dramatically deteriorates check the Display in accordance with the following instructions. Remember to check the peripherals top inpiont the source of the failure. If the display still fails to perform as expected,connect your helpline for assistance. No power - Check all connections to the TV.
Need help?
Do you have a question about the L22ND and is the answer not in the manual?
Questions and answers