Table of Contents
Advertisement
Advertisement
Table of Contents

Related Manuals for Liebert EM

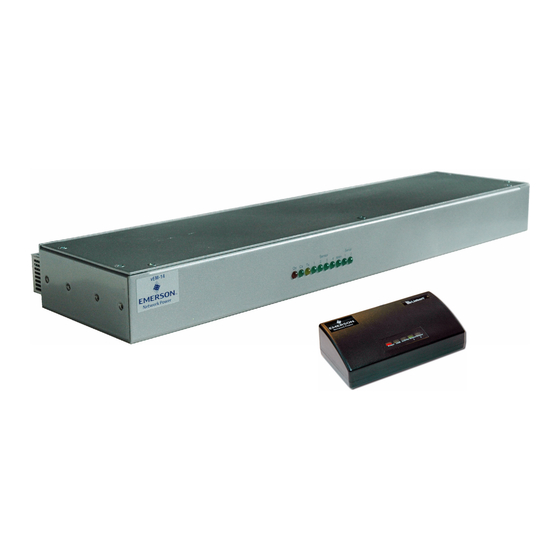
Summary of Contents for Liebert EM
- Page 1 Liebert OpenComms ™ User Manual Monitoring For Business-Critical Continuity...
-
Page 3: Table Of Contents
Mounting the Unit on a Wall (EM / EM PDU Controllers) ......6... - Page 4 Power Window (EM PDU & vEM-14 Controllers) ....... . .
- Page 5 Front view (EM PDU & vEM-14 controllers shown)........
-
Page 7: Introduction
The OpenComms EM is available in several models, which vary in size and number and types of ports. All models have sensor ports to monitor temperature, humidity, water detection and contact closure, and all models have either an external or built-in temperature/humidity sensor: •... -
Page 8: Overview
• The unit may be placed on a flat surface or mounted on a wall, using mounting holes on the bot- tom of the unit. See 2.2.1 - Mounting the Unit on a Wall (EM / EM PDU Controllers) for more information. -
Page 9: Connectors On Back Of Unit
1.1.3 Connectors on Back of Unit The back of the OpenComms EM, shown in Figure 2, has an input power source, sensor ports, a modem port and an Ethernet port. The EM PDU and vEM-14 controllers have serial ports, and vEM-14 controllers also have 10 dry contact inputs. -
Page 10: Table 2 Indicators Summary
Indicators The front of the OpenComms EM has indicators that show input power to the unit and the status of various connections, as shown in Figure 3 and described in Table 2. Figure 3 Indicators on front of unit EM CONTROLLER... -
Page 11: Installation
• Open the shipping carton carefully. Use care to avoid puncturing the container with sharp objects that might damage the contents. • Inspect the OpenComms EM and all included components for damage. See Table 3 for a list of items that should be included with each model. -
Page 12: Decide On Placement Of The Opencomms Em
Mounting the Unit on a Wall (EM / EM PDU Controllers) The bottom of the EM / EM PDU controller has two holes to accommodate screws to secure the unit to a wall, either horizontally or vertically. You will need a screwdriver and any screws or bolts that will fit in the slots on the bottom of the unit. -
Page 13: Mounting The Unit On A Wall Or In A Rack (Vem-14 Controllers)
Mounting the Unit on a Wall or in a Rack (vEM-14 Controllers) The vEM-14 controller may be mounted on a wall or in a rack, such as the Liebert Foundation. The unit has four holes on each side, as shown in Figure 5. -
Page 14: Make Connections
Make Connections All ports are on the back of the OpenComms EM. The port placement and port labels differ for each model. Refer to Figure 2 for your model. 2.3.1 Connect Power to the Unit • Connect the DC power adapter to the DCN/Power port on the back of the OpenComms EM, as shown in Figure 2. -
Page 15: Assign An Aip Address
IP A SSIGN AN DDRESS After connecting the OpenComms EM device to your network, the next step is to identify the device to the network by assigning an IP address. Consult Your Network Administrator Consult your network administrator to obtain an IP address that is appropriate for your network, as well as a subnet mask and default gateway address. -
Page 16: Use Arp To Assign An Ip Address
This method may be preferable if you are not using a Microsoft host. NOTE These steps must be done on the same network segment where the OpenComms EM is connected. To use the ARP command: 1. Open a command prompt. In Windows, one way to do this is: •... -
Page 17: Web Interface Overview
Main Parts of the Web Interface The Web interface gives you access to all the features of the OpenComms EM device. You may use any Internet browser to access the Web interface. The browser shown below is just one example. -
Page 18: Table 6 Color Coding Used In Web Interface
The Web interface uses color coding to indicate the status of sensors connected to the unit, as shown in Table 6, to help you quickly identify sensors that require attention. In EM PDU and vEM-14 controllers, the same color scheme is used for MP Advanced Power Strips connected to the unit. -
Page 19: Table 7 Examples Of Sensor Limits - Temperature And Humidity Sensors
Dry-Contact Sensor Thresholds A dry-contact sensor has only two states: Normal and Critical, as shown in Table 8. The user defines Normal as either Normally Open or Normally Closed and the OpenComms EM designates the opposite state as Critical. Table 8... -
Page 20: Table 9 Examples Of Sensor Limits - Mp Advanced Power Strip Sensors
4.4.3 MP Advanced Power Strip Thresholds When using the OpenComms EM to monitor MP Advanced Power Strips, you may set thresholds that will trigger alerts for power, voltage, current and temperature sensors in each power strip. Each sensor has four thresholds: High Critical, High Warning, Low Warning and Low Critical. The Normal range is determined by these limits. -
Page 21: Sensor Names And Status
Sensor Names and Status The Web interface displays four items about sensors in all windows available through the Summary, Sensors and Power tabs, as shown in Table 10. The sensor’s Name is an optional user-defined description; the Description is created at the factory and cannot be changed. -
Page 22: Getting Started With The Web Interface
Address • Enter the appropriate user account name in the User Name box; user names are case-sensitive. The default user name is liebert (all lowercase). For instructions on creating user accounts, see 5.6 - Security Window. • Leave the Password box blank (the default liebert user account has no password). -
Page 23: View Summary Data
Sensor status (all models) Temperature & humidity combination sensor (see NOTE* in Table 12) Power strip status (EM PDU & vEM-14 controllers) Serial device status (reserved for future use) Click on a port number to: • Change threshold settings for any sensor (see 5.3.1 - Configure Sensors) •... -
Page 24: Sensors Window
Sensors Window The Sensors tab provides access to sensor-related data and settings, including: • Setting thresholds that will trigger alerts for each sensor (see 5.3.1 - Configure Sensors) • Creating display names for any sensor (see 5.3.2 - Create or Change Sensor Names) •... -
Page 25: Create Or Change Sensor Names
Sensor 3 and Sensor 4 for the vEM-14 controller. For example, Tem- perature 1 corresponds to any temperature sensor connected to the Sensor 1 port. The following table shows which text boxes correspond to each type of sensor available from Liebert (also see Table 3). -
Page 26: View Sensor Graphs
5.3.3 View Sensor Graphs The OpenComms EM sensor data may be viewed in graphic format, along with the sensor’s upper and lower alarm limits, as described in 5.3.1 - Configure Sensors. The OpenComms EM stores up to 1,440 data samples for each sensor. Sensor data samples can be stored at intervals of 1 minute, 5 minutes, 10 minutes or 15 minutes. -
Page 27: Figure 6 Sensor Graph - Humidity Sensor Example
Figure 6 Sensor graph - humidity sensor example SENSOR GRAPH Humidity sensor example Refresh button The line graph shows the selected sensor’s readings (black) chronologically from left to right—the most current reading is on the far right—as well as Warning (yellow) and Critical (red) limits. •... -
Page 28: Power Window (Em Pdu & Vem-14 Controllers)
Power Window (EM PDU & vEM-14 Controllers) The Power tab provides access to MP Advanced Power Strips connected to the OpenComms EM, including: • Turning receptacles on or off—all at once, individually or in pairs (see 5.4.1 - Control Receptacles) •... -
Page 29: Figure 8 Linking Receptacles
When two receptacles are linked, the Connections column dis- plays the link as x:y, where x is the OpenComms EM serial port number (1 or 2) and y is the number of the linked receptacle. In the example below, receptacles 4 and 7 on serial port 1 are linked, shown in the Connections column as 1:7 and 1:4. -
Page 30: Configure Thresholds
5.4.2 Configure Thresholds You may set thresholds that will trigger alerts for power, voltage, current and temperature sensors in each power strip. Select a power strip To do this: • In the left side of the Power Data window, shown above, select a power strip (Port 1 or 2). •... -
Page 31: View Power Strip Graphs
5.4.3 View Power Strip Graphs Power strip data may be viewed in graphic format, similar to those of sensor data. To access the Power Strip Graphs window (see 5.4.1 - Control Receptacles for more details): • Click on the Power tab at the top of the Web interface. •... -
Page 32: Create Or Change Port Names
5.4.4 Create or Change Port Names The Port Names feature allows you to create a name to help identify a serial port. This name is dis- played throughout the Web interface and in notifications sent by pager or e-mail. To access the Port Names window, log in (see 5.1 - Open the Web Interface and Log In) and: •... -
Page 33: Alerts Window
Alerts Window The OpenComms EM may be configured to send alerts by e-mail or dial pagers to notify personnel when a sensor reading crosses a threshold, either entering a warning or critical state or returning to normal status. See 4.4 - Thresholds in the Web Interface for more information. -
Page 34: Modem Setup
5.5.2 Modem Setup The OpenComms EM may be configured to send a numeric message to a pager. Note: The unit requires an external modem to send pager alerts. The modem port is set at 9600 baud, no parity, 8 data bits and 1 stop bit. For details on connecting the unit to a modem, see 6.1 - Modem Setup and Pinout Guide and 2.3.3 - Connect to a Modem. -
Page 35: Snmp Trap Alerts Setup
5.5.3 SNMP Trap Alerts Setup The OpenComms EM may be configured to send SNMP trap alerts to a computer whenever the status of a sensor changes from normal to a warning or critical state, as well as a return-to-normal alert when the reading falls within the normal range. -
Page 36: Security Window
Create a Password for the Default Liebert Account (Administrators Only) The OpenComms EM comes with a user account named liebert with full administrative privileges to permit initial login. By default, this user account has no password. Liebert recommends creating a password for this account to prevent configuration by unauthorized users. -
Page 37: Create A New User Account (Administrators Only)
5.6.2 Create a New User Account (Administrators Only) An administrator may create user accounts for up to 50 users, including the administrator account. Only users with administrative privileges may create user accounts. To do this, log in as an administrator (see 5.1 - Open the Web Interface and Log In) and: •... -
Page 38: Modify An Existing Account (Administrators Only)
5.6.3 Modify an Existing Account (Administrators Only) Users with administrative privileges may change all options on all users’ accounts, including their own. Users without administrative access are prevented from changing anything except their own password; for details, see 5.6.4 - Change Password (Users with Read/Write access). To change a user account, log in as an administrator (see 5.1 - Open the Web Interface and Log In) and: •... -
Page 39: Change Password (Users With Read/Write Access)
5.6.4 Change Password (Users with Read/Write access) Users with Read or Read & Write access may change their password but no other user account infor- mation for their own accounts or those of other users. To change your own password, log in (see 5.1 - Open the Web Interface and Log In) and: •... -
Page 40: Sys Info Window
Sys Info Window The OpenComms EM may be configured to send alerts by e-mail or dial pagers to notify personnel when a sensor reading crosses a threshold, either entering a warning or critical state or returning to normal status. See 4.4 - Thresholds in the Web Interface for more information. -
Page 41: Snmp Information
• If desired, enter the name of a person to contact in the System Contact box. • The OpenComms EM model name appears in the System Name box—for example, EM PDU Controller. Enter a different name if desired. -
Page 42: Data Presentation
• The OpenComms EM samples data from all connected sensors at regular intervals specified in the Data Sample Rate box. To change the interval, click on the Down arrow to the right of the box and select the interval: 1, 5, 10 or 15 minutes. -
Page 43: Serial Ports
5.7.4 Serial Ports NOTE The Serial Port 1 and 2 windows are reserved. This section shows the default settings, which should NOT be changed. To view the Serial Port 1 and 2 windows, log in (see 5.1 - Open the Web Interface and Log In) and: •... -
Page 44: Table 15 Serial Cable Pinout - Mp Advanced Power Strip
UIDES Modem Setup and Pinout Guide The OpenComms EM must be connected to a modem to send pager alerts when a sensor reading crosses a user-defined threshold (see 5.5.2 - Modem Setup for more information). The unit is compatible with modems that have DB9 or DB25 serial COM ports. A proper cable must be constructed to allow communication between the unit and the modem. -
Page 45: Downloading Firmware Updates
CAUTION When the firmware is updated, all settings except the network configuration are lost. 1. The first step is to download the upgrade text file. To do this, visit Liebert’s Web site at http://www.liebert.com Application Support at 1-800-222-5877. The firmware upgrade files are named with the model name, firmware version number and the extension “.txt”... -
Page 46: Specifications
PECIFICATIONS Table 16 OpenComms EM specifications Power Requirements EM & EM PDU controller Input 120 VAC, 60 Hz Output 9 VDC, 500 mA, unregulated 9 VDC, 500 mA, unregulated Dimensions 4.75 x 2.5 x 1.625 W x D x H, in. (mm) (120.7 x 63.5 x 41.3) - Page 48 © 2006 Liebert Corporation All rights reserved throughout the world. Specifications subject to change without notice. ® Liebert and the Liebert logo are registered trademarks of Liebert Corporation. All names referred to are trademarks or registered trademarks of their respective owners.
Need help?
Do you have a question about the EM and is the answer not in the manual?
Questions and answers