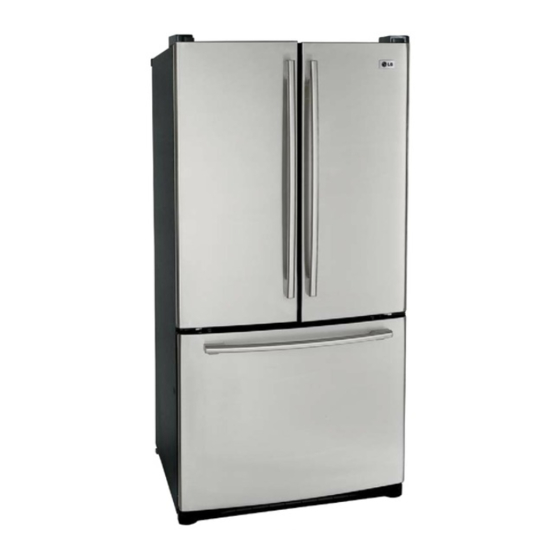
LG LFC22760 Series User Manual
Lg refrigerator user manual
Hide thumbs
Also See for LFC22760 Series:
- Owner's manual (50 pages) ,
- Service manual (50 pages) ,
- Manual (35 pages)

Subscribe to Our Youtube Channel
Related Manuals for LG LFC22760 Series


Summary of Contents for LG LFC22760 Series
- Page 1 Guide Please read this guide thoroughly before operating and keep it handy for reference at all times. RADOR ELADOR Cuidado trucciones antes de _s como referencia P/No. 3828JL8075F...
-
Page 2: Table Of Contents
English Version French Version Warranty (E.U.A.) Safety Instructions Grounding Requirements Parts and Features Refrigerator Installation Unpacking your refrigerator Installation Base Grille Removing, Reversing and Replacing Your refrigerator doors Pull out drawer Leveling and door alignment Using your refrigerator Ensuring proper air circulation... -
Page 3: Limited Warranty
LG Electronics will repair or at its option replace, without charge, your product which proves to be defective in material or workmanship under normal use during the warranty original purchase. This warranty is good only to the original purchaser of the product during the warranty period as long as it is in the U.S. -
Page 4: Garantia Limitada
Visite nuestro sitio web/http://www.lgservice.com LG Electronics reparara o en su defecto reemplazara sin cargo, el producto defectuoso en material o mane de obra bajo uso normal durante el periodo de garantia que se menciona a continuacion compra. Esta garantia es valida solo para el comprador original del producto durante el periodo de garantia mientras permanezca en los E.E.U.U. -
Page 5: Safety Instructions
• Before replacing a burned-out light bulb, unplug the refrigerator or turn off power at the circuit breaker or fuse box in order to avoid contact with a live wire filament. (A burned- out light bulb may break when being replaced.) NOTE: Setting either or both controls to the OFF position does not remove power to the light circuit. -
Page 6: Recommended Grounding Method
POWER CORD REPLACEMENT If the power cord is damaged, it must be replaced by the manufacturer, by our service center or by qualified personal by LG Electronics, to avoid some risk. BEFORE YOU THROW AWAY YOUR OLD REFRIGERATOR OR FREEZER Take off the doors. -
Page 7: Parts And Features
Usethissection to become morefamiliar w iththepartsandfeatures, NOTE: This guide covers several different models. The refrigerator you have purchased may have some or all of the items listed below. The locations of the features Digital Sensor Control* Refrigerator Light Shelves Temperature Contro*l... -
Page 8: Refrigerator Installation
They are packed Safety Instructions together to prevent possible damage during shipment, Let your refrigerator run for 2 or 3 hours before putting food in it, Check the flow of cold air in the freezer compartment is now ready for use. -
Page 9: Tools You May Need
Hex head socket wrench HOWTO REMOVE DOOR HANDLES To move refrigerator through ahouse door, it ma necessary to remove the refrigerator door hand 1. Removing Refrigerator Handle • Grasp the handle tightly with both hands and slide the handle up (1)(this may require some force). - Page 10 Refrigerator Door NOTE: Handle appearance may vary. IMPORTANT." Before you begin, turn the refrigerator OFF and unplug it, Remove food and any bins from doors. • Left Door , Loosen the cover screw (1). • Disconnect door switch wire (2).
- Page 11 2. Replacing Refrigerator Door • Right Door • Lower the door onto the middle hinge pin (7). • Make sure the door is aligned with the cabinet, , Replace the top hinge (4) installing hinge screws (3) to secure it, •...
-
Page 12: Removing And Replacing
NOTE: Handle appearance may vary, IMPORTANT." Before you begin, turn the refrigerator OFF and unplug it, Remove food and any bins from doors. • Left Door • Loosen the screws and remove the cove on back side (see figure A). - Page 13 2. Replacing Refrigerator Door • Right Door • Lower the door onto the middle hinge pin (9). Make sure the door is aligned with the cabinet, • Replace the top hinge (7) installing hinge screws (6) to secure it. " Make sure the gasket on the door is flush against the cabinet and is not folded, Support the door on the handle side while securing hinge.
- Page 14 HOW TO REMOVE AND INSTALL THE PULLOUT DRAWER IMPORTANT: To avoid possible injury, product or property damage, you will need two people to perform the following instructions. 1. Removing Pu|lout Drawer = PuJt the drawer open to full lower extension. Remove the lower basket (1) by lifting basket from rail system.
-
Page 15: Your Refrigerator Doors
HOW TO REMOVE AND INSTALL THE PULLOUT DRAWER IMPORTANT: To avoid possible injur or product or property damage, you will need two people to perform the following instructions. 2. Installing Pullout Drawer • With both hands, hold the center of the bar and pull it out to let both rails out to full extension simultaneously. -
Page 16: Leveling And Door Alignment
AND DOOR ALIGNMENT Leveling Your refrigerator has two front leveling screws the right and one on the left, If your refrigerator seems unsteady or you want the doors to close easier, adjust the Refrigerator's tilt using the instructions below: 1. Plug the refrigerator's power cord into a 3-prong... -
Page 17: Using Your Refrigerator
With this feature you'll listen a alarm when the freezer or air must flow refrigerator door is not closed within 1 minute after it is opened. These tones repeat every 30 seconds. The alarm is cancelled when the freezer or the refrigerator is closed correctly. -
Page 18: Adjusting Control Settings
SETTING THE CONTROLS o Your refrigerator has a control pad on the dispenser that lets you regulate the temperature in the freezer and refrigerator compartments. o Initially set the REFRIGERATOR (3°C) and the FREEZER CONTROL at 0°F (-18°C). Leave it at this setting for 24 hours (one day) to stabilize. -
Page 19: Food Storage Guide
Store in original carton on interior shelf, not on door shelf. Fruit Wash, let dry, and store in refrigerator in plastic bags or in the crisper. Do not wash or hull berries until you are ready to use them, Sort and keep berries in their original container in a crisper, or store in a loosely closed paper bag on a refrigerator shelf. -
Page 20: Refrigerator Section
Storing similar food items together in your refrigerator and adjusting the shelves to fit different heights of items will make finding the exact item you want easier; it will also reduce the amount of time the refrigerator door is open, saving energy. IMPORTANT: Do not clean glass shelves with warm water when they are cold. -
Page 21: Chef Fresh
CHEF FRESH / SNACK PAN While holding the chef fresh with one hand, pull it forward slightly. Lift slightly and pull it out, Colder some models is applied an Cold independent temperature control. NOTE: DO NOT store lettuce or other leafy produce in this drawer. -
Page 22: Crisper Cover With Lattice On Inner Surface
CRISPER COVER WITH LATTICE ON INNER SURFACE (on some models) To remove the crisper cover: 1. Remove both crisper drawers, 2. While holding the crisper cover support (2), pull the cover up and out(1 ). _WARNING: Be careful when handing glass cover since glass is not attached to cover. -
Page 23: Freezer Section
FREEZER SECTION ICE BIN (on some models) 1. To separate the ice bin, pull out the drawer as much as possible. 2. Gently lift and pull out the ice bin. 3. To reinstall, pull out the drawer as much as possible and set the ice bin in its correct position, and then push in the drawer ICE BIN - DURABASE... -
Page 24: Glide- Out Drawer
It displays in months the number of months left to exchange the filter from the moment power is connected to the refrigerator. If you have changed the filter after 6 months of use, press and hold the FILTER button 3 seconds or more and the filter display will be initialized with a buzzing sound. -
Page 25: Filter
It is recommended that you replace the filter when the water filter indicator light turns on or your water dispenser or ice maker decreases noticeably. After changing the water filter cartridge, reset the water filter status display and indicator light by pressing and holding the BUTTON for 3 seconds, How to change the old cartridge. -
Page 26: Care And Cleaning
To help remove odors, you can wash the inside of the refrigerator with a mixture of baking soda and warm water. Mix 2 tablespoons baking soda to 1 quart of water (26 g soda to 1 liter water.) Be sure the baking soda is completely dissolved so does it not scratch the surfaces of the refrigerator. -
Page 27: Power Interruptions
This stops odor and mold from building up. WHEN YOU MOVE When you are moving your refrigerator to a new home, follow these steps to prepare it for the move, 1. Remove all food from the refrigerator and pack all frozen food in dry ice. -
Page 28: Normal Sounds You May Hear
. When the ice storage bin is removed for more than a may take minute or two, ° When the refrigerator will not be used for several days. NORMAL • The icemaker water valve will buzz as the icemaker fills with water. -
Page 29: Connecting The Water Line
To determine how much tubing you need: measure the distance from the water valve on the back of the refrigerator to the water supply pipe. Then add 8 feet (2.4 m). Be sure there is sufficient extra tubing (about 8 feet [2.4 m] coiled into 3 turns of about 10 [25 cm] diameter) to... - Page 30 NOTE: Be sure there is sufficient extra tubing (about 8 feet coiled into 3 turns of about 10 diameter) to allow the refrigerator to move out from the wall after installation. 7. CONNECT...
-
Page 31: Plug In The Refrigerator
, If your refrigerator does not have a water filter, we recommend installing one. If your water supply has sand or particles that could clog the screen of the refrigerator's water valve, Install the filter in the water line near the refrigerator. -
Page 32: Understanding Sounds You May Hear
UNDERSTANDING SOUNDS YOU MAY HEAR Your new refrigerator may make sounds that your old one didn't make. Because the sounds are new to you, you might be concerned about them. Most of the new sounds are normal. Hard surfaces, like the floor, walls and cabinets, can make the sounds seem louder than they actually are. - Page 33 Adding food and opening the door warms the refrigerator. It is normal for the refrigerator to run longer in order to cool the refrigerator back down. Adding a large amount of food warms the refrigerator. See the Food Storage...
- Page 34 When you open the door, warmer air enters the refrigerator. As the warm air cools, it can create a vacuum, If the door is hard to open, wait 5 minutes to allow the air pressure to equalize, then see if it opens more easily.
- Page 35 The more the door is opened, the faster the humidity builds up, and the more warm air the refrigerator must cool. In order to keep the refrigerator cool, try to get everything you need out of the refrigerator at once, keep...
Need help?
Do you have a question about the LFC22760 Series and is the answer not in the manual?
Questions and answers