Nokia 6820 User Manual
Hide thumbs
Also See for 6820:
- User manual (179 pages) ,
- Service manual (28 pages) ,
- Quick start manual (9 pages)
Table of Contents
Advertisement
Quick Links
Advertisement
Table of Contents

Subscribe to Our Youtube Channel
Related Manuals for Nokia 6820


Summary of Contents for Nokia 6820
- Page 1 User Guide for Nokia 6820 9310461 Issue 1...
- Page 2 DECLARATION OF CONFORMITY We, NOKIA CORPORATION declare under our sole responsibility that the product NHL-9 is in conformity with the provisions of the following Council Directive: 1999/5/EC. A copy of the Declaration of Conformity can be found at http://www.nokia.com/phones/declaration_of_conformity Copyright © 2004 Nokia. All rights reserved.
- Page 3 Nokia reserves the right to revise this document or withdraw it at any time without prior notice.
-
Page 4: Table Of Contents
Switching the keyboard lights on or off..................24 2. Your phone.......................25 Keys (flip closed)............................25 Connectors..............................26 Keys (flip open)............................26 Standby mode.............................28 Screen saver.............................30 Wallpaper ..............................30 Essential indicators in standby mode....................31 Keypad lock (Keyguard) ...........................33 Over the air settings service........................34 ‹ Copyright 2004 Nokia. All rights reserved. - Page 5 Options for sending a message.......................54 Writing and sending e-mail via SMS....................55 Reading and replying to an SMS message or an SMS e-mail ..........56 Inbox and sent items folders......................57 Archive folder and my folders ......................57 ‹ Copyright 2004 Nokia. All rights reserved.
- Page 6 Accepting or rejecting a chat invitation..................75 Reading a chat message........................75 Participating in a chat conversation.....................76 Editing your own information......................76 Contacts for the chat ........................77 Blocking and unblocking messages....................77 Groups..............................78 Voice messages............................79 Info messages............................80 ‹ Copyright 2004 Nokia. All rights reserved.
- Page 7 Adding contacts to the subscribed contacts ................97 Viewing the subscribed contacts ....................97 Unsubscribing a contact........................98 Copying contacts............................98 Sending and receiving a business card ....................99 Speed dials ...............................99 Voice dialling............................100 Adding and managing voice tags....................101 ‹ Copyright 2004 Nokia. All rights reserved.
- Page 8 Enhancement settings........................119 Security settings..........................120 Restore factory settings ........................121 Gallery (Menu 5) ............................. 121 Camera (Menu 6)............................ 124 Taking a photo ............................. 124 Recording a video clip ........................125 Camera settings........................... 126 ‹ Copyright 2004 Nokia. All rights reserved.
- Page 9 Collections............................. 140 Other options available for an application or application set..........141 Downloading a game or an application ..................142 Extras..............................143 Voice recorder........................... 143 Calculator ............................144 Countdown timer..........................145 Stopwatch............................146 ‹ Copyright 2004 Nokia. All rights reserved.
- Page 10 Digital signature ..........................158 SIM services (Menu 10) ........................159 7. PC Connectivity .................... 160 PC Suite ..............................160 (E)GPRS, HSCSD and CSD ......................... 162 Using data communications applications ..................162 8. Battery information..................163 ‹ Copyright 2004 Nokia. All rights reserved.
- Page 11 Charging and Discharging........................163 CARE AND MAINTENANCE................165 IMPORTANT SAFETY INFORMATION............... 167 ‹ Copyright 2004 Nokia. All rights reserved.
-
Page 12: For Your Safety
SWITCH OFF NEAR BLASTING Don’t use the phone where blasting is in progress. Observe restrictions, and follow any regulations or rules. USE SENSIBLY Use only in the normal position. Don’t touch the antenna unnecessarily. ‹ Copyright 2004 Nokia. All rights reserved. - Page 13 (e.g. to exit a call, to exit a menu, etc.) to clear the display. Enter the emergency number, then press . Give your location. Do not end the call until told to do so. ‹ Copyright 2004 Nokia. All rights reserved.
-
Page 14: Network Services
Triband is a network dependent feature. Check with your local service provider if you can subscribe to and use this feature. This wireless phone, the Nokia 6820, is a 3GPP GSM Release 99 terminal supporting (E)GPRS service, and is designed to also support Release 97 GPRS networks. However, proper functionality in all Release 97 GPRS networks cannot be guaranteed. -
Page 15: About Enhancements
• When you disconnect the power cord of any accessory, grasp and pull the plug, not the cord. • Check regularly that any vehicle-installed accessories are mounted and are operating properly. • Installation of any complex car accessories must be made by qualified personnel only. ‹ Copyright 2004 Nokia. All rights reserved. -
Page 16: General Information
• The module PIN is required to access the information in the security module. Security module on page 156. The module PIN is supplied with the SIM card if the SIM card has a security module in it. ‹ Copyright 2004 Nokia. All rights reserved. -
Page 17: Puk And Puk2 Codes (8 Digits)
The wallet code is required to access the wallet services. If you key in an incorrect wallet code several times, the wallet application is blocked for five minutes. For further information, see Wallet on page 132. ‹ Copyright 2004 Nokia. All rights reserved. -
Page 18: Overview Of The Phone Functions
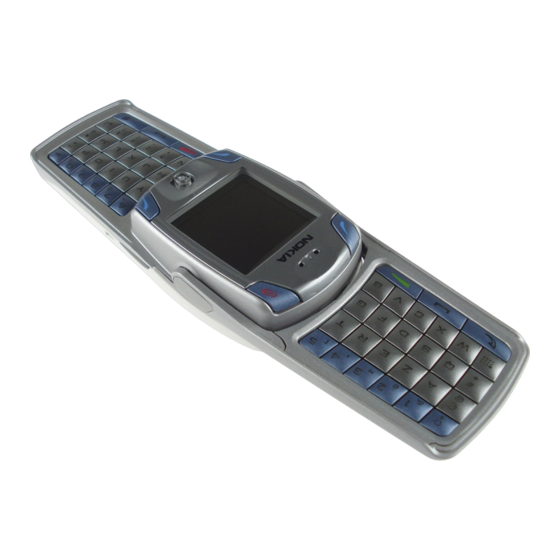
Overview of the phone functions Your Nokia 6820 phone is approved for use on EGSM 900,GSM 1800 and GSM 1900 networks. It provides many functions that are practical for daily use, such as a calendar, clock, alarm clock, and built-in camera. The camera can be used for recording video clips and taking pictures which you can, for example, attach as wallpaper in standby mode or as thumbnail pictures in Contacts. -
Page 19: Shared Memory
Java applications, etc. may take all of the shared memory and your phone may display a message that the memory is full. In this case, delete some of the information or entries stored in the shared memory features before continuing. ‹ Copyright 2004 Nokia. All rights reserved. -
Page 20: Getting Started
(1) and, at the same time, lift the back cover off the phone (2). 2. Slide the battery towards the cover (3) until you hear it click into place. ‹ Copyright 2004 Nokia. All rights reserved. - Page 21 4. Insert the SIM card into the SIM card holder (6). Make sure that the SIM card is properly inserted and that the golden contact area on the card is facing downwards. Close the SIM card holder (7) and slide it back into its place (8). ‹ Copyright 2004 Nokia. All rights reserved.
-
Page 22: Charging The Battery
You can use the phone while the charger is connected. ‹ Copyright 2004 Nokia. All rights reserved. -
Page 23: Switching The Phone On And Off
SIM card is properly inserted, or SIM card not supported, contact your network operator or service provider. Your phone does not support 5-Volt SIM cards and the card may need to be changed. ‹ Copyright 2004 Nokia. All rights reserved. -
Page 24: Switching The Keyboard Lights On Or Off
• To switch the keyboard lights off, press the keyboard light key or close the flip. ‹ Copyright 2004 Nokia. All rights reserved. -
Page 25: Your Phone
The 5-way joystick is also used to move the cursor up and down, right and left when writing text, using the calendar, and in some game applications. Pressing the joystick briefly selects the function. ‹ Copyright 2004 Nokia. All rights reserved. -
Page 26: Connectors
5. Camera lens on the back cover of the phone. Keys (flip open) When you open the flip, the display graphics are rotated 90 degrees and the left, middle and right selection keys ‹ Copyright 2004 Nokia. All rights reserved. - Page 27 See also Switching the keyboard lights on or off on page 24. 2. Power key switches the phone on and off. ‹ Copyright 2004 Nokia. All rights reserved.
-
Page 28: Standby Mode
Standby mode When the phone is ready for use (the flip can be either closed or open), and you have not keyed in any characters, the phone is in standby mode. ‹ Copyright 2004 Nokia. All rights reserved. - Page 29 Move, then select where you want to move the function. If you for some reason have deleted the content of the Go to menu, press to add a function. 5. The middle selection key in standby mode is Menu. ‹ Copyright 2004 Nokia. All rights reserved.
-
Page 30: Screen Saver
Display settings on page 106. Wallpaper You can set your phone to display a background picture as wallpaper when the phone is in standby mode, see Display settings on page 106. ‹ Copyright 2004 Nokia. All rights reserved. -
Page 31: Essential Indicators In Standby Mode
The alarm clock is set to On. See Alarm clock on page 127. The countdown timer is running. See Countdown timer on page 145. The stopwatch is running in the background. See Stopwatch on page 146. ‹ Copyright 2004 Nokia. All rights reserved. - Page 32 The loudspeaker has been activated. See Options during a call on page 39. Calls are limited to a closed user group. See Security settings on page 120. The timed profile is selected. See Profiles on page 103. ‹ Copyright 2004 Nokia. All rights reserved.
-
Page 33: Keypad Lock (Keyguard)
When you end or reject the call, the keypad will automatically lock. For locking the keypad during a call, see Options during a call on page 39, and for setting the security keyguard, see Security keyguard Phone settings on page 117. ‹ Copyright 2004 Nokia. All rights reserved. -
Page 34: Over The Air Settings Service
For more information on the availability of the settings, contact your network operator, service provider or the nearest authorised Nokia dealer. You may be able to receive the connection settings for (E)GPRS, multimedia messages, synchronisation, chat and presence, e-mail and for multi-mode browser. - Page 35 If you want to delete a connection set from the phone, key in *#335738# (*#delset# in letters) in standby mode, select a connection set that you want to delete and press Delete. Then confirm your selection and the phone returns to standby mode. ‹ Copyright 2004 Nokia. All rights reserved.
-
Page 36: Call Functions
Making a call using contacts • To search for a name/phone number that you have saved in Contacts Searching for a contact on page 92. Press to call the number on the display. ‹ Copyright 2004 Nokia. All rights reserved. -
Page 37: Speed Dialling A Phone Number
• If Speed dialling is set to on, press and hold a speed dialling key until the call is started. ‹ Copyright 2004 Nokia. All rights reserved. -
Page 38: Answering Or Rejecting An Incoming Call
During a call, press to answer the waiting call. The first call is put on hold. Press to end the active call. To activate the Call waiting function, see Call settings on page 115. ‹ Copyright 2004 Nokia. All rights reserved. -
Page 39: Options During A Call
• Loudspeaker to use your phone as a loudspeaker during a call. Do not hold the phone to your ear during loudspeaker operation as the volume may be ‹ Copyright 2004 Nokia. All rights reserved. - Page 40 If you have connected a compatible handsfree unit or a headset to the phone, Handset in the options list is replaced with Handsfree Headset and the selection key Normal with Handsf. or Heads., respectively. ‹ Copyright 2004 Nokia. All rights reserved.
-
Page 41: Writing Text
• To switch between lower and upper case, indicated by the top left of the display, or to key in symbols, press either the keyboard. You can either press the shift key and the desired character ‹ Copyright 2004 Nokia. All rights reserved. -
Page 42: Typing Accented Characters
• To type an accented character that is not included in the list of special characters under , such as á, press and hold and simultaneously press ’a’ repeatedly until the desired accented variant of ’a’ appears on the display. ‹ Copyright 2004 Nokia. All rights reserved. -
Page 43: Writing Text When The Flip Is Closed
1. Start writing a word using the keys . Press each key only once for one letter. The word may change after each keystroke. ‹ Copyright 2004 Nokia. All rights reserved. -
Page 44: Writing Compound Words
Example: To write Nokia when the English dictionary is selected, press once for N, once for o, once for k, once for i and once for a. To insert a number while in letter mode, press and hold the desired number key. -
Page 45: Tips For Writing Text
• To insert a word that is not in the dictionary when using predictive text input, press Options and select Insert word. Write the word using traditional text input and press Save. The word is also added to the dictionary. ‹ Copyright 2004 Nokia. All rights reserved. - Page 46 OK. • To insert a name from Contacts, press Options and select Insert contact. To insert a phone number or a text item attached to the name, press Options select View details. ‹ Copyright 2004 Nokia. All rights reserved.
-
Page 47: Using The Menu
4. If the selected submenu contains further submenus, repeat step 3. Select the next submenu, for example Anykey answer. 5. Select the setting of your choice. 6. Press Back to return to the previous menu level, and Exit to exit the menu. ‹ Copyright 2004 Nokia. All rights reserved. - Page 48 1, press Menu, and then key in the rest of the desired shortcut number. Press Back to return to the previous menu level, and Exit to exit the menu. ‹ Copyright 2004 Nokia. All rights reserved.
-
Page 49: List Of Menu Functions
1. Missed calls 2. Received calls 3. Dialled numbers 4. Delete recent call lists 5. Timers and counters 3. Contacts 1. Search 2. Add contact 3. Delete 4. My presence 5. Subscribed names 6. Copy ‹ Copyright 2004 Nokia. All rights reserved. - Page 50 8. More settings 9. Restore factory settings 5. Gallery 1. Images 2. Video clips 3. Graphics 1. Shown if supported by your SIM card. For availability, contact your network operator or service provider. ‹ Copyright 2004 Nokia. All rights reserved.
- Page 51 7. Organiser 1. Alarm clock 2. Calendar 3. To-do list 4. Notes 5. Wallet 6. Synchronisation 8. Applications 1. Games 2. Collection 3. Extras 9. Services 1. Home 2. Bookmarks 3. Download links ‹ Copyright 2004 Nokia. All rights reserved.
- Page 52 4. Service inbox 5. Settings 6. Go to address 7. Clear the cache 10.SIM services 1. Only shown if supported by your SIM card. The name and contents vary depending on the SIM card ‹ Copyright 2004 Nokia. All rights reserved.
-
Page 53: Menu Functions
The number of available characters and the current part number of a multi-part message are shown on the top right of the display, for example 120/2. Special (Unicode) characters, such as á, may take up more space in the message than other characters. ‹ Copyright 2004 Nokia. All rights reserved. -
Page 54: Options For Sending A Message
Distribution lists on page 59. • To send a message using a message profile, select Sending profile and the desired message profile. For defining a message profile, see Message settings on page 80. ‹ Copyright 2004 Nokia. All rights reserved. -
Page 55: Writing And Sending E-Mail Via Sms
5. To send the e-mail, press Send . If you have not saved the settings for sending e-mails, the phone asks for the number of the e-mail server. Press to send the e-mail. ‹ Copyright 2004 Nokia. All rights reserved. -
Page 56: Reading And Replying To An Sms Message Or An Sms E-Mail
Select Message details to view, if available, the sender’s name and phone number, the message centre used, and the date and time of receipt. ‹ Copyright 2004 Nokia. All rights reserved. -
Page 57: Inbox And Sent Items Folders
To organise your messages, you can move some of them to the Archive folder, or add new folders for your messages. While reading a message, press Options. Select Move, scroll to the folder to which you want to move the message and press Select. ‹ Copyright 2004 Nokia. All rights reserved. -
Page 58: Templates
The number of characters that you can include in a message depends on the size of the picture. To view the text and the picture together before sending the message, press Options and select Preview. ‹ Copyright 2004 Nokia. All rights reserved. -
Page 59: Distribution Lists
• To view the contact information of a recipient, scroll to the desired name, press Options and select View details. • To delete a recipient from the list, scroll to the desired name, press Options and select Delete contact. ‹ Copyright 2004 Nokia. All rights reserved. -
Page 60: Text Message Counter
If the message contains an image, the phone scales it down to fit the display area. The multimedia function uses shared memory, see Shared memory on page 19. Copyright protections may prevent some images, ringing tones or other content from being copied, modified, transferred or forwarded. ‹ Copyright 2004 Nokia. All rights reserved. -
Page 61: Writing And Sending A Multimedia Message
81. For availability and subscription to the multimedia messaging service, contact your network operator or service provider. 1. Press Menu and select Messages, Multimedia msgs. Create message. 2. Key in a message, see Writing text on page 41. ‹ Copyright 2004 Nokia. All rights reserved. - Page 62 Send to e- mail Send to many. 5. Enter the recipient’s phone number (or e-mail address) or search for it in Contacts. Press and the message is moved to the Outbox folder for sending. ‹ Copyright 2004 Nokia. All rights reserved.
-
Page 63: Reading And Replying To A Multimedia Message
Menu and select Messages, Multimedia msgs. and Inbox. Scroll to view the message. 2. Press Select to view the message. The function of the middle selection key changes according to the displayed object. ‹ Copyright 2004 Nokia. All rights reserved. - Page 64 • Open calend. note Open bus. card to view a calendar note or a business card. See also the options in Gallery, see Gallery (Menu 5) on page 121. ‹ Copyright 2004 Nokia. All rights reserved.
-
Page 65: Inbox, Outbox, Saved And Sent Items Folders
To discard the waiting message, press Exit and Yes. If you press No, you can view the message. ‹ Copyright 2004 Nokia. All rights reserved. -
Page 66: Deleting Messages
Before you can send and retrieve any e-mails, you may need to do the following: • Obtain a new e-mail account or use the current one. For availability of your e- mail account contact your e-mail service provider. ‹ Copyright 2004 Nokia. All rights reserved. -
Page 67: Writing And Sending An E-Mail
5. To send the e-mail message, press Send. Select • Send now to send the e-mail immediately. If you have not already connected to the e-mail account, your phone establishes the connection first and then sends the e-mail. ‹ Copyright 2004 Nokia. All rights reserved. -
Page 68: Downloading E-Mail Messages From Your E-Mail Account
Inbox, or press Back to view it later. If more than one message is received, select the message that you want to read. An unread text message is indicated by ‹ Copyright 2004 Nokia. All rights reserved. -
Page 69: Reading And Replying To An E-Mail Message
Send later, see Writing and sending an e-mail on page 67, and Sent items for saving e-mails that have been sent. ‹ Copyright 2004 Nokia. All rights reserved. -
Page 70: Deleting E-Mail Messages
ID and password and the settings for chat. For setting the required settings for the chat service, see Chat and my presence settings on page 104. ‹ Copyright 2004 Nokia. All rights reserved. - Page 71 76. • To search users and groups, see Search Starting a chat session on page 73. • To read a message for a new chat session, see Reading a chat message on page ‹ Copyright 2004 Nokia. All rights reserved.
-
Page 72: Entering The Chat Menu
See Chat and my presence settings on page 104. You can also select Connect. settings when you have connected to the chat service. ‹ Copyright 2004 Nokia. All rights reserved. -
Page 73: Connecting To And Disconnecting From The Chat Service
Scroll to the contact with whom you would like to chat and press Chat. If you have received a new message from a contact, it is indicated by indicates the online and the offline contacts in the phone’s contacts memory. ‹ Copyright 2004 Nokia. All rights reserved. - Page 74 To start the chat session when you have found the user or the group, scroll to the user or the group that you want, press Options and select Chat Join group. • To start a chat session from Contacts, see Viewing the subscribed contacts page 97. ‹ Copyright 2004 Nokia. All rights reserved.
-
Page 75: Accepting Or Rejecting A Chat Invitation
If the contact information can be found in the phone’s memory for contacts and the phone recognises it, the sender’s name is shown. To save a new contact in the phone’s memory, press Options and select ‹ Copyright 2004 Nokia. All rights reserved. -
Page 76: Participating In A Chat Conversation
Select My settings to view or edit your own availability status or screen name. Select Availability and either Available for all Avail. for contacts Appear offline) to allow all chat users, or ‹ Copyright 2004 Nokia. All rights reserved. -
Page 77: Contacts For The Chat
Connect to the chat service and select Conversations Chat contacts. Highlight the contact in the contacts list from whom you want to block incoming messages. Press Options, select Block contact and press OK. ‹ Copyright 2004 Nokia. All rights reserved. -
Page 78: Groups
Select a name from the contacts list to add it to the private group list. To add more names to the list, press Options and select Add member and select a new name. ‹ Copyright 2004 Nokia. All rights reserved. -
Page 79: Voice Messages
Press Listen to call your voice mailbox number. Tip: Pressing and holding calls your voice mailbox, when the flip is closed. When the flip is open, press and hold the corresponding number key. ‹ Copyright 2004 Nokia. All rights reserved. -
Page 80: Info Messages
• For message type Text, select Default recipient number to save a default number for sending messages for this message profile. ‹ Copyright 2004 Nokia. All rights reserved. -
Page 81: Overwrite Settings
You may receive the multimedia connection settings as an over the air message from the network operator or service provider. For receiving the settings over the air, see Over the air settings service on page 34. ‹ Copyright 2004 Nokia. All rights reserved. - Page 82 Edit active multimedia settings and edit the active settings. Select each of the settings one by one and key in all the required settings. Contact your network operator or service provider for the settings. ‹ Copyright 2004 Nokia. All rights reserved.
-
Page 83: Settings For E-Mail
Select either POP3 IMAP4 depending on the type of e-mail system that you are using. If both types are supported, select IMAP4. Changing the server type also changes the incoming port number. ‹ Copyright 2004 Nokia. All rights reserved. - Page 84 The most common default value is 25. If you have selected POP3 as a server type, the following options are shown: • Incoming (POP3) port. Key in the port number that you have obtained from your e-mail service provider. ‹ Copyright 2004 Nokia. All rights reserved.
- Page 85 Incoming (IMAP4) port. Key in the port number that you have obtained from your e-mail service provider. • Reply-to address. Key in the e-mail address to which you want the replies to be sent. ‹ Copyright 2004 Nokia. All rights reserved.
-
Page 86: Font Size Setting
Font size. Service commands Press Menu and select Messages Service commands. Key in and send service requests (also known as USSD commands), such as activation commands for network services, to your service provider. ‹ Copyright 2004 Nokia. All rights reserved. -
Page 87: Call Register (Menu 2)
(network service). • Dialled numbers to view up to 20 phone numbers that you have most recently called or attempted to call. See also Last number redialling on page 37. ‹ Copyright 2004 Nokia. All rights reserved. -
Page 88: Timers And Counters
GPRS connection timer. Scroll to check the duration of the last GPRS connection or the total GPRS connection time. You can also clear the timers. The security code is required to clear the timers. ‹ Copyright 2004 Nokia. All rights reserved. -
Page 89: Contacts (Menu 3)
Settings. Select • Memory in use to select the memory, either SIM card or phone, that you want to use for your contacts. To recall names and numbers from both memories for ‹ Copyright 2004 Nokia. All rights reserved. -
Page 90: Saving Names And Phone Numbers (Add Contact)
The first number saved is automatically set as the default number and it is indicated by a frame around the number type indicator, for example . When ‹ Copyright 2004 Nokia. All rights reserved. - Page 91 ID when it is on the Chat contacts or in Subscribed names list. To set the selected number as the default number, select Set as default. ‹ Copyright 2004 Nokia. All rights reserved.
-
Page 92: Adding An Image To A Name Or Number In Contacts
3. Scroll to the contact that you want, and press Details. Scroll to view the details of the selected contact. Depending on the Contacts view selection in Selecting settings for contacts page 89, the subscribed contacts are shown differently. Either only the ‹ Copyright 2004 Nokia. All rights reserved. -
Page 93: Deleting Contacts
Move the joystick down in standby mode, scroll to the contact that you want to edit or delete and press Details. Scroll to the name, number, text item or image that you want to edit or delete. ‹ Copyright 2004 Nokia. All rights reserved. -
Page 94: My Presence
You need to access the presence service before you can share your presence status with others. Other viewers need access to the presence service and a compatible phone to share your presence status. Press Menu and select Contacts presence. Select ‹ Copyright 2004 Nokia. All rights reserved. - Page 95 • Blocked list to view all the persons you have blocked from viewing your presence information. • Settings and select ‹ Copyright 2004 Nokia. All rights reserved.
-
Page 96: Subscribed Contacts
My presence Connect to ’My presence’ service. You can also view the subscribed contacts when you are not connected to the presence service but you cannot see the presence status of the contact. ‹ Copyright 2004 Nokia. All rights reserved. -
Page 97: Adding Contacts To The Subscribed Contacts
The status information of the first contact on the dynamic contacts list is shown and it may include text and some of the following icons: indicate that the person is either available, busy or not available. indicates that the person’s presence information is not available. ‹ Copyright 2004 Nokia. All rights reserved. -
Page 98: Unsubscribing A Contact
Note that any text items saved in the phone’s internal memory, such as e-mail addresses, will not be copied to the SIM card. 1. Press Menu and select Contacts and Copy. ‹ Copyright 2004 Nokia. All rights reserved. -
Page 99: Sending And Receiving A Business Card
Press Assign, or if a number has already been assigned to the key, press Options and select Change. Press Search, and select first the name and then the number ‹ Copyright 2004 Nokia. All rights reserved. -
Page 100: Voice Dialling
Note: You must say the name exactly as you said it when you recorded it. This may be difficult in, for example, a noisy environment or during an emergency, so you should not rely solely upon voice dialling in all circumstances. ‹ Copyright 2004 Nokia. All rights reserved. -
Page 101: Adding And Managing Voice Tags
. A short tone is heard and Speak now displayed. 2. Say the voice tag clearly. The phone plays the recognised voice tag and then dials the phone number of the voice tag after 1.5 seconds. ‹ Copyright 2004 Nokia. All rights reserved. -
Page 102: Info Numbers And Service Numbers
Tone settings on page 105. Press Menu and select Contacts, Caller groups and select the desired caller group. You can select from the following functions Group name, Group ringing tone, Group logo, Group members. ‹ Copyright 2004 Nokia. All rights reserved. -
Page 103: Settings (Menu 4)
The settings can also be changed in the Tone settings menu, see Tone settings on page 105. To rename a profile, select Profile name. The General profile cannot be renamed. ‹ Copyright 2004 Nokia. All rights reserved. -
Page 104: Chat And My Presence Settings
Select each of the settings one by one and key in all the required information that you have received from your network operator or service provider. Note that the connection settings are in the Connection settings menu. ‹ Copyright 2004 Nokia. All rights reserved. -
Page 105: Tone Settings
• Keypad tones to adjust the tone level of the keypad. • Warning tones to set the phone to sound tones, for example when the battery is running out of power. ‹ Copyright 2004 Nokia. All rights reserved. -
Page 106: Display Settings
• Menu view to select how the main menu items are displayed on the phone. Select List or Grid. ‹ Copyright 2004 Nokia. All rights reserved. -
Page 107: Time And Date Settings
Time format to select the 12-hour or 24-hour time format. The clock is also used for the functions Messages, Call register, Alarm clock, timed Profiles, Calendar, Notes, and screen saver, for example. ‹ Copyright 2004 Nokia. All rights reserved. -
Page 108: Personal Shortcuts
Add. If the command already has a voice tag, the indicator is shown. For adding and activating a voice command, see Voice dialling on page 100. ‹ Copyright 2004 Nokia. All rights reserved. -
Page 109: Connectivity
Bluetooth devices. Check with your local authorities. The SAP profile allows you to connect to compatible devices, such as the Nokia car enhancement RAN 610. When the SAP profile is active, the phone is disconnected from the GSM network, and thus, all phone functions are deactivated. -
Page 110: Bluetooth Connection
Paired devices to view a list of Bluetooth devices that are currently paired with the phone. Scroll to the desired device. If you want to delete the pairing to the device, press Delete. ‹ Copyright 2004 Nokia. All rights reserved. -
Page 111: Bluetooth Settings
(for example a computer). Do not point the IR (infrared) beam at anyone’s eye or allow it to interfere with other IR devices. This device is a Class 1 Laser product. ‹ Copyright 2004 Nokia. All rights reserved. -
Page 112: (E)Gprs
Internet Protocol (IP)- based network. EGPRS (Enhanced GPRS), also known as EDGE (Enhanced Data Rates for Global Evolution) is similar to GPRS but it enables faster connection. For more ‹ Copyright 2004 Nokia. All rights reserved. - Page 113 When you start an application using (E)GPRS, the connection between the phone and the network is established, and data transfer is possible. When you ‹ Copyright 2004 Nokia. All rights reserved.
- Page 114 • Scroll to Alias for access point and press Select. Key in the name that you would like for the activated access point and press OK. ‹ Copyright 2004 Nokia. All rights reserved.
-
Page 115: More Settings
(APN) to establish a connection to an (E)GPRS network. Contact your network operator for the APN. You can also set the (E) GPRS dial-up service settings (Access Point Name) on your PC using the Nokia Modem Options software, see PC Suite on page 160. If you have set the settings on both your PC and on your phone, note that the PC’s... - Page 116 (network service) to select the phone line 1 or 2 for making calls, for example you can use line 1 for personal calls and line 2 for business calls. For more information on availability, contact your network operator or service provider. ‹ Copyright 2004 Nokia. All rights reserved.
-
Page 117: Phone Settings
Security code (5 to 10 digits) on page 16. • Enter the security code. To set the security keyguard, select On. The keypad lock remains active, if you open the flip. ‹ Copyright 2004 Nokia. All rights reserved. - Page 118 See also Using the menu on page 47. • Start-up tone to set the phone to play a start-up tone when it is switched on. ‹ Copyright 2004 Nokia. All rights reserved.
-
Page 119: Enhancement Settings
20 seconds after you have switched off the car’s ignition. • For Text phone, select Use text phone and select to use the text phone settings instead of headset or loopset settings. ‹ Copyright 2004 Nokia. All rights reserved. -
Page 120: Security Settings
For more information, contact your network operator or service provider. • Security level. Select Phone and the phone will ask for the security code whenever a new SIM card is inserted into the phone. ‹ Copyright 2004 Nokia. All rights reserved. -
Page 121: Restore Factory Settings
63. Your phone supports a usage rights system to protect acquired content. A piece of content, for example a ringing tone, can be protected and associated with certain ‹ Copyright 2004 Nokia. All rights reserved. - Page 122 Select the appropriate bookmark to connect to the desired site. If the connection fails, you may not be able to access the page from the service whose connection settings are currently active. In this case, enter the ‹ Copyright 2004 Nokia. All rights reserved.
- Page 123 • Activate content to update the usage rights of the selected file. This option is only shown if the rights update is supported by the file. ‹ Copyright 2004 Nokia. All rights reserved.
-
Page 124: Camera (Menu 6)
Standard photo, Portrait photo Night mode if the lighting is dim for taking photos. If you want to add the photo to a name/phone number saved in Contacts, select Portrait photo. ‹ Copyright 2004 Nokia. All rights reserved. -
Page 125: Recording A Video Clip
Recording a video clip Press Menu, and select Camera, Video and press Record. The red indicator and the remaining recording time are shown at the top of the display. ‹ Copyright 2004 Nokia. All rights reserved. -
Page 126: Camera Settings
If you select Automatic, the default title will be used, or if you select title, you can key in or edit a new title. ‹ Copyright 2004 Nokia. All rights reserved. -
Page 127: Organiser (Menu 7)
If the alarm time is reached while the phone is switched off, the phone switches itself on and starts sounding the alarm tone. If you press Stop, the phone asks whether you want to ‹ Copyright 2004 Nokia. All rights reserved. -
Page 128: Calendar
• Settings to set the date, time, date or time format, or the first day of the week. In the Auto-delete option you can set the phone to automatically delete old ‹ Copyright 2004 Nokia. All rights reserved. -
Page 129: Making A Calendar Note
Contacts) and press Save. Then key in the year of birth and press OK. To set the alarm for the note, select With tone Silent (no alarm tone) and then set the alarm time. ‹ Copyright 2004 Nokia. All rights reserved. -
Page 130: When The Phone Sounds An Alarm For A Note
High, Medium or Low. The phone automatically sets the deadline without an alarm for the note. To change the deadline, view the note and select the option for the deadline. ‹ Copyright 2004 Nokia. All rights reserved. -
Page 131: Notes
If the note is too long to be sent as a message, the phone will ask you to delete the approprbiate number of characters from your note. ‹ Copyright 2004 Nokia. All rights reserved. -
Page 132: Wallet
Creating a wallet profile on page 134. • Cards to save personal card information. You can save payment card, loyalty card and access card information, for example, username and password ‹ Copyright 2004 Nokia. All rights reserved. -
Page 133: Saving Card Details
4. Key in or accept the suggested card name, and fill in the fields for the details. You can also receive card information to your phone over the air from a card issuer or service provider. You will be notified as to which category the card belongs to. ‹ Copyright 2004 Nokia. All rights reserved. -
Page 134: Personal Notes
3. Fill in the following fields and press OK. Some of the fields contain data that are selected from the wallet. You need to save the data before you can create a wallet profile. • Select payment card next - select a card from the payment card list. ‹ Copyright 2004 Nokia. All rights reserved. -
Page 135: Wallet Settings
Choose the product that you want to buy and carefully read all the information provided before your purchase. Note: The text may not fit within a single screen. Therefore, make sure to scroll through and read all of the text before your purchase. ‹ Copyright 2004 Nokia. All rights reserved. -
Page 136: Synchronisation
, calendar and Notes to correspond to the data on your compatible PC by starting the synchronisation from the PC. The contact data in your SIM card will not be synchronised. ‹ Copyright 2004 Nokia. All rights reserved. -
Page 137: Synchronising From Your Phone
Activate. Mark the data that are going to be synchronised. See Data to be synchronised Settings for the synchronisation on page 138. 3. Press Menu and select Organiser, Synchronisation and Synchronise. The marked data in the active set will be synchronised after confirmation. ‹ Copyright 2004 Nokia. All rights reserved. -
Page 138: Settings For The Synchronisation
Mark the data you want to synchronise, Contacts, Calendar, and/or Notes and press Done. • Database addresses. Select Contacts database Calendar database and/or Notes database. • User name. Key in the user name and press OK. ‹ Copyright 2004 Nokia. All rights reserved. -
Page 139: Synchronising From A Compatible Pc
Note: Your phone must be switched on to use this function. Do not switch the phone on when wireless phone use is prohibited or when it may cause interference or danger. Games The games use shared memory, see Shared memory on page 19. ‹ Copyright 2004 Nokia. All rights reserved. -
Page 140: Collections
Open to launch an application. For functions that you can access by pressing Options in the applications list, see Other options available for an application or application set on page 141. ‹ Copyright 2004 Nokia. All rights reserved. -
Page 141: Other Options Available For An Application Or Application Set
Delete to delete the application or application set from your phone. Note that if you delete a pre-installed application or an application set from your phone, you may download it again to your phone from www.nokia.com. • Details to give additional information about the application. -
Page 142: Downloading A Game Or An Application
Browsing the pages of a service on page 150. • Use the Nokia Application installer from PC Suite to download the applications to your phone. Note:Nokia does not warrant for applications from non-Nokia sites. If you choose to download Java applications from them, you should take the same precautions, for security or content, as you would with any site. -
Page 143: Extras
Gallery menu. 4. To listen to the last recording, select Play last recorded. To send the recording as a multimedia message, or send it via IR or Bluetooth connection, select Send. ‹ Copyright 2004 Nokia. All rights reserved. -
Page 144: Calculator
Tip: Alternatively, press once to add, twice to subtract, three times to multiply or four times to divide, if you are using the calculator with the flip closed. 4. Key in the second number. ‹ Copyright 2004 Nokia. All rights reserved. -
Page 145: Countdown Timer
Stop the alarm by pressing any key. If no key is pressed, the alarm stops automatically within 30 seconds. To stop the alarm and to delete the note, press Exit. Press Restart restart the countdown timer. ‹ Copyright 2004 Nokia. All rights reserved. -
Page 146: Stopwatch
Select the time set that you want to view. To delete the saved times, select Delete times. Select Delete all, or One by one, scroll to the times that you want to delete, and press Delete. ‹ Copyright 2004 Nokia. All rights reserved. -
Page 147: Services (Menu 9)
1. Save the service settings that are required to access the service that you want to use. See page 148. 2. Make a connection to the selected service. See page 149. 3. Start browsing the pages of the service. See page 150. ‹ Copyright 2004 Nokia. All rights reserved. -
Page 148: Setting Up The Phone For A Service
4. Select Edit active service settings. Select each of the settings one by one and key in all the required settings according to the information you have received from your network operator or ‹ Copyright 2004 Nokia. All rights reserved. -
Page 149: Connecting To A Service
• Key in the address of the service: Press Menu and select Services and then Go to address. Key in the address of the service, and press OK. ‹ Copyright 2004 Nokia. All rights reserved. -
Page 150: Browsing The Pages Of A Service
• To select a highlighted item, press the joystick briefly or press • To enter letters and numbers, press the keys and to enter special characters, press the key . When the phone’s flip is open, you can key in letters and numbers normally. ‹ Copyright 2004 Nokia. All rights reserved. -
Page 151: Options While Browsing
The multi-mode browser supports functions that you can access while browsing. You can make a voice call, send DTMF tones while a voice call is in progress, and save a name and a phone number from a page. ‹ Copyright 2004 Nokia. All rights reserved. -
Page 152: Disconnecting From A Service
UTF-8 encoding when sending a Web address to a compatible phone. ‹ Copyright 2004 Nokia. All rights reserved. -
Page 153: Cookies
Note: Your phone may have some pre-installed bookmarks for sites that are not affiliated to Nokia. Nokia does not guarantee or endorse these sites. If you choose to access them, you should take the same precautions for security or content as you would with any Internet site. -
Page 154: Receiving A Bookmark
Note: Nokia does not warrant for applications from non-Nokia sites. If you choose to download Java applications from them, you should take the same precautions, for security or content, as you would with any site. -
Page 155: Cache Memory
Security features may be required for some services, such as banking services or shopping on a site. For such connections you need security certificates and possibly a security module, which may be available on your SIM card. For more information, contact your service provider. ‹ Copyright 2004 Nokia. All rights reserved. -
Page 156: Security Module
• The phone uses a server certificate to improve security in the connection between the phone and the content server. The phone receives the server certificate from the service provider before the connection is established and ‹ Copyright 2004 Nokia. All rights reserved. - Page 157 Important: Before changing these settings, you must make sure that you really trust the owner of the certificate and that the certificate really belongs to the listed owner. ‹ Copyright 2004 Nokia. All rights reserved.
-
Page 158: Digital Signature
Select the user certificate that you want to use. Key in the signing PIN (see Access codes on page 16) and press OK. The digital signature icon will disappear and the service may display a confirmation of your purchase. ‹ Copyright 2004 Nokia. All rights reserved. -
Page 159: Sim Services (Menu 10)
SIM services by selecting the option Confirm SIM service actions Phone settings. Note that accessing these services may involve sending a text message (SMS) or making a phone call for which you may be charged. ‹ Copyright 2004 Nokia. All rights reserved. -
Page 160: Pc Connectivity
• Nokia Sound Converter to edit polyphonic ringing tones in supported formats to be compatible with your phone and to transfer them to your phone. • Nokia Content Copier to copy data or back-up data from your phone to a compatible PC or to another compatible Nokia phone. - Page 161 • Nokia Settings Manager to edit and send your browser bookmarks or to update the connection sets to your phone. • Nokia Phone Editor to send text messages (SMS) and to edit the contacts in your phone. • Nokia Phone Browser to view the contents of the Gallery folder of your phone on a compatible PC.
-
Page 162: (E)Gprs, Hscsd And Csd
For better performance during data calls, place the phone on a stationary surface with the keypad facing downward. Do not move the phone or hold it in your hand during a data call. ‹ Copyright 2004 Nokia. All rights reserved. -
Page 163: Battery Information
Always try to keep the battery between 15°C and 25°C (59° F and 77° F). A phone with a hot or cold battery may ‹ Copyright 2004 Nokia. All rights reserved. - Page 164 Batteries’ performance is particularly limited in temperatures well below freezing. Do not dispose of batteries in a fire ! Dispose of batteries according to local regulations (e.g. recycling). Do not dispose as household waste. ‹ Copyright 2004 Nokia. All rights reserved.
-
Page 165: Care And Maintenance
• Use a soft, clean and dry cloth to clean the lenses (e.g. camera, proximity sensor and light sensor). • Use only the supplied or an approved replacement antenna. Unauthorised antennas, modifications or attachments could damage the phone and may violate regulations governing radio devices. ‹ Copyright 2004 Nokia. All rights reserved. - Page 166 All of the above suggestions apply equally to your phone, battery, charger or any accessory. If any of them is not working properly, take it to your nearest qualified service facility. The personnel there will assist you and, if necessary, arrange for service. ‹ Copyright 2004 Nokia. All rights reserved.
-
Page 167: Important Safety Information
Electronic devices Most modern electronic equipment is shielded from radio frequency (RF) signals. However, certain electronic equipment may not be shielded against the RF signals from your wireless phone. ‹ Copyright 2004 Nokia. All rights reserved. - Page 168 RF energy or if you have any questions. Switch off your phone in health care facilities when any regulations posted in these areas instruct you to do so. Hospitals or health care facilities may be using equipment that could be sensitive to external RF energy. ‹ Copyright 2004 Nokia. All rights reserved.
-
Page 169: Potentially Explosive Atmospheres
(such as propane or butane); areas where the air contains chemicals or particles, such as grain, dust or metal powders; and any other area where you would normally be advised to turn off your vehicle engine. ‹ Copyright 2004 Nokia. All rights reserved. -
Page 170: Emergency Calls
Because of this, connections in all conditions can not be guaranteed. Therefore, you should never rely solely upon any wireless phone for essential communications (e.g. medical emergencies). ‹ Copyright 2004 Nokia. All rights reserved. - Page 171 Council of the European Union. These limits are part of comprehensive guidelines and establish permitted levels of RF energy for the general population. The guidelines were developed by independent scientific organisations through periodic and thorough ‹ Copyright 2004 Nokia. All rights reserved.
- Page 172 SAR values may vary depending on national reporting requirements and the network band. For SAR information in other regions please look under product information at www.nokia.com. ‹...
- Page 173 Nokia Corporation, Nokia Mobile Phones ("Nokia") warrants the appearance of the defect within the warranty period; that this NOKIA product ("Product") is at the time of its original purchase free of defects in materials, design and (iii) the Product was not returned to Nokia or its authorized...
-
Page 174: Warranty Card
WARRANTY CARD FILL IN WITH BLOCK LETTERS Purchaser's Name: ______________________________________________________________________________ Address:__________________________________________________________________________________________ __________________________________________________________________________________________ Country: __________________________________________________________________________________________ Phone: ___________________________________________________________________________________________ Date of Purchase (dd/mm/yy): – Product Type (on phone type label under battery): Product Model (on phone type label under battery): Phone Serial No (on phone type label under battery): Place of Purchase: _______________________________________________________________________________ Store Name: _____________________________________________________________________________________ Store Address: ___________________________________________________________________________________...
Need help?
Do you have a question about the 6820 and is the answer not in the manual?
Questions and answers