
Summary of Contents for Fuel Fitness F300
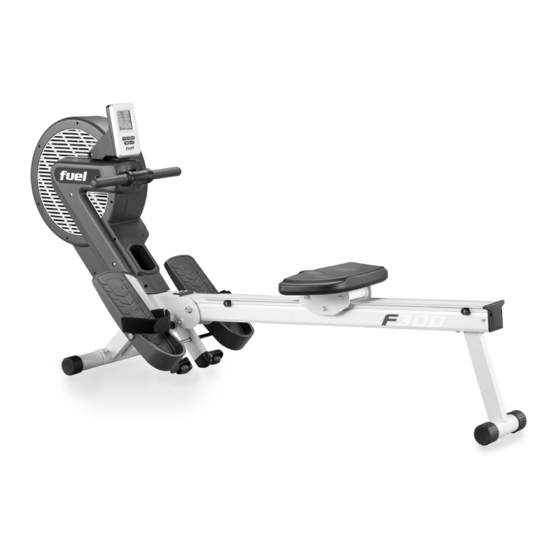
- Page 1 F300 ROWER OWNER’S MANUAL PLEASE CAREFULLY READ THIS ENTIRE MANUAL BEFORE OPERATING YOUR NEW ROWER...
-
Page 3: Table Of Contents
Congratulations On Your New Rower and Welcome to the FUEL Fitness Family! FUEL Fitness. Your new FUEL Fitness will do all we can to make your ownership experience as pleasant as possible for many years to come. If you have questions, or if parts are missing or damaged, or you require customer service, call 1-866-697-6531. -
Page 4: Product Registration
Failure to do so may result in damage to the display or electronic components. IMPORTANT: Do not operate the product if the power supply, its plug, or its cord has been damaged. F300 ROWER... -
Page 5: Important Safety Instructions
Failure to follow all guidelines may compromise the effectiveness of the exercise experience, expose yourself (and possibly others) to injury, and reduce the longevity of the equipment. SAVE THESE INSTRUCTIONS - THINK SAFETY! CAUTION!! Please be careful when unpacking the carton. F300 ROWER... -
Page 6: Assembly Tools
F300 ASSEMBLY PACK CHECKLIST HARDWARE STEP 1 ALL OTHER PARTS PRE-ASSEMBLED ON UNIT #93. 3/8” x 21/2mm #94. 3/8” x 23 x 1.5T #95. 3/8” x 12.5T Carriage Bolt Curved Washer Cap Nut (2 pcs) (2 pc) (2 pcs) ASSEMBLY TOOLS #96.Wrench... -
Page 7: F300 Assembly Instructions
F300 ASSEMBLY INSTRUCTIONS FRONT STABILIZER & WHEEL COVERS Hardware Step 1 #93. 3/8” x 2½mm Carriage Bolt (2 pcs) #94. 3/8” x 23 x 1.5T Curved Washer (2 pc) #95. 3/8” x 12.5T Cap Nut (2 pcs) Mount the Front Stabilizer (6) onto the Main Frame (1) by using two Carriage Bolts (93) going through Front Stabilizer (6) and Main Frame (1), two Curved Washers(94) and Cap Nuts(95). - Page 8 Pull up the Main frame (1) as shown in figure 2 and install the Rear Stabilizer (3) on the end of the Aluminum Track (2). Use Combination M5 Allen Wrench & Phillips Head Screw Driver (97) to tighten with four Button Head Socket Bolts (92) and four Flat Washers (69). F300 ROWER...
- Page 9 Pull out Locking Pin (60) of the Aluminum Track (2) and put on level, then re- turn the Locking Pin (60) and lock well. Pull up the unit as shown in the figure in circled box when returning the Locking Pin (60). F300 ROWER...
- Page 10 Bushings (73) and Pedals (72) on both ends (make sure pedals are correct for each side) and use Combination M5 Allen Wrench & Phillips Head Screw Driver (97) to tighten the shaft with two Flat Washers(69) and two Button Head Socket Bolts(92). F300 ROWER...
- Page 11 M5 Allen Wrench & Phillips Head Screw Driver (97) to tighten with two Phillips Head Screws (45). Secure two Rubber Foots(82) at both ends of the aluminum track with two Phillips Head Screws(83). Secure Protective Cap (84) at of the aluminum track with two Phillips Head Screws (45). F300 ROWER...
-
Page 12: Operation Of Your Console
OPERATION OF YOUR CONSOLE F300 CONSOLE KEY FUNCTIONS START 1. Pressing this key under nonoperational mode, starts P0 exercise mode. 2. Choose a program, pressing this key to into exercise mode. STOP/RESET 1. Pressing this key under operational mode, the console enters pause mode. -
Page 13: Program Operation
DIST/CAL/COUNT and 10 segments of resistance setting with setting levels 1~16. Press START key when finish and the program starts. During the workout, use UP/DOWN key to control the resistance, STOP to pause and press and hold STOP to return to the ready mode. F300 ROWER... -
Page 14: Manufacturer's Limited Warranty
2014 FUEL Fitness Inc. warrants all its home use rower parts for a period of time listed below, from the date of retail sale, as determined by a sales receipt or in the absence of a sales receipt, eighteen (18) months from the original factory shipping date. FUEL Fitness’s responsibilities include providing new or remanufactured parts, at FUEL Fitness’s option, and technical support to our independent... - Page 16 ©2014 All RIghts Reserved. F300 Owner’s Manual...
Need help?
Do you have a question about the F300 and is the answer not in the manual?
Questions and answers