HELVAR 924 User Manual
Hide thumbs
Also See for 924:
- Installation manual (2 pages) ,
- Installation manual (2 pages) ,
- Installation and user manual (58 pages)

Related Manuals for HELVAR 924


Summary of Contents for HELVAR 924
-
Page 1: Table Of Contents
Contents Section Page Welcome To 924 TouchPanel Using Screen And Menus Switching On For The First Time Recommendations For Configuring Setting Up Loads And Groups Setting Up Scenes Digidim Controls Setting Up Screens Automating TouchPanel With Scheduler Automating TouchPanel With Sequences And Cycles... - Page 2 Key to symbols used in this guide: Master Panel: A section with this symbol beside the heading applies to TouchPanel in Master Panel mode. Toolbox Slave: A section with this symbol beside the heading applies to TouchPanel in Toolbox Slave Panel mode. Workshop Slave: A section with this symbol beside the heading ap- plies to TouchPanel in Workshop Slave mode.
-
Page 3: Welcome To 924 Touchpanel
Thank you for choosing a Helvar product, and welcome to our growing family of customers around the world. By choosing Helvar you have invested in great value technology that we hope you will enjoy using for many years. This guide is designed to help you get the most from your TouchPanel. - Page 4 1. Do’s and Don’ts TouchPanel uses a touch-sensitive screen designed for use with your fingertip or a stylus. To select an item on the screen, press once on the item, using gentle pressure. You can also control the lighting with the Remote Control Handset (available separately).
-
Page 5: Using Screens And Menus
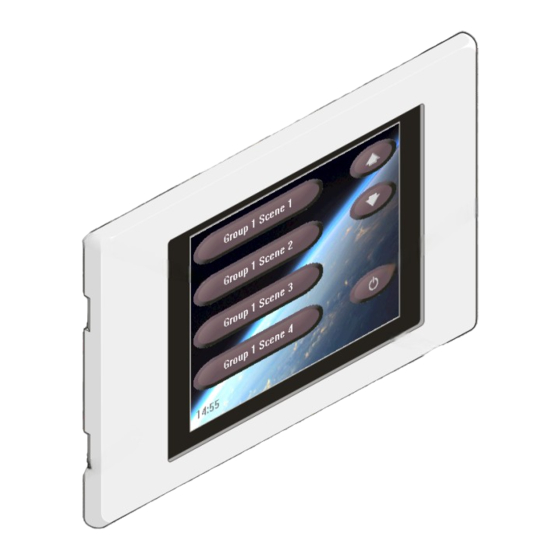
2. Using Screens and Menus Everything you can do with TouchPanel involves using its system of Screens and Menus. This section explains what Screens and Menus are, what the various elements are and what they do, and explains how to use the Configuration menus and Pop up menu together. 2.1 About Screens Screens provide a graphical user interface for controlling your lighting system on a day-to-day basis. - Page 6 2.2 About Configuration Menus And The Pop Up Menu These are text menus used to configure and customize TouchPanel, configure lighting scenes, configure Scheduled Events, and customize the look and content of Screens. Title and advice Area Shows the title of the current menu, or advice for you to follow.
- Page 7 2.3 Accessing Configuration Menus Press the Hotspot in the lower-right corner of the screen for at least four seconds. Type in the password and press Press . The Main Menu will appear. To learn about password protection see Section 15. When you have entered a valid password, features protected by the password can be used until the password expires.
- Page 8 2.5 Using Configuration Menus And Pop Up Menu The Configuration menus and Pop up menu are used together to perform many different tasks. Nor- mally you press an item to select it but, sometimes the Pop up menu is made available when an item can have an action performed on it.
-
Page 9: Switching On For The First Time
3. Switching On For The First Time TouchPanel requires some configuration before it can be used. The configuration process is a once- only process that starts automatically when TouchPanel is switched on, unless the configuration process has been completed previously. Once the mode of operation has been set, you can only change it by resetting TouchPanel to factory defaults. - Page 10 Modes Of Operation Only 1 allowed in Programming Client TouchPanel in Digidim Master mode Digidim Master mode Control Panels Point computer Toolbox software Dimmer S-DIM DALI TouchPanel in TouchPanel in Dimmer DALI/Digidim Digidim Slave mode Digidim Slave mode Dimmers Ballasts Any number allowed in Digidim Slave mode, up to the...
-
Page 11: Recommendations For Configuring
4. Recommendations For Configuring Configuring TouchPanel allows you to customize its features to suit your needs. Configuring involves working with Loads, Groups, Scenes, and Screens. The number of items that you can configure depends on the mode of operation chosen for TouchPanel. To learn about mode of operation and how to set it see section 3.2. -
Page 12: Setting Up Loads And Groups
Setting Up Loads And Groups In Master Panel mode TouchPanel detects the presence of loads automatically and can work with them immediately, but it is usually easier for you to work with loads once you have given them meaningful names, and organised them into groups. This chapter explains how to set up, name and group loads. - Page 13 This example shows four Loads in three Groups. Group 1 contains L1 and L2, which are in the Kitchen and Breakfast Bar respectively; Group 2 contains L3 and L4, which are in the Breakfast Bar and Diner respectively; and Group 3 contains L2 and L3, which are in the Breakfast Bar. These Groupings allow you to control the lights in just the Kitchen, just the Diner, or just the Breakfast Bar.
- Page 14 5.5 Renaming A Load It can be useful to rename each load to indicate its purpose or location, and to make it easier to identify each load later. From Main Menu select the following: to display a list of discovered Loads. to view the Pop up Menu.
- Page 15 5.7 Edit Load Properties From Main Menu select the following: to display a list of discovered Loads. to view the Pop up Menu. to enter edit mode. The load level display shows the groups to which each load belongs. Choose the load you want to edit. to edit the Load properties.
- Page 16 5.9 Deleting a Missing Load Levels are normally set by calling a scene that sets the required levels, but you can also set the level for individual loads manually. From Main Menu select the following: to display a list of discovered Loads. to display the Pop Up Menu.
-
Page 17: Setting Up Scenes
Setting Up Scenes A scene is an arrangement of lighting levels. When a scene command is directed at a Group, usually all loads in the Group will change their level accordingly. If a scene command is Broadcast, usually all loads in the system will change their level accordingly. It is possible for a load to ignore particular scenes, leaving its level unchanged even after receiving this scene command. - Page 18 6.1 Setting Up Scenes Before setting up Scenes, you should assign the Loads to Groups. To learn more about Groups see section 5. From Main Menu select the following: to display the Edit Scenes menu. Select the Group containing the loads you want to edit. Select the scene to edit it.
-
Page 19: Digidim Controls
DIGIDIM Controls TouchPanel can recognise Digidim Controls that are present in the lighting system. View information about each control, find out if a control is missing, and to configure and rename controls. To learn how to refresh the Controls list see section 13.1. 7.1 Viewing Information About A Digidim Control From Main Menu select the following:... - Page 20 and then select a Group to which the control will belong. to enable or disable infrared. and then select the type for each input (for input units only). You may change an input type from Switch Edge , Switch Button , Analogue Edge , or Analogue Slider depending on the input unit selected.
- Page 21 then to set the Rising Threshold percentage (for Analogue Input Unit 942 only). then to set the Falling Threshold percentage (for Analogue Input Unit 942 only). to modify the slider input (for Analogue Input Unit 942 only). See section 25.5. to change the button function.
- Page 22 7.5 Editing Digidim Control Subdevice Properties (Sliders) From Main Menu select the following: to display the Controls menu. Select the Control for which you want to edit the subdevice properties. Select a slider to edit. (There is only one slider for 110 slider devices.) and then select a group to which this slider will belong.
- Page 23 From Main Menu select the following: to display the Controls menu. Select Control from which you want to edit subdevice properties and select a button to edit. and then select a group to which the PIR will belong. and then one of the following PIR modes: to set the On Timeout.
- Page 24 100 Rotary Switch 942 Analogue Input Unit 110 Single Slider Panel 440 Input Unit 111 Dual Slider Panel 444 Mini Input Unit 121 Panel 924 TouchPanel 122 Fader Panel 930 Panel 124 Panel 935 Panel 125 Panel 939 Panel 126 Panel A control that is not recognised or yet supported by TouchPanel.
-
Page 25: Setting Up Screens
Setting Up Screens A Screen is a collection of buttons, shapes, clock, captions and background picture or colour, customized to suit your needs. Screen customization allows you add new buttons, arrange them however you wish, assign actions to them, and even use Themes to change the way they look. - Page 26 Each box represents a Screen, and each line indicates a link to another Screen. The Default Screen provides common scenes, such as scenes to switch all lights on or off, plus a link to Areas, which contains links to other Screens relating to each part of the nightclub. This hierarchical arrangement of Screens can be extended or changed easily.
- Page 27 Editing Screen Properties Screen properties allow you to change the Layout and Theme or background of a Screen, and change the Group to which its buttons belong. From Main Menu select the following: to display the Screens menu. to display the Pop up menu. to enter Properties mode.
- Page 28 Deleting A Screen From Main Menu select the following: to display the Screens menu. to display the Pop Up menu. to enter Delete mode, Select the screen to be deleted. to delete the highlighted screen Repeat steps 5 and 6 to delete more Screens, or to exit Delete mode.
- Page 29 Moving Controls The controls on a Screen can be arranged to suit your needs. For example, it is usual to arrange scene buttons into one or more columns; arrange the modifier buttons to one side of the screen, one above the other, and to position the Off button near the bottom-right of the screen.
- Page 30 Editing Control Properties From Main Menu select the following: to display the Screens menu. Select the Screen to edit. to display the Pop up menu, if necessary. to enter Properties mode. Press the control that you want to edit. The properties of each control type you can edit are explained in the following steps: Button: to edit the button caption.
- Page 31 to display the customize Button Appearance Settings screen. Choose one of the following options: to choose a style for the button. This will override the button style from the Theme. to adjust the text justification of the button (clock and label controls do not allow this). to choose a colour for the button caption.
- Page 32 8.10 Mapping Keys It is possible to map the TouchPanel addresses and keys to mirror the Designer software to emulate key presses. Please see RS232 AV Interface to 910/920 Router User Guide (D004457) for further in- formation. Tip! Map the addresses via the Screens menu as opposed to at button level. This is because all ad- dress edits made at screen level will apply to the lower button level - meaning you will only have to set the address once for all TouchPanel buttons.
-
Page 33: Automating Touchpanel With Scheduler
Automating the TouchPanel TouchPanel can automate the lighting by recalling scenes or linking to Screens at regular daily or weekly intervals. It does this by using Scheduled Events. Here are some examples of common ways you can use Scheduled Events: Calling a scene at a specific day and time: Calling a scene at a specific time is the most commonly used Scheduled Event, as it allows you to automate lighting changes to suit your daily/weekly routines. - Page 34 Editing A Scheduled Event From Main Menu select the following: to display the Scheduled Events menu. Select the Scheduled Event to edit. to set the trigger time (only available for Scene Recall function). Choose one of the following settings: to set a time. to use the dawn time, then adjust the time relative to dawn.
-
Page 35: Automating Touchpanel With Sequences And Cycles
Automating TouchPanel With Sequences And Cycles Note: Unavailable with Designer Slave Mode A Sequence allows you to execute a range of scenes automatically, by making connections between them called Links. Each Link defines how long the scene associated with it will remain in use before the next scene is executed, and the fade time that will be used for the transition. - Page 36 10.1 Sequences And Cycles Quick Reference The icons shown below are used when editing a Sequence or Cycle. They help to identify the start, middle and end of a Sequence. The first Link in a Sequence. A Link in the middle of a Sequence, or any Link in a Cycle. The last Link in a Sequence.
- Page 37 10.3 Editing A Sequence Or Cycle From Main Menu select the following: to display the Sequences and Cycles menu. Select the Sequence or Cycle to edit. Select a Link to edit. to rename the Link. The first Link name is also used as the name for Sequence or Cycle. to set the Link Duration.
- Page 38 10.4 Adding A Link To A Sequence Or Cycle From Main Menu select the following: to display the Sequences and Cycles menu. Select the Sequence or Cycle you want to add a Link to. Select the Link that you want to be executed before the Link you are about to add. The existing Link will be opened for editing.
- Page 39 10.6 Deleting A Sequence Or Cycle From Main Menu select the following: to display the Sequences and Cycles menu. to display the Pop up menu. to enter Delete mode. Select the Sequence or Cycle to delete. It will be highlighted. to delete the highlighted Sequence or Cycle.
-
Page 40: Configuring A Remote Control
Configuring A Remote Control TouchPanel can be controlled (though not configured) via an infra-red remote control. You can use Helvar Remote Control 303 (shown) or a compatible “learning” unit that uses the Philips RC5 standard infra-red protocol. Scene Selector Modify Up... - Page 41 11.2 Renaming A Remote Control From Main Menu select the following: to display the Options menu. to display the Remote Control menu. to view the Pop Up menu. and then select the remote control you want to rename. and then type in a new name for the remote control. to save the changes.
-
Page 42: Backing Up And Restoring
Backing Up And Restoring All information stored in TouchPanel can be backed up to a computer, via a USB connection. Backed up information can also be restored, to the same TouchPanel or others, by the same means. To use TouchPanel Backup you will need a computer with a USB port to connect the computer to TouchPanel. - Page 43 12.2 Connecting A Computer To The USB Port Ensure the software has been installed (see step 12.1) Insert a flat bladed screwdriver into one of the side recesses of TouchPanel, and then twist the screwdriver gently to lever off the bezel. With the bezel loosened, remove Panel by hand.
- Page 44 12.4 Restoring TouchPanel It is usual for each TouchPanel in a lighting system to have different content. For this reason, each backup also records the serial number of the TouchPanel from which it has been made. If you attempt to restore the backup to a different TouchPanel, you will be warned about the mismatched serial numbers as a precaution, though you may continue with the restore.
- Page 45 12.5 Backup And Restore Status In TouchPanel Backup the following graphics indicate the status of the connection and communication with TouchPanel. The USB cable is not connected between the computer and TouchPanel. The USB cable has been connected between the computer and TouchPanel, but TouchPanel Backup has not yet established communication with TouchPanel.
-
Page 46: Refreshing And Discovering Devices
Refreshing and Discovering Devices Refresh may be necessary if Digidim or DALI devices are added or removed without re-powering TouchPanel. You can do this by using the Refresh Devices feature. TouchPanel looks for new and existing devices, and then updates the list of devices that you can see in the Loads and Controls menus. -
Page 47: Resetting To Factory Defaults
Resetting To Factory Defaults This procedure returns TouchPanel to its factory settings. After resetting TouchPanel, the next time you switch it on, it will behave as if it is being switched on for the first time. This procedure will cause all settings stored in TouchPanel to be lost, including Screens, Groups, Scenes, Scheduled Events, Sequences and Cycles. -
Page 48: Password Protection
Password Protection TouchPanel has many configuration options that affect how it will work with the lighting system. All these features are accessed via the Hotspot. To prevent accidental or unauthorised access, the Hotspot is protected by a password. Each TouchPanel can have a separate password. TouchPanel is provided with a default password, shown at the bottom of this page, but you can change the password whenever you wish. -
Page 49: Setting Time, Date, Location And Language
Setting The Time, Date, Location And Language TouchPanel has a built-in clock and perpetual calendar that recognises leap years automatically. The clock and calendar are used by the Scheduler to determine when to trigger scheduled events. The time and date can be displayed on a Screen by adding a Clock control. To learn how to do this see section 8.5. - Page 50 16.2 Setting The Date And Time From Main Menu select the following: to display the Options menu. to display the Set Date And Time menu. to set the date and time. to enable or disable Daylight Saving (also known as Summer Time). to save the changes.
-
Page 51: Setting The Backlight
Setting The Backlight TouchPanel’s screen is backlit so that you can see it in low lighting conditions. When TouchPanel is not being used, the backlight level can be set to dim automatically so that it is not intrusive. So that you can see TouchPanel’s controls when you need them, when the backlight has dimmed, touch the screen once to brighten the backlight. -
Page 52: Cleaning
Cleaning TouchPanel’s touch-sensitive screen will respond to any touch, so you should enter its cleaning mode before cleaning it. This mode switches off the screens touch-sensitive features for 20 seconds so you can clean the screen without inadvertently affecting the lights or selecting on-screen menu items. - Page 53 18.1 Using Cleaning Mode While Not In Editing Mode While TouchPanel is not in editing mode, press the Hotspot to display the Enter Password screen. to enter Cleaning mode. A 20-second countdown will be shown on the screen. The screen will not respond to touch until the countdown has ended.
-
Page 54: Calibrating The Screen
Calibrating The Screen TouchPanel is supplied with the screen already calibrated. However, you may re-calibrate the screen manually if necessary. 19.1 Re-calibrating The Screen For greater accuracy when re-calibrating the screen, we recommend that you use a stylus or similar soft-tipped, non-writing device. -
Page 55: Problems And Solutions
This may happen if communications are poor (check cables), or it may be that the control is one that Helvar has developed since this version of TouchPanel was assembled. If this is the case, a software update may be available, which provides support for this control. - Page 56 20.1 Helvar Customer Support Helvar has representatives in 49 countries, which can provide support in your local language. For information about Helvar support facilities in your country, see the Helvar website at www.helvar.com. Helvar Regional Support with a Service Agreement Helvar provides a range of support services that give you access to our technical expertise.
-
Page 57: About The Lighting System
To learn more about these subjects see Digidim Lighting Control Designing, Specifying and Installing (Document 7860038) (available separately). If using TouchPanel in a Lighting Router system, see the online help provided with Workshop software (available separately), or contact Helvar Customer Support for details of training courses. 21.1 About Lighting Circuits A lighting circuit is a collection of one or more lights that are connected together and therefore work together. - Page 58 21.3 About Lighting Scenes In simple terms, a scene is an arrangement of lighting that suits a particular purpose. For example, a dining room may need practical lighting when holding a meeting there, atmospheric lighting when dining entertaining, other lighting presentation purposes and, of course, occasionally no lighting at all.
-
Page 59: Icon Quick Reference
Icon Quick Reference Accept Changes Colour picker Pop up menu Time Zone hotspot Cancel changes Change screen Configuration Location background picture menus Add mode Change button Options menu Region appearance Properties mode Button control Other functions Locale menu Delete mode Clock control Temeperature/ Language...
Need help?
Do you have a question about the 924 and is the answer not in the manual?
Questions and answers