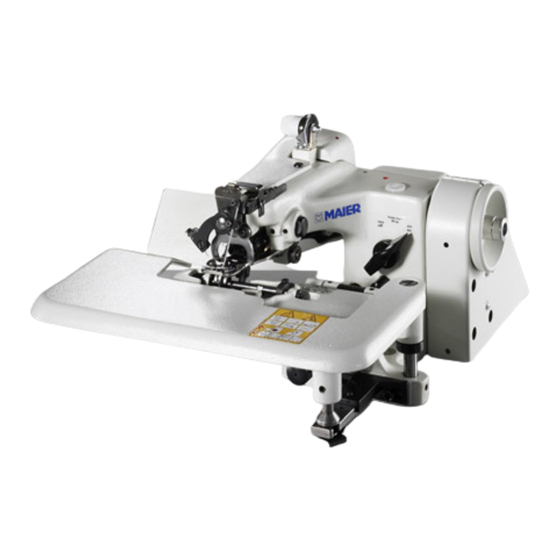

Summary of Contents for Maier 220
- Page 1 Bedienungsanleitung Operating instructions Manuel d´instructions Instrucciones de servicio 220, 221, 240, 241, 251, 261, 271, 281, 252, 352...
-
Page 2: Table Of Contents
Blind stitch hems on the cloth tuck ........................ 16 Setting the stitch depth (penetration) ........................ 18 Classes 220, 221, 240, 241, 251, 261, 271 ....................18 Classes 252 and 352 ............................ 19 Setting the cloth retainers for classes 251, 261, 271, 281, 252, 352 ..............21 Setting the helical spring ........................... -
Page 3: Manufacturer's Declaration
89/392/CEE, annexe II B 89/392/CEE, annexe II A Nous déclarons la conformité de l’unité ou Nous déclarons que la tête couseuse de la MAIER- l’installation de couture MAIER-Machine à coudre à Machine à coudre à points invisibles (tête couseuse) Classe et no. de série voir plaque est destinée à être points invisibles Classe et no. - Page 4 Of course, apart from this, we - as the manufacturer - are ready to answer your questions at any time, and to help you with any problems you may have. In this case, please write direct to us or telephone us. Maier-Unitas GmbH Maschinenfabrik Postfach 1130 D-73253 Köngen –...
-
Page 5: General Notes
General notes Directives The machine has been built in accordance with the European regulations stated in the manufacturer's declaration and conformity declaration. In addition to these operating instructions, you must take account of all generally applicable statutory and other regulations and other statutory provisions – including those of the Operator's country - as well as the applicable environmental protection regulations. -
Page 6: Safety Symbols
Safety symbols Danger spot! Items requiring special attention. Danger of injury to operators or specialist staff! Attention! Never work without finger guards and protective devices! Switch off main switch before threading, changing needles, cleaning etc. Items requiring the Operator's special attention These operating instructions form part of the machine and must be available for operators at all times. -
Page 7: Operators And Specialist Staff
Operators and specialist staff Operators Operators are the persons who are responsible for preparing, operating and cleaning the machine, and for troubleshooting in the sewing zone. Operators have a duty to observe the following items: The safety notes specified in the operating instructions must be observed during all work! No method of working must be used that affects the safety of the machine! Close-fitting clothing must be worn. -
Page 8: Hazard Warnings
Hazard warnings When the machine is in operation, a 1 m working area must be kept clear in front of and behind the machine, so that unhindered access is possible at any time. No objects must be left lying on the table during setup and adjustment of the machine! The objects could be clamped or thrown out. -
Page 9: Disposal Of The Machine
Risk of injury due to the machine being started again inadvertently. Oil holes marked in red are provided on the cover and on the machine body. The machine should be oiled at these points about two or three times per month, One drop of sewing machine oil per oil hole is sufficient. -
Page 10: Assembly Of The Machine
Fit belt guard as shown in Fig. 11. Fit the thread stand. Fitting the finger guard (not on classes 220, 221, 271) It is essential that the finger guard is fitted, to prevent any finger injury when opening the frame (with treadle or stop motor). -
Page 11: Mounting Instructions For The Mini-Motor 46 Attachment Kit
Mounting instructions for the mini-motor 46 attachment kit Classes 221 /241/ 251 / 261 /271 Dismantle the rear cover on the machine body. Remove blanking plug 240236, bolts 221212 and spring 221213. Remove shaft 221204. Refit shim 221204A and push the new shaft into the machine body. The shaft should protrude 10 mm beyond the machine body. -
Page 12: Automatic Frame Drop Device
Accessories: Thread stand, treadle with transmission linkage or knee-lift lever, chains, hooks, 2-part belt guard plate, finger guard (not with classes 220, 221, 271), oiler, screwdriver, open-ended spanner, Allen key, cover, spare parts list. -
Page 13: Sewing Machine Table Tops
Sewing machine table tops Sewing machine table top for models 220, 221, 271 Sewing machine table top for models 220, 221, 271 with sub-class 46... - Page 14 Sewing machine table top for models 240, 241, 251, 252, 261, 281, 352 Sewing machine table top for models 240, 241, 251, 252, 261, 281, 352 with sub-class 46/2...
-
Page 15: Operation
Operation Threading Switch off the machine! Risk of injury due to the machine being started again inadvertently. Machine without thread cutter (Fig. 1) The thread is run over the thread stand through the thread guide A, the rear thread eyelet, between the thread tensioning discs C (not round the pin), through the front thread eyelets D (right-hand hole) and through the hole on the needle claw E. -
Page 16: Inserting The Cloth And Sewing
Inserting the cloth and sewing The needle must be in its extreme left-hand position when inserting the cloth. Press down on the treadle or knee-lift lever, then insert the cloth so that the hem fold is positioned on the right-hand side and is far enough under the feed dog for the feed dog to grip it. - Page 17 When using a stop motor with frame drop device and thread cutter, then simply by stepping back off the treadle, the needle is automatically positioned, the thread cut off and the frame opened for removal of the material. If thread pulls are visible on the outside of the cloth after sewing, or if the seam is too loose at the hem edge, the thread tension must be set slacker or tighter accordingly.
-
Page 18: Setting The Stitch Depth (Penetration)
Setting the stitch depth (penetration) Classes 220, 221, 240, 241, 251, 261, 271 Adjusting screw A for setting the stitch depth is located under the frame plate. To check the stitch depth, turn the hand-wheel until the needle point is positioned directly above the plunger (rib shaft) B. -
Page 19: Classes 252 And 352
Classes 252 and 352 With the above machine classes (double blind stitch), the cloth is inserted folded in an "S" shape (see Fig. 4). In this case, the distance from the seam to the hem edges can be any value required. All other essential information on inserting the cloth is described on page 16. - Page 20 Setting the stitch depth of the left-hand plunger/rib shaft The left-hand plunger/rib shaft is responsible for penetration of the outside of the hem and so must be adjusted with particular care. Penetration shallower deeper For design-related reasons, the right-hand plunger/rib shaft depends on the setting of the left-hand plunger/rib shaft.
-
Page 21: Setting The Cloth Retainers For Classes 251, 261, 271, 281, 252, 352
Setting the cloth retainers for classes 251, 261, 271, 281, 252, 352 (lowering over cross seams) For setting the cloth retainers, the cloth is inserted in the machine as for sewing (not on the cross seam). Cloth retainer A (the left-hand cloth retainer on classes 251,261,271 and 252/352) is adjusted with the knurled screw B such that - with a single layer of cloth (when the needle pierces the cloth) –... -
Page 22: Fitting The Needle
The needle centres itself as it has a flat shank. Important: make sure that you use the correct needle system! System 251 EU Classes 220, 221, 240, 241, 251, 271, 352 System 251 LG Classes 251-25, 252, 261 System 251 Classes 221-19/2 and 221-19/4 Normal needle size 80, size 70 or 60 for thin cloth, size 90 for thick cloth. -
Page 23: Skip Stitch Device
Skip stitch device Class 221, 241, 251, 261, 271 machines are equipped with a skip stitch device. When sewing thin cloths, this enables the top layer of cloth to be pierced with only every second (1:2) or every third (1:3) stitch. The plunger (rib shaft) either moves beyond the needle, or stops short of it, in this 1:2 or 1:3 cycle. -
Page 24: Instructions For The Mechanic
Instructions for the mechanic Setting the stitch plate Switch off the machine! Risk of injury due to the machine being started again inadvertently. Spin the machine by hand. Here, the needle should slide on the needle plate A with no clearance until stitching the cloth, but it must not be lifted by it either. -
Page 25: Basic Setting Of The Needle Movement
Basic setting of the needle movement Switch off the machine! Risk of injury due to the machine being started again inadvertently. Position the needle at the right-hand dead centre position by turning the hand-wheel. The needle point must now be 2 mm (0.7 mm on class 252 and 1.0 mm on class 352) away from the right-hand stitch plate edge. -
Page 26: Adjusting The Looper
Adjusting the looper Switch off the machine! Risk of injury due to the machine being started again inadvertently. Basically, the following rule must be borne in mind: When adjusting the eccentric cam G (Fig. 18), the looper is raised or lowered at both points E and L. -
Page 27: Adjusting The Looper Stroke
Adjusting the looper stroke If the long finger of the looper takes up the thread too far in front of the needle, or just behind it, as it passes over the needle, the looper must be set forward or back, so that it takes up the thread earlier or later. -
Page 28: Stitch Length Adjustment
Higher number – longer stitch length, lower number = shorter stitch length. When changing the stitch length, bear in mind that the feed dog changes too, and on class 220, the plunger (rib shaft) also changes. So you must recheck the feed dog setting, see page 30 of the operating instructions. -
Page 29: Plunger (Rib Shaft) Adjustment
If this is not the case, it can be adjusted as follows: Classes 220, 221, 271: Align the plunger (rib shaft) accurately by adjusting the pivot screws. See spare parts list, page 4, items 19 and 20. -
Page 30: Play
Play Once the alignment is complete, make sure that the plunger (rib shaft) has no axial play. Any play can be corrected by a tighter setting of the set collar or the pivot screws on the plunger shaft. If the plunger (rib shaft) has any radial play, this can be remedied by readjustment. On classes 221, 271 and on the right-hand plunger (rib shaft) on classes 252, 352, this is carried out by adjusting the pivot screws. -
Page 31: Feed Dog Adjustment
Feed dog adjustment Switch off the machine! Risk of injury due to the machine being started again inadvertently. The feed dog must be adjusted such that – in its lowest position – it projects approx. 2 mm (at least tooth depth) beyond the underside of the stitch plate. In addition, it should be placed as far forward as possible in the stitch plate cut-out. -
Page 32: Sewing Faults And How To Remedy Them
Sewing faults and how to remedy them Fault Cause Remedy Thread tears Thread tension too tight Slacken thread tension Needle worn out Change needle, see page 16 Looper wrongly adjusted see page 25 Needle stroke wrongly adjusted see page 16 Sharp edge in looper, stitch plate or feed Polish the part Needle breaks Needle not fitted correctly... -
Page 33: Sewing Tools
The machines are equipped with special sewing tools for different purposes. The tools are also available separately: Tool Order No. Description Suitable for classes 220, 221, 240, 241, 251, 271, 281 Feed dog 220145 Normal serration 220145 F Fine serration... -
Page 34: Technical Data
Technical data Class Class Class Class Class 220, 221, 240, 221-19/2, 221- 241, 251, 271 19/4 Number of stitches/min up to 3000 2500 2500 2300 2000 Length of stitch 3-8 mm 3-8 mm 3-8 mm 3-8 mm 2-8 mm Hand-wheel diameter...
Need help?
Do you have a question about the 220 and is the answer not in the manual?
Questions and answers