Advertisement
Slidebar Manual_new_USA-5_manual_peter 1/23/2014 9:19 AM Page 1
LIMITED WARRANTY
If your product does not work properly because of a defect in material or work-
manship, Custom Autosound Mfg.,Inc. (the Company) will for the length of the
period indicated on the chart below, which starts with the date of original pur-
chase ("Limited Warranty period"), at its option either (a) repair your product with
new or refurbished parts, or (b) replace it with a new or refurbished product. The
decision to repair or replace will be made by the company.
Product or Part Name
All In-dash car radios, radio/tape
player combinations.
During the "Labor" Limited Warranty period there will be no charge for labor.
During the "Parts" Limited Warranty period, there will be no charge for parts. This
Limited Warranty is extended only to the original purchaser and only covers
product purchased as new. A purchase receipt or other proof of the original pur-
chase date is required for Limited Warranty service.
To obtain repairs or replacement within the terms of this warranty, the product
should be delivered, transportation prepaid, to the Company at the address
shown below.
This warranty does not extend to the elimination of car static or motor noise cor-
rection, antenna problems, costs incurred for removal or reinstallation of product,
or damage of tapes, speakers accessories or car electrical systems.
This warranty does not apply to any product or part thereof which has been
damaged through alteration, mishandling, misuse, neglect, or accident.
ANY IMPLIED WARRANTY IS LIMITED TO THE DURATION OF THIS WRIT-
TEN WARRANTY. UNDER NO CIRCUMSTANCES SHALL THE COMPANY BE
LIABLE FOR ANY LOSS OR DAMAGE, DIRECT OR CONSEQUENTIAL, ARIS-
ING OUT OF THE USE OR INABILITY TO USE THIS PRODUCT: No person or
representative is authorized to assume for the Company any liability other than
expressed herein in connection with the sale of this product.
Some states do not allow limitations on the length of an implied warranty or the
exclusion or limitation of incidental or consequential damage to the above limita-
tions or exclusion may not apply to you.
This warranty gives you specific legal rights and you may also have other rights
which vary from state to state.
1030 W. Williamson Ave. Fullerton CA. 92833
800-888-8637 714-773-1423 FAX 714-773-1523
PARTS
LABOR
Two (2) Years One (1) Year
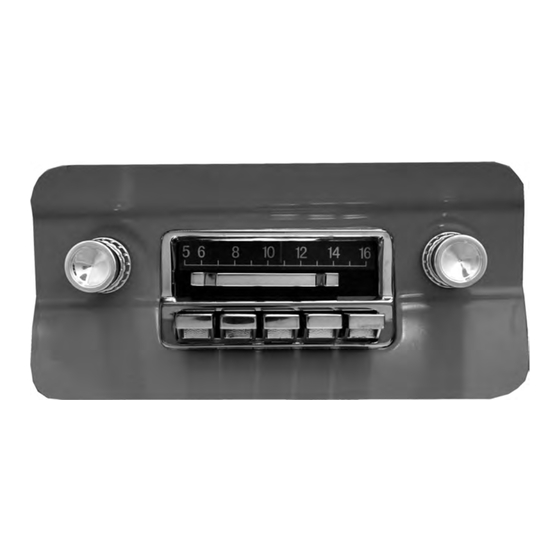
SLIDEBAR
RADIO
AM/FM
RDS T
WITH
UNER AND
N HIGH POWER 300 WATTS
N AM/FM with RDS & 25 Pre-sets
N 7 LCD Color Choices (selectable)
N iPod doc Charge and Control
N CD Changer Controller
N Auxiliary In
N Subwoofer Line out w/ x-over
N Front/ Rear Fader
N Left/Right Balance
R
I
I
Y
EADY TO
NSTALL
N
N
A
O
SSEMBLY
User's Manual
T
O
C
HE
RIGINATOR OF
LASSIC
V
OEM
R
EHICLE
FIT
ADIOS
S
1977
INCE
E
H
D
XCLUSIVE
IDEAWAY
ISPLAY
N Bass / Mid / Treble Control
N DSP EQ
N Clock
N Direct Fit to OEM Dash Opening
N USB MP3/WMA Player
N Loudness Function
N Last Volume Memory
N RCA Pre-out (2 Pair)
N Auto Antenna lead
O
D
OUR
RIGINAL
ASH
R
!
EQUIRED
Advertisement
Table of Contents

Related Manuals for Custom Autosound SLIDEBAR RADIO


Summary of Contents for Custom Autosound SLIDEBAR RADIO
-
Page 1: Limited Warranty
If your product does not work properly because of a defect in material or work- manship, Custom Autosound Mfg.,Inc. (the Company) will for the length of the period indicated on the chart below, which starts with the date of original pur-... - Page 2 Slidebar Manual_new_USA-5_manual_peter 1/23/2014 9:19 AM Page 2 This radio is for 12volt negative ground vehicles only. If your electrical system is 6volts and or positive ground Custom Autosound has power inverters #PGPI- HC (positive ground power inverter) and voltage boosters #NGVB-HC (negative ground voltage booster) for use with this radio.
-
Page 3: Radio Specifications
Elimination other than yours. We offer over 300 different ‘conversions’ for various makes, year 1. Install an L.C. Filter Network in the power leads of the Slidebar radio. The filter groups, all radios are ready to install, no assembly required. -
Page 4: Radio Installation
Thank you for your purchase of this Custom Autosound product! lations however, electrical noise may affect the quality of sound reproduction. If electrical noise is present after installing your Slidebar radio, identify the source of the Owner- Installer: Please review installation instructions and owners manual. - Page 5 INTRO Low Level Output (Line Out Jacks) Connection This radio is only compatible with the Custom Autosound USA-CD60 6 disc changer or the 1disc The Slidebar radio is equipped with low level, high impedance outputs. The low level CD1 player.
-
Page 6: Ipod Operation
(4)(5) to change folders if your drive is set up with folders. Connection for Optional Note: The folder name or number does not appear on the LCD Display. Track numbers Custom Autosound for songs in the folder are determined by the 6CD Changer, CD1 Player or Bluetooth adapter order in which they were recorded to the flash drive. - Page 7 Option: the left front knob clockwise or counter-clockwise to select PI Sound or PI Mute. By adding the Custom Autosound BLUKIT you can stream music or do hands MASK DPI (Works in EURO Mode only) free calling from your Bluetooth enable device to this radio.
- Page 8 Slidebar Manual_new_USA-5_manual_peter 1/23/2014 9:19 AM Page 8 Function See FIG.3 Radio Mode USB/CDC Mode MIDRANGE TURN PRESS Press the left front knob to turn the unit on. Look for CUSTOM Use this function to make a more AUTOSOUND ON POWER UP Power detailed boost or cut adjustment of midrange (vocal) frequencies as fol-...
- Page 9 Slidebar Manual_new_USA-5_manual_peter 1/23/2014 9:19 AM Page 9 FADER The fader control allows you to fade Function See FIG.3 Radio Mode USB/CDC Mode the sound from the front pair of speak- TURN PRESS Pre-set 2 Press to select the #2 radio Press to play 10 seconds of ers to the rear pair of speakers.
- Page 10 Slidebar Manual_new_USA-5_manual_peter 1/23/2014 9:20 AM Page 10 SEE FIG.3 Function See FIG.3 Radio Mode USB/CDC Mode Adjusting the sound properties: Press the right front knob, then release, to access the sound properties menu. System Menu Press and hold the right front knob for 3 seconds to access Repeatedly press and release the front right knob to scroll through the the sub-menu system where you can adjust: Auto/Manual available menu options.
Need help?
Do you have a question about the SLIDEBAR RADIO and is the answer not in the manual?
Questions and answers