Table of Contents
Advertisement
Quick Links
Advertisement
Table of Contents

Related Manuals for Rodgers 558


Summary of Contents for Rodgers 558
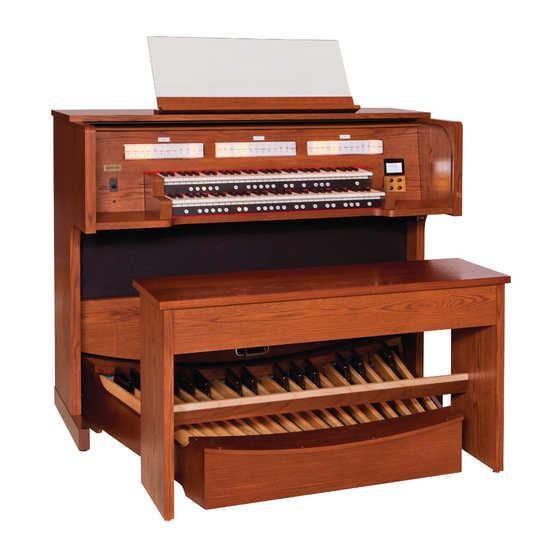
- Page 1 2-Manual Organ...
-
Page 2: Important Safety Instructions
WARNING: To reduce the risk of fire or electric shock, do not expose this apparatus to rain or moisture. The lightning flash with arrowhead symbol, within an CAUTION equilateral triangle, is intended to alert the user to the RISK OF ELECTRIC SHOCK presence of uninsulated “dangerous voltage”... -
Page 3: Table Of Contents
Selecting Stops (Sounds) ....... . . Saving and Loading Memory Banks (558, 568 only) ....32 Selecting a Sound Variation (Voice Palette) . -
Page 4: Using The Unit Safely
“Notice to Users” (p. 3) when: If you need to move the instrument, Rodgers Instruments Corporation, as consult with your retailer, or Rodgers listed on the “Notice to Users” (p. 3). • The power-supply cord or the plug has Instruments Corporation, as listed on the been damaged;... -
Page 5: Important Notes
4 hours after you in the display may not always match what appears possible to restore the data, and Rodgers assumes stop playing or operating the unit. If you don’t in the manual. -
Page 6: Care And Maintenance
ABOUT THE PERFORMANCE TOUCH KEYBOARDS For generations, organ key tops were made from the best materials – ivory (for white keys) and ebony (for black keys). The Performance Touch keyboards use the latest technologies to reproduce the touch and feel of these materials. •... -
Page 7: Quick Tour
Quick Tour Music Rest Keyboard Cover Tablets Power Switch Pistons Headphone Jack USB Memory Connector (578) Organ Bench USB Memory Connector (558, 568) Pedalboard External Connectors... -
Page 8: About The Display
Quick Tour About the Display Contents of the Main Screen 558, 568 General memory bank number General memory bank number General memory piston number General memory piston number Keyboard transposition status Keyboard transposition status Range (semitones) Range (semitones) -6–+5 -6–+5... -
Page 9: About Pistons
ѥ ѥ This is used when an optional board for external speakers has been installed. This piston allows you to play Chimes voice. [CHIMES] Piston This piston is on upper manual. (558, 568) -
Page 10: About Toe Pistons
Display and Panel MIDI IN, OUT Connectors You can connect external MIDI devices here to exchange performance data with the organ. Connector for Service Use (558, 568) NOTE ѥ ѥ This connector is for technical service use only. Do not connect anything to this connector. -
Page 11: Making Settings In The Menus
Making Settings in the Menus Heres how to make settings using the menus. Perform these steps from Turn the [Value/Exit Menu] knob to change the item’s setting. the main screen. For a list of the menu items, refer to the next page. Press the [Select/Menu] knob to access the menu. -
Page 12: Hymn Player (578 Only)
Making Settings in the Menus Hymn Player (578 only) Play back Hymn and Prelude Menu item Value Explanation Mode – Select Hymn or Prelude Hymn number – Select Hymn number Next Intro, Verse Select to play introduction or verse VAR. Prelude begins at a random selection and plays continuously Play Mode [S] FIXED... -
Page 13: Pitch/Tuning
Making Settings in the Menus Pitch/Tuning Settings for pitch, Temperament, Tuning, and Transpose Menu item Value Explanation The reference pitch can be changed from “A=440.0 Hz” to “A=415.0 Hz” (Baroque pitch) or “A=392.0 Hz” (Versailles pitch). VERSAILLES 392 (Hz) Pitch BAROQUE 415 (Hz) MODERN... -
Page 14: User/Midi Coupler
Reverb [V] [P] OFF, 0–127 Speci es the reverb depth for the sound assigned to the [USER/MIDI] coupler. For organ sounds, set this “OFF. ” (558, 568 only) Warmth [V] [P] -10–10 Adjusts the low-frequency tone for the sound assigned to the [USER/MIDI] coupler. -
Page 15: Console
Making Settings in the Menus About MIDI transmit channels When the [USER/MIDI] coupler is o Even when the [USER/MIDI] coupler is o , the performance data from each division is transmitted on the following MIDI channels. When the [USER/MIDI] coupler is on As appropriate, you’ll need to change the MIDI reception settings on To avoid a con ict between the MIDI transmit channels of the various the MIDI device that’s connected. -
Page 16: Tremulant
Sets the tremulant for MAN-I. Division MAN-II Sets the tremulant for MAN-II. Depth [V] (558, 568) 0–127 With a setting of “0, ” no tremulant will be applied. Increasing this value will make the tremulant deeper. Depth [S] (578) Rate [V] (558, 568) 0–127... -
Page 17: Crescendo
Adjusts the volume of the main and antiphonal speaker system. [Division Audio] (558, 568) Four di erent types of settings can be established depending on whether the [MAIN OFF] and [ANT ON] pistons have been pressed or not. MAN-I/PD to Main1 [S] 0–127... -
Page 18: Midi
Making Settings in the Menus MIDI MIDI settings Menu item Value Explanation When the organ is connected to a MIDI sequencer, change this setting to Local O . Local O : the keyboard is disconnected from the internal sound generator. No sound will be heard when you play the Local keyboard. -
Page 19: Save/Load (Usb)
Save/load the contents of the general memory pistons and voice setup, and format the USB ash drive Menu item Explanation Save Memory Bank (558, 568 only) Refer to “Saving and Loading Memory Banks (558, 568 only)” (p. 32). Load Memory Bank (558, 568 only) Copy Memory Bank Refer to “Copying a Memory Bank” (p. 33). -
Page 20: Storing Your Settings (Customize)
Setting Group Default Voice Palettes (*) “User/MIDI coupler” screen settings VOICING “Tremulant” screen settings (558, 568) Loaded Voice Setup (p. 34) “Room Modeling” screen settings “Console” screen settings “Tremulant” screen settings (578) “Exp. Pedal” screen settings “Audio” screen settings... -
Page 21: Selecting Stops (Sounds)
Selecting Stops (Sounds) By pressing the sound tablets you can play a variety of pipe organ sounds. The sounds assigned to the tablets are called “stops. ” The sound tablets are organized into groups called “divisions. ” These tablets are called “division tablets. ” If the indicator of a division tablet is lit, you’ll be able to play the corresponding stop. -
Page 22: Storing A Combination Of Stops
Storing a Combination of Stops About the general memory pistons The general memory pistons can store the stop, coupler, and tremulant settings. The stored settings are maintained even when the power is turned o . There are 10 general memory pistons, 1 through 10, and each piston can store one registration. The combination of general memory pistons 1–10 is stored as a “bank. -
Page 23: Using Memory Banks
Storing a Combination of Stops Using Memory Banks The state of the general memory pistons and the division memory pistons can be stored as a “memory bank. ” Storing the Combination of Memory Pistons as a Memory Bank Use the memory bank select [M–]/[M+] pistons to select the memory bank number to be used for storage. While holding the [SET] piston, press one of the general memory pistons or division memory pistons. -
Page 24: Using Memory Banks With Usb Memory (578 Only)
The capacity of an external memory device is much greater than that of the organ’s internal combination memory. In order to make easy use of this additional capacity, Rodgers uses the concept of memory folders. Like a le folder, a memory folder is used to store groups of information on the memory device. -
Page 25: Changing The Settings For Full Organ
From the main screen, press the [Select/Menu] knob. (558, 568 only) Turn the [Select/Menu] knob to select “Exp. Pedal.” (558, 568 only) Press the [Select/Menu] knob to access the “Exp. Pedal.” Turn the [Select/Menu] knob to select “Crescendo.” Press the [Select/Menu] knob to access the “Crescendo.”... -
Page 26: Practicing Along With A Preset Song Or Performance Data
Practicing Along with a Preset Song or Performance Data You can practice by playing along with preset songs (demo songs) that are built into the organ, or with performance data that you’ve recorded from your own playing. MEMO Songs can also be played back in succession. Start from the state where playback is stopped. Then, using the [Select/Menu] knob, select “Play Mode. ” Next, turn the [Value/Exit Menu] knob to change the setting to “CHAIN. -
Page 27: Muting A Speci C Division During Playback
Practicing Along with a Preset Song or Performance Data Muting a Speci c Division During Playback When playing back a song, you can individually mute (silence) the performances of each division. From the main screen, press the [STOP] piston to access the “Song Recorder” screen. Choose the song that you want to play back. -
Page 28: Recording Your Performances
Recording Your Performances Recording a Song From the main screen, press the [STOP] piston to access the “Song Recorder” screen. MEMO You can also access the “Song Recorder” screen by Quick Menu. Press the [REC] piston; the [REC] piston will light. The [PLAY/PAUSE] piston will blink, and the organ will enter recording-standby mode. -
Page 29: Deleting A Recorded Song
Recording Your Performances If a screen like the following appears If the save destination already contains data, the following message will appear. • Press the [SET] piston if you want to overwrite the data; i.e., replace the previous contents of the song. The existing data will be erased, and the performance data you recorded will be saved. -
Page 30: Copying A Saved Song
Recording Your Performances Copying a Saved Song MEMO • You can’t copy a preset song. • Up to 99 songs can be saved in internal memory, and up to 999 songs can be saved in one USB ash drive unit. Connect your USB ash drive to the USB memory connector. -
Page 31: Hymn Player (578 Only)
Hymn Player (578 Only) Selecting Hymn or Prelude Changing Hymn book Press the [HYMN PLAYER] piston. Press [HYMN PLAYER] piston. Turn the [Select/Menu] knob to move the cursor to Mode. Turn the [Select/Menu] knob to select “Book”. Turn the [Value/Exit Menu] knob to select Hymn or Prelude. Turn the [Value/Exit Menu] knob to select Hymn book. -
Page 32: Saving And Loading Settings On Usb Flash Drive
Saving and Loading Memory Banks sound settings that you want to load. Press the [SET] piston. (558, 568 only) A con rmation screen will appear. If you decide to cancel, press the [Value/Exit Menu] knob. Memory banks can be saved to USB ash drive. -
Page 33: Deleting A Memory Bank From Usb Flash Drive
Saving and Loading Settings on USB Flash Drive (558, 568 Only) Turn the [Select/Menu] knob to select the Deleting a Memory Bank from USB Flash Drive “No.” eld, and turn the [Value/Exit Menu] knob to select the number of the sound settings that you want to copy. -
Page 34: Loading A Voice Setup
Press the [Select/Menu] knob to access the “Delete Voice screen. Setup” screen. (558, 568 Only) Turn the [Select/Menu] knob to select the (558, 568 Only) Turn the [Select/Menu] knob to select “Delete “Load from” eld, and turn the [Value/Exit Menu] knob to from,”... -
Page 35: Backing Up Data/Performing An Initialization
Backing Up Data/Performing an Initialization Returning all Settings to the Factory- Backing Up/Loading Data Set State (Factory Reset) Here’s how to back up and load data. Connect your USB ash drive to the USB memory connector. All settings stored in the organ can be reset to their factory-set From the main screen, press the [Select/Menu] knob. -
Page 36: List Of Shortcuts
List of Shortcuts By using these shortcuts you can directly access a desired screen without going through a menu screen. To access the screen Shortcut Demo screen Press the [PLAY/PAUSE] piston Pitch/Tuning screen Press any key Operate the expression pedal Expression Pedal screen Operate the kick switch Edit parameter save con rmation screen... - Page 37 For China For EU Countries...
- Page 38 List of Shortcuts...
- Page 40 1905439B Copyright 2011 Rodgers Instruments Corporation. All rights reserved. Jun. 1, 2011...
Need help?
Do you have a question about the 558 and is the answer not in the manual?
Questions and answers