Table of Contents
Advertisement
Quick Links
Advertisement
Table of Contents

Related Manuals for Akiyama TEMPUS


Summary of Contents for Akiyama TEMPUS
- Page 1 User Manual...
-
Page 2: Table Of Contents
1.4. Rear panel ......................................6 1.5. Connections ...................................... 7 2. SOFTWARE INSTALATION AND SETUP ............................... 8 2.1. TEMPUS Akiyama ASIO Drivers ..............................8 2.1.1. Akiyama ASIO drivers’ installation ............................8 2.1.2. Akiyama ASIO drivers Configuration ............................9 2.2. Traktor 2 ......................................9 2.2.1. - Page 3 TEMPUS. User Manual Intended to alert the user to the presence of important operation maintenance (servicing) instructions literature accompanying this appliance. The lightning flash with arrowhead symbol within the equilateral triangle is intended to alert the use to the presence of un-insulated “dangerous voltage”...
- Page 4 Safe this manual at reach so you can go back to the basic in case you need it. PRELIMINARY Check the contents of the TEMPUS box and find the following items: 1- Controller 1- Installation and instructions CD...
-
Page 5: Controls And Connections
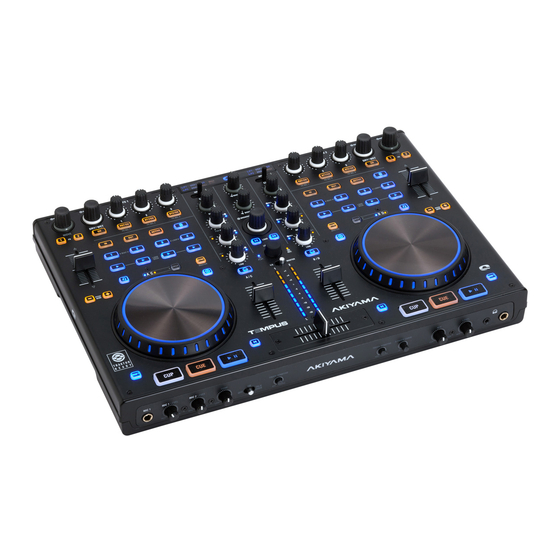
TEMPUS. User Manual 1. CONTROLS AND CONNECTIONS 1.1. Deck Panel 1. Controls distribution for an optimal use of Virtual DJ and 4. Durable large-size Cue, Play and Cue Play buttons. Traktor 2. 5. Dual FX units control with 4 knobs and 4 buttons for each 2. -
Page 6: Mixer Panel
TEMPUS. User Manual 1.2. Mixer Panel 1. Input Select Display: Display the selected inputs included +10dB. Press this button to active kill function to the lowest level “-35dB”. L/P1 (Line/Phono 1), L/P2 (Line/Phono 2), USB1 (from PC), USB2 (from PC), AUX and DVS (from PC). MIDI CTRL... -
Page 7: Front Panel
TEMPUS. User Manual 1.3. Front panel cut off at either end. Rotate anti-clockwise to lengthen fade to 1. MIC 1 Jack: This jack is used to connect a microphone to gradually mix across fader and 50/50 mix in center only. -
Page 8: Connections
TEMPUS. User Manual 6. RCA MASTER OUTPUT Jacks: The RCA jacks send a 10. CHANNEL PHONO/ LINE INPUT Connectors: Turntables equipped with MM pickup cartridge (All DJ turntable use MM low current unbalanced output signal. pickup cartridges) may be connected to these jacks as long as CAUTION: These jacks should only be used for shorter cable the PHONO/ LINE selector switches is in the “PHONE”... -
Page 9: Software Instalation And Setup
TEMPUS. User Manual 2. SOFTWARE INSTALATION AND SETUP Before you can start using Akiyama TEMPUS it is necessary to install Akiyama ASIO drivers to optimize the performance of the sound card of TEMPUS. ASIO drivers can only be installed on Windows. MAC uses CoreAudio drivers which don’t need to be installed. -
Page 10: Akiyama Asio Drivers Configuration
Traktor Setup Wizard in this manual. 2.2. Traktor 2 TEMPUS is bundled with Traktor 2 LE. We will go through the steps to install and configure Traktor 2 LE and PRO to be controlled by TEMPUS. -
Page 11: Mac Installation
TEMPUS. User Manual Select the folder where setup will install files and click “Next”. Traktor 2 will be successfully installed. Click “Finish” to exit from the Installation Wizard. 2.2.2. MAC Installation Execute the Traktor 2 installation file. Installation will start with the verification of the setup package. - Page 12 TEMPUS. User Manual Select “Agree” and continue with installation wizard. Type you password and select “Install Software”. Following will appear a window showing the Installation Type Wait until the following window appears: information. Press “Continue”. Traktor 2 will be successfully installed. Click “Close” to exit Select the folder where setup will install files and click “Install”.
-
Page 13: Traktor 2 Le Registration
Start Guide … in the Service Center. Wizard” and the Welcome window will pop up. Connect Tempus to your computer and click “Next”. Type your e-mail and Password if you already own a user account. Otherwise you must create a new User Account. - Page 14 Choose “Akiyama” as manufacturer and “Tempus LE” or Check the setup and click “Finish” to exit from the Setup “Tempus” on model depending on if you are using Traktor 2 LE Wizard. If there is anything wrong on the setup you can come or PRO.
-
Page 15: Functions And Controls
CD or turntable is connected to DVS mode. decks. Microphone input will be available on decks B and D NOTE: In order to use time code vinyl with TEMPUS, you will when Live input is selected. have to use DJ software compatible with any soundcard. You only can use time code with Traktor Scratch PRO if you use one of the compatible Native Instruments sound cards. -
Page 16: Track/Sample Deck Mode
TEMPUS. User Manual well. In this case you need to select external mixer in the Setup NOTE: USB outputs are the channels that go from the PC to Wizard. Make sure that inputs are configured as follow: the controller (They could be considered as controller inputs). -
Page 17: Traktor 2 Le
TEMPUS. User Manual 3.3. Traktor 2 LE 1. AUTOLOOP - 2: No function. - BT1/ON: No function. - 3: Turn the control to adjust the FILTER parameter. - AUTOLOOP: Turn the control to select loop size. Press the - BT2/ON: FILTER parameter On/Off. - Page 18 TEMPUS. User Manual - SYNC: Use the SYNC button to match the BPMs of different 10. BROWSER decks. Shift (Set Master): Press to set to master the deck in which it - BROWSER: Turn the encoder to browse through your list of has been pressed.
-
Page 19: Traktor 2 Pro
TEMPUS. User Manual 3.4. Traktor 2 PRO TRACK DECK 1. AUTOLOOP In SINGLE (SGL) mode we modify different parameters of a given effect. GROUP mode (GRP) you can use three effects - AUTOLOOP: Turn the control to select loop size. Press the simultaneously with a one-knob control. - Page 20 TEMPUS. User Manual - RST/ON (SGL): Use this button to reset the effect. Shift (Load from Deck): This function makes possible to copy one loop/sample from Track Deck to each slot of the Sample - RST/ON (GRP): 1st effect of the unit On/Off.
- Page 21 TEMPUS. User Manual - SYNC: Synchronizes the slot/s BPM value with the Master Shift (Filter): Turn the control to adjust the FILTER parameter. Press the control to On/Off this function. BPM. - MONITOR CUE ( ): Pre-listen the respective channel 4.
-
Page 22: Setup And Firmware Update
TEMPUS. User Manual 4. SETUP AND FIRMWARE UPDATE There are two approaches to set the device. One is setting Current Firmware Version through the Settings and Update software. The other is directly control by the hardware. Before you update firmware for this device you had better recheck the firmware version. -
Page 23: Channel Settings
TEMPUS. User Manual Following functions you can set the device by your 4.3.3. Sample buttons setting requirements. You can change the Samples setting by holding the left deck “DECK SWITCH” button for 3 seconds and press the “Channel 4.3.1. Channel settings 2 monitor Cue”... -
Page 24: Apendix
8H 8 24 40 56 72 88 104 120 136 152 168 184 200 216 232 248 you can see at the table TEMPUS MIDI MAP. We can send 9H 9 25 41 57 73 89 105 121 137 153 169 185 201 217 233 249... - Page 25 TEMPUS. User Manual TEMPUS MIDI MAP BUTTON MIDI COMMAND MIDI COMMAND SHIFT+ KEY & KNOB LEFT and RIGHT DECK AUTO_LOOP 09,9n,01,7F 09,9n,01,00 0x33 AUTO_LOOP(knob) 0B,Bn,01,41(Increment) 0B,Bn,01,3F(Decrement) 0x1F FX_ON1 09,9n,02,7F 09,9n,02,00 0x34 FX_ON2 09,9n,03,7F 09,9n,03,00 0x35 PITCH_FADER 0E,En,00,00 0E,En,7F,7F 09,9n,04,7F 09,9n,04,00...
- Page 26 TEMPUS. User Manual TEMPUS MIDI MAP BUTTON MIDI COMMAND MIDI COMMAND SHIFT+ CUE_LEVEL 0B,Bx,14,00(Minimun) 0B,Bx,13,7F(Maximum) 0x32 MIC1_LEVEL 0B,Bx,15,00(Minimun) 0B,Bx,14,7F(Maximum) 0x33 MIC2_LEVEL 0B,Bx,16,00(Minimun) 0B,Bx,15,7F(Maximum) 0x34 MIC_TONE 0B,Bx,17,00(Minimun) 0B,Bx,16,7F(Maximum) 0x35 MIC_OFF 09,9x,29,7F 09,9x,29,00 0x5B MIC_ON 09,9x,2A,7F 09,9x,2A,00 0x5C MIC_TALK_OVER 09,9x,2B,7F 09,9x,2B,00 0x5D...
- Page 27 TEMPUS. User Manual TEMPUS MIDI MAP LEDs LED ON LED OFF CH_METER4 0B,Bn,02,30 0B,Bn,02,00 CH_METER5 0B,Bn,02,3C 0B,Bn,02,00 CH_METER6 0B,Bn,02,48 0B,Bn,02,00 CH_METER7 0B,Bn,02,54 0B,Bn,02,00 CH_METER8 0B,Bn,02,60 0B,Bn,02,00 CH_METER9 0B,Bn,02,6C 0B,Bn,02,00 CH_METERA 0B,Bn,02,78 0B,Bn,02,00 EFFECTS FX1(2)_ON 09,9n,1E,7F 09,9n,1E,00 FX1(2)_EFX1 09,9n,1F,7F 09,9n,1F,00 FX1(2)_EFX2...
-
Page 28: Technical Specifications
TEMPUS. User Manual 5.2. Technical specifications 1. GENERAL SECTION PRODUCT 2 Channel Digital Mixer & MIDI Controller POWER SOURCE DC12V, 2.0A POWER CONSUMPTION 24WATTS DIMENSIONS 410mm (W) X 297mm (D) X 65 mm (H) WEIGHT 3.22kg 2. INPUT/OUTPUT IMPEDANCE & SENSITIVITY: (EQ FLAT, MAXIMUM GAIN) 2-1.INPUT IMPEDANCE AND REFERENCE INPUT LEVEL:... - Page 29 TEMPUS. User Manual (3) High Band: ( Hi Band center frequency is 16KHz ) Maximum level: +10 ± 1dB (at 16KHz) Minimum level(Kill): Less than -34dB (at 16KHz) 16. NOTES (1) The specifications are subject to change to any improvement by negotiations in advance.
- Page 30 C/ Praga, nº 11. Pol. Cova Solera 08191. Rubí - Barcelona (Spain) www.akiyamadj.com info@akiyamadj.com...
Need help?
Do you have a question about the TEMPUS and is the answer not in the manual?
Questions and answers