
Summary of Contents for JLab PRO-7
- Page 1 User Manual Before operating your JLab PRO-7 Tablet, please read, understand, and follow these instructions.
-
Page 2: Table Of Contents
CONTENTS Welcome Important Safety Instructions Care of the Environment What’s in the Package Layout of your Tablet Getting Started Charging the Battery Powering Up Checking Out the Controls and Connections Physical Controls Virtual Controls Connections and Plug-ins Basic Operations Power Monitoring and Charging Reset Connecting to your Computer and Loading Files Powering on your Tablet... -
Page 3: Welcome
WELCOME Thank you for purchasing a JLab PRO-7 tablet! We appreciate your business. This guide is designed to walk you through the basics of using your new tablet. Please make sure to read the safety instructions below to prevent bodily injury and/or damage to the tablet. -
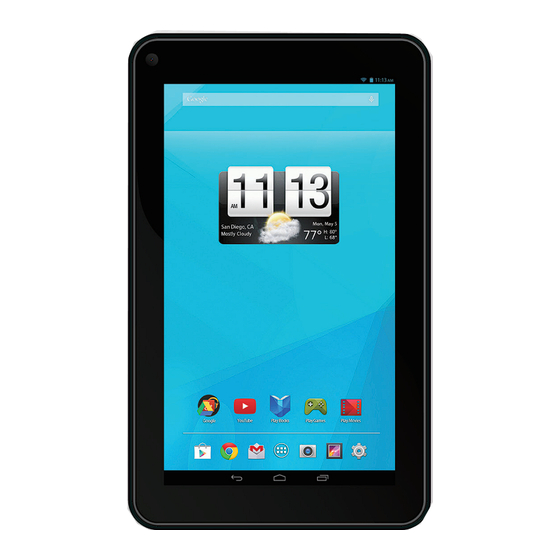
Page 4: Layout Of Your Tablet
LAYOUT OF YOUR TABLET Once you have unpacked your Tablet, take a look around it so that you know where all the controls and connections are located. Front Back It’s now time to get your Tablet ready for use. Follow the instructions for getting started, then you will be able to check out and try the various controls, icons, connections and features so that you will be comfortable using your new device. -
Page 5: Getting Started
6 to 8 hours to make sure that it is fully charged. Powering Up When the battery is fully charged, switch on your JLab PRO-7 Tablet. To do this, press and hold the power on/off button until the JLab PRO-7 logo appears: The logo remains until the startup operation is finished; the... -
Page 6: Checking Out The Controls And Connections
It is usually shown at the bottom of the screen, but it can also show up in other places. There are a large number of virtual controls. What they are, what they do and how they work is explained in the “Basics” section, or in the section where they are used. Connections and Plug-ins USB/Charger Port – This is used with the USB/Charger cable when you need to charge the battery on your JLab PRO-7 Tablet, or if you wish to connect your Tablet to another device (such as a personal computer or notebook). Audio Jack – You can plug headphones into this jack for personal listening or when you are making a phone call. Micro-SD Card Slot – If you wish to increase the data storage on your Tablet you can purchase a micro-SD card and plug it in here. Your Tablet will accept cards up to 32GB capacity. -
Page 7: Main System Menu
Main System Menu Your main system menu allows you to access applications you have downloaded and adjust the settings on your tablet. Please note: We are unable to provide support for third party applications. Please contact the software manufacturer for issues with an application. -
Page 8: Video
1. Tap “new”. 2. Input a name for your new play list. 3. Tap “save”. Delete the music in a play list 1. Tap music. 2. Tap and hold the music you want to delete from the play list. 3. In the pop up music setting menu, tap delete to finish. Video Tap the video application 1. Tap gallery or list selections. 2. The device will display all compatible video files. 3. Tap the file you want play. Images View images 1. Tap the gallery application. 2. This will bring up the image gallery, tap the file or folder you want to view. 3. Tap the image you want to view, the system will view the image in full screen. 4. When you view images, you can zoom in and out by pinching or sliding two fingers apart. Edit and setting images as a contact or desktop After opening an image, tap the image again to bring up your menu and delete icons. Tapping the delete icon will allow you to delete the image. -
Page 9: Browser
Delete an email account You can delete the set POP3 or IMAP email account from your Device. 1. Tap email. 2. Enter your inbox. 3. Touch the menu icon. 4. Tap setting. 5. Select the account you wish to remove. 6. A menu list will appear, select delete account. 7. Tap OK to delete. Sending email 1. Tap Email to display your mail box. 2. Tap the inbox, it will refresh the new emails automatically; tap it to read new email. 3. Touch the button at the top of screen. 4. Input the receiver’s email address in the receiver column. 5. Input subject and email content. 6. Tap to add attachment, touch menu icon, a menu will pop up. 7. Tap “add attachment”. -
Page 10: System Settings
Bookmark Management Setting webpage bookmark 1. Go to any webpage. 2. Tap and select “OK” to add this website to bookmark. Opening a bookmark 1. Tap , and it will show bookmark list in the browser. 2.Tap the bookmark you want to open that webpage System Settings Voice and Display Sound and volume setting 1. Tap the setting icon. 2. Tap “Sound”. 3. Tap volume to adjust the volume for music and video. 4. Or press “VOL +” or “VOL – Button” to adjust the volume. Display Settings Adjust the brightness of your screen 1. Tap the setting icon. 2. Tap display Tap brightness, a slide bar will open. Slide this bar to the right to increase brightness, and to the left to decrease brightness 3. Tap OK. -
Page 11: Sd Card And Internal Memory
SD Card and Internal Memory View SD Card and MID Memory Available Space 1. Tap the setting icon. 2. Tap memory. 3. View the available space on the SD card. 4. View internal memory space. Safely remove the SD card Please follow this procedure when removing the SD card to prevent damage to your SD card and files 1. Tap the setting icon. 2. Tap memory. 3. Tap remove SD card. 4. Pull out the SD card. Date and Time Manually adjust the date, time and time zone 1. Tap the setting icon. -
Page 12: Uninstalling An Application
Uninstalling an Application Tap the settings icon. 1. Tap Application. 2. Select the application you want to uninstall, tap uninstall. 3. Tap OK to finish uninstalling the app. Troubleshooting 1. It takes a long time to power up when I power on for the first time. The first time you power the device on, or after updating the device, it may take as long as 3 minutes to power on as it initial- izes files. Subsequent power sequences should take less than a minute 2. Sometimes, the device feels warm to the touch. When charging, or after a long period of use, it is common for the device to feel slightly warm. This is normal as the battery charges or discharges and is not a cause for concern. -
Page 13: Apollo Brands Limited Warranty To End-Users
APOLLO BRANDS LIMITED WARRANTY TO END-USERS Warranty; Limited Warranty Period, Warranty Recipient; Exclusions; Exclusive Remedy: 1. The tablet you purchased (the “Product”) is manufactured by Apollo Brands. Apollo Brands is providing this Limited Warranty to the original end-user purchaser of the Product only (the “Purchaser” or “you”). This warranty is nontransferable. 2. Apollo Brands warrants to you that this Product will be free from defects in materials and workmanship for one year from the date of purchase (the “Warranty Period”). If you obtain a Return Merchandise Authorization (“RMA”) and return the Product to Apollo Brands in accordance with the procedures set forth below during the Warranty Period, the Product will be repaired or replaced (with the same or a similar model, which may be a refurbished model) at Apollo Brands’ option, without charge for either parts or labor. This warranty shall not apply if the Product is modified, tampered with, misused, physically damaged, or subjected to abnormal working conditions (including, but not limited to, electrical, fire, and water damage). -
Page 14: Fcc Information
FCC Information This equipment has been tested and found to comply with the limits for a Class B digital device, pursuant to Part 15 of the FCC Rules. These limits are designed to provide reasonable protection against harmful interference in a residential installation. This equipment generates, uses and can radiate radio frequency energy and, if not installed and used in accordance with the instructions, may cause harmful interference to radio communications.
Need help?
Do you have a question about the PRO-7 and is the answer not in the manual?
Questions and answers