Table of Contents
Advertisement
Advertisement
Table of Contents

Subscribe to Our Youtube Channel
Summary of Contents for Vuzix Wrap 920 VR
- Page 1 Wrap ™ 920 VR Bundle User Guide...
-
Page 2: Table Of Contents
Table of Contents Overview ......................4 Using This Manual .................... 6 1. Installation & Setup ....................8 Installation Overview ..................9 Hardware Assembly ................... 9 Wrap Noise Isolating Earphones ..............9 Wrap Tracker 6TC ..................10 ... - Page 3 PC Audio ..................... 30 3. Wrap Tracker 6TC ....................31 Installation ....................32 Degrees of Freedom ..................33 4. Vuzix VR Manager ....................34 VR Manager 3.0 ....................35 Calibrator ......................36 Drift ......................39 ...
-
Page 4: Overview
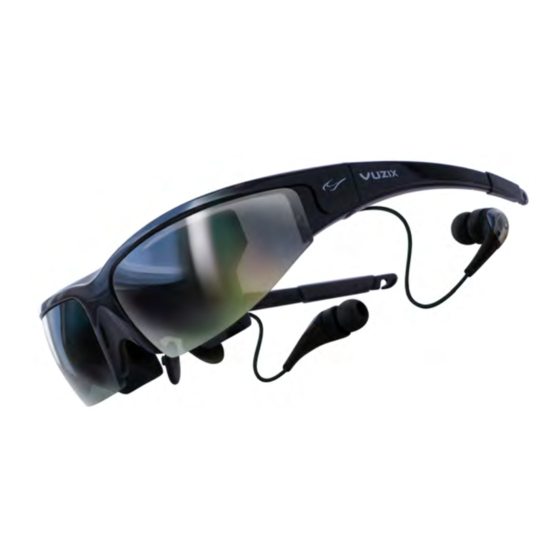
Introduction Overview The Wrap 920 VR is a standard Wrap 920 video eyewear bundled with a Wrap VGA Adapter and a Wrap Tracker 6TC. The addition of these accessories transforms the Wrap 920 into a virtual reality system that empowers you to step inside virtual worlds. - Page 5 VR environment. Wrap 920 The Wrap 920 video eyewear forms the base of the Wrap 920 VR Bundle. It provides a 67-inch virtual display, as seen from 10 feet, that is worn like a pair of sunglasses.
- Page 6 3D stereoscopic video, and VR support for a wide variety of games, simulators and other applications. A copy of VR Manager is included in the Wrap 920 VR Bundle software package, available for download from the Digital Distribution page of the Vuzix website:...
-
Page 7: Using This Manual
Using This Manual When viewing a User Guide, especially for a product as diverse as the Wrap 920 VR Bundle, you may be tempted to skip over certain portions or even entire sections. We have tried to make the important points visible and be easy to find through special formatting and related topic organization. -
Page 8: Installation & Setup
Section 1 Installation & Setup... -
Page 9: Installation Overview
Installation Overview The Wrap eyewear installation is divided into three stages: assembling and adjusting the basic eyewear components, connecting the AA Control Box for media players, connecting and configuring a VGA computer connection, and adjusting the onscreen audio/video controls. It may sound complex but its really quite simple. Your Wrap 920 can be connected to almost any media source by simply changing the Control Box and its cable. -
Page 10: Wrap Tracker 6Tc
To install the Wrap Earphones: Plug an earphone into each of the audio ports on either side of the display module. Either earphone can be used on the left or right. To use the eyewear without the earphones: Unplug the earphones from your Wrap eyewear and control volume using the audio controls provided on your media source. -
Page 11: Focus Adjustment
The nose pad assembly is designed for a single user and its wire arms should not be bent repeatedly or at sharp angles as this may cause a weakening and eventual breakage of the nose pad arms. Should you break one of these arms, contact Vuzix (www.vuzix.com) to order a replacement. -
Page 12: Aa Control Box - Media Player Connection
“RCA cables” is provided with your eyewear as is a custom composite cable for Apple iPod touch, iPhone and iPad. Additional cables and accessories are available from the Vuzix website (www.vuzix.com). The AA Control Box serves two functions; it provides eyewear audio/video controls and power, provided by two (2) AA batteries (included). - Page 13 Plug the eyewear’s Multi-connect Cable from your eyewear into the matching connector on the Battery/Control Box. The black side of the connector tip and the “Vuzix” imprint face up toward the buttons on the Control Box. Connect a Vuzix compatible composite cable into the Control Box port...
- Page 14 Control Box. Partial insertion is a common error. You can use the universal composite cable, with the three barrel connectors, or the custom Apple composite cable that plugs directly into iPod touch, iPhone and iPad products. Additional cable models are available from the Vuzix website (www.vuzix.com). ...
-
Page 15: Computer Connection
Note: The Wrap 920 VR may display 2D video and play audio on computer systems configured with Mac and other operating systems. These operating environments are not officially supported for this product and neither technical support nor supporting software, such as 3D video drivers and tracker calibration, are provided for these configurations. -
Page 16: Vr Manager Installation
The digital distribution files are compressed in a “.zip” file. A .zip compatible compression program comes with Windows so the file will automatically decompress when double-clicked. Your decompressed files will be in a folder titled “Wrap 920 VR.” This folder contains the complete software set for your Vuzix eyewear, including its documentation. -
Page 17: Wrap Eyewear To Pc Hardware Connection
Follow the onscreen instructions, enabling any permission requested by your computer and its operating system. Tip: During the installation process, the screens, options and buttons displayed will vary from one version of the Windows to the next. We suggest choosing the default options. The Setup program will advise you when the installation is complete. - Page 18 • If your computer does not have any video ports available, you can acquire and use a VGA Splitter. • The USB connector requires a USB 2.0 port able to deliver the required data transfer speed and power. If you are connecting through a USB hub, ensure that the hub is 2.0 compliant and that it is serviced by an external power supply.
-
Page 19: Display Configuration
Display Configuration If your display settings are not configured correctly your eyewear will display blank blue screens. To configure your display settings: Adjust your display resolution to 1024 x 768. Set the display refresh rate to 60 Hz. ... -
Page 20: Tracker Calibration
use any of the above. The lower resolution show a smaller display area but with increased clarity. Tracker Calibration The last step in the setup process is to calibrate the Wrap Tracker 6TC. Your Wrap Tracker uses nine different sensors to track movement. These include gyroscopes, accelerometers and magnetometers. - Page 21 When the Zero Gyros screen appears: Place the Wrap eyewear flat on your desk facing your computer. Do not move the eyewear while the gyro zeroing process is being performed. Follow the on-screen instructions. Upon completion of the gyro zeroing process, the VR Manager program will complete loading and present you with its Calibration screen.
- Page 22 Pitch Roll This process captures tracker data through its full range of movement for the yaw, pitch and roll axis. The indicator bars will move while additional data is being received but will stop when no new data is received, indicating its full range of movement has been captured.
- Page 23 The Set Zero button establishes the Tracker’s home or centered position. As you move your head you will see the indicators and values in the Yaw, Pitch and Roll indicators reflect movement relative to that centered position. Your Wrap video eyewear is now setup and ready for use. Some types of video and certain operating situations may require audio or video adjustment to achieve optimum performance.
-
Page 24: A/V Controls
Section 2 A/V Controls... -
Page 25: Control Box
Control Box The Wrap 920 VR Bundle includes two Control Boxes; the AA battery powered model for media players and the VGA Control Box for connecting to a personal computer. Both models look similar and provide the same set of control buttons. - Page 26 The Control Box has two modes of operation, when the OSD (On Screen Display) is shown and when is it not displayed, and the Control Buttons perform different tasks in each of these operating modes. When the OSD is NOT displayed: Opens or displays the OSD.
-
Page 27: Display Controls & Options
Display Controls & Options Battery Control Box OSD VGA Control Box OSD " &' " &' %" $" ) ) +,- +,. .,/ %" %" $" ) ) +,- +,. .,/ 01234 %" /!56 677 68 000%" 01234 /!56 677 68 000%"... - Page 28 !" #" $ $ &'( &') )'* Format Selection Your Vuzix video eyewear eyewear supports standard 2D video and multiple formats of stereoscopic 3D content. This option is used for displaying all standard 2D content. It is the default format option.
-
Page 29: Battery Indicator
Anaglyph 3D format support for red and blue filters. Anaglyph 3D format support for blue and amber filters. Note: “Field Sequential” 3D video format used for the Vuzix iWear VR920 is not supported. !" #$%&' 3D View 3D images and video can be composed in parallel or cross-eye views. -
Page 30: Audio Level & Controls
Four bars indicate a fully charged battery. When the remaining battery level drops to approximately 10% the indicator will display only a single bar and a low battery indicator will be displayed regardless of the OSD display status. Note: Some batteries, such as rechargeable units, may not display four bars even when fully charged. -
Page 31: Wrap Tracker 6Tc
Section 3 Wrap Tracker 6TC... -
Page 32: Installation
The Wrap Tracker 6TC is a 6-DoF (Degrees of Freedom) capable tracker with compass. It plugs directly into your Wrap eyewear and communicates with your computer through the VGA Control Box USB connection. Installation Installation of a Tracker onto your Wrap eyewear is as simple as plugging it into the eyewear and installing the VR Manager software. -
Page 33: Degrees Of Freedom
See the Support section of this User Guide for additional information on the Vuzix Developer Program, found in the Developer Program section of the Vuzix website: www.vuzix.com/developer. -
Page 34: Vuzix Vr Manager
Section 4 Vuzix VR Manager... -
Page 35: Vr Manager 3.0
VR Manager version 3.x is a software application that provides support services for Vuzix video eyewear products connected to a Windows based personal computer. It provides a calibration system for a Wrap Tracker, support for Vuzix Extensions, and diagnostic tools. -
Page 36: Calibrator
Monitor: Provides access to and management of Vuzix Extension files. These Extension files enable stereoscopic 3D video and/or head tracking in select applications lacking native support for these features. Misc. Tools: Technical data and diagnostic resources designed to assist in troubleshooting stereoscopic 3D and tracking problems. - Page 37 Upon completion of the gyro zeroing process, the VR Manager program will complete loading and present you with its Calibration screen. Tip: For the most accurate calibration, try to stabilize earphone movement and position your eyewear as close as possible to the position it will be in when used. This will minimize fluctuations in the eyewear’s relative position to nearby magnetic influences.
- Page 38 Pitch Roll This process captures tracker data through its full range of movement for the yaw, pitch and roll axis. The indicator bars will move while additional data is being received but will stop when no new data is received, indicating its full range of movement has been captured.
-
Page 39: Drift
This may be incorporated directly into the application (native support) or externally through a Vuzix Extension. Vuzix Extensions are accessed and managed through the Monitor section of the VR Manager. The Title list shows all of the Vuzix Extensions and their current status. -
Page 40: Extension Notes
Note: Software titles employing native 3D video and/or head tracking support are not listed in the Monitor, as they do not require VR Manager Extension support. Only titles requiring Extensions are included in the Monitor listing. Extension Notes Extension Notes describe the capabilities, configuration instruction and manual installation information for each Extension. -
Page 41: Enabling Extensions
Right-click on an Extension title and choose “View Extension Info” from the pop-up menu. Enabling Extensions Vuzix Extensions are automatically installed with the VR Manager but they are not automatically enabled. In order for an Extension to be used, the VR Manager must detect the appropriate file directory and the Extension must be enabled. -
Page 42: Detecting Installed Applications
Detecting Installed Applications When the VR Manager is installed it searches for installed applications with matching Vuzix Extensions. It them identifies the appropriate Extension with a yellow indicator – available but not enabled. If an application is installed after VR Manager, you must manually initiate a title search for an Extension to be associated with the newly installed programs. -
Page 43: Misc. Tools
Misc. Tools This section of the VR Manager provides assistance in identifying and correcting technical problems with your Vuzix eyewear and Extensions. It provides Vuzix Customer Service with the information required to quickly identify the cause and solution to your problem. - Page 44 Clicking on this button provides information on the current versions of supporting software and hardware firmware. Status Status displays technical information regarding your Vuzix hardware, drivers and other information that might assist Customer Service in identifying the cause of a problem you are encountering.
- Page 45 To manual initiate a Zero Gyro process: Place your eyewear flat on a desktop and do not move it during the Zero Gyro process. Press the “Zero Gyros” button. Follow the on-screen instructions.
-
Page 46: Service & Support
Section 5 Service & Support... -
Page 47: Cleaning
Cleaning Your Wrap eyewear is virtually maintenance free, requiring only occasional cleaning with a soft microfiber cloth. Do not spray cleaners onto the eyewear or any of its components or immerse them in water. If required, spray a small amount of optical lens cleaner on a microfiber cloth and use that to clean stubborn marks or any oily film. - Page 48 • Disconnect the VGA Control Box VGA cable, wait 30 seconds and then re-connect it. • A better alternative, but more time consuming, is to simply reboot your computer. Video is displayed in 2D only. Your Control Box may be configured for 2D display, possibly caused by an unknown button press on the Control Box, setting the eyewear to 2D or the media content may not be a compatible 3D format.
-
Page 49: Support Services
Detailed explanation of the symptoms you are experiencing your questions. Vuzix Developer Program Vuzix provides a Developer Support Program that offers support services to software developers, including access to an SDK for tracker and stereoscopic video support. This SDK is available for royalty free use and can be downloaded free of charge from the Vuzix website. -
Page 50: Fcc Compliance
FCC Compliance NOTE: This equipment has been tested and found to comply with the limits for a Class B digital device, pursuant to Part 15 of the FCC Rules. These limits are designed to provide reasonable protection against harmful interference in a residential installation. This equipment generates, uses and can radiate radio frequency energy and, if not installed and used in accordance with the instructions, may cause harmful interference to radio communications. - Page 51 Apple Inc., registered in the U.S. and other countries. Vuzix, the Vuzix logo, View the Future and Wrap are trademarks of Vuzix Corporation registered in the U.S. and other countries. © 2011 Vuzix Corporation. All rights reserved.
Need help?
Do you have a question about the Wrap 920 VR and is the answer not in the manual?
Questions and answers