Fractal Axe-Fx II Owner's Manual
Preamp/fx processor
Hide thumbs
Also See for Axe-Fx II:
- Owner's manual (199 pages) ,
- Quick reference manual (27 pages) ,
- Quick reference manual (21 pages)

Related Manuals for Fractal Axe-Fx II


Summary of Contents for Fractal Axe-Fx II
- Page 1 Owner’s Manual Also mostly suitable for the Axe-Fx II XL until an update is available in April 2014...
-
Page 3: Legal Notices
Fractal Audio Systems Axe-Fx II Owner’s Manual. Contents Copyright © 2011 -2012. All Rights Reserved. No part of this publication may be reproduced in any form without the permission of Fractal Audio Systems. Fractal Audio Systems, Axe-Fx, Axe-Fx II, Axe-Fx II Mark II, G2 Modeling Technology (“G2”), Humbuster, Multipoint Iterative Matching and Impedance Correction (“MIMIC”), Virtual Vacuum Tube (“VVT”) are trademarks of Fractal... -
Page 4: Certificate Of Conformity
Zappa, Adrian Belew, Steve Vai, John Petrucci, the Edge, Peter Frampton, Neal Schon, King’s X, Scott Appleton (Def Leppard/Rush/etc.) and more. This work is based extensively on the original Axe-Fx manual by Fractal Audio founder and Axe-Fx creator Cliff Chase. - Page 5 “Axe-evangelists” to the world’s most celebrated pro players; that we’d soon be writing the foreword to a manual for the sequel: the Axe-Fx II. Nevertheless, the Axe-Fx II is here. Advances in technology and knowledge, along with the shared insights of our community, have allowed us to design and produce a next-generation product that represents a giant step forward.
-
Page 6: Table Of Contents
Axe-Fx II Four Cable Method (“4CM”) ....................21 Direct to FOH plus Real Amps on Stage ....................22 Axe-Fx II as Effects Processor Only (with Guitar Amps) ............... 23 Axe-Fx II as a Computer Audio Interface ..................... 24 Axe-Fx II and MFC-101 ......................... 25 Axe-Fx II: One Possible “Big Rig”... - Page 7 TABLE OF CONTENTS 4 Basic Operation and Editing ............27 4.1 Presets ....................27 4.2 The Grid ....................28 Inserting and Removing Blocks ......................28 Shunts ..............................29 Connector Cables ..........................30 Moving Blocks on the Grid ........................32 Example Presets on the Grid ........................ 33 4.3 Editing Sounds ..................
- Page 8 TABLE OF CONTENTS Delay Common Parameters ......................... 63 5.7 Drive [DRV] .................... 65 5.8 Effects Loop [FXL] ................... 67 5.9 Enhancer [ENH] ..................69 5.10 Feedback Send [SND] & Return [RTN] ..........69 5.11 Filter [FLT] ................... 70 5.12 Flanger [FLG] ..................71 5.13 Formant [FRM] ..................
- Page 9 TABLE OF CONTENTS Octave Divider ........................... 100 Crystals ............................... 101 Advanced Whammy ........................... 102 Arpeggiator ............................103 Custom Shifter ........................... 104 5.25 Quad Chorus [QCH] ................105 5.26 Resonator [RES] ................. 107 5.27 Reverb [REV] ..................108 5.28 Ring Modulator [RNG] ............... 111 5.29 Rotary Speaker [ROT] ................
- Page 10 TABLE OF CONTENTS Damping ............................. 131 Auto Engage ............................131 Program Change Reset ........................131 7.3 Control Sources ..................132 LFO1 & 2 ............................132 ADSR 1 & 2 ............................133 Sequencer ............................133 Envelope Follower ..........................134 Pitch Detector ............................ 134 Manual Knobs ............................
- Page 11 TABLE OF CONTENTS 12 Tempo ..................150 12.1 Setting the Tempo ................150 12.2 Synchronizing Sound Parameters ............150 12.3 Tempo to Use ..................151 12.4 Auto Delay ..................151 12.5 Metronome ..................151 13 Backing Up and Restoring ............152 13.1 MIDI/SysEx Backup and Restore ............
- Page 12 MFC-101 Scene Features ....................... 179 Table of CC# Values for Scene Select ..................... 179 16.17 Glossary & Resources ..............180 16.18 Axe-Fx II Bank & Preset Numbers Table .......... 184 16.19 Factory Default Settings ..............185 17 Specifications ................187 17.1 Midi Implementation Chart ...............
-
Page 13: What's New
The Axe-Fx II takes "real amp tone and feel" to the next level, offering the latest word on restoring digital to its rightful place as the superior solution for guitar processing. - Page 14 Tone Matching to “Clone” any Tone The Axe-Fx II features a new Tone Matching block with the capability to match the sound of a real or recorded amp. It does this by analyzing the difference between the sound of your preset (the “local” signal) and a “reference”...
- Page 15 WHAT’S NEW Improved Digital I/O In addition to its USB interface, the Axe-Fx II sports SPDIF and AES input and output connectors. 7-pin MIDI In and a selectable MIDI Out/Thru jack are provided for interconnection with other MIDI-controllable equipment. Built for MFC-101 The Axe-Fx II features an all-new dedicated control port for connecting an MFC-101 MIDI Foot.
-
Page 16: Introduction
A Word on Modeling You may have noticed that the Axe-Fx II is not typically described as a “modeler.” This is not to diminish its debt to heritage; on the contrary, we’ve done thousands of hours of deep analysis of the greatest amps, cabs, and effects of all time. - Page 17 Gone are the headaches and hassles of systems of so many boxes strung together with so many wires, prone as they are to failure and noise. And let’s say a small meteor hits the stage and obliterates your Axe-Fx II: you can literally restore to a new unit during the intermission and be up and running again for the next set.
-
Page 18: The Inventory/Grid Concept
(Note: Seven empty columns were removed from the illustration and are represented by •••) The figure above presents a stylized example of an Axe-Fx II preset. The INPUT is routed through a SHUNT to feed a “WAH” block. (The shunt has no effect on the sound and is shown only to introduce the concept of its use.) The WAH block is connected to an “AMP”... -
Page 19: Connectivity And More
See the Effects Guide (p. 39) for more detail on blocks and their parameters. A powerful new feature of the Axe-Fx II allows you to maintain your own collection of Global Blocks (p.122) that can be inserted and then kept synchronized across multiple presets. -
Page 20: Overview
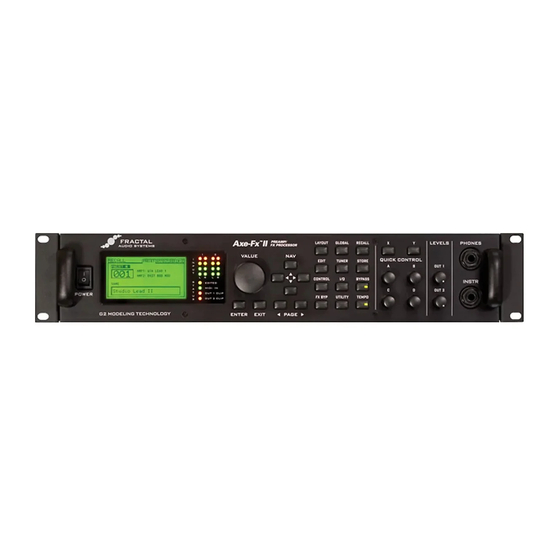
Review the following to familiarize yourself with the hardware features of the unit. 2.1 The Front Panel Figure 2-1 The Axe-Fx II is housed in a powder-coated steel enclosure with an anodized aluminum faceplate. Dual front handles allow easy rack mounting and removal. Switch turns the unit on or off. - Page 21 – Enters the STORE menu where you can save, rename, or swap presets. See p. 37 for details. – Bypasses the Axe-Fx II, routing the output of the A/D directly to the input of the D/A converters, defeating all processing functions and lighting the BYPASS LED. Press again to un-bypass.
-
Page 22: The Rear Panel
I/O:AUDIO menu (p. 138). These jacks transmit and receive at a fixed rate of 48k. – This provides the means to connect the Axe-Fx II to a PC or Mac, enabling a host of two-way audio and MIDI capabilities. See section 2.3 on p.12. Like the digital i/o, USB Audio operates only at 48k. - Page 23 Be careful not to insert other types of connectors such as USB or guitar cables into the MFC expansion port of the Axe-Fx II, as doing so can damage your unit. This leaves tell-tale signs on the motherboard and is NOT covered under warranty.
-
Page 24: Computer Integration
USB 2.0 Support required Software Installation Although the Axe-Fx II drivers are fully class-compliant, software installation is still required on all platforms. Without drivers installed, USB capabilities of the Axe-Fx II will not work correctly. Both Mac and Windows versions can be downloaded from our web site at http://www.fractalaudio.com/support. -
Page 25: Capabilities
Two Simultaneous Channels of 48k/24-bit Audio from the Computer to the Axe-Fx II Two outputs, typically called OUT 0 and OUT 1, allow audio to be sent from the computer to the Axe-Fx II where it can be mixed with processed signal at the main outputs or routed through onboard effects. - Page 26 Four Simultaneous Channels of 48k/24-bit Audio from the Axe-Fx II to the Computer Four outputs, typically called IN 0, IN 1, IN 2, and IN 3, allow audio to be routed from the Axe-Fx II to the computer, recorded, processed, or monitored.
-
Page 27: Connections
Before making connections, be sure to turn down the volume of your amps and switch off all power. Take extreme care NEVER to connect the SPEAKER outputs of an amplifier to any jack on the Axe-Fx II as this will damage one or both devices. -
Page 28: The Pedal Jack
3.3 System Parameters As you can see, the Axe-Fx II is equipped with a flexible array of input/output connector jacks. The diagrams above cover the layout of the hardware, but seeing a few complete setups can also be helpful as you decide how to connect other equipment. -
Page 29: Connection Diagrams
CONNECTIONS 3.4 Connection Diagrams Familiarize yourself with the capabilities of inputs, outputs, and control connections through this overview. The diagrams that follow in sections 3.4.1 through 3.4.10 illustrate several real-world applications. Figure 3-1 – I/O Overview Doc v14.00... -
Page 30: Axe-Fx Ii Into Self-Powered Full-Range Speakers
Global Settings: Default I/O Settings: Default Notes: With its built-in amp and speaker simulations, the Axe-Fx II can be played directly into P.A. or other self- amplified, full-range, flat-response (FRFR) speakers. Externally amplified (passive) FRFR speakers are equally well- suited. This might just as easily be a Front-of-House system with floor or in-ear monitors. In this configuration, the Axe-Fx II creates all aspects of the end-to-end guitar chain for the ultimate in tonal flexibility—stompboxes, amps,... -
Page 31: Axe-Fx Ii With Power Amp And Guitar Speakers
In any case, the settings required for this setup are not ideally suited for monitoring through the Axe-Fx II headphone jack, as what you hear through headphones will not sound like what you will hear through the speakers. -
Page 32: Axe-Fx Ii Effects Loop
Global Settings: See Below I/O Settings: See Below Notes: The Axe-Fx II has a stereo FX Loop that allows you to insert outboard gear such as preamps or processors at almost any point in the signal chain of any preset. You’ll learn more about editing presets in section 4, and the Effects Loop block is detailed on page 67. -
Page 33: Axe-Fx Ii Four Cable Method ("4Cm")
To use the 4CM, you will need to create special presets where AMP and CAB blocks are replaced by the FX LOOP block (p. 67). Signal hits the Axe-Fx II first, into any effects that you want in front of the amp—compressor, drive, wah, and the like. -
Page 34: Direct To Foh Plus Real Amps On Stage
Global Settings: Default I/O Settings: Set OUT1 MODE and OUT 2 MODE as required for stereo or mono Notes: This setup is similar to others in which the Axe-Fx II is used direct into full-range speakers. Here, however, a special preset feeds both the direct and power amp/cab rig by placing an FX LOOP block between the AMP and CAB, so signal is passed to Output 2 before it is processed by the CAB block and passed to Output 1. -
Page 35: Axe-Fx Ii As Effects Processor Only (With Guitar Amps)
It is easy enough to extend each of the above configurations for use in stereo. With the Axe-Fx II in a loop, connect OUT1 R to the RETURN of a second amp, bypassing that unit’s preamp altogether, or run fully within the loops of two separate amps using IN1 L/R and OUT1 L/R. -
Page 36: Axe-Fx Ii As A Computer Audio Interface
Send audio from the computer to the Axe-Fx II for processing (and send it back to record the result). Use the Axe-Fx II rear inputs to record other line-level audio sources, with or without Axe-Fx II processing. -
Page 37: Axe-Fx Ii And Mfc-101
I/O Settings: Determined by how the Axe-Fx II is to be used with other connected amps/speakers/etc. Notes: The Axe-Fx II provides a significant advantage over its predecessors in that the Fractal Audio MFC-101 MIDI foot controller can be connected to the new, dedicated rear-panel MFC control port. A single Ethernet (CAT5, non- crossover) cable carries bidirectional communications to support the many powerful features of MFC-101 “Axe-Fx... -
Page 38: Axe-Fx Ii: One Possible "Big Rig
Axe-Fx II: One Possible “Big Rig” Here the Axe-Fx II is the centerpiece of a “big rig,” combining the capabilities of several other diagrams shown above. The main outs feed a pair of powered FRFR cabs, so you can design and monitor sounds and play live with the same sound. -
Page 39: Basic Operation And Editing
Global Blocks (p. 122). As of firmware 9.0, each Axe-Fx II preset also contains eight SCENES. The current Scene is shown on the recall screen and can be changed with the “A” QUICK CONTROL knob. For more on setting up SCENES, see p. 175. -
Page 40: The Grid
Figure 4-2 – In this image of an empty grid, off-screen areas are grayed. Inserting and Removing Blocks As explained in “The Concept” on page 6, the Axe-Fx II grid must be populated with blocks—components pulled from a large inventory of amps, cabs, stompbox, studio effects, mixers, and more. The insertion, modification, or removal of blocks happens at the grid cursor, a filled rectangle controlled with the buttons. -
Page 41: Shunts
98%. Each block has a “cost,” and when the sum of all blocks reaches the limit, a warning message prevents you from adding additional blocks. The Axe-Fx II is extremely powerful, and most presets do not come close to the limit. -
Page 42: Connector Cables
The second example above would produce NO SOUND as nothing is “wired up” to pass signal to the output! If a preset is unexpectedly silent, inspect it carefully for one or more missing cables. The Rules of Axe-Fx II Cables No cables = No sound. Even one missing link will break the entire chain. - Page 43 BASIC OPERATION AND EDITING If you try to connect to an EMPTY location, a SHUNT will be created there. You can ONLY connect to blocks in the next column to the right. represents the origin of a connector cable. shows valid possible destinations.
-
Page 44: Moving Blocks On The Grid
A Word on Shunts and Cables In the real world, cables and connectors can have an impact on the tone of a guitar rig. In the Axe-Fx II, nothing could be further from the truth. Shunts and connectors, whether long, short, split, merged, or crisscrossed in a huge mess, have absolutely no sonic properties whatsoever. -
Page 45: Example Presets On The Grid
Wahwah, Whammy, Tremolo, Overdrive, Phaser, and Flanger are all connected to an AMP/CAB combination, followed by Delay and Reverb. As you can see, the Axe-Fx II supports a great number of simultaneous effects; this preset uses just a portion of the unit’s total CPU power, leaving considerable room for more effects on other rows. - Page 46 The presets in this section represent only four examples of the nearly limitless possibilities that can be created using the GRID, BLOCKS, and CONNECTORS of the Axe-Fx II. In addition to reviewing these diagrams, you can gain valuable insight and ideas by exploring the factory presets or by discussing techniques with other members of the Fractal Audio community.
-
Page 47: Editing Sounds
Parameter settings determine precisely how an effect will sound. These are arranged on PAGES in the display of the Axe-Fx II. The system of parameters and pages for any block is referred to as its EDIT menu. To Open the EDIT Menu for Any Effect Block…... -
Page 48: Quick Control
4.4 X/Y Switching One of the new features of the Axe-Fx II is X/Y switching, available on 10 different effect block types: Amp, Cab, Chorus, Delay, Drive, Flanger, Pitch Shifter, Phaser, Reverb, and Wahwah. Each instance of each of these blocks is equipped with two fully independent sets of parameters—“X”... -
Page 49: X/Y Quick Jump
Can you imagine a stompbox that can’t be stomped? Neither can we. Any effect on the Axe-Fx II can be bypassed (or engaged) in three different ways: 1. Press the front panel button while the block is either selected in the grid or open to edit. -
Page 50: Saving Changes
Swapping the Locations of Two Presets The Axe-Fx II has a new feature that allows you to SWAP the locations of two saved presets. This is useful, for instance, if you want to re-order the factory presets without overwriting any of them, or if you need to move a “keeper”... -
Page 51: Effects Guide
170+ different “types” based on stock, custom and hybrid models. You get great amp sounds from the Axe-Fx II using only the basic drive and tone controls on PG1 and PG2 of the edit menu. In general most knobs behave exactly like those on actual amp when possible. -
Page 52: Basic Amp Parameters (Type, Pre, Pwr, Eq
10, matching knob settings between the Axe-Fx and the original amp will recreate the same tones. Some of the original amps simulated on the Axe-Fx II do not have all of the tone controls offered on our models. Some, for example, have no mid control. To faithfully simulate the configuration of the original, set any superfluous controls to noon (or “0.00”... - Page 53 BRIGHT SWITCH – Many amplifiers contain a “treble peaker,” included as a pull or toggle switch, or even hard-wired. Every amp on the Axe-Fx II includes this control. The effect may be subtle or quite TYPE pronounced depending on the amp This is also affected by the setting (p.54).
-
Page 54: Amp Speaker Parameters
EFFECTS GUIDE types instead of selecting a number. EL34, EL84, 6L6, 6V6, KT66, KT88, 6550, 6973, 6AQ5 and 300B (triode) are offered, as well as an ideal tetrode and ideal pentode. The power tube type defaults to the appropriate type when the amp type is selected but may be changed freely. -
Page 55: Amp Dynamics Parameters
This same parameter is shown in the Advanced Parameters page as CATHODE THRESH CATHODE SQUISH – The Axe-Fx II has “cathode squish modeling” for cathode biased power amp models. sets the amount of bias shift due to cathode voltage rise. This parameter is set to a suitable CATHODE SQUISH value upon selecting of an amp . -
Page 56: Advanced Amp Parameters
EFFECTS GUIDE of power amp distortion is achieved, then adjust matching until the character of the distortion is as desired. The various LF and HF resonance parameters interact strongly with this parameter so be sure to experiment with those as well when crafting a tone. Advanced Amp Parameters INPUT SELECT –... - Page 57 EFFECTS GUIDE DYN DEPTH – Similar to dynamic presence, this increases or decreases lows when the virtual power amp is pushed. Dynamic depth is not present on real amps, but provides a valuable tone shaping tool on the Axe-Fx. Dynamic Presence, Dynamic Depth and the Character controls (see below) are quite powerful, and generally speaking “a little goes a long way.”...
- Page 58 TYPE CATHODE SQUISH BIAS EXCURSION — The Axe-Fx II accurately models grid conduction and resulting bias excursion. This results in a more dynamic, thicker and bouncier tone. controls how much the grid voltage BIAS EXCURSION droops when the grids conduct.
- Page 59 EFFECTS GUIDE to smooth the response and reduce noise. You can adjust the amount of capacitance, and the resulting frequency, using these parameters. MV LOCATION – Sets the location of the Master Volume. Most amps have the Master Volume before the phase inverter (“Pre PI”).
-
Page 60: Cabinet [Cab]
– Selects between “HI-/ULTRA-RES,” “NORMAL RES” (formerly “MONO LO-RES”) and “STEREO” modes. The CAB block can load two different IR formats: Standard Axe-Fx II (2048) Res and UltraRes™. The MODE parameter determines how a loaded IR is used to process audio. With set to "HI-/ULTRA-RES", Standard... - Page 61 Manufacturer and product names mentioned below are trademarks or registered trademarks of their respective owners, which are in no way associated or affiliated with Fractal Audio Systems. The names are used only to illustrate sonic and performance characteristics of the Axe-Fx II MIC TYPES.
-
Page 62: User Cabs
See Common Mix Parameters on p.120 for more information. User Cabs In addition to the 130+ onboard cab simulators, the Axe-Fx II allows you to store up to 100 “User” IR files onboard. Using Axe-Edit, Cab-Lab, Fractal-Bot or a 3 party MIDI utility, you transmit the IR file in SysEx format to your Axe- Fx, and the sound of that cab becomes available on your unit. -
Page 63: Chorus [Cho]
Used subtly, the effect can be ambient and liquid, while more extreme settings can produce a vibrato or “Leslie” effect. The Axe-Fx II offers a high-quality, multi-voice stereo chorus capable of producing anything from exceptionally smooth ensemble effects to a wildly detuned warble. - Page 64 EFFECTS GUIDE TEMPO – Sets the chorus rate in rhythmic relation to the global tempo. For example, if the tempo is set to “1/4” and the global tempo is 120 BPM, the chorus modulation rate will automatically be set to 2 Hz (BPM/60 = Hz).
- Page 65 EFFECTS GUIDE Low: A neutral version of the Dimension with no tonal coloration. Med: Classic Dimension processing buttons 1-3. Set RATE and DEPTH to taste. High: Classic Dimension processing button 4. Set RATE and DEPTH to taste. The Chorus block also has a MIX page with LEVEL, BALANCE, and BYPASS MODE parameters.
-
Page 66: Compressor [Cmp]
In guitar pedalboards, a compressor is often placed at the start of an effects chain (though using the effect in front of high-gain distortion can increase noise or squealing). In the recording studio, a Compressor is typically placed towards the end of a signal chain to smooth irregular levels. The Axe-Fx II provides both pedal and studio-type compressors (detailed below). - Page 67 EFFECTS GUIDE LOOK AHEAD – Despite fast attack times, a compressor can fail to “catch” very fast transients. Look Ahead introduces a short audio delay so the compressor’s gain control stage has sufficient time to respond to the detector, which is side-chained with no delay. Look ahead can reduce “popping,” especially when heavy compression is used on very percussive sources.
-
Page 68: Crossover [Xvr]
5.5 Crossover [XVR] This two-way stereo crossover contains 4th-order Linkwitz-Reilly filters. Each Axe-Fx II preset can use two crossover blocks. You can create a three- way crossover by feeding one output of the first to the input of the second. -
Page 69: Delay [Dly]
5.6 Delay [DLY] The Axe-Fx II Delay block lets you create classic, modern, and innovative echo effects. A “delay” records an input and then plays it back later in time, creating the effect of an echo...echo…echo. Modified tape recorders were once used for this purpose, but these had sound quality, noise, and reliability concerns. -
Page 70: Mono Delay
EFFECTS GUIDE MSTR FDBK – Master Feedback scales any and all feedback parameters on PG2 of the Delay. Note that the range of this control is 0–200%, making it possible (easy, in fact) to “overload” the feedback loop. – This is a copy of the control on the MIX page, placed here for easy adjustment of the wet/dry balance without page-flipping. -
Page 71: Stereo Delay
EFFECTS GUIDE Please be aware that because the MONO delay contains only one delay line, the two parameters on its LFO PHASE MOD page have no effect. Similarly, the parameters must be set to “LEFT” or “BOTH” for modulation to LFO TARGET occur. -
Page 72: Dual Delay
EFFECTS GUIDE Dual Delay This is a stereo-in/stereo-out delay with fully independent controls for most L-R parameters. Figure 5-10 – The Dual Delay Block TIME L TIME R – Dual parameters to set the time of the left and right delay lines. When is shown in TIME parenthesis, it is being set automatically by the... -
Page 73: Ping-Pong Delay
EFFECTS GUIDE Ping-Pong Delay The echoes of this easy-to-use Ping-Pong Delay alternate between left and right channels in stereo. The Ping-Pong Delay uses the same algorithm as the Stereo Delay (p. 66), except the ECHO PAN parameter is replaced by SPREAD. SPREAD –... -
Page 74: Tape Delay
EFFECTS GUIDE – When this is turned ON, the reverse playback process is active and can be heard. Turning RUN to OFF will mute playback (though any samples in the buffer will still silently run out). This switch can be remotely operated with a modifier (attached, for example, to a footswitch) to stop and start playback. -
Page 75: Delay Common Parameters
HEAD 2 RATIO – The Axe-Fx II tape delay has two heads, or “taps” on the loop. This control sets the relative position of the second playback head from zero to a maximum of 100%—the HEAD 1 TIME value. Settings close to 100% (e.g. - Page 76 A Word on “Spillover” The Axe-Fx II Delay is capable of “spillover,” which means that effect tails ring out when the effect is bypassed or when you change presets. For more on this subject, please see Setting Up Spillover on p. 173.
-
Page 77: Drive [Drv]
Manufacturer names and product names mentioned below are trademarks or registered trademarks of their respective owners, which are in no way associated with or affiliated with Fractal Audio Systems. The names are used only to illustrate sonic and performance characteristics of the Fractal Drive TYPES, which have been created by incredibly detailed analysis of the actual amps that inspired them. - Page 78 Tube Drv 4-knob Based on the Chandler™ Tube Driver (4-knob version) FAS LED-Drive Designed by Fractal Audio Systems based on LED clipping. DRIVE – Sets the amount of gain/overdrive/distortion/fuzz/boost. Note: A high-gain drive before a high-gain amp can cause noise and squealing.
-
Page 79: Effects Loop [Fxl]
5.8 Effects Loop [FXL] The Axe-Fx II has a full-stereo effects loop that can be used to insert outboard hardware anywhere in the signal chain of a preset. Any signal at the input of the [FXL] block is passed to the physical OUTPUT 2 (“FX SEND”) on the Axe-Fx II. - Page 80 EFFECTS GUIDE The FX Loop block has a MIX page with LEVEL, BALANCE, and BYPASS MODE parameters. See Common Mix Parameters on p. 120 for more information. Each Axe-Fx II preset can use one FX Loop block. Doc v14.00...
-
Page 81: Enhancer [Enh]
The Enhancer has no mix parameters or bypass mode modifier switch. Both types offer a control. LEVEL Each Axe-Fx II preset can use one Enhancer block. 5.10 Feedback Send [SND] & Return [RTN] The Feedback Send and Feedback Return blocks allow you to route sound from any point in the preset routing to any other point, bending the rule that signal may only flow from left to right. -
Page 82: Filter [Flt]
The latter controls the amount of signal that SEND LEVEL OUTPUT LEVEL passes through the block. Each Axe-Fx II preset can use one FB Send and one FB Return block. The Feedback Return block has LEVEL, BALANCE, and BYPASS MODE parameters. See Common Mix MIX, Parameters on p. -
Page 83: Flanger [Flg]
“feedback” control (sometimes called “regeneration” or “intensity”) which returns some of the output signal to the input and intensifies the characteristic sweep. A regenerative flanger is a real attention-getter. Each Axe-Fx II preset can use two fully independent Flanger blocks. Flanger X/Y Channel Switching Each instance of the Flanger block stores two fully independent sets of parameters called X and Y. - Page 84 EFFECTS GUIDE – Sets the ratio of wet and dry (duplicated from the MIX page). TEMPO – Locks the flanger rate in rhythmic relation to the global tempo. For example, if the tempo is set to “1/4” and the global tempo is 120 BPM, the rate will automatically be set to 2 Hz (BPM/60 = Hz). To ignore the global tempo set the tempo control to NONE.
-
Page 85: Formant [Frm]
For example, the vowel sound "eee" can be reproduced with a bank of narrow bandpass filters with various frequencies and amplitudes. The Axe-Fx II Formant Filter can be set statically or blend dynamically between vowels. The... -
Page 86: Gate/Expander [Gte]
When set up to completely silence incoming signals below a certain threshold, the expander is called a gate. Each Axe-Fx II preset can use two fully independent Gate/Expander blocks. Figure 5-15 – The Gate/Expander Block THRSH –... -
Page 87: Graphic Equalizer [Geq]
15 to 60 seconds, depending on your choices for mono/stereo/undo. Looper functions can be operated from the Axe-Fx front panel or remotely via MIDI. Fractal Audio Systems’ MIDI Foot Controller product, the MFC-101, offers a dedicated LOOPER CONTROL MODE for the Axe-Fx II. - Page 88 – Slows the Looper’s speed to half. Playback and normal or overdub recording are supported at half speed. For double speed playback, record in half speed and then switch back to normal. Note: Halving the speed slightly reduces high-end frequency response. Each Axe-Fx II preset can use one Looper block. Looper Advanced Controls MODE –...
-
Page 89: Megatap Delay [Mgt]
The Megatap Delay is a 2.5 second, 40-tap delay line with parametric control of time, amplitude, and panning. This effect can be used to create interesting sonic patterns or to increase “density” before reverberant effects. Each Axe-Fx II preset can use one Megatap block. Figure 5-16 – The Megatap Delay Block... -
Page 90: Mixer [Mix]
The mixer lets you fine-tune level blends or use modifiers (p. 127) to crossfade between different effects or chains. Each pair of gain and balance controls corresponds to a row in the grid. For a more thorough description of how Axe-Fx II mixers work, see section 16.11, Mixology, on p. 169. Page 1 Parameters GAIN 1 –... -
Page 91: Multiband Compressor [Mbc]
Each Axe-Fx II preset can use two fully independent Mixer blocks. 5.19 Multiband Compressor [MBC] The Axe-Fx II contains a three-band compressor that is great for mastering or compressing a mix. It also works as a tone-shaping tool, providing independent level and dynamics control over low, mid, and high frequencies. -
Page 92: Multi Delay [Mtd]
5.20 Multi Delay [MTD] The Multi Delay is a rhythmic multi-tap delay block. Each Axe-Fx II preset can use two fully independent Multi Delay blocks, each of which may be set to any one of ten sub-algorithms: Quad Tap, Plex Delay, Plex Detune, Plex Shift, Band Delay, Quad Series, Ten-Tap, Rhythm Tap, Diffusor, and Multi Tape Delay. - Page 93 EFFECTS GUIDE Mix Parameters All Multi Delay types share a common MIX page with , and LEVEL BALANCE BYPASS MODE GLOBAL MIX parameters. See Common Mix Parameters on p.120 for more information on these controls. Doc v14.00...
-
Page 94: Quad Tap Delay
EFFECTS GUIDE Quad Tap Delay The Quad Tap Delay offers four “taps,” each of which extracts a signal from any point in the delay line. It is useful for cool creative and rhythmic effects. Each tap has its own level and pan controls, plus a bandpass filter with adjustable frequency and Q. -
Page 95: Plex Delay
EFFECTS GUIDE DUCKER ATTEN – (Ducker Attenuation) Sets the amount by which the effect volume will duck (decrease). A setting of 20 dB, for example, will decrease the echoes by 20 dB when the input level is above the threshold. Set to 0.0 to defeat the ducker. -
Page 96: Plex Detune
EFFECTS GUIDE Parameters DECAY TIME – Sets the amount of time required for the echoes to fade by adjusting the coefficients of the feedback matrix. Use caution, as high decay times can result in instability. DIFFUSION – Sets the amount of cross-coupling between delay lines. Higher values increase the density of the echoes and result in a more reverb-like sound. -
Page 97: Plex Shift
EFFECTS GUIDE Figure 5-20 – Plex Detune (and Plex Shift) Multi Delay Type CROSSFADE – Sets the amount of overlap used in the granules of the pitch shifters. Lower settings give a “grainy” sound, while higher values smooth the sound. DETUNE 1,2,3,4 –... -
Page 98: Quad Series Delay
EFFECTS GUIDE Figure 5-21 – The Band Delay Multi Delay Type Quad Series Delay The delay lines of the Quad Series Delay are connected end-to-end so that their times are compounded as the signal travels from one to the next. Each line has its own output tap, however, so the output of any line can also be heard as it enters the next delay in the series. -
Page 99: Rhythm Tap Delay
EFFECTS GUIDE time. The levels of individual delay taps can also be adjusted from -80 to +20 dB. Pan is set as a that can SHAPE change automatically as the taps progress. MONO/STEREO – Sets the mode of the Ten-Tap Delay. In mono mode, twice as much delay per tap is possible. -
Page 100: Diffusor
EFFECTS GUIDE The parameters for the Rhythm Tap Delay include those of the Ten-Tap Delay (5.20.7 above) plus the following: FEEDBACK – Sets the feedback level from the final repeat to the input of the delay line. You can use this in conjunction with the decay to control the overall decay behavior. -
Page 101: Quad Tape Delay
“chopper” effects (use a square wave LFO!) Panning covers anything from slow swings to psychotic shudders. Each Axe-Fx II preset can use two fully independent Tremolo/Panner blocks. Figure 5-24 – The Pan/Tremolo Block Parameters EFF TYPE –... -
Page 102: Parametric Eq [Peq]
5.22 Parametric EQ [PEQ] The 5-band Parametric Equalizer is one of the most precise and flexible tone-shaping tools in the Axe-Fx II. It lets you select the exact frequencies you want to focus on, adjust how much you want to boost or cut, and specify how the change should affect neighboring frequencies. -
Page 103: Phaser [Pha]
The phaser in the Axe-Fx II is extremely powerful. It allows two to 12 stages to be cascaded with positive or negative feedback and a flexible, stereo LFO. It also offers a special mode to recreate the classic ‘vibe effects with astonishing accuracy. -
Page 104: Basic Parameters
EFFECTS GUIDE Figure 5-26 – The Phaser Block Phaser X/Y Channel Switching Each instance of the Phaser block stores two fully independent sets of parameters called X and Y. Selecting between these allows you to change all block settings—instantly—at the touch of a switch or button (excluding current Bypass State and any Modifier assignments). -
Page 105: Pitch Shifter [Pit]
VIBE MODE – Technically, this parameter sets the all-pass frequency spacing. But it would probably suffice to say that if Jimi, Robin, and David had a favorite Axe-Fx II phaser setting, this would be it. The TYPE parameter on the BASIC page can be used to get dial in classic ‘vibe sounds instantly, or you can manually turn this switch ON to experiment with your own settings. -
Page 106: Common Parameters
Auto Pitch – Turn your guitar or voice into Cher or T-Pain. Actually, please don’t…we’ve removed the Axe- Fx Ultra’s “Auto Pitch” algorithm from the Axe-Fx II ;) Each Axe-Fx II preset can use two fully independent Pitch Shifter blocks. Pitch Shifter X/Y Channel Switching Each instance of the Pitch block stores two fully independent sets of parameters called X and Y. -
Page 107: Detune
EFFECTS GUIDE to center. A value of -100% will reverse the position of the voices. You can use a modifier on this parameter to move the voices around the stereo field in real time. MASTER LEVEL – Multiplies the level values by this amount. Pitch Source, Track, and Adjust PITCH TRACK –... - Page 108 EFFECTS GUIDE VOICE 1 DELAY, VOICE 2 DELAY – Sets the delay time of the selected voice. Doc v14.00...
-
Page 109: Fixed Harmony
EFFECTS GUIDE Fixed Harmony The Fixed Harmony mode creates two voices at fixed intervals from the note played, with the possibility of using feedback and/or delay to create cascades of upward/downward shifting. Figure 5-28 – The Fixed Harmony Pitch Shifter Type INPUT MODE –... - Page 110 EFFECTS GUIDE the actual note played and the two shifted voices, three-note chords can be formed. Crank out some Maiden, Boston, or Thin Lizzy all by yourself! Figure 5-29 – The Intelligent Harmony Pitch Shifter Type VOICE1 DETUNE, VOICE 2 DETUNE –...
- Page 111 EFFECTS GUIDE VOICE1 DLYTEMPO, VOICE 2 DLYTEMPO – Locks the delay time to the global tempo. For example, if the global tempo is 120 BPM, and is set to a quarter note “1/4,” then the delay time will be 500 ms. To TEMPO ignore the global tempo, set the tempo control to NONE.
-
Page 112: Classic Whammy
EFFECTS GUIDE Classic Whammy The whammy, first introduced in 1991, is a relative newcomer to the field of guitar effects. The Classic Whammy brings all of the expected sounds to the Axe-Fx II. Its parameter is designed to be operated CONTROL remotely using a modifier (p. -
Page 113: Crystals
EFFECTS GUIDE Crystals The Crystals Pitch Shifter is similar to the Fixed Harmony mode (p. 97) but is designed for special effects. It features much longer possible “splice” times inside the shifter, reverse shifting, and a flexible feedback architecture. Figure 5-32 – The Crystals Pitch Shifter Type VOICE1 DETUNE, VOICE 2 DETUNE –... -
Page 114: Advanced Whammy
EFFECTS GUIDE For sake of explanation, the Crystal algorithm “splicing” parameters detailed below are not listed in the order in which they appear on the display of the Axe-Fx II. VOICE1 SPLICE, VOICE2 SPLICE – Pitch shifting breaks a signal into pieces called “granules.” These are manipulated individually and then “spliced”... -
Page 115: Arpeggiator
EFFECTS GUIDE Arpeggiator The Arpeggiator uses a 32-step sequencer to control the shift amount of a harmonizer so that complex arpeggio patterns can be created from a single note. Arpeggios “intelligently” transpose inside the designated key/scale as you play different notes. So, in the key of C (Ionian) Major, the note “C natural” will arpeggiate as C-E-G (C major), but the note D natural will arpeggiate as D-F-A (d minor). -
Page 116: Custom Shifter
– Selects the custom scale to use for each voice. – This transposes both custom scales to the desired key. Internally the Axe-Fx II assumes all Custom Scales have a root of A so this shift is relative to that note. For example, if your custom scale was in A major and you wanted to perform in G major you’d set KEY to G. -
Page 117: Quad Chorus [Qch]
80s session player clean sound. It takes time to set up, but your efforts will be rewarded with incredibly lush and liquid chorus sounds. It is a four-voice chorus with a powerfully complex modulation generator. Each Axe-Fx II preset can use two fully independent Quad Chorus blocks. Figure 5-35 – The Quad Chorus Block The parameters of the Quad Chorus are divided across pages for Master, Chorus 1–4, Advanced, and Mix. - Page 118 EFFECTS GUIDE Chorus Unit Parameters Each chorus unit has an identical set of parameters. TIME – Sets the minimum time delay of the selected chorus voice. All modulation is positive/unipolar. LEVEL – Sets the output level of the selected chorus voice. –...
-
Page 119: Resonator [Res]
Figure 5-37 –- The Resonator Block, Shown in its MONO INPUT MODE. Each Axe-Fx II preset can use two fully independent Resonator blocks. Parameters MODE – The Resonator can operate in one of two modes. -
Page 120: Reverb [Rev]
Early simulators incorporated metal springs and plates, but as with delay processing, reverberation effects were truly revolutionized by digital technology. The Axe-Fx II is one of the finest you are likely to have heard: realistic, lush, and dense, with the ability to emulate real spaces, vintage springs, classic digital effects, and more. - Page 121 EFFECTS GUIDE Plate Simulates the sound of a vintage reverb plate characterized by smooth yet bright sound that is especially popular for vocals. The Axe-Fx II Plate simulation captures the "shiny" sound without all the complicated setup. Cathedral Surround your tone with heavenly reverb in this incredible simulation of a grand space.
- Page 122 A Word on “Spillover” The Axe-Fx II Reverb is capable of “spillover,” which means that effect tails ring out when the effect is bypassed or when you change presets. For more on this subject, please see Setting Up Spillover on p. 173.
-
Page 123: Ring Modulator [Rng]
The Axe-Fx II Ring Modulator goes beyond the classic effect in that the modulation frequency can be dynamically controlled by the pitch of the input. Each Axe-Fx II preset can use two fully independent Ring Modulator blocks. Parameters FREQ –... -
Page 124: Rotary Speaker [Rot]
Stevie Ray Vaughan's "Cold Shot" offering an example of the sound of this variant. The Axe-Fx II Rotary Speaker simulator reproduces all these classic sounds and offers more control. Also, it doesn't weigh 300 lbs. or require four guys to move it up a flight of stairs. -
Page 125: Synth [Syn]
The global ADSRs or LFOs may be used to modulate a variety of functions. Each Axe-Fx II preset can use two fully independent Synth blocks. Figure 5-40 –- The Synth Block Parameters... -
Page 126: Tone Matching [Tma]
“local” signal). This process is covered by a separate mini-manual available on our web site. Here is a summary: 1. CREATE a starting point preset on the Axe-Fx II, dialing it in as close as possible to the desired tone. Don’t forget to include the Tone Matching block, positioned where it can hear the reference signal and the output of your starting preset in mono without effects that might impede analysis. -
Page 127: Vocoder [Voc]
EFFECTS GUIDE 5.32 Vocoder [VOC] The Axe-Fx II has a digital recreation of the classic analog vocoder. The vocoder, created by Homer Dudley, was originally designed as means of compressing human speech for transmission over narrow-band carrier channels. In the 1970s, Robert Moog and Wendy Carlos pioneered the use of the Vocoder for musical applications. -
Page 128: Volume/Pan [Vol]
From Jimi Hendrix's “Voodoo Chile” to, well, Stevie Ray Vaughan's “Voodoo Chile,” the wah pedal holds a unique place in the annals of rock history. The Axe-Fx II Wahwah is the embodiment of this legacy but with modern reliability and control and a smooooth feel. - Page 129 EFFECTS GUIDE Each Axe-Fx II preset can use two fully independent Wahwah blocks. Wahwah X/Y Channel Switching Each instance of the WAH block stores two fully independent sets of parameters called X and Y. Selecting between these allows you to change all block settings—instantly—at the touch of a switch or button (excluding current Bypass State and any Modifier assignments).
-
Page 130: Input Noise Gate
EFFECTS GUIDE 5.35 Input Noise Gate Every Axe-Fx II preset includes a “built-in” Noise Gate connected directly to the main inputs. To edit noise gate parameters, press and turn to the INPUT/GTE page. The Noise Gate is always active but can be defeated by turning the control fully counterclockwise. -
Page 131: Output Mixer
EFFECTS GUIDE Normally you will want to leave this on AUTO, but you may also select any of the following values manually. This setting is saved with the preset. 1MΩ 70 kΩ 1MΩ+ Capacitor 70 kΩ + Capacitor ... -
Page 132: Common Mix Parameters
5.37 Common Mix Parameters Almost every block in the Axe-Fx II has a MIX page with parameters to determine how the output of that block contributes to the overall preset signal. On some blocks, these controls appear on other pages. Take a moment to familiarize yourself with these important controls and the differences between their settings. - Page 133 EFFECTS GUIDE MUTE IN –When the block is bypassed, its inputs are disconnected, silencing the dry immediately but allowing existing effect “tails” to ring. New signals are prevented from entering the effect until it is re-engaged. MUTE OUT – When the block is bypassed, its inputs remain connected, but its outputs are muted.
-
Page 134: Global Blocks
With this feature, “links” keep designated blocks in your presets synchronized to their global “masters,” which are stored in a separate and independent memory area of the Axe-Fx II. Changes saved to a Global Block cause linked blocks to update when the presets that contain them are recalled. Links to Global Blocks remain in place until you manually remove them—even if you make and save other changes to the block or the preset! -
Page 135: Saving To A Global Block
Modifier settings are NOT saved with Global Blocks, but blocks that have an X/Y switch (p. 36) will have all parameter settings for BOTH states saved in the Global Block. Global Blocks are included in an Axe-Fx II SYSTEM backup or dump (p. 152). Without further ado, let’s look at a “how-to.”... -
Page 136: Loading And Linking A Global Block
GLOBAL BLOCKS To review: 1) Open the Global Blocks Screen. 2) Save the Global Block with a Link. 3) Save the Preset. If you miss that last step, your changes to the Global Block will be lost the moment you recall a new preset. To edit or update a Global Block: 1) open any linked instance;... -
Page 137: Unlinking Preset And Global Blocks
GLOBAL BLOCKS variant or if you want to share a preset with another Axe-Fx II owner who may not have the same Global Block settings as you. To load a Global Block without linking: First select a block of the appropriate type to insert into the current preset. -
Page 138: Backing Up/Sharing Presets Containing Global Blocks
Backing Up/Sharing Presets Containing Global Blocks As you learned above, presets with links to Global Blocks refer to the “System” area of the Axe-Fx II to obtain their parameter settings. When such presets are backed up or dumped for sharing—whether individually or in a bank—... -
Page 139: Modifiers & Controllers
Some, like the built-in LFOs and Envelope Follower, are “internal” to the Axe-Fx II, while others, like a connected expression pedal or a footswitch which sends a MIDI message, are referred to as “external” controllers. - Page 140 MODIFIERS & CONTROLLERS To Create a Modifier… Select any controllable parameter ( ) and press the button to show the MODIFIER screen. Select a to assign to the current parameter or SOURCE choose NONE to remove an existing modifier. ...
-
Page 141: Transformations
MODIFIERS & CONTROLLERS To start, a WAH block is inserted on the grid. Pressing opens its EDIT menu. The modifier symbol beneath the CONTROL knob indicates that a modifier can be added here. Selecting this parameter and then pressing opens the MODIFIER screen. Selecting EXT1 for the SOURCE attaches this controller to our parameter, and the wah pedal starts working! “Follow the bouncing ball”... -
Page 142: Scale And Offset
MODIFIERS & CONTROLLERS Here are some more examples of the kinds of curves you can create by changing . With START, MID, END, SLOPE a bit of practice, you will learn to achieve desired modifier effects quickly. Example 2: Setting MIN and MAX allow a modifier’s range to be “pegged”... -
Page 143: Damping
MODIFIERS & CONTROLLERS Damping If MODIFIERS add automation or remote-control in “real time,” damping allows these changes to happen in “stretched time.” Normally, parameters change at the same rate as modifier sources. Their values may be re- mapped as we saw above, but changes happen simultaneously. Every little tremble of your foot is reflected by a little tremble in the sound. -
Page 144: Control Sources
The Axe-Fx II contains two global LFOs that can be individually programmed per-preset for use as modifier sources to control various other parameters. Press the front panel button to find the LFO1 and LFO2 menu pages for the current preset. -
Page 145: Adsr 1 & 2
“TRI” wav for rhythmically equal segments.) ADSR 1 & 2 The Axe-Fx II contains two ADSR or “envelope” generators that can be used as control sources. ADSR stands for “attack, decay, sustain, release”—the four time segments that determine how long it takes for the entire envelope to run its course. The graph below illustrates this concept. -
Page 146: Envelope Follower
MODIFIERS & CONTROLLERS RATE – Sets the rate at which the sequence is stepped through. At 1 Hz, each step will last for 1 second. When is shown in parenthesis, it is being controlled by the tempo parameter (below). Set RATE TEMPO “NONE”... -
Page 147: Manual Knobs
Select the desired item, press ENTER, and use the remote controller to send some data to the Axe-Fx II; the source will be set automatically. (This is also a good way to ensure that remote devices are in fact set up and transmitting correctly.) Remember that the channel of incoming CC# messages must match that of the Axe-Fx II under I/O:MIDI. -
Page 148: Global Parameters
Changes made in this area take effect immediately without needing to be STORED. The settings for all global parameters are included in a backup of the Axe-Fx II “SYSTEM” (See p. 152). Default assignments for all system parameters are listed beginning on p. 185. -
Page 149: Output Parameters
(+/- 12 dB) for fine-tuning of the tone across all presets. The outermost bands are shelf type filters. These come in handy when using the Axe-Fx II in different acoustical environments, or when you change amps/speakers with no opportunity to adjust your presets. -
Page 150: Input/Output Parameters
MIDI, and control settings for the Axe-Fx II. I/O settings are global, and changes made in this area take effect immediately without needing to be STORED. The settings for all I/O parameters are included in a backup of the Axe-Fx II “SYSTEM”... - Page 151 OUTPUT 1 MODE This determines how OUTPUT 1 signals will be processed after the output mixer of the grid. This control makes it easy to use the same Axe-Fx II presets in a variety of (STEREO/ stereo and mono performance or recording environments. The decision to use SUM SUM L+R/ L+R or COPY L>R should be based on the source material.
-
Page 152: Midi Parameters
The MIDI page of the I/O menu contains parameters related to MIDI channel, thru, and program changes. PARAMETER Description MIDI CHANNEL Sets the channel on which the Axe-Fx II will receive MIDI messages. OMNI causes 1–16, OMNI the unit to respond to incoming messages on ANY channel. MIDI THRU... - Page 153 MIDI OUT port. The default setting of ALL ensures that a connected MFC-101 Midi Foot Controller will be able to show the Axe-Fx II Tuner on the floor, and that its TEMPO LED will flash in time with the current Axe-Fx II system tempo.
-
Page 154: Control Parameters
MIDI CC number, or choose “PEDAL” for the onboard jack. Set to NONE to disable remote control. The Axe-Fx II also has a “learn” feature that allows it to detect control sources automatically. Select the desired item, press ENTER, use the remote controller to send some data, and the source will be set automatically. - Page 155 +/-20 dB with a single sweep! AMP1 BYP Every block instance in the inventory of the Axe-Fx II except FB SEND, FB RETURN, AMP 2 BYP MIXER, and SHUNT can be set up with a global, dedicated MIDI CC assignment to CAB 1 BYP control its bypass state.
- Page 156 INPUT/OUTPUT PARAMETERS AMP1 XY The X/Y switching feature equips various Axe-Fx II blocks with dual independent AMP 2 XY sets of parameters, making it possible to have two completely different switchable CHO1 XY settings for a single block. Data values from 0–63 will select the Y state, while …...
-
Page 157: Pedal Parameters
The PEDAL page of the I/O menu contains parameters to set up and use an expression pedal or switch through the jack on the rear panel of the Axe-Fx II. Simply connect the device, set its type, and perform a calibration if using a continuous-type expression pedal. -
Page 158: Utilities
To the right of the I/O section, CPU Utilization (CPU%) is shown on its own meter. The total CPU usage must not exceed 98% or the entire system could destabilize. The Axe-Fx II works to prevent this condition from occurring. -
Page 159: Ir Capture
Impulse Responses (IR) for use in the CAB block. To use the utility, you must connect the Axe-Fx II to a power amp and speaker so the test tones may be played, connect a mic and preamp to the input of the Axe-Fx II so the resulting response may be captured, perform the test, name, and save the IR to a USER slot. -
Page 160: Firmware
The PRESET utilities (p. 146) allow dumping individual User Cab IRs to MIDI or USB for backup. Remember also that user cab IRs 1–50 are included with a dump of the Axe-Fx II System (see chapter 13) but user cabs 51–100 are NOT. -
Page 161: Tuner
TUNER 11 Tuner The Axe-Fx II includes a state-of-the art onboard TUNER, an essential tool for the performing or recording musician. It is easy to operate and features high-resolution automatic pitch detection, a calibration control, offsets for modified tuning schemes, and the option to mute audio while tuning. The button shows the tuner. -
Page 162: Tempo
BPM clock that can run autonomously or march to the rhythm of an upstream device outputting MIDI Beat Clock. The tempo is available to control a variety of rates and times in the Axe-Fx II. -
Page 163: Tempo To Use
“PRESET,” the Global Tempo will change to the saved BPM value TEMPO TO USE whenever that preset is loaded. Factory presets in the Axe-Fx II are saved with a tempo of 120 BPM and a TEMPO setting of “PRESET.”... -
Page 164: Backing Up And Restoring
OUT port of the Axe-Fx II. There is no onscreen confirmation when a PRESET dump initiates or completes. DUMP BANK (A, B, or C) TO MIDI dumps a batch of 128 presets to the MIDI OUT port of the Axe-Fx II. Bank A contains presets 0-127, B contains 128-255, and C contains 256-383 (or 1-128, 129-256 and 257-384 when DISPLAY OFFSET (p. -
Page 165: Restoring From A Computer
Create the connection between the Axe-Fx II and computer. This might be via legacy MIDI interface or USB. Transmit the desired SysEx file from the application to the Axe-Fx II. It is not necessary to ready the Axe-Fx in any way. -
Page 166: Machine-To-Machine Transfers
Preset, Bank or System data can be transferred directly from one Axe-Fx II to another. Connect the MIDI OUT of the first Axe-Fx to the MIDI IN of the second and use any of the DUMP TO MIDI entries in the UTILITY menu. -
Page 167: Firmware Updates
FIRMWARE page. Press Transmit the file from the computer to the Axe-Fx II. A progress bar will appear on the Axe-Fx II while it receives the firmware. It will take several minutes to transfer the file. -
Page 168: Troubleshooting
A: See the tutorial on page 171. Q: My Axe-Fx II is behaving erratically or “froze up” while I was using it. What should I do? A: First try a simple reboot. If that doesn’t work, Disconnect MIDI, USB and MFC and hold RECALL while you power on the unit. - Page 169 It is also possible, however, that the preset in question uses Global Blocks that have changed. Q: When I play audio from the computer through the Axe-Fx II, the sound is processed by the effects, and I can’t hear the guitar. What’s wrong? A: Change the MAIN INPUT SELECT from USB to ANALOG (IN 1).
-
Page 170: Appendix
16.1 Table of Amp Types Amp Types in the Axe-Fx II are exacting digital models of the actual amps they are based on. Our approach is commonly referred to as “physical modeling,” where the individual components are modeled and assembled so the virtual model reproduces every aspect of how the real amp sounds and works as a system.MIMIC™... - Page 171 PVH® 6160 A modified version of the PVH 6160 – less fizzy than the original, with a bouncier feel. FAS BASS Created by Fractal Audio Our take on how a bass amp should sound FAS BROOTALZ Created by Fractal Audio Inspired by a savagely popular metal amp.
- Page 172 APPENDIX RECTO1 RED MDRN Boogie™ 2 Ch. Dual Rectifier® Based on the original Mesa Boogie 2-channel Dual Rectifier. Red channel, "Modern" Mode. RECTO2 ORG MDRN Boogie™ 3-Ch. Dual Rectifier® Based on the modern, more aggressive 3-channel Rectifier. Orange channel, Modern mode. RECTO2 ORG VINTG Boogie™...
-
Page 173: Table Of Cab Types
Fractal Audio Systems. The names are used only to illustrate sonic and performance characteristics of the Fractal Amplifier TYPES, which have been created by incredibly detailed analysis of the actual amps that inspired them 1x6 OVAL 45. -
Page 174: Loading User Cab Irs
SETTINGS area. 4. Transmit the file from the computer to the Axe-Fx II. The Axe-Fx II will not show a progress bar, but its MIDI IN LED will flash. If the IR File you transmitted has an embedded name, this will be displayed on the Axe-Fx II in the bottom line of the CAB PG2 menu once the file has been received successfully. -
Page 175: Shortcuts Overview
IN THE I/O CONTROL MENU: Press ENTER to start LEARNING MODE for any function on the page. Move the external controller or send a MIDI CC# to the Axe-Fx II, and the selected function will learn the assignment. IN THE SEQUENCER MENU ... -
Page 176: 60-Second Edit Guide
APPENDIX 16.5 60-Second Edit Guide The following is provided as a quick start-up or reminder about editing on the Axe-Fx II. Figure 16-1 – 60-Second Edit Guide Doc v14.00... -
Page 177: Understanding Preset Size Limits
CPU usage (and provides a specific numerical readout above). If the total CPU load were to exceed 98%, the Axe-Fx II would become unable to do much of anything, so there are safeguards that prevent this condition from occurring. First, you are stopped from inserting any block whose potential CPU usage might cause an overload by the message “INSUFFICIENT CPU”;... -
Page 178: Lfo Waveforms, Duty, And Phase
16.8 LFO Waveforms, Duty, and Phase All of the modulation effects in the Axe-Fx II (Chorus, Flanger, Delay, Phaser, Tremolo, etc.) and the two Global LFOs share a common set of waveform types—“shapes” that define the way they change over time. These are represented below, together with an indication of how the parameter controls wave symmetry. -
Page 179: Tempo Cross Reference
APPENDIX 16.9 Tempo Cross Reference The tables below list the rhythmic values available in every tempo parameter on the Axe-Fx II. The first lists these in the order they appear as you turn the wheel, with their equivalency in BEATS. The heavy border shows a breaking point between common and uncommon tempos. -
Page 180: Mono And Stereo
Guide, beginning on p. 39, covers every block and its processing in detail. 3. Mono Summing vs. Splitting – When you need to run the Axe-Fx II in MONO, several options determine how otherwise stereo signals will be processed: Half-Stereo: By leaving the Axe-Fx II in stereo and connecting only the left main output to a mono input, you get “half-stereo.”... -
Page 181: Mixology
L+R. 4. Mono and Stereo at Once – New for the Axe-Fx II is the ability to operate OUT2 as a summed MONO copy of the stereo OUT1 signal (or vice versa). Select COPY OUT1>OUT2, then choose the output mode for each pair of jacks that best suits your needs. -
Page 182: Humbuster™ Technology
"cheater plugs," expensive isolation transformers, or other noise reduction devices or methods. It is especially helpful when using the Axe-Fx II with a device like an amp head, which can both add and amplify ground hum, but it provides similar benefits when connecting to the 1/4"... -
Page 183: Setting Up A Wah Pedal
4. Assign the External Controller to the Wah parameter. Here are the steps in greater detail: 1) Connect an expression pedal to the onboard pedal jack of the Axe-Fx II. Expression pedals use Tip-Ring- Sleeve cables and typically have a linear resistance taper. -
Page 184: Using An Expression Pedal On An Mfc-101
3) Since Expression Pedal #2 on the MFC-101 is pre-configured to send MIDI CC# 16, and MIDI CC#16 is pre- configured to control EXTERNAL 1 on the Axe-Fx II, no special settings are required in the I/O menu for this tutorial. -
Page 185: Setting Up Spillover
APPENDIX 16.14 Setting Up Spillover Spillover allows delay and reverb tails to ring out when an effect is bypassed or when you change presets. This method details how to set up spillover when using different presets. Firmware 9.0 added SCENES capability, which makes it easier to get perfect spillover within a single preset as detailed in the first section below. -
Page 186: Using Send And Return
LEVEL At left, the significant columns of this preset are shown as they would appear on the display of the Axe-Fx II. Notice that on the Axe-Fx II the connector from SEND to RETURN is not visible! Countless variations of Send/Return loop presets are possible when you use different effects, vary their order, or enter and tap the loop in different places. -
Page 187: Extending The Length Of Effect Chains
MFC-101. In the example below, three scenes of an Axe-Fx II preset are shown. AMP and CAB remain ON in all three scenes. In Scene 1 (“S1,” top) DELAY and REVERB are engaged. In Scene 2 (mid), DELAY is switched off, while COMPRESSOR... - Page 188 APPENDIX and PHASER are simultaneously switched ON. In Scene 3 (bottom), COMPRESSOR, DRIVE, CHORUS, MULTITAP DELAY and REVERB are on. X-Y states and preset MAIN output level can also be set differently in each scene. Figure 16-4 - Block Bypass Changes Across Three Scenes Doc v14.00...
-
Page 189: Selecting Scenes
APPENDIX Selecting Scenes The current scene is shown on RECALL:PRESET screen, and on all pages of the LAYOUT menu. Figure 16-5 - "Scene 1" shown on the RECALL:PRESET screen Figure 16-6 "Scene 1" shown on the LAYOUT:EDIT (grid) screen. To select a scene, turn the “A” QUICK CONTROL knob on the front panel of the Axe-Fx. Scenes can also be selected via MIDI. -
Page 190: Spillover In Scenes
Program Change to Scene Mapping… The Axe-Fx II MIDI Program Change Map (See the Axe-Fx II Owner’s Manual, Section 9.3) has been updated so that SCENE as well as PRESET can be mapped for each incoming program change message. Ignore Redundant PC (under I/O: MIDI) must be ON for seamless scene changes via PC. -
Page 191: Scene Features
It is possible to directly assign any scene (SCENE 1, 2, 3 etc.) or to select “SCENE INCR” or “SCENE DECR” as the function for any Axe-Fx Mode IA switches. Changing scenes (whether on the Axe-Fx II front panel or remotely) also updates MFC-101 LEDs for all Axe-Fx Mode IA Switches. -
Page 192: Modifier Power
This list used to appear at the end of the MODIFIERS chapter. It was moved here to make space there for updated content. Here is a list of ideas for the MODIFIER feature of the Axe-Fx II: Eliminate conspicuous chorus “pulsing” with subtle RATE modification. Try an LFO or Envelope. - Page 193 Feedback is also sometimes known in the effects world as “regeneration” and, less aptly, “resonance.” Four Cable Method (4CM): A rig design where the Axe-Fx II is used both “in front of” and inside the effects loop of a tube amp. See p.
- Page 194 Latency: In terms of effect processors, latency is an unwanted delay between what you play and what you hear. The Axe-Fx II latency is so low that it is equivalent to standing just a few feet away from a tube amp.
- Page 195 SysEx: Short for System Exclusive. A type of MIDI data that can be understood only by the particular make and model of MIDI device that created it. On the Axe-Fx II, it is used for presets, banks, system backups, and User Cab IR files, and to allow real-time control of the unit via a connected MFC-101 or computer running Axe-Edit (q.v.).
-
Page 196: Axe-Fx Ii Bank & Preset Numbers Table
16.19 Axe-Fx II Bank & Preset Numbers Table The following table shows the BANK and PROGRAM CHANGE commands needed to recall an Axe-Fx II preset via MIDI. Bank select commands persist until another valid bank select is received or the unit is rebooted. Remember that DISPLAY OFFSET (p. -
Page 197: Factory Default Settings
APPENDIX 16.20 Factory Default Settings GLOBAL CONFIG Modeling Version NEWEST Power Amp Modeling: Cabinet Modeling: Spillover: BOTH Global Reverb Mix (offset): Global Effects Mix (offset): Global Noisegate Threshold Offset Global Amp Gain: IR Capture Mode ULTRA-RES GLOBAL OUT 1 All bands flat (0.00) GAIN: Flat (0.00) GLOBAL OUT 2... - Page 198 APPENDIX I/O CONTROL Default CC assignments appear in the table below: Function Function Function Input Volume Compressor 1 Bypass Resonator 1 Bypass Out 1 Volume Compressor 2 Bypass Resonator 2 Bypass Out 2 Volume Crossover 1 Bypass Reverb 1 Bypass Bypass Crossover 2 Bypass Reverb 2 Bypass...
-
Page 199: Specifications
SPECIFICATIONS 17 Specifications FRONT PANEL INPUT Connector: 1/4” phone jack, unbalanced. Impedance: 1 MegaOhm (less if Input Impedance is active) Max. Input Level: +16 dBu (conditioned for guitar use) REAR INPUTS Connector: 1/4” phone jack, balanced. Impedance: 1 MegaOhm Max. Input Level: +20 dBu A/D CONVERSION Bit Depth:... -
Page 200: Midi Implementation Chart
BANK select messages are persisted until a subsequent valid Bank Select Program Change is received. Selecting a preset via the Axe-Fx II front panel will also transmit the corresponding bank select and program change number messages Fractal Audio The list of parameters that can be controlled/edited via SysEx is listed in the Owner’s Manual under Factory Default Settings. -
Page 201: Warranty
This warranty only applies only to products sold and used in the USA and Canada. Fractal Audio Systems shall not be liable for damages or loss resulting from the negligent or intentional acts of the shipper or its contracted affiliates. - Page 202 Offering for sale any Impulse Response data (e.g. “Tone Match Export/Save/Dump”, “User Cab Export/Save/Dump”) created, converted or modified using the Axe-Fx II requires a commercial use license. Recording studios, consultants, and other commercial entities may use these features in conjunction with work performed for their commercial customers, but the resulting data files created may not be offered for sale without a commercial license.
- Page 203 NOTES Doc v14.00...
Need help?
Do you have a question about the Axe-Fx II and is the answer not in the manual?
Questions and answers