Table of Contents
Advertisement
Advertisement
Table of Contents

Related Manuals for Quantum Rehab Q6 Edge HD

Summary of Contents for Quantum Rehab Q6 Edge HD
- Page 2 S A F E T Y G U I D E L I N E S WARNING! A Quantum Rehab Provider or a qualified technician must perform the initial setup of this power chair and must perform all of the procedures in this manual.
- Page 3 C O N T E N T S INTRODUCTION ..........................4 SAFETY ..............................5 III. YOUR POWER CHAIR ........................7 ASSEMBLY ............................11 COMFORT ADJUSTMENTS ......................15 BATTERIES AND CHARGING ..................... 21 VII. CARE AND MAINTENANCE ......................25 LANGUAGE USAGE This owner’s manual is intended for distribution in all English-speaking countries where Pride Power Chairs are sold.
- Page 4 I . I N T R O D U C T I O N SAFETY WELCOME to Quantum Rehab, a division of Pride Mobility Products (Pride). The power chair you have pur- chased combines state-of-the-art components with safety, comfort, and styling in mind. We are confident that these design features will provide you with the conveniences you expect during your daily activities.
- Page 5 I I . S A F E T Y PRODUCT SAFETY SYMBOLS The symbols below are used on the power chair to identify warnings, mandatory actions, and prohibited actions. It is very important for you to read and understand them completely. NOTE: There are more warnings identified and explained in the Consumer Safety Guide that is included with your power chair.
-
Page 6: General Guidelines
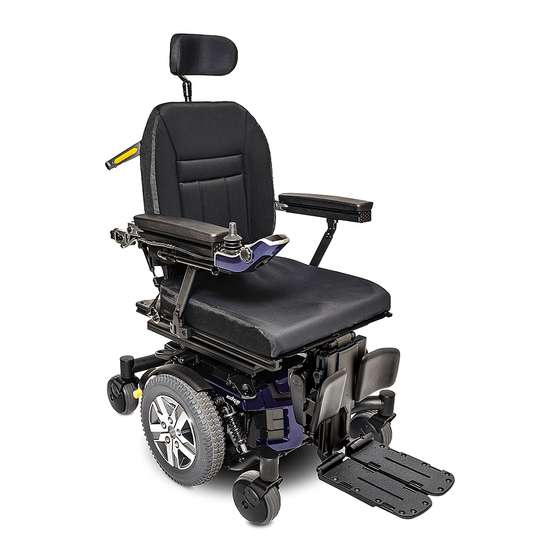
The contents of this manual are based on the expectation that a mobility device expert has properly fitted the power chair to the user and has assisted the prescribing healthcare professional and/or the Quantum Rehab Pro- vider in the instruction process for the use of the product. - Page 7 I I I . Y O U R P O W E R C H A I R THE Q6 SERIES POWER CHAIR Your power chair has two main assemblies: the seat assembly and the power base assembly. See figure 1. Typically, the seat assembly includes the armrests, seatback, and seat base.
- Page 8 I I I . Y O U R P O W E R C H A I R TRAPEZE BARS REAR SHROUD FRONT COVER MANUAL FREEWHEEL LEVER Figure 2. The Q6 Series Power Base Electrical Components The electrical components consist of the controller assembly, the batteries, and the motors. The batteries, motors, and controller power module (if equipped) are located on the power base assembly.
- Page 9 If the circuit trips, allow your power chair to “rest” for approximately one minute. The circuit breaker will reset itself. Turn on the controller and continue normal operation. If the main circuit breaker continues to trip repeatedly, contact your Quantum Rehab Provider. CONTROLLER POWER MODULE...
- Page 10 To clear this code, turn off the controller and place the power chair in drive mode. Then, turn on the controller. The error message should be cleared. If it is not, contact your Quantum Rehab Provider. NOTE: The power chair will be significantly easier to push with the power off.
-
Page 11: Initial Assembly
Nylon insert lock nuts should not be reused as it may cause damage to the nylon insert, resulting in a less secure fit. Replacement nylon insert lock nuts are available at local hardware stores or through your Quantum Rehab Provider. ARMREST ANGLE... - Page 12 I V . A S S E M B L Y Seat Installation SEAT LATCH SAFETY It may be necessary to install the seat either prior to initial operation or after transporting your power chair. Contour seats are attached to the power base with the Universal Mounting System (UMS).
- Page 13 See figure 11. Figure 10. Transit Securement Brackets MANDATORY! The power chair should used indicated manufacturer’s instructions. If you have any questions about the proper use of your power chair, contact your Quantum Rehab Provider. Q6 Series...
- Page 14 I V . A S S E M B L Y FRONT OF VEHICLE Figure 11. Unoccupied Transit System Securement Points Q6 Series...
-
Page 15: Comfort Adjustments
WARNING! The center of gravity of your power chair was factory set to a position that meets the needs of the demographic majority of users. Your Quantum Rehab Provider has evaluated your power chair and made any necessary adjustments to suit your specific requirements. Do not change your seating configuration without first contacting Pride Mobility Products or your Quantum Rehab Provider. - Page 16 V . C O M F O R T A D J U S T M E N T S 7. Remove the hardware that attaches the trapeze bars to the seat interface weldments. See figure 12. 8. Move the trapeze bars up or down to the desired height.
- Page 17 V . C O M F O R T A D J U S T M E N T S Seatback Angle Adjustment If your power chair is equipped with an adjustable seat- back, you can adjust it to four (4) different angles: 90°, JAM NUT 102°, 105°, or 107°.
- Page 18 V . C O M F O R T A D J U S T M E N T S Controller Position You can move the controller in toward or out away from the armrest, or change the position of the control- ler for either left-hand or right-hand use.
- Page 19 V . C O M F O R T A D J U S T M E N T S Foot Platform Height Adjustment The foot platform height is easily adjusted to several different heights. To raise or lower the foot platform: 1.
- Page 20 MANDATORY! Inspect the positioning belt for loose parts or damage, including tears, worn spots, bent hardware, damaged latch mechanisms, dirt or debris, before each use of the power chair. If you discover a problem, contact your Quantum Rehab Provider for maintenance and repair.
-
Page 21: Batteries And Charging
Wear goggles and gloves when handling batteries and wash hands after handling. WARNING! Contact your Quantum Rehab Provider if you have any questions regarding the batteries in your power chair. PROHIBITED! Always use two batteries of the exact same type, chemistry, and amp- hour (Ah) capacity. - Page 22 We do not recommend using other types of chargers (e.g., an automotive battery charger). NOTE: Your power chair’s charger will not operate after the batteries have been discharged to nearly zero voltage. If this happens, call your Quantum Rehab Provider for assistance. How often must I charge the batteries? Many factors come into play when deciding how often to charge the batteries.
- Page 23 V I . B A T T E R I E S A N D C H A R G I N G Daily Use If you use your power chair on a daily basis, charge the batteries as soon as you are finished using your power chair.
- Page 24 V I . B A T T E R I E S A N D C H A R G I N G How can I ensure maximum battery life? A fully charged deep-cycle battery will provide reliable performance and extended battery life. Keep your power chair’s batteries fully charged whenever possible.
-
Page 25: Care And Maintenance
3. Check the joystick operation and the brakes before using your power chair again. 4. If any inconsistencies are found, take your power chair to a Quantum Rehab Provider. Power chairs that are frequently exposed to sources of water, such as incontinence, should be inspected often for corrosion and electronic components may need to be replaced frequently. - Page 26 Check the rubber boot around the base of the joystick for damage. Visu- ally inspect the boot. Do not handle or try to repair it. See your Quantum Rehab Provider if there is a problem.
- Page 27 Your power chair must be disposed of according to applicable local and national statutory regulations. Contact your local waste disposal agency or Quantum Rehab Provider for information on proper disposal of power chair packaging, metal frame components, plastic components, electronics, batteries, neoprene, silicone, and polyurethane materials.
- Page 28 WARNING! The batteries in your power chair should only be serviced or replaced by an authorized Quantum Rehab Provider or a qualified technician. WARNING! Do not replace batteries when seat is occupied. WARNING! Power chair batteries are heavy. See specifications table. If you are unable to lift that much weight, be sure to get help.
- Page 29 V I I . C A R E A N D M A I N T E N A N C E To replace the batteries: 1. Turn off the power to the controller. 2. Make sure that the power chair is in drive mode. See III. “Your Power Chair.” 3.
- Page 30 When to See Your Quantum Rehab Provider for Service The following symptoms could indicate a serious problem with your power chair. If necessary, contact your Quantum Rehab Provider. When calling, have the model number, serial number, nature of the problem, and the error code if available.
Need help?
Do you have a question about the Q6 Edge HD and is the answer not in the manual?
Questions and answers
My gpp edge power chair won't move, battery fully charged
Can put the chair in drive mode battery is fully charged,joystick light won't stay on