
Related Manuals for Roberts MP-SOUND 43


Summary of Contents for Roberts MP-SOUND 43
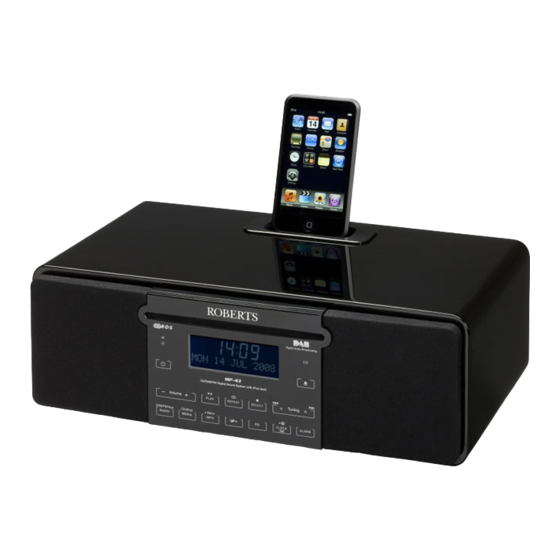
- Page 1 CD/DAB+/FM Digital Sound System with dock for iPod Please read this manual before use...
- Page 2 iPod is a trademark of Apple Inc., registered in the U.S. and other countries. "Made for iPod" means that an electrical accessory has been designed to connect specifi cally to iPod and has been certifi ed by the developer to meet Apple performance standards. Apple is not responsible for the operation of the device or its compliance with safety and regulatory standards.
-
Page 3: Table Of Contents
Contents About this instruction manual .............2 CD track programming .............27 Introduction ...................3 MP3 / WMA CD mode ..............28 MP3 / WMA fi le and folder selection ........29-30 MP-43 Sound System features ..........3 Controls and connections ............4-5 iPod Docking ................31 Remote control ................6-7 Navigating your iPod ..............32 Playing a fi... -
Page 4: About This Instruction Manual
About this instruction manual This instruction manual is split into sections for each of the different operating (page 3) Introduction modes of your Roberts MP-43 Digital Sound System. The introduction describes the features and controls of the product. (page 10) DAB+ Radio... -
Page 5: Introduction
Introduction MP-43 Sound System features The Roberts MP-43 Digital Sound System provides the following range of features in an attractive compact unit:- ● Easy-to-read 2 line text display with large clock display. ● Radio for DAB+ and FM (with RDS) broadcasts. -
Page 6: Controls And Connections
Controls and connections (Front) 1. Infra-red sensor 8. Equaliser button 15. Tuning down / Rewind button 2. On / Standby button 9. Sleep / Clock set button 16. Select / Stop button 3. Radio button 10. Alarm button 17. Repeat button 4. -
Page 7: Controls And Connections
Introduction Controls and connections (Rear) 20. Telescopic aerial 23. Auxiliary input socket 21. Headphone socket 24. Mains input socket 22. Line output socket If you need any further advice, please call our Technical Helpline on :- 1300 556 816... -
Page 8: Remote Control
Note: The button marked Record is not used with the MP-43. It is intended for use with another Roberts product. Button 8, marked CD/iPod/SD/USB, only provides access to CD and iPod functionality. The SD/USB markings are for another Roberts product. - Page 9 Introduction Remote control battery replacement 1. Remove the battery cover on the rear of your remote control by applying pressure to the catch in the direction shown by the arrow in the diagram, and then lifting the cover. 2. Insert 2 x AAA size batteries into the compartment. Make sure the (+) and the (-) ends of the batteries are positioned as shown inside the compartment.
-
Page 10: Using The Touch Panel
Using the touch panel Display icons The MP-43 sound system has a stylish touch panel instead of conventional buttons. To operate the buttons simply touch the button area with the tip of a fi nger for about half a second. The clock set and system menu functions marked with a dot ( ) are accessed by means of a long touch (2-3 seconds) on the appropriate button until the display on the sound system shows that the command has been accepted. -
Page 11: Using The Sound System For The Fi Rst Time
Introduction Using the sound system for the fi rst time 1. Place your sound system on a fl at surface. 2. Fully extend the telescopic aerial. The aerial should be fully extended and positioned vertically for optimum reception. 3. Plug the mains lead into the mains socket located on the back of your sound system ensuring that the plug is pushed fully into the socket. -
Page 12: Dab+ Radio
Operating your sound system - DAB+ 1. Fully extend the telescopic aerial. If your sound system is in standby mode, press the On / Standby button to switch it on. 2. Press and release the Radio button to select DAB+ mode. The display will show "DAB"... -
Page 13: Selecting A Station - Dab
DAB+ Radio Selecting a station - DAB+ 1. When the unit is in DAB+ mode the upper line of the text display normally shows the name of the station currently tuned. 2. Repeatedly press the Tuning Up or Down buttons to scroll through the list of available stations on the lower line of the text display. -
Page 14: Display Modes - Dab
Display modes - DAB+ When in DAB+ mode your radio has a range of display options. 1. Press the Info button to cycle through the various modes. a. Scrolling text Displays scrolling text messages such as artist/track name, phone in number, etc. -
Page 15: Finding New Stations - Dab
DAB+ Radio Display modes - DAB+ cont. f. Signal error Displays the signal error for the station being listened to. The lower the number the better the signal received. g. Bit rate/audio type Displays the digital bit rate and audio type for the current DAB+ radio station. -
Page 16: Manual Tuning - Dab
Manual Tuning - DAB+ Manual tuning allows you to tune directly to the various DAB+ channels. 1. Press and release the Menu button so that the display shows "Station list". 2. Press the Tuning Up or Down buttons until "Manual tune" appears on the display. -
Page 17: Station Order Setup - Dab
DAB+ Radio Station order setup - DAB+ Your radio has 3 station order settings from which you can choose. The station order settings are, alphanumeric, ensemble and valid. Note: The default station order setting is alphanumeric. 1. Press and release the Menu button so that "Station list" appears on the display. -
Page 18: Station Order Setup - Dab
Station order setup - DAB+ - cont. Ensemble Press the Tuning Up or Down buttons until "Ensemble" appears on the display. This mode organises the station list by DAB+ multiplex. 4. Press and release the Select button to select the station order setting required. -
Page 19: Software Version - Dab
DAB+ Radio Software version - DAB+ only The software version display cannot be altered and is provided for reference only. 1. To view the DAB+ software version installed in your sound system, press and release the Menu button so that "Station list" appears on display. -
Page 20: Dynamic Range Control - Dab
Dynamic Range Control (DRC) settings - DAB+ only DRC can make quieter sounds easier to hear when your radio is used in a noisy environment. This function is only for the DAB+ waveband. 1. Press the On / Standby button to switch on your sound system. 2. -
Page 21: Fm Radio
FM Radio Operating your radio - Search tuning FM 1. Fully extend the telescopic aerial. 2. Press the On / Standby button to switch on your sound system. 3. Press and release the Radio button until the FM band is selected. 4. -
Page 22: Manual Tuning - Fm
Manual tuning - FM 1. Press the On / Standby button to switch on your sound system. 2. Press and release the Radio button to select the FM band and fully extend the Telescopic aerial for optimal FM reception. 3. Press the Tuning Up or Down buttons to tune to a station. The frequency will change in steps of 50kHz. -
Page 23: Display Modes - Fm
FM Radio Display modes - FM Your sound system has four display options for FM radio mode. In addition to the audio content of the programme, data is broadcast using the Radio Data System (RDS). RDS is a system in which inaudible digital information is added to the normal FM radio transmission. -
Page 24: Presetting Stations
Presetting stations You may store your preferred DAB+ and FM radio stations to the preset station memories (1 to 10). The procedure for setting presets and using them to tune stations is the same for FM and DAB+ modes, and is described below. -
Page 25: Cd / Mp3 / Wma
CD / MP3 / WMA Compact discs Use only Digital Audio CDs which have the symbol. Use only full size CDs (12cm diameter) with the sound system. Mini CDs (8cm diameter) are not compatible with the player and may jam the CD mechanism. -
Page 26: Playing A Cd
Inserting a CD Ensure the CD player is empty before inserting a disc. If there is a disc in the player then the CD indicator will be lit. If you cannot insert a disc, press the CD Eject button to remove the CD currently in the player. 1. - Page 27 CD / MP3 / WMA 4. To stop play, press the Stop button. The total number of CD tracks and the stop symbol ( ) will be displayed. If you put the unit into standby mode without pressing the Stop button, then the next time the unit is switched on it will return to the previously played track.
-
Page 28: Cd Search And Repeat
Search function 1. While the CD is playing, press and hold the Fast-forward or Rewind buttons. Release the button when the desired part of the track is reached. Repeat a single track 2. While the CD is playing, press the Repeat button until the repeat single track symbol ( ) appears in the display. -
Page 29: Cd Track Programming
CD / MP3 / WMA CD track programming In addition to playing of complete CDs, selected tracks, or a random selection, the CD player allows you to programme a sequence of up to 20 tracks to be played in whatever order you choose. 1. -
Page 30: Mp3 / Wma Cd Mode
MP3 / WMA CD Mode The MP-43 is able to play CD-R and CD-RW discs containing MP3 and WMA fi les. It is assumed in this section that a fi le is equivalent to a CD track. An MP3 / WMA CD may not contain more than 511 fi les and not more than 99 folders. -
Page 31: Mp3 / Wma Fi Le And Folder Selection
CD / MP3 / WMA Playing an MP3 / WMA CD 1. Press the Play / Pause button to start playing from the CD. The display will show the fi rst folder and fi le numbers - "01" and "001". 2. -
Page 32: Search Function
Select a specifi c fi le 1. For fi le numbers 1-9 simply press the corresponding digit button. For fi le numbers ten and above press the required digits using the 10/0 button to enter the digit zero. 3. If the fi le number entered exceeds the number of playable fi les on the CD, then the last fi... -
Page 33: Ipod Docking
iPod Docking iPod docking Your MP-43 sound system has an iPod dock facility which allows you to play digital audio fi les and video soundtracks held on your iPod directly. The MP-43 uses the Universal Dock Connector developed for use with iPods. -
Page 34: Navigating Your Ipod
Navigating your iPod 1. Use the Menu button on the remote control to navigate to higher level menus on your iPod. 2. Use the Folder Up or Down buttons on the remote control as required to move up and down a menu screen on your iPod. 3. - Page 35 iPod Docking Search function 1. While the iPod is playing, press and hold the Fast-forward or Rewind buttons. 2. Release the button when the desired part of the item is reached. Repeat a single fi le 1. While the iPod is playing, press the Repeat button until the repeat single fi...
-
Page 36: Clock And Alarms
Alarms Your MP-43 sound system has two alarms which can each be set to wake you to DAB+, FM radio, CD, iPod or buzzer alarm. The alarms may be set while the unit is in standby mode or while playing. 1. - Page 37 Clock and Alarms 8. Press the Tuning Up or Down buttons to choose the required alarm mode and then press the Select button to confi rm the setting. Each alarm can be set to any of the following modes: BUZZER - will wake you with a buzzer alarm DAB+ - will wake you with DAB+ radio...
-
Page 38: Cancelling Alarms
Cancelling alarms 1. While an alarm is sounding it can be cancelled by pressing the On / Standby button. 2. To cancel an alarm at any other time, enter the alarm setup menu and set the alarm On/Off option to "Off". See steps 1 - 5 on page 34. Snooze 1. -
Page 39: Setting The Clock Manually
Clock and Alarms Setting the clock manually The MP-43 will automatically set its clock when tuned to a DAB+ radio station or to an FM station which is broadcasting the time via RDS. If the clock cannot be set using DAB+ or FM radio then you will need to set the clock manually before the alarm function can be used. - Page 40 6. Press the Tuning Up or Down buttons until the desired year is set. Keep the button pressed to cause the digits to change more quickly. 7. Press and release the Select button to confi rm the year setting. The month will fl...
-
Page 41: Standby Brightness Control
Clock and Alarms Standby brightness control The brightness of the display when the unit is in standby mode may be adjusted. If you use the unit in the bedroom, you may prefer a lower standby brightness level than the standard setting. 1. -
Page 42: Equaliser Function
Equalizer function The sound on your sound system can be adjusted to suit your personal taste for the material that you are listening to. The MP-43 has six preset equalizer modes. Alternatively, you may set the treble and bass levels to your own preferences. -
Page 43: Audio And Setup
Audio and Setup Bass control 5. Press the Equalizer button to cycle through the modes until "Bass" appears on the upper line of the text display. The current bass setting will be shown on the lower line. 6. To adjust the bass setting press and release the Tuning Up or Down buttons until the desired level is displayed. -
Page 44: Auxiliary Input Socket
Auxiliary input socket A 3.5mm stereo Auxiliary Input socket is provided on the rear of your sound system to permit an audio signal to be fed into the unit from an external audio device such as iPod, MP3 or CD player. 1. -
Page 45: Headphone Socket
Audio and Setup Headphone socket A 3.5mm stereo Headphone Socket is provided on the rear of your sound system for use with headphones. Inserting a plug automatically mutes the internal loudspeakers. IMPORTANT: Excessive sound pressure from earphones and headphones can cause hearing loss. Aerial removal The fi... -
Page 46: Touch Panel Sensitivity Control
Touch panel sensitivity control The sensitivity of the touch panel may be adjusted. The default setting will normally be found to provide satisfactory operation, however, the touch panel system may respond differently depending upon the moisture of the skin. The touch panel sensitivity may be reduced or increased relative to the standard setting. -
Page 47: System Reset
Audio and Setup System reset If your radio fails to operate correctly, or some digits on the display are missing or incomplete carry out the following procedure. 1. Press and hold the Menu button so that the display shows "Set Brightness"... -
Page 48: Information
Cautions Do not allow this sound system to be exposed to water, steam or sand. • The sound system shall not be exposed to dripping or splashing and Do not leave your sound system where excessive heat could cause that no objects fi lled with liquids, such as vases, shall be placed on damage. -
Page 49: Notes
Information Notes ................................................................................................................................................................................................................................................................................................................................................................................................................................................................................................................................................................................................................................................................................................................................................................................................................................................................If you need any further advice, please call our Technical Helpline on :- 1300 556 816... - Page 50 Notes ................................................................................................................................................................................................................................................................................................................................................................................................................................................................................................................................................................................................................................................................................................................................................................................................................................................................
-
Page 51: Warranty
Company’s service department for attention. In the event that it is not possible to return the radio to the Roberts' dealer from whom it was purchased, please contact Glen Dimplex Australia Pty Ltd at the address shown overleaf. - Page 52 Glen Dimplex Australia Pty Ltd Unit 2, 205 Abbotts Road Dandenong South Victoria 3175 Australia Ph: 1300 556 816 Fax: 1800 058 900 Website: http://www.robertsradio.com.au Issue 3 AUS © 2009 Roberts Radio Limited...
Need help?
Do you have a question about the MP-SOUND 43 and is the answer not in the manual?
Questions and answers