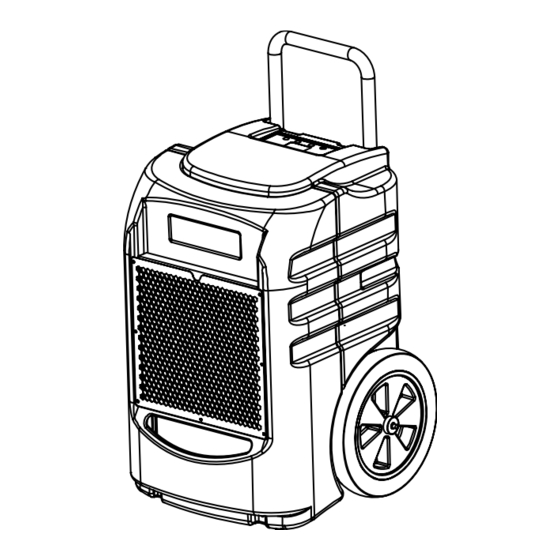
Summary of Contents for Bluedri BD-LGR75C
- Page 1 LGR Dehumidifier Owner’s Manual 115v Model: BD-LGR75C Please read this owner’s manual before operating and keep safe for future reference...
-
Page 2: General Information
GENERAL INFORMATION Thank you for choosing our LGR Dehumidifier This Owner’s Manual will provide you with valuable information necessary for the proper care and maintenance of your new dehumidifier. Please take a few moments to read the instructions thoroughly and familiarize yourself with all the features and operation of this dehumidifier. -
Page 3: Important Instructions
IMPORTANT INSTRUCTIONS When using any electrical appliance, Basic safety precautions should always be followed. WARNING - to reduce the risk of fire, electrical shock or injury to persons or property: Always operate the product from a power source of the same voltage, frequency and rating as indicated on the product identification plate. - Page 4 IMPORTANT INSTRUCTIONS Do not place objects on the product or allow objects to obstruct the inlet or outlet openings, or operate in close proximity to walls or curtains, etc. The use of attachments or accessories not recommended or sold by the product distributor may cause injury to persons or damage to property.
-
Page 5: Product Identification
PRODUCT IDENTIFICATION FIG.A: FRONT Control panel Domed decal Filters Air intake metal grill Water pipe Storage location Water pipe Water pipe Connector (Female) Pull rod FIG.B: REAR Air outlet Power cord fixed support Rating label Power cord Wheel Water pipe connector (male) - 4 -... -
Page 6: Setting Up Instructions
SETTING UP INSTRUCTIONS SETTING UP THE DEHUMIDIFIER WARNING No not obstruct the air intake or air outlet IMPORTANT Place dehumidifier in the upright position. When transporting a dehumidifier to site, allow the dehumidifier to stand for 30 minutes before switching ON. - Page 7 SETTING UP INSTRUCTIONS Illustration of correct positioning for best performance ENSURE PROPER ATTACH DUCTWORK: This dehumidifier can attach diameter 0.558 foot air outlet ductwork to satisfy the needs of different places. To avoid airflow restrictions , Do not attach exceed a 16.5 foot length ductwork, the ductwork ensure do not winding .
- Page 8 SETTING UP INSTRUCTIONS ENSURE PROPER DRAINAGE: This dehumidifier contains a built-in pump that connects to a drainage hose which is stored in the back of the unit. Uncoil the entire hose to ensure that there are no kinks or restrictions and place the unattached end into a drain or run to the outdoors.
-
Page 9: Control Panel
CONTROL PANEL Digital Control Panel ON/OFF: Press once to turn the unit ON or OFF. PURGE: Press the “PURGE” key to empty water from the pump reservoir. During normal operation the pump purges automatically when the reservoir is full. Use “PURGE”... - Page 10 CONTROL PANEL The LCD displays symbols : Dehumidify ON. : Defrost ON. : Draining. : Fan start up : Setting humidity. : Ambient humidity. : Total running hours. : Ambient temperature. - 9 -...
-
Page 11: Plug In Electrical Cord
OPEARTION Plug in electrical cord This dehumidifier must be plugged into a grounded polarized 115 VAC/60Hz outlet rated at least 15 amps. Make sure the drain hose is connected and routed to a safe location. Plug in electrical cord, The screen will display standby: ... -
Page 12: Humidity Setting
OPEARTION IMPORTANT: To avoid water spillage. Do not move the dehumidifier for at least three minutes after turning the power off. Before transporting, be sure to remove the external drain hose, drain it carefully, and return it to the pocket provided on the back of the unit. - Page 13 OPEARTION 2. When the adjust humidity is below 25% . the “CO” will be displayed. The unit will entry to continuous dehumidify mode . Total running hours display and job hours display setting 1. Press the function key twice, the cursor turns to the total running hours , The total running hours the cursor flashing.
- Page 14 OPEARTION Centigrade and Fahrenheit setting 1. Press the function key thrice, the cursor turns to the centigrade , The centigrade the cursor flashing. 2. Press the regulate key to switch to fahrenheit. 3. Wait 3 seconds after switch to fahrenheit is completed, the unit will automatic recognition of numerical.
- Page 15 MAINTEANCE Cleaning Or Replaced Filter NOTE: The working performance of the dehumidifier will be greatly reduced if the filters are clogged. Check filter weekly. Cleaning or replaced filter if get clogged. Ensure the dehumidifier is turned OFF and plug is removed from the power outlet before performing maintenance.
-
Page 16: Storing The Unit
STORING THE UNIT Storing the unit Follow the guidelines below when storing the unit: Prior to storing the unit, clean filters and drain water from the unit. 2. Wind the power cord to the back of the unit. 3. Put the water pipe to the water pipe storage location for front of the unit. -
Page 17: Troubleshooting
TROUBLE SHOOTING FAULT CAUSE SOLUTION Unit does not No power to machine. Plug in unit; check power at operate Unit not switched on. outlet and at base of unit. Switch unit on. Fan not Obstructed air Remove obstruction. turning outlet and fan. Unit 1. -
Page 18: Fault Codes
TROUBLE SHOOTING Fault codes The table below shows error messages that the system may report. If the display shows an “ER” message, first unplug the unit and then plug it back in. This may reset the electronics and no further action may be necessary. If an error message reappears, use the table below to help identify the problem. -
Page 19: Specification
SPECIFICATION Dehumidifying Capacity 75pints/day (AHAM Conditions-80°F/ 60% RH): Dehumidifying Capacity (Saturation Conditions - 90°F/ 145pints/day 90%RH): 115V/60Hz, Power Supply: 625W/5.5A Refrigerant: R410A/26.5oz(750g) Working Temperature: 41°F~95°F Controls Electronic Touchpad L-259CFM Process Air H-300CFM Unit Size(inch ): 19.7x17.9x28 Packing Size(inch): 22.8x18.9x28.5 Net/Gross Weight( lbs): 84/90 - 18 -...


Need help?
Do you have a question about the BD-LGR75C and is the answer not in the manual?
Questions and answers