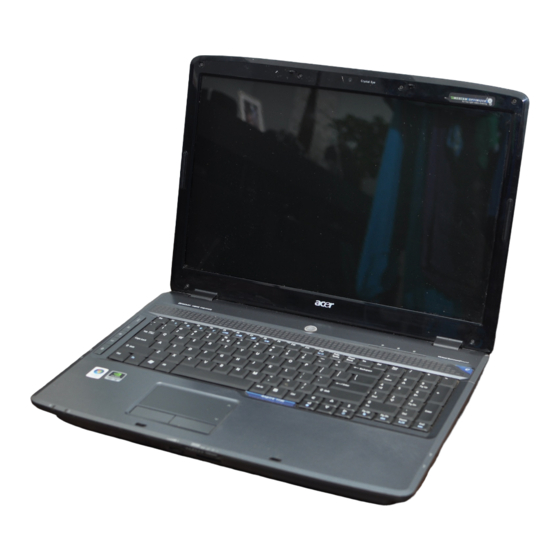
Acer Aspire 7730 Series Service Manual

Acer Aspire 7730 Series Service Manual

Hide thumbs Also See for Aspire 7730 Series:
Table of Contents

Advertisement

Aspire 7730/7730G Series
Service Guide
Service guide files and updates are available
on the ACER/CSD web; for more information,
please refer to
http://csd.acer.com.tw
PRINTED IN TAIWAN

Advertisement

Table of Contents
loading

Summary of Contents for Acer Aspire 7730 Series

  • Page 1 Aspire 7730/7730G Series Service Guide Service guide files and updates are available on the ACER/CSD web; for more information, please refer to http://csd.acer.com.tw PRINTED IN TAIWAN...
  • Page 2: Revision History

    Revision History Please refer to the table below for the updates made on Aspire 7730/7730G Series service guide. Date Chapter Updates...
  • Page 3 Copyright Copyright © 2008 by Acer Incorporated. All rights reserved. No part of this publication may be reproduced, transmitted, transcribed, stored in a retrieval system, or translated into any language or computer language, in any form or by any means, electronic, mechanical, magnetic, optical, chemical, manual or otherwise, without the prior written permission of Acer Incorporated.
  • Page 4 Conventions The following conventions are used in this manual: SCREEN MESSAGES Denotes actual messages that appear on screen. NOTE Gives bits and pieces of additional information related to the current topic. WARNING Alerts you to any damage that might result from doing or not doing specific actions.
  • Page 5 DIFFERENT part number code to those given in the FRU list of this printed Service Guide. You MUST use the list provided by your regional Acer office to order FRU parts for repair and service of customer machines.
  • Page 7: Table Of Contents

    Using the System Utilities ..........16 Acer GridVista (dual-display compatible) ......16 Launch Manager .
  • Page 8 Table of Contents Removing the Optical Drive Module ........60 Main Unit Disassembly Process .
  • Page 9 Table of Contents Replacing the MXM Module ........123 Replacing the DIMM Modules .
  • Page 10 Table of Contents Display Port Test ..........194 USB Port Test .
  • Page 11: System Specifications

    5-in-1 card reader • Audio Dolby-certified surround sound system with two built-in stereo speakers and one subwoofer • supporting low-frequency effects S/PDIF (Sony/Philips Digital Interface) support for digital speakers • Acer PureZone technology with two built-in stereo microphones • Chapter 1...
  • Page 12: Dimensions And Weight

    • Touch Pad pointing device • Empowering Key • Easy-launch buttons: WLAN, Internet, email, Bluetooth, Acer Arcade™ • Acer MediaTouch keys: play/pause, stop, previous, next and record keys • Volume wheel • Acer Media Center remote control* • I/O interface Acer EasyPort IV connector •...
  • Page 13 3 USB 2.0 ports • HDMI™ port with HDCP support • Consumer infrared (CIR) port • External display (VGA) port • Headphones/speaker/line-out port with S/PDIF support • Microphone-in jack • Line-in jack • Ethernet (RJ-45) port • Modem (RJ-11) port •...
  • Page 14: System Block Diagram

    System Block Diagram Chapter 1...
  • Page 15: Your Acer Notebook Tour

    Your Acer Notebook tour After knowing your computer features, let us show you around your new computer. Front View Icon Item Description Acer PureZone Two internal stereo microphones for sound recording. Acer Crystal Eye Web camera for video communication. Display screen Also called Liquid-Crystal Display (LCD), displays computer output.
  • Page 16: Closed Front View

    Keyboard For entering data into your computer. Speakers Left and right speakers deliver stereo audio output. Acer MediaTouch For use with Acer Arcade and other media keys playing programs. Power button Turns the computer on and off. Closed Front View...
  • Page 17: Left View

    Left View Icon Item Description Acer EasyPort IV Connects to Acer EasyPort IV. connector Ethernet (RJ-45) Connects to an Ethernet 10/100/1000-based port network. External display Connects to a display device (VGA) port (e.g. external monitor, LCD projector). HDMI Connects to a television or display device with HDMI HDMI input.
  • Page 18: Right View

    Right View Icon Item Description Kensington lock Connects to a Kensington-compatible computer slot security lock. Optical drive Internal optical drive; accepts CDs or DVDs. Optical disk access Lights up when the optical drive is active. indicator Optical drive eject Ejects the optical disk from the drive. button Emergency eject Ejects the optical drive tray when the computer is...
  • Page 19: Bottom View

    Bottom View Icon Item Description Battery bay Houses the computer's battery pack. Battery release Releases the battery for removal. latch Memory Houses the computer's main memory. compartment Hard disk bay Houses the computer's hard disk (secured with screws). Battery lock Locks the battery in position.
  • Page 20: Indicators

    WLAN, Internet, email, Bluetooth, Arcade and Acer Empowering Technology. The mail and Web browser buttons are pre-set to email and Internet programs, but can be reset by users. To set the Web browser, mail and programmable buttons, run the Acer Launch Manager. Icon...
  • Page 21: Touch Pad Basics (With Fingerprint Reader)

    Touch Pad Basics (with fingerprint reader) The following items show you how to use the Touch Pad with Acer Bio-Protection fingerprint reader: Move your finger across the Touch Pad (2) to move the cursor. • Press the left (1) and right (4) buttons located beneath the Touch Pad to perform selection and •...
  • Page 22: Using The Keyboard

    Using the Keyboard The keyboard has full-sized keys and an embedded numeric keypad, separate cursor, lock, Windows, function and special keys. Lock Keys and embedded numeric keypad The keyboard has three lock keys which you can toggle on and off. Lock key Description Caps Lock...
  • Page 23: Windows Keys

    Windows Keys The keyboard has two keys that perform Windows-specific functions. Description Windows key Pressed alone, this key has the same effect as clicking on the Windows Start button; it launches the Start menu. It can also be used with other keys to provide a variety of functions: : Open or close the Start menu <...
  • Page 24: Hot Keys

    Icon Function Description <Fn> + <F1> Hotkey help Displays help on hotkeys. <Fn> + <F2> Acer eSettings Launches Acer eSettings Management in Acer Management Empowering Technology. <Fn> + <F3> Acer ePower Launches Acer ePower Management in Acer Management Empowering Technology.
  • Page 25: Special Key

    Special Key You can locate the Euro symbol and the US dollar sign at the upper-center and/or bottom-right of your keyboard. The Euro symbol Open a text editor or word processor. Hold <Alt Gr> and then press the <5> key at the upper-center of the keyboard. NOTE: Note : Some fonts and software do not support the Euro symbol.
  • Page 26: Using The System Utilities

    Apply to confirm the new settings and click OK to complete the process. Acer GridVista is a handy utility that offers four pre-defined display settings so you can view multiple windows on the same screen. To access this function, please go to Start ´...
  • Page 27: Launch Manager

    Double (vertical), Triple (primary at left), Triple (primary at right), or Quad Acer Gridvista is dual-display compatible, allowing two displays to be partitioned independently. Acer Gridvista is dual-display compatible, allowing two displays to be partitioned independently. AcerGridVista is simple to set up: Run Acer GridVista and select your preferred screen configuration for each display from the task bar.
  • Page 28: Hardware Specifications And Configurations

    Hardware Specifications and Configurations Processor Item Specification CPU type Intel® Penryn (dual core) CPU package Intel® 479 pin Micro-FCPGA Features Supports Intel architecture with Dynamic execution. On-die, primary 32-kB instruction cache and 32-kB write-back data cache. On-die, up to 6MB second level shared cache with advanced transfer cache architecture.
  • Page 29 Item Specification Features Upstream accelerated Hub architecture interface for access to GMCH. PCI Express Base Specification, Revision 1.1 support. PCI 2.3 interface. (4 PCI Request/Grant pairs). ACPI Power Management Logic Support. Enhanced DMA controller, interrupt controller, timers functions. Integrated Serial ATA host controllers with independent DMA operation on six ports and AHCI support.
  • Page 30 System Memory Item Specification Memory controller Built-in Memory size 0MB (no on-board memory) DIMM socket number 2 sockets Supports memory size per socket 2 GB Supports maximum memory size 4G for 64bit OS (with two 2GB SODIMM) Supports DIMM type DDR II 677 Mhz /DDR III 1066 MHz SDRAM memory interface design Supports DIMM Speed...
  • Page 31 Item Data heads Drive Format Disks Spindle speed (RPM) Performance Specifications Buffer size Interface Max. media transfer rate (disk- buffer, Mbytes/s) Data transfer rate (host~buffe r, Mbytes/s) DC Power Requirements Voltage tolerance Combo Drive Module Item Specification Vendor & model name Performance Specification Transfer rate (KB/sec) Buffer Memory...
  • Page 32 Item Specification BIOS package 8 pins SOIC Supported protocols BIOS password control Set by setup manual LCD 15.4” Item Specification Vendor/model name Screen Diagonal (mm) 15.4 TFT WXGA, 220nits, 8ms Active Area (mm) Display resolution (pixels) Pixel Pitch Pixel Arrangement Display Mode Typical White Luminance (cd/m also called Brightness...
  • Page 33 Item Specification Features Unified Shader Architecture Support Microsoft® DirectX® 10 Shader Model 4 Geometry Instancing 2.0 SGI OpenGL® 2.0 Optimizations and support Adaptive PCI Express Interface High efficiency integrated adaptable and programmable Video Processor (VP2) Integrated Bit Stream Processor (BSP) NVIDIA PureVideo/Pure Video HD Technology Industry Video codec standard hardware acceleration Advanced Spatial Temporal De-Interlacing...
  • Page 34 Memory Card Reader Item Specification Type JMicron JMB385 Features Support 5-in-1 Card Reader (MS,MS pro, SD, MMC, xD) Compliant with SD Memory Card Specification Version 2.0 Compliant with MultiMediaCard Specification Version 4.1 Compliant with Memory Stick Standard Format Specification Version 1.4 Compliant with Memory Stick PRO Format Specification Version 1.00 Compliant with xD Picture Card Specification Version 1.20...
  • Page 35 Bluetooth 2.0+EDR Bluetooth control for BT optical mouse Keyboard Item Specification Type Aspire series: New Acer Non-Ergo Keyboard Total number of keypads 88-/89-/93-key Windows logo key Internal & external keyboard work Plug USB keyboard to the USB port directly: Yes...
  • Page 36 Item Specification Normal voltage 11.1V Charge voltage 16.0V Chapter 1...
  • Page 37: System Utilities

    Chapter 2 System Utilities BIOS Setup Utility The BIOS Setup Utility is a hardware configuration program built into your computer’s BIOS (Basic Input/ Output System). Your computer is already properly configured and optimized, and you do not need to run this utility. However, if you encounter configuration problems, you may need to run Setup.
  • Page 38: Information

    ATAPI Model Name: Slimtype DVD A DS8A2S System BIOS Version: V0.15T2 VGA BIOS Version: Intel V1588 Serial Number: Asset Tag Number: Product Name: Aspire 4930 Manufacturer Name: Acer UUID: 864BD4BE-6B22-5843-38D2-001B38D637FC Help Select Item F5/F6 Change Item Setup Default Exit Select Menu Enter...
  • Page 39: Main

    Main The Main screen allows the user to set the system time and date as well as enable and disable boot option and recovery. InsydeH20 Setup Utility Rev. 3.5 Information Main Advanced Security Power Boot Exit Item Specific Help System Time [13:04:04] This is the help for the System Date...
  • Page 40: Advanced

    Advanced The Advanced screen allows the user to configure the various advanced BIOS options. IMPORTANT: Making incorrect settings to items on these pages may cause the system to malfunction. Unless you have experience adjusting these items, we recommend that you leave these settings at the default values.
  • Page 41 Parameter Description Submenu Items Enter the USB Configuration menu. • USB Driver Select Configuration • EHCI 1 and 2 • UHCI 1 to 5 • Per-Port Control Chipset Enter the Chipset Configuration menu. • Port 80h Cycles Configuration • DMI Link ASPM Control •...
  • Page 42: Security

    Security The Security screen contains parameters that help safeguard and protect your computer from unauthorized use. InsydeH20 Setup Utility Rev. 3.5 Information Main Advanced Security Power Boot Exit Item Specific Help Supervisor Password Is: Clear Install or Change the User Password Is: Clear password and the length HDD Password Is:...
  • Page 43: Setting A Password

    Setting a Password Follow these steps as you set the user or the supervisor password: Use the n and p keys to highlight the Set Supervisor Password parameter and press the Enter key. The Set Supervisor Password box appears: Type a password in the “Enter New Password” field. The password length can not exceeds 8 alphanumeric characters (A-Z, a-z, 0-9, not case sensitive).
  • Page 44: Changing A Password

    Changing a Password Use the n and p keys to highlight the Set Supervisor Password parameter and press the Enter key. The Set Password box appears. Type the current password in the Enter Current Password field and press Enter . Type a password in the Enter New Password field.
  • Page 45: Power

    Power The Power screen allows the user to configure various CPU and power management options and device wakeup behavior. InsydeH20 Setup Utility Rev. 3.5 Information Main Advanced Security Power Boot Exit Item Specific Help X Advanced CPU Control These items control X Platform Power Management various CPU parameters.
  • Page 46 Parameter Description Submenu Items Platform Power Enter the Platform Power Management • PCI Clock Run management menu. • _CST - C4 Latency Value • C4 on C3 - Deeper Sleep ACPI S3 Enable or Disable ACPI S1/S3 Sleep State Wake on PME Enable or Disable wake up when the system power is off and a PCI Power Management Enable wake up event occurs.
  • Page 47: Boot

    Boot This menu allows the user to decide the order of boot devices to load the operating system. Bootable devices includes the USB diskette drives, the onboard hard disk drive and the DVD drive in the module bay. InsydeH20 Setup Utility Rev.
  • Page 48: Exit

    Exit The Exit screen allows you to save or discard any changes you made and quit the BIOS Utility. InsydeH20 Setup Utility Rev. 3.5 Information Main Advanced Security Power Boot Exit Item Specific Help Exit Saving Changes Exit System Setup and Exit Discarding Changes save your changes to Load Setup Defaults...
  • Page 49: Bios Flash Utility

    BIOS Flash Utility The BIOS flash memory update is required for the following conditions: New versions of system programs • New features or options • Restore a BIOS when it becomes corrupted. • Use the Phlash utility to update the system BIOS flash ROM. NOTE: If you do not have a crisis recovery diskette at hand, then you should create a Crisis Recovery Diskette before you use the Phlash utility.
  • Page 50: Remove Hdd/Bios Utility

    Remove HDD/BIOS Utility This section provide you with removing HDD/BIOS method: Remove HDD Password: If you key in wrong HDD password three times, HDD password error code displays. See the image • below. To reset the HDD password, run HDD_PW.EXE as follows: Key in hdd_pw 15494 0 Press 2.
  • Page 51 Remove BIOS Password: If you key in the wrong Supervisor Password three times, System Disabled displays on the screen. See the image below. To reset the BIOS password, run BIOS_PW.EXE as follows: Key in bios_pw 14452 0 Select one string from the list. Chapter 2...
  • Page 52 Reboot the system and key in the selected string (qjjg9vy, 07yqmjd etc.) for the BIOS user password. Chapter 2...
  • Page 53: Machine Disassembly And Replacement

    Chapter 3 Machine Disassembly and Replacement This chapter contains step-by-step procedures on how to disassemble the notebook computer for maintenance and troubleshooting. Disassembly Requirements To disassemble the computer, you need the following tools: Wrist grounding strap and conductive mat for preventing electrostatic discharge •...
  • Page 54: General Information

    General Information Pre-disassembly Instructions Before proceeding with the disassembly procedure, make sure that you do the following: 1. Turn off the power to the system and all peripherals. 2. Unplug the AC adapter and all power and signal cables from the system. 3.
  • Page 55: External Module Disassembly Process

    External Module Disassembly Process External Modules Disassembly Flowchart The flowchart below gives you a graphic representation on the entire disassembly sequence and instructs you on the components that need to be removed during servicing. For example, if you want to remove the main board, you must first remove the keyboard, then disassemble the inside assembly frame in that order.
  • Page 56: Removing The Battery Pack

    Removing the Battery Pack 1. Turn computer over. 2. Slide the battery lock/unlock latch to the unlock position. 3. Slide and hold the battery release latch to the release position (1), then slide out the battery pack from the main unit (2).
  • Page 57: Removing The Sd Dummy Card

    Removing the SD dummy card 1. Push the SD dummy card all the way in to eject it. 2. Pull it out from the slot. Chapter 3...
  • Page 58: Removing The Expresscard Dummy Card

    Removing the ExpressCard dummy card 1. Push the ExpressCard dummy card all the way in to eject it. 2. Pull it out from the slot. Chapter 3...
  • Page 59: Removing The Lower Covers

    Removing the Lower Covers 1. See “Removing the Battery Pack” on page 46. 2. See “Removing the Lower Covers” on page 49. 3. See “Removing the Lower Covers” on page 49. 4. Loosen the ten captive screws from the Memory, HDD1, and HDD2 Covers. Memory Cover HDD2...
  • Page 60: Removing The Dimm Modules

    7. Remove the HDD2 cover as shown. Removing the DIMM Modules 1. See “Removing the Battery Pack” on page 46. 2. Remove the Memory Module cover. See “Removing the Lower Covers” on page 49. 3. Push out the release latches on both sides of the DIMM socket to release the DIMM module. 4.
  • Page 61: Removing The Mxm Module

    Removing the MXM Module 1. See “Removing the Battery Pack” on page 46. 2. Remove the Memory Module cover. See “Removing the Lower Covers” on page 49. 3. Remove the four securing screws. Step Size Quantity Screw Type WLAN Module M2.5*9 (NL) 4.
  • Page 62 3. Remove the three securing screws. Step Size Quantity Screw Type WLAN Module M2*3 (NL) 4. Remove the bracket from the module. 5. Remove the Turbo RAM Module. NOTE: Some models come equipped with either a TV Tuner module or a Turbo RAM module. Chapter 3...
  • Page 63: Removing The Tv Tuner Module

    Removing the TV Tuner module 1. See “Removing the Battery Pack” on page 46. 2. Remove the HDD2 cover. See “Removing the Lower Covers” on page 49. 3. Disconnect the TV Tuner cable from the module. 4. Remove the three securing screws. Step Size Quantity...
  • Page 64: Removing The Wlan Module

    5. Remove the bracket from the module. 6. Remove the TV Tuner module. NOTE: Some models come equipped with either a TV Tuner module or a Turbo RAM module. Removing the WLAN Module 1. See “Removing the Battery Pack” on page 46. 2.
  • Page 65: Removing The Hard Disk Drive1 Module

    NOTE: The following is the correct cable-color to connector designation: TR1 (left) to White, TR3 (middle) to Gray, and TR2 (right) to Black. 5. Move the cables away to avoid damaging the them, and remove the two screws on the WLAN board to release the WLAN board.
  • Page 66 3. Remove the two securing screws. Step Size Quantity Screw Type HDD Carrier M2*3 (NL) 4. Use the pull-tab to lift up the HDD1 module to remove. NOTE: To prevent damage to device, avoid pressing down on it or placing heavy objects on top of it. Chapter 3...
  • Page 67 5. Remove the four screws (two each side) securing the HDD to the carrier. Step Size Quantity Screw Type HDD Carrier M2*3 (NL) 6. Turn the HDD module upside down, and lift the HDD carrier up. Chapter 3...
  • Page 68: Removing The Hard Disk Drive2 Module

    Removing the Hard Disk Drive2 Module 1. See “Removing the Battery Pack” on page 46. 2. Remove the HDD2 cover. See “Removing the Lower Covers” on page 49. 3. Remove the two securing screws. Step Size Quantity Screw Type HDD Carrier M2*3 (NL) 4.
  • Page 69 5. Remove the four screws (two each side) securing the HDD to the carrier. Step Size Quantity Screw Type HDD Carrier M2*3 (NL) 6. Turn the HDD module upside down, and lift the HDD carrier up. 7. Remove the connector from the HDD. Chapter 3...
  • Page 70: Removing The Optical Drive Module

    Removing the Optical Drive Module 1. See “Removing the Battery Pack” on page 46. 2. Remove the Memory cover. See “Removing the Lower Covers” on page 49. 3. Loosen the captive screw securing the ODD module and remove the ODD cap. 4.
  • Page 71 6. Remove the two screws securing the ODD bracket and remove the ODD bracket from the optical disk drive module. Step Size Quantity Screw Type ODD Bracket M2*2.5(NL) 7. Insert a pin in the eject hole of the ODD to eject the ODD tray. 8.
  • Page 72: Main Unit Disassembly Process

    Main Unit Disassembly Process Main Unit Disassembly Flowchart Screw List Step Screw Quantity Color Part No. Switch Cover M2*3 (NL) MA0000060G0 LCD Module M2.5*8(NL) MA000005YG0 LCD Module M2.5*5 (NL) MA000007YG0 Upper Cover M2.5*8 (NL) MA000005YG0 Upper Cover M2.5*5 (NL) MA000007YG0 Touch Pad Bracket M2*3 (NL) MA0000060G0...
  • Page 73: Removing The Switch Cover

    Removing the Switch Cover CAUTION: Using tools to remove the Switch Cover may cause damage to the outer casing. It is recommended that only fingers are used to remove the Switch Cover. 1. Remove the Battery Pack. See “Removing the Battery Pack” on page 46. 2.
  • Page 74: Removing The Switch Board

    Removing the Switch Board 1. Remove the Switch Cover. See “Removing the Switch Cover” on page 63. 2. Remove the two securing screws from the Switch Board. Step Size Quantity Screw Type Switch Board M2*3 (NL) 3. Disconnect the Switch Board to Ekey board FFC cable as shown. 4.
  • Page 75: Clearing Password Check And Bios Recovery

    Clearing Password Check and BIOS Recovery This section provide you the standard operating procedures of clearing password and BIOS recovery for Aspire 7730/7730G. Aspire 7730/7730G provide one Hardware Open Gap on main board for clearing password check, and one Hotkey for enabling BIOS Recovery. Clearing Password Check Hardware Open Gap Description Item...
  • Page 76: Model Definition And Configuration

    Appendix A Model Definition and Configuration Aspire 7730/7730G Series Acer Wirele Descriptio DIMM DIMM HDD 1 Blueto VOIP Model Country Part (GB) Phone AS505 India LX.AV AS5051AN ATMK N14.1 SO512 N80G NSM8 ABT_ 1ANW 30C.0 WXMi WXGA MBII5 B5.4K ATH54...
  • Page 77: Test Compatible Components

    Appendix B Test Compatible Components This computer’s compatibility is tested and verified by Acer’s internal testing department. All of its system ® ® functions are tested under Windows XP Home, Windows XP Pro environment. Refer to the following lists for components, adapter cards, and peripherals which have passed these tests.

This manual is also suitable for:

Aspire 7730g series

Table of Contents