Table of Contents
Advertisement
Quick Links
Advertisement
Table of Contents

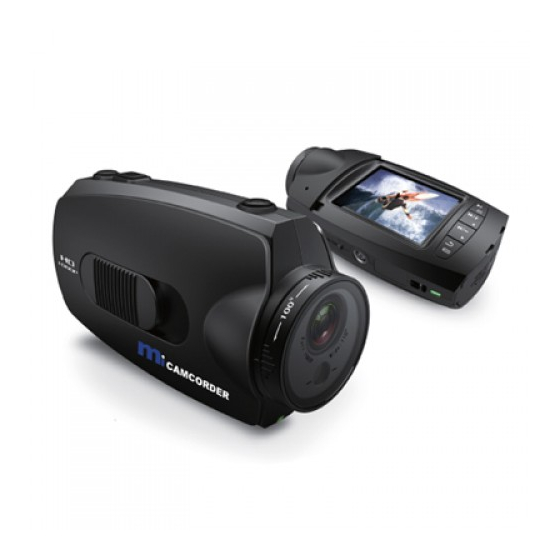
Summary of Contents for MICAMCORDER MI-96HD
-
Page 2: Table Of Contents
DIRECTORY Preface System Function Settings Product Assurance Setting Operational Approach Product Overview Resolution Setting Product Features Quality Setting Package Content Video Rotating Setting Product Structure Record Mode Setting Firmware Update External MIC VOL Setting Operating Instructions Internal MIC VOL Setting Installing the Battery Record Overwrite Setting Installing the Micro-SD card... -
Page 3: Preface
PREFACE Thank you for purchasing the MI-96HD high resolution digital camcorder. The MI-96HD is a small, all-in-one design that is convenient for you to record activities anytime and anywhere. With the high speed dynamic photograph function, it can clearly record any activity, and let you share the experience with anybody. -
Page 4: Product Features
PRODUCT FEATURES 1. Resolution : 960 x 240 ; integrated 2.0-inch TF LCD 2. Image sensor: 5Mega pixel ,1/2.5-inch CMOS sensor 3. Video output: HDMI CTS1.2 Compliant 4. Composite video output (AV-OUT) 5. Video signal format: MPEG-4 AVC/H.264 6. Resolutions: 1920 x 1080(30FPS) 1440 x 1080(30FPS) 1280 x 720 (25FPS/50FPS/30FPS/60FPS) 848 x 480(30FPS /60 FPS) 7. -
Page 5: Package Content
PACKAGE CONTENT Goggle Strap Mount Flat Mount Bar Mount Vented Helmet Mount Rubber Belt x 3 3M sticker x 3 Lanyard Rope Carry Pouch HDMI HDMI Elastic Strap USB Cable HDMI Cable AV-OUT Cable Wired Remote Microphone AC Charger Battery CD-Rom/User Manual NOTE: ALL CONTENTS ABOVE ARE SUBJECT TO CHANGE WITHOUT PRIOR NOTICE. -
Page 6: Product Structure
PRODUCT STRUCTURE MAIN UNIT 1. 110°lens 2. Horizontal laser light 3. Camera shutter 4. [ ]Press and Hold for 2 seconds to power on or power off the Cam 14. Locking key of rear cover 5. Recording key 15. Internal MIC 6. -
Page 7: Firmware Update
E: Vented Helmet Mount, with the Velcro strap is ideal for mounting the camera to various styles of vented helmets. FIRMWARE UPDATE Please check the current software version if you want to get the latest firmware Update then please compare with the latest version on www.micamcorder.com. -
Page 8: Operating Instructions
2: Follow the instructions. Insert the SD card in the correct direction. (Refer to picture 5) 3: Push the back cover to the closed position. (Please refer to picture6) Picture4 NOTE: THE MI-96HD REQUIRES A CLASS 4 OR ABOVE SD CARD TO OPERATE CORRECTLY. MOST FAULTS WITH OPERATING CAMERAS ARE BECAUSE A CHEAP SD CARD... -
Page 9: Installing The Mounts/Brackets
OPERATING INSTRUCTIONS Installing the mounts 1. Follow the instructions. Fix the mounts to the camera in the correct direction. (Refer to picture 1) MAIN UNIT MOUNTS A Picture1 2: Follow the instructions. Using the screw cap to fix the mount to the 1/4 thread of camera (Or it can be fixed on other 1/4 tread mounts. -
Page 10: Recording Instructions
OPERATING INSTRUCTIONS Recording Instructions 1.Press [ ] key and hold for 2 seconds to power up the camera. 2. Adjust the lens to the proper angle. a) Face a blank surface and press [ ] to turn on the lasers ( The lasers will disappear in 15 seconds). -
Page 11: Start/Stop Recording Via Wired Remote
OPERATING INSTRUCTIONS Start / stop Recording Via Wired Remote Press [ ] key ( hold for 2 seconds ) to power up the camera. 1. Connect wired remote to the DIGITAL interface of camera (Refer to picture 1) 2: Press REC key on the wired remote to start recording, recording indicator ( red ) turns on and flashes when it is recording. -
Page 12: Pictures Shooting Instructions
OPERATING INSTRUCTIONS Picture Shooting Instructions In standby mode , press key to take photos. (Refer to picture1) Picture Resolution: 5 mega pixels Picture Size: 2560 x 1920 Picture1 Playback Instructions 1. Playback on the camera a)Press and push the screen cover backwards to open it. (Refer to picture1) b)Gently press LCD key , and the screen will come on. - Page 13 OPERATING INSTRUCTIONS 2. Connect to other TV/Display devices to playback. a)Connect one end of AV-out cable to the DIGITAL interface on the base of the camera, and connect the other end of AV-out cable to your TV or other display device.( Refer to picture1) b)Turn on the TV or display device, and enter into the AV-in mode.
-
Page 14: Output Connection
OUTPUT CONNECTION Connect to external MIC Connect MIC device to camera for capturing higher quality audio. MIC-IN Picture1 Connect to HD TV via HDMI Connect HDMI cable to HDMI interface on the camera and HDMI interface of TV. The LCD will turn off automatically when connected to TV. -
Page 15: Connect To Pc Via Usb
OUTPUT CONNECTION Connect to PC via USB Connect USB to the Digital interface of camera and USB port on the PC. (Refer to picture1) Picture1 Connect to power source 1. Connect the power line to DIGITAL interface of camera, power light (Red) is on when it is connected. -
Page 16: System Function Settings
SYSTEM FUNCTION SETTINGS Setting Operational Approach Press[MODE] to switch into system function settings mode. 1: Press key to shift the yellow cursor, choose the setting function, press OK key to set up. 2. Press key to choose the needed function, press OK again. Press MODE to switch into system function settings mode. -
Page 17: Record Mode Setting
SYSTEM FUNCTION SETTINGS Record Mode Setting NTSC PAL When using in different countries, choose the TV system according to local standard. The image will be flickeringly if the TV system is set incorrectly. External MIC VOL Setting The volume of external MIC or audio equipment can be set, and there are 7 grades that can be selected. -
Page 18: Tv Type Setting
FRENCH Select the needed language All specifications above are based on the testing standard of MICAMCORDER. Appearance and all specifications are subject to change without prior notice. Color of product shown in the user manual maybe different from that included in the... - Page 19 High De nition MI-96HD PLEASE REFER TO: http://www.micamcorder.com THE ACCESSORIE MAYBE SUPPLIED DIFFERENTLY SUBJECT TO THE MARKET, PLEASE CONSULT IT WITH THE LOCAL AGENT. MICAMCORDER.COPYRIGHT 2008. ALL RIGHT RESERVED.
Need help?
Do you have a question about the MI-96HD and is the answer not in the manual?
Questions and answers