Table of Contents
Advertisement
Advertisement
Table of Contents

Summary of Contents for Atmospheric Water Systems dewpoint DH9
- Page 1 RESET COOL DH9 Owner’s Manual...
- Page 2 congratulations you are about to enjoy pure water...
- Page 3 © 2009 Atmospheric Water Systems, Inc. All international rights reserved. Dewpointe ® is a registered trademark of Atmospheric Water Systems, Inc. All international rights reserved. 189 Cross St. San Luis Obispo, CA 93401 U.S.A. cs@aws-h2o.com | (866) 857-5074 | (805) 858-9280 V309_2 www.aws-h2o.com...
-
Page 4: Table Of Contents
contents Quick Start Guide Changing the Top Tank UV In The Box Changing the Inline UV Basic Features Changing the Bottom Tank UV Control Panel Optional Maintenance LCD Monitor Draining the Dewpointe Operation Cleaning the Bottom Tank DH9 Hot & Cool Water Settings Cleaning the Top Tank DH9X Cool Water Settings Trouble Shooting... -
Page 5: Quick Start Guide
quick star t guide When your Dewpointe arrives, please refer to the following steps for installation: Do NOT immediately connect your Dewpointe to an electrical power source when you take it out of the packing material. Let it sit overnight in standing position to allow the refrigerant in the compressor to settle. NOTE: Plugging the Dewpointe immediately to power may permanently damage the compressor. -
Page 6: In The Box
in the box Your Dewpointe DH9 or DH9X Two replacement Activated Charcoal Filters RESET COOL Two replacement spigots with mesh screens One Dewpointe wrench Auxiliary water line - 25 feet Auxiliary water connection kit a. Shut-off valve b. Shut-off valve plug c. -
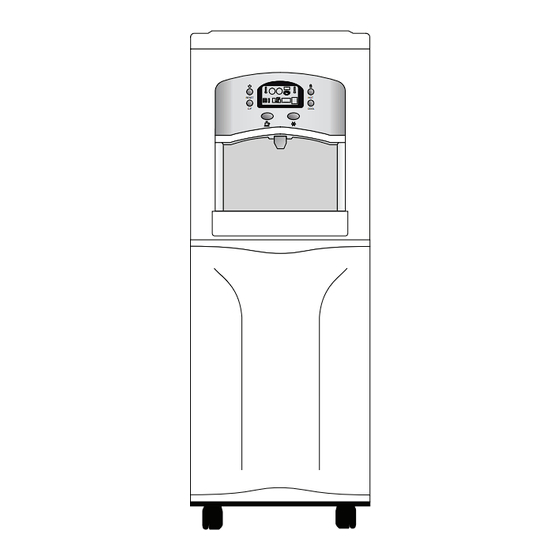
Page 7: Basic Features
Basic Features RESET Control Panel COOL Spigot Removable Drip Tray Removable Front Panel Locking Front Wheels Features... - Page 8 Wiring Diagram Technical Specs & Water Production chart Circuit Board Access Panel Air Filter Venturi Fan Exhaust Vent Water Collection Plate Drain Plug Waste Water Outlet (RO) Bottom Holding Tank Water Inlet Vent Features...
-
Page 9: Control Panel
Control Panel DH9 shown LCD Monitor Hot Button/Lock Unlock/Power (DH9 only) Button RESET Cool Button C/F Button COOL Hot Water Button Cold Water Button (DH9 only) Features... - Page 10 Control Panel LCD Monitor An advanced LCD monitor displays humidity, UV bulb life, tank water levels, water temperature and system functions. The LCD monitor will not fully light up unless the system is unlocked. Unlock/Power Button Press and hold the Unlock/Power Button in order to change the factory presets. Once unlocked, press briefly to reset the filter timer;...
-
Page 11: Lcd Monitor
LCD Monitor Features... - Page 12 LCD Monitor Heating Level Indicator The thermometer icon displays the hot water tank’s proximity to the set hot water temperature. Hot Water Temperature Displays the hot water temperature or ambient room temperature if hot water element is turned off. Heating Icons When the small circular icon is lit, the heating element is turned on.
- Page 13 LCD Monitor Features...
- Page 14 LCD Monitor Icon lights up when the Top Tank UV bulb is on. Icon lights up when the Inline UV bulb is on. Icon lights up when the Bottom Tank UV bulb is on. Ultraviolet Icon Icon is lit when any one of the UV lights is on. Icon will flash when any of the UV bulbs needs to be replaced. Booster Pump Display Becomes animated when Booster Pump is pumping water from the Bottom Tank to the Top Tank.
-
Page 15: Operation
operation Turning on the Dewpointe • The Dewpointe automatically turns on when plugged in. • The LCD Monitor will immediately light up. • The system will remain unlocked for 10 seconds. You can modify the factory presets if you choose to. •... -
Page 16: Dh9X Cool Water Settings
Setting the Cool water temperature (DH9X only) Press and hold the Unlock/Power Button to enter Program Mode. Press and hold the Button until the Cool Water Temperature display starts flashing. Use the Cool Button to cycle through the preset cool water temperatures. NOTE: The Cool water setting will automatically exit after 10 seconds of no activity. -
Page 17: Dispensing Cool Water
Dispensing Cool Water • Press and hold the Cold Water Button until water dispenses; release button to stop flow. DH9X • Press and hold the Cold Water Button until water dispenses; release to stop flow. NOTE: The Snowflake Button does not dispense water. If the cool water does not come out at the desired temperature: •... -
Page 18: Dispensing Hot Water
Dispensing Hot Water (DH9 only) Press and hold Button until you hear a beep. Press and hold Hot Water Button ( ) until hot water is dispenses; release button to stop flow. NOTE: The Hot Water Button will automatically lock after 10 seconds of no activity. DH9 shown RESET COOL... -
Page 19: Maintenance
maintenance Maintenance Schedule Air Filter Clean every 2-4 weeks. Depending on your air quality you may have to clean more frequently. Drip Tray Rinse every 2-4 weeks. Activated Charcoal Filter Replace every 4 months. Sediment Filter Replace every 12 months. Post Carbon Filter Replace every 12 months. -
Page 20: Cleaning The Air Filter
Cleaning the Air Filter Turn off and unplug your Dewpointe. Gently pull the Dewpointe away from the wall so you can access the back. Slide the air filter out of the slot. Rinse thoroughly and let dry. NOTE: DO NOT use detergent or any cleaning solvents. Slide the air filter back in. -
Page 21: Cleaning The Water Collection Plate
Cleaning the Water Collection Plate Turn off and unplug your Dewpointe. Gently pull the Dewpointe away from the wall so you can access the back. Slide the Water Collection Plate out of the slot. Rinse with warm water. NOTE: Do not use detergent or any cleaning solvents. Slide the Water Collection Plate back in. -
Page 22: Cleaning The Activated Carbon Filter
Cleaning the Activated Charcoal Filter Turn off and unplug your Dewpointe. Gently pull the Dewpointe away from the wall so you can access the back. Slide the Bottom Tank out. Lift Activated Charcoal Filter out of the tank. Rinse the filter in the sink to remove any build up that may have accumulated. -
Page 23: Front Filter Diagram
Front Filter Diagram Sediment Filter Pre-Carbon Post Carbon Filter Reverse Osmosis (RO) Filter Maintenance... -
Page 24: Changing The Front Filters
Changing the Front Filters Turn off your Dewpointe. Unplug the unit. Gently remove the front lower panel by pushing down on the sides and pulling forward. Release the water lines from the top of the filter. Note: Remove C-Clip and press the small ring holding the line in towards the elbow joint to release and then pull the line out. -
Page 25: Changing The Top Tank Uv
Changing the Top Tank UV Turn off and unplug your Dewpointe. Back Panel Gently pull the Dewpointe away from the wall so you can access the back. Remove the two screws from the back of the top lid. Slide and lift the lid off. Disconnect the UV connection clip. -
Page 26: Changing The Inline Uv
Changing the Inline UV Top View Turn off and unplug your Dewpointe. Gently pull the Dewpointe away from the wall so you can access the back. Remove the two screws from the back of the top lid. Slide and lift the lid off. Disconnect the UV wire clip Cut the white tape around the Styrofoam cap at the crease. -
Page 27: Changing The Bottom Tank Uv
Changing the Bottom Tank UV Turn off and unplug your Dewpointe. Gently pull the Dewpointe away from the wall so you can access the back. Slide the Bottom Tank out Disconnect the 2 water lines. Disconnect the UV wire clip. Disconnect 2 float sensor wire clips. -
Page 28: Optional Maintenance
optional maintenance The following procedures should be preformed as needed. If you have any questions, please contact customer service. cs@aws-h2o.com | (866)-857-5074 Optional Maintenance... -
Page 29: Draining The Dewpointe
Draining your Dewpointe Turn off and unplug your Dewpointe. Gently pull the Dewpointe away from the wall. Move the Dewpointe to a location where you can allow water to drain out of the back drain plug. NOTE: HOT WATER will come out first when draining (DH9 only). Wait at least one full hour before draining to allow water to cool. -
Page 30: Cleaning The Bottom Tank
Cleaning the Bottom Holding Tank Turn off your Dewpointe. Unplug the unit. Gently pull the Dewpointe away from the wall so you can access the back. Slide the Bottom Tank out. Remove the Activated Carbon Filter and Lid. Pour out any water in tank. NOTE: There should be enough play in the lines pull the tank out without having to disconnect anything. -
Page 31: Cleaning The Top Tank
Cleaning the Top Holding Tank Turn off your Dewpointe. Back Panel Unplug the unit. Gently pull the Dewpointe away from the wall so you can access the back. Drain your Dewpointe according to instructions on page (25). Remove the two screws from the back of the top lid. Lift and slide the lid off. -
Page 32: Trouble Shooting
trouble shooting If you experience a problem with your Dewpointe, there is probably a quick and easy solution. Please take note of: • The last service you preformed • Abnormal sounds • Water production • Any water odor or leaks •... -
Page 33: Alerts - Warning Lights
Alerts UV warning light The Ultraviolet Icon warning light will flash and you will hear 3 short beeps when one of the three UV bulbs is not functioning properly. NOTE: Make sure you Dewpointe is turned off before preforming any maintenance. Check the following bulbs: Check the UV bulb in the Top Holding Tank. - Page 34 Alerts Filter Warning Icon The Warning Filter light (arrow) will flash and beep when the filters need to be changed. Follow the directions on page (20) to change the carbon filters. NOTE: The RO filter only needs to be changed once every two years. Press the ‘Reset’...
- Page 35 Alerts ‘Warning’ light turns on The Warning Light turns on if the system detects a leak. The Dewpointe will stop producing water if any leaks are detected. Check for leaks: Turn the machine off and unplug. Open the front panel to expose the filters. Check all of the tubing and connections to make sure they are tight and secure.
-
Page 36: Possible Problems
Problem Water output is too weak Clean the filter inside the spigot or replace. To change Spigot or Spigot Screens: Gently unscrew Spigot. Check Spigot Filters to make sure they are not clogged. NOTE: The Spigot comes with 4 filters placed inside. If water continues flow slowly, remove two of the screens. - Page 37 Problem • Check copper tubing from the compressor to make sure it is not touching any of the side panels. Turn off and unplug your Dewpointe. Covered Copper Tubing Pull the Dewpointe away from the wall so you can access the back. Remove screws from the lower back panel and remove panel.
- Page 38 Problem Strange Tasting Water • You may need to replace the filters, check your maintenance records. • If the machine has been left running for more than two weeks without dispensing water, the tanks may need to be cleaned. Pages (24-27). Slow or no water production If temperature and humidity drop below appropriate levels, your Dewpointe will produce water at a slower...
-
Page 39: Filtration Process
DH9 FiItration Process Filtration Process... - Page 40 Filtration Process Air Filter Zero-Waste Reverse Osmosis (RO) Filter Air enters the Dewpointe through a specialized The RO Filter removes pathogens, mineral salts, filter that removes small airborne particles heavy metals and organic compounds. Water including: pollen, dust, pet dander, mites and that cannot pass through the membrane is microbes.
-
Page 41: Water Production Chart
water production Water Production... -
Page 42: Technical Specifications
technical specifications DH9X Height 44.4” (112 cm) Height 44.4” (112 cm) Width 15.8” (40 cm) Width 15.8” (40 cm) Depth 15.8” (40 cm) Depth 15.8” (40 cm) Net Weight 100 lbs (45.4 kg) Net Weight 100 lbs (45.4 kg) Top Tank 2.5 G (9.5 L) Top Tank 4.1 G (15 L) -
Page 43: Warranty
Atmospheric Water Systems, Inc. (AWS) warrants the Dewpointe Atmospheric Water Generator, including all accessories, against defects in materials and workmanship as follows: LABOR: For a period of ninety (90) days from the date of purchase, if your Dewpointe is found to be defective, AWS will repair or replace the Dewpointe atmospheric water generator at no charge. -
Page 44: Parts List
par ts DH9AWK DH9 Auxiliary Water Kit (includes all parts to connect your Dewpointe to a municipal water supply. DH9AF DH9 Air Filter and housing. DH9UTUV DH9 11 Watt Ultraviolet Bulb for Top Tank. DH9HWUV DH9 11 Watt Ultraviolet bulb for hot water flow spigot line. DH9LTUV DH9 4 Watt Ultraviolet Bulb for Bottom Tank. -
Page 45: Maintenance Schedule
maintenance record Year DH9AF DH9CF DH9SED1 DH9PRE1 DH9POST1 DH9ROF2 DH9UTUV DH9HWUV DH9LTUV Enter the date of replacement for each filter in respective years. Maintenance Record... - Page 46 www.dewpointewater.com...
Need help?
Do you have a question about the dewpoint DH9 and is the answer not in the manual?
Questions and answers