Table of Contents
Advertisement
Quick Links
Download this manual
See also:
User Manual
Advertisement
Table of Contents

Subscribe to Our Youtube Channel
Related Manuals for Elektron Octatrack DPS-1


Summary of Contents for Elektron Octatrack DPS-1
- Page 2 The included switched-mode power supply is CEC Level IV compliant. The device contains a non rechargable lithium perchlorate battery cell that may need to be recycled separately de- pending on local environmental laws. If the battery needs replacing, please contact Elektron or a local professional technician for servicing.
- Page 3 Important Safety Information for the Octatrack DPS-1 Carefully read these instructions and save them for future reference. Warning To reduce the risk of fire, electrical shock or product damage: Do not expose the apparatus to rain, moisture, dripping or splashing and also avoid •...
-
Page 5: Table Of Contents
INTRODUCTION......................1-1 CONVENTIONS IN THIS MANUAL..................... 1-1 THE BACKGROUND OF THE OCTATRACK ..............1-2 SUGGESTED APPLICATIONS OF THE OCTATRACK............... 1-2 LOOPER DEVICE .......................... 1-2 RADICAL SOUND PROCESSOR ....................1-2 BACKING TRACK MACHINE......................1-3 LIVE SETUP HUB .......................... 1-3 REMIX TOOL..........................1-3 EFFECTS UNIT EXTRAORDINAIRE ..................... 1-3 PANEL LAYOUT AND CONNECTORS................1-4 FRONT PANEL ............................ - Page 6 NO MOUNTED SET ........................1-17 SWITCHING COMPACT FLASH CARDS ..................1-17 SETS CONTAINING NO PROJECTS................... 1-17 CREATE AND MOUNT A SET......................1-18 AUDIO POOL............................. 1-18 ADDING CONTENT TO THE AUDIO POOL ................1-18 AUDIO FILE COMPATIBILITY ...................... 1-19 PROJECTS......................... 1-20 LOADING SAMPLES TO THE SAMPLE SLOTS ................
- Page 7 MAIN OUTPUT ROUTING ......................1-46 CUE OUTPUT ROUTING......................1-46 ROUTING EXAMPLES......................... 1-46 PATTERNS........................1-49 BASIC PATTERN OPERATIONS....................... 1-49 SELECTING A PATTERN......................1-49 PATTERN CHAINING ........................1-49 GRID RECORDING MODE ....................... 1-49 PARAMETER LOCKS........................1-50 NOTE TRIG PARAMETER LOCKS....................1-50 TRIGLESS TRIGS ........................1-50 SAMPLE LOCKS ..........................
- Page 8 PRODUCT DESIGN AND DEVELOPMENT..................1-71 ADDITIONAL DESIGN........................1-71 FACTORY DEFAULT SOUND DESIGN .................... 1-71 USER’S MANUAL ..........................1-71 CONTACT INFORMATION..................1-71 ELEKTRON WEBSITE ........................1-71 DELIVERY ADDRESS ........................1-71 TELEPHONE ............................. 1-71 APPENDIX A: MACHINE REFERENCE THRU MACHINE ..........................A-1 THRU MAIN ............................A-1 THRU SETUP ..........................A-1...
- Page 9 CHORUS SETUP ...........................A-7 DYNAMIX COMPRESSOR........................A-8 COMPRESSOR MAIN........................A-8 COMPRESSOR SETUP.........................A-8 LO-FI COLLECTION..........................A-9 LO-FI MAIN.............................A-9 LO-FI SETUP..........................A-9 ECHO FREEZE DELAY........................A-10 DELAY MAIN ..........................A-10 DELAY SETUP ..........................A-10 GATEBOX PLATE REVERB......................A-11 REVERB MAIN ..........................A-11 REVERB SETUP .......................... A-11 INDEX...
-
Page 11: Introduction
INTRODUCTION INTRODUCTION Thank you for choosing the Octatrack DPS-1. The Octatrack is a dynamic performance sampler ideal for real-time sampling, remixing and audio content manipulaton. It features the improved Elektron step sequencer which makes it easy to bend and process samples in new and unique ways. -
Page 12: The Background Of The Octatrack
THE BACKGROUND OF THE OCTATRACK THE BACKGROUND OF THE OCTATRACK The first relatively affordable samplers were released in the 1980’s and made a huge impact on the music scene of that time. Suddenly producers could incorporate sonic ele- ments, taken from completely new sources, in their compositions. This resulted in the birth and evolution of several genres, for example hip hop. -
Page 13: Backing Track Machine
OCTATRACK DPS-1 USER’S MANUAL for operating system version 0.995. This manual is copyright © 2011 Ele- ktron Music Machines MAV AB. All reproduction without written authorization is strictly prohibited. The information in this manual may change without notice. -
Page 14: Panel Layout And Connectors
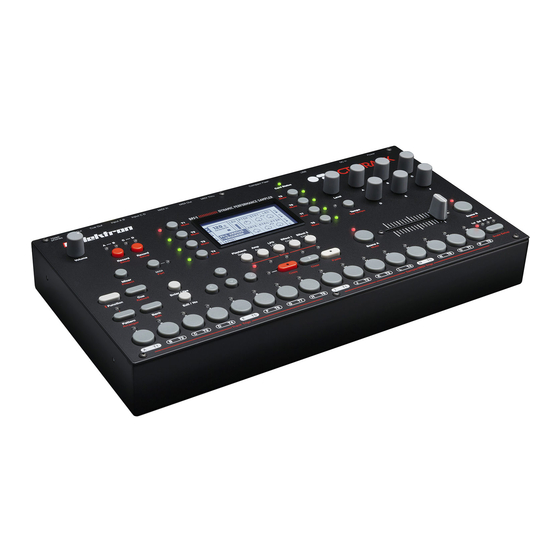
PANEL LAYOUT AND CONNECTORS PANEL LAYOUT AND CONNECTORS FRONT PANEL The Octatrack front panel: HEADPHONES VOLUME CONTROL sets the volume for the stereo headphones jack. [AUDIO RECORD] buttons are used for real-time sampling through the external inputs. There is one [AUDIO RECORD] button per audio input pair. The <AUDIO RECORD>... - Page 15 PANEL LAYOUT AND CONNECTORS Pressing the [MIDI] button activates the MIDI sequencer mode of the Octatrack. [FUNC- TION] + [MIDI] opens up the PARTS menu. A lit <MIDI> LED indicates the MIDI sequencer is active. When in the RECORD SETUP menu this LED indicates the signal of the internal sample source and the internal source selection for recorder trigs.
-
Page 16: Rear Connectors
Headphones output. RACK MOUNT KIT (ACCESSORY) The Octatrack can be rack mounted in a standard 19” rack, using the Elektron rack mount kit which can be ordered separately. When rack mounted, the Octatrack occupies four standard height units plus additional space, usually about 1 HE, needed to accommodate for cables plugged into the unit. -
Page 17: The Compact Flash Card Reader
We strongly recommend you to use a Compact Flash card tested and recommended by Elektron, such as the one bundled with the Octatrack. Never remove the card while data is being read or written to it. Doing so might cor- •... - Page 18 It will hold data at least 6 years before needing replacement. If the battery needs replacement, the “BATTERY LOW” message will appear in the display. Con- tact Elektron support or your nearest repair center. • Turn off the machine when it is not in use. Use the power switch.
-
Page 19: Overview Of The Octatrack Structure
OVERVIEW OF THE OCTATRACK STRUCTURE OVERVIEW OF THE OCTATRACK STRUCTURE The Octatrack is organized in a hierarchical way, starting with the set as the top level struc- ture. It is important to understand the internal structure to make the most of the possibilities at hand. -
Page 20: Projects
OVERVIEW OF THE OCTATRACK STRUCTURE PROJECTS Projects can be regarded as a collection of compositions. A project contains 16 banks, 8 arrangements, 8 track recorders and their recorder buffers, 128 sample slots dedicated to Flex machines, 128 slots dedicated to Static machines and the BPM setting for all the pat- terns of the project. -
Page 21: Tracks
OVERVIEW OF THE OCTATRACK STRUCTURE TRACKS An Octatrack pattern handles eight internal tracks. Each internal track hosts a machine. Any machine type can be assigned to any of the eight internal tracks. More information about tracks are found in the section “TRACKS” on page 37. MACHINES Machines are assigned to the eight internal tracks. -
Page 22: The User Interface
THE USER INTERFACE THE USER INTERFACE The center of Octatrack editing is the LCD display. The main interface screen is shown below: Icons showing the current machine assignments and status of the tracks. First the machine assignments are shown. “F” = Flex machine, “S” = Static machine, “T” = Thru machine, “N”... -
Page 23: Parameter Editing
THE USER INTERFACE The [ARROW] buttons The [FUNCTION] key The [TRIG] keys The LEVEL knob All windows can be closed using the [EXIT/NO] key. • PARAMETER EDITING The DATA ENTRY knobs are used to change the track parameters. The location of the knobs correspond to the layout of the parameters on the screeen. -
Page 24: Quick Start
QUICK START QUICK START This quick start will guide you through some of the basic operations to allow you to start using the Octatrack right away. First connect it as described in section “CONNECTING THE UNIT”, on page 7. MOUNTING A SET AND LOADING A PROJECT A set needs to be mounted for the Octatrack to be able to save projects and load samples to the Flex and Static sample slots. -
Page 25: Adjusting The Samples Of The Demo Patterns
QUICK START Select pattern A02, which is the second demo pattern, by pressing [PATTERN] + [TRIG] key 2. Pattern A03 is selected by pressing [PATTERN] + [TRIG] key 3 and so on. ADJUSTING THE SAMPLES OF THE DEMO PATTERNS All tracks contain five TRACK PARAMETER menus. There parameters affecting the sam- ple of the track are found. -
Page 26: Recording A Pattern Using Grid Recording
QUICK START Enter the PLAYBACK SETUP menu by pressing [FUNCTION] and [PLAYBACK]. The sample slot list will be opened. If samples already are present in the sample slot list, select a sample and press [ENTER/YES] to assign it to the machine. To load a new sample from the audio pool to a sample slot, select a sample slot and press [ENTER/YES]. -
Page 27: Sets
SETS SETS A set is the top layer of the Octatrack hierarchy. Sets are completely self contained. If the same set is being used by two Octatracks both units will load the same sample content and will settings wise be exactly the same, given both units have the same project loaded and the same OS version installed. -
Page 28: Create And Mount A Set
SETS CREATE AND MOUNT A SET Sets are created and mounted in the EDIT PROJECTS menu. Press [FUNCTION] + [EDIT] to open this menu. Select PROJECTS and press [ENTER/YES]. Then select MOUNT OTHER SET and press [ENTER/YES]. The currently active set is indicated by inverted graphics. -
Page 29: Audio File Compatibility
SETS • When loading samples to the Flex and Static sample slots a representation of the AUDIO folder will appear as a file browser in the Octatrack. Read more about the file browser in “FILE BROWSER” on page 22. • After opening a set folder the AUDIO folder and the saved projects of the set are visible. -
Page 30: Projects
PROJECTS PROJECTS Each set can contain an amount of projects only limited by the size of the Compact Flash card. A project contains: Up to 16 banks. • • Up to 8 arrangements. 128 Flex sample slots and their associated Flex samples. •... -
Page 31: Loading To The Sample Slots In The Playback Setup Menu
PROJECTS pressed will appear. The Flex sample slot list will be displayed if the active track contained a Flex machine. The Static sample slot list will be displayed if the active track contained a Static machine. If the track contained any other machine type the machine list will appear. If so, open the Flex sample slot list by moving the cursor to FLEX and pressing the [RIGHT] arrow key. -
Page 32: File Browser
PROJECTS If the track contains any other type of machine, a Flex or Static machine first needs to be assigned to the track. Read more about this procedure in section “ASSIGNING MACHINES TO TRACKS” on page 37. Load a sample by selecting an empty sample slot and pressing [ENTER/YES]. The file browser reflecting the content of the audio pool of the active set will be opened. -
Page 33: Edit Project Menu
PROJECTS • At the root of the audio pool file structure several folders might be found. The AUDIO folder contains the audio pool. Any saved projects of the set are repre- sented by folders as well. If audio files, as recommended, only have been put in the AUDIO folder the project folders will appear as empty. -
Page 34: Track
PROJECTS RESTORE PROJECT restores the project to the state defined by a restore point. MOUNT OTHER SET will change sets. Read more about sets in section “SETS” on page 17. PURGE SAMPLES will remove all unused samples from the project. Note that files are only removed from the project, the actual files will not be deleted from the audio pool. -
Page 35: System
PROJECTS SCALE PER TRACK reflects the NORMAL and PER TRACK settings found in the SCALE SETUP menu. Read more about these settings and what they do in “SCALE SETUP” on page 55. Two settings exist. • NO is the default setting. All tracks are set to NORMAL. •... -
Page 36: Mixer Menu
PROJECTS DATE/TIME SETTINGS is where the day and time settings are set. MIXER MENU In the MIXER menu settings for the headphones output, inputs A/B and C/D are made. While in this menu the function of the [TRIG] buttons will be to mute or cue tracks. The MIXER menu settings are common for all banks and patterns in a project. -
Page 37: Project Settings
PROJECTS To mute a track, simply press the corresponding [TRIG] key. An unlit <TRIG> LED and an dotted square in the track mute section of the MIXER menu indicates a muted track. A lit red <TRIG> LED and an outlined square in the track mute section of the MIXER menu means a track is audible. -
Page 38: Track Recorders
PROJECTS SEND TRANSPORT • ON makes the Octatrack send out system realtime messages like play, stop and continue. • OFF hinders the Octatrack from sending out transport messages. This is the default setting. RECEIVE TRANSPORT • ON makes the Octatrack respond to system realtime messages like play, stop and continue. - Page 39 PROJECTS [TRACK] + [MIDI] will sample internal sounds to the recorder of the track whose track but- ton is pressed. The sample source, or sources, of the recorder are set in the RECORD SETUP menu. Placing out recorder trigs on the step sequencer is also carried out in this menu. Enter the RECORD SETUP menu by pressing [FUNCTION] + any of the [AUDIO RECORD] but- tons.
-
Page 40: Manual Sampling
PROJECTS setting of 16 will for example always record the equivalent of 16 1/16th notes with a scale setting of 1x. If RLEN is set to MAX the length of the recorder sample will always be 16 seconds of length. TRIG offers three different sampling behaviors once the sampling process is initiated. -
Page 41: Sampling Using Recorder Trigs
PROJECTS If you are sampling from the external inputs, make sure audio from an external device is being sent to the Octatrack inputs. The <AUDIO RECORD> LEDs indicate the strength of the signal sent to the inputs. If you hear sound but see no LED activity, try increasing the volume of the external audio by either increasing the GAIN parameter in the MIXER menu or by increasing the volume on the external device itself. -
Page 42: Playback Of Captured Recorder Samples
PROJECTS recorder trig listens to is indicated by inverted source graphics in the LCD and by lit <AUDIO RECORD> and <MIDI> LEDs. Deselect a source by repeating the procedure. If the source selection is changed subsequent recorder trigs being placed out will default to the latest source selection. -
Page 43: Banks, Parts And Scenes
BANKS, PARTS AND SCENES BANKS, PARTS AND SCENES Each project contains up to 16 banks. Banks contain: Up to 16 patterns. • 4 parts. • Each part contains: Information about which machines are assigned to the tracks. • • Information about which Flex and Static samples are assigned to the machines. •... -
Page 44: Part Reload
BANKS, PARTS AND SCENES if you want another pattern of the bank to contain other assignments, you need to save the current settings as a part. The EDIT PARTS menu is opened by pressing [FUNCTION] + [MIDI]. The PARTS column to the left displays the parts and their names. The MODE column to the left offers various commands related to parts. -
Page 45: Scene Volume Locking
BANKS, PARTS AND SCENES Once a scene is assigned you can lock its parameters. The functionality is similar to assigning parameter locks to a note trig. Press the [SCENE] button containing the scene you want to alter and choose the value of the track parameters you want to lock to the scene by turning the DATA ENTRY knobs. -
Page 46: Scene Mute
BANKS, PARTS AND SCENES assigned to one of the scene slots contain locked parameters the crossfader will interpolate between those values and the general parameter values of the active part. The color of the <CROSSFADER> LEDs corresponds to the position of the crossfader and reflects how much the two scenes are in effect in relation to each other. -
Page 47: Tracks
TRACKS TRACKS The Octatrack can control 8 internal stereo tracks at the same time. For a track to be able to process or affect sound a machine needs to be assigned to it. Thru and Neighbor machines offer various audio routing options. Flex and Static machines are used to process samples. -
Page 48: Assigning Machines In The Playback Setup Menu
TRACKS the [LEFT] arrow key to access the machine list. In all other cases the machine list will be accessed directly when opening the QUICK ASSIGN menu. Select the machine that should be assigned to the track and press [ENTER/YES] to assign •... -
Page 49: Assigning Samples In The Playback Setup Menu
TRACKS list will be displayed if the track contained a Flex machine. The Static sample slot list will be displayed if the track contained a Static machine. Select the sample that should be assigned to the machine of the track and press [ENTER/ YES] to assign it. -
Page 50: Playback Main
TRACKS PLAYBACK MAIN Open the PLAYBACK MAIN menu by pressing the [PLAYBACK] key. This menu will differ depending on the type of machine assigned to the track. Read more about the various machine types in “Appendix A: MACHINE REFERENCE“. PLAYBACK SETUP Open the PLAYBACK SETUP menu by either pressing [FUNCTION] + [PLAYBACK] or quickly double pressing [PLAYBACK]. -
Page 51: Amp Setup
TRACKS AMP SETUP Open the AMP SETUP menu by either pressing [FUNCTION] + [AMP] or quickly double pressing [AMP].. AMP controls the behavior of the amplitude envelope. • ANLG will not necessarily make the envelope start from zero once a note is being trigged. -
Page 52: Lfo Main
TRACKS • TTRIG will, if the multi mode filter is assigned to effect 1, not necessarily make the filter envelope start from zero once a note trig or a trigless trig is being activated by the sequencer. Instead, the filter envelope attack will start from the current envelope level. -
Page 53: Lfo Designer
TRACKS In the column to the left four page alternatives exist. Three identical pages for the three LFOs and at the end of the list the LFO designer page. To edit the behavior of an LFO, navigate to the corresponding page by using the [UP]/ [DOWN] arrow buttons. -
Page 54: Effect 1 And Effect 2
TRACKS designer waveforms are available to all LFOs. Access the LFO designer by navigating to the DESIGNER menu in the leftside column. A custom LFO waveform consists of 16 steps where each step can have a unique value. The steps can either be stepped or interpolated. All changes in the waveform are instantly visualized by the LFO waveform representation in the center of the LCD screen. -
Page 55: Direct Track Muting
TRACKS 12/24dB Multi Mode Filter 2-band Parametric EQ DJ-style Kill EQ 2-10 Stage Phaser Flanger 2-10 tap Chorus Dynamix Compressor Lo-fi Collection EFFECT 2 offers: 12/24dB Multi Mode Filter 2-band Parametric EQ DJ-style Kill EQ 2-10 Stage Phaser Flanger 2-10 tap Chorus Dynamix Compressor Lo-fi Collection Echo Freeze Delay... -
Page 56: Track Routing
TRACKS TRACK ROUTING Tracks can be routed to either the main outputs or the cue outputs. Tracks are routed to the main outputs by default. MAIN OUTPUT ROUTING The default setting for all tracks. They are routed to the main outputs. CUE OUTPUT ROUTING Pressing [CUE] + [TRACK] will route the selected track to the cue outputs. - Page 57 TRACKS Fig 1. A Machinedrum and a Monomachine are MIDI slaved and connected to the two input pairs of the Octatrack. The Octatrack acts like a super mixer. It adjusts the levels of the incoming signals, applies effects and samples the other machines in real time. fig.
- Page 58 TRACKS Fig 3. Four mixer aux sends are connected to the inputs of the Octatrack. Each aux send sends a different signal. The Octatrack applies effects and reconstructs the incoming audio. fig. 4. Fig 4. Two DJ decks are connected to the Octatrack inputs. The headphones output is •...
-
Page 59: Patterns
PATTERNS PATTERNS The sequencer of the Octatrack shares a lot of similarities with the Machinedrum and Mon- omachine sequencers but have been considerably improved. It is incredibly powerful and plays an extremely important role in processing sounds and samples. The sequencer stores information in patterns. -
Page 60: Parameter Locks
PATTERNS Enter GRID RECORDING mode by pressing the [REC] key. A lit red <REC> LED indicates GRID RECORDING mode is active. Select the track to which you want to add note trigs by pressing the relevant [TRACK] button. Place out note trigs by pressing the [TRIG] keys. Note trigs are indicated by red <TRIG>... -
Page 61: Machine And Track Trigging
PATTERNS The sample slot list of the machine assigned to the track will appear. The sample already assigned to the machine is called TRK DEFAULT. While holding the [TRIG] key of the note trig pressed, use the [UP] and [DOWN] arrow keys to navigate in the list. Select the sam- ple that should be locked to the note trig and press [ENTER/YES] to a lock it. -
Page 62: Track Copy
PATTERNS Select the pattern you want to clear. Press and hold [FUNCTION]. Then press [PLAY] to clear the pattern. A message “CLEAR PATTERN” will be shown in the display. The clear pattern operation can be undone by pressing [FUNCTION] + [PLAY] directly after performing it. -
Page 63: Note Copy
PATTERNS The clear track page operation can be undone by pressing [PATTERN PAGE] + [PLAY] directly after performing it. The message “UNDO PAGE” will be shown in the display. NOTE COPY It is possible to copy a note trig, complete with all parameter lock settings, and paste it to a new location in the track. -
Page 64: Swing
PATTERNS EDIT PROJECT menu. Press [FUNCTION] + [BANK] to open the EDIT PROJECT menu. Select TRACK and then SLIDE PATTERN. Press [ENTER/YES] to open the SLIDE menu. First, choose the track you wish to apply the slide trigs to by pressing the appropriate [TRACK] button. -
Page 65: Scale Setup
PATTERNS ing and holding the [TRIG] key of the note trig you want to micro edit, then press either the left or right [ARROW] button. TRIG COUNT sets the number of times the note trig should be repeated. Adjust this setting with the up and down [ARROW] keys. -
Page 66: Per Track
PATTERNS fast as the 3/4X setting. 2X allows the track to be played back at twice the global tempo. Double speed is useful for increasing the base resolution of the step sequencer to 32th notes. Three quarter-speed is useful when the Octatrack is playing alongside other instru- ments set to the same BPM and you want the Octatrack to play triplets. -
Page 67: Tempo
PATTERNS TEMPO Here the general BPM of the patterns are set. The TEMPO screen is opened by pressing the [TEMPO] key. Now you can use the LEVEL encoder to change the current tempo in integer steps. The [UP] and [DOWN] arrow keys change the decimal part of the tempo. TAP TEMPO To tap a tempo, hold the [FUNCTION] key and tap the [TEMPO] key at a steady rhythm. -
Page 68: The Audio Editor
THE AUDIO EDITOR THE AUDIO EDITOR The audio editor is where editing of imported or recorded samples takes place. A number of tasks are carried out here. Trimming, loop point settings, normalization and, maybe most important of all, handling of slices. ACCESSING THE AUDIO EDITOR The audio editor is either accessed from the QUICK ASSIGN menu by using shortcuts. - Page 69 THE AUDIO EDITOR Set the start point with the A knob. A start point is indicated by an “S”marker. The sample will start to play from this position. A loop is indicated by an “L” marker. Move the loop point by turning the B knob. If a loop point is set, the sample will play from the start point to the end point, then loop from the loop point to the end point.
-
Page 70: Slice
THE AUDIO EDITOR SLICE Access by pressing [AMP] while in the audio editor. Here slice points are handled. A slice is a section of a sample. A total of 64 slices can be placed out anywhere in a sam- ple. Slices can be of different lengths and even overlap each other. A Flex sample slice can contain a loop point, loop points are however not available to Static sample slices. -
Page 71: Attributes
THE AUDIO EDITOR SLIC set to ON, STRT set to SL3 = STRT 4 when SLIC is set to OFF SLIC set to ON, STRT set to SL4 = STRT 6 when SLIC is set to OFF Note that turning off SLIC may change the structure of a sample completely. •... -
Page 72: Operations
THE AUDIO EDITOR • If the LOOP parameter in the FLEX/STATIC PLAYBACK SETUP menu is set to AUTO, different loop settings can be applied to different samples used in a track. TIMESTRETCH sets whether timestretch should be applied to the sample or not. Different timestretch algorithms are at hand. - Page 73 THE AUDIO EDITOR SAVE TRIM AS NEW SAMPLE will save the adjusted sample in the audio pool of the set. When choosing this operation the naming window will appear. A .wav file extension will be added to the chosen sample name. SAVE TRIM AND AUTO-ASSIGN will save the adjusted sample in the audio pool of the set.
-
Page 74: The Arranger
THE ARRANGER THE ARRANGER An arrangement is basically a number of patterns played in sequence. Each row in an arrangement can have settings for pattern length, scene assignments, tempo and mute. You can also loop segments of an arrangement or jump between arrangement rows. All this makes for a very powerful way of arranging your patterns. -
Page 75: Chain
THE ARRANGER press [ENTER/YES]. The active arrangement is always displayed in the header of the ARRANGEMENT menu. CHAIN Will make the arrangement selected in this menu start play immediately after the currently playing arrangement has finished playing. It has a similar function to pattern chaining, with the exception that no more than one arrangement can be chained. - Page 76 THE ARRANGER PAT displays which patterns are assigned to the rows. Move the focus to this column using the [ARROW] keys. Set the pattern you want to be played on the arrangement row using the LEVEL knob, or by pressing the appropriate [BANK]/[PATTERN]+[TRIG] key combi- nations.
- Page 77 THE ARRANGER and press [ENTER/YES] to open the ROW TEMPO window. Set the BPM with the LEVEL knob. Rows with dedicated BPM settings are indicated with a “B”. M offers mute settings per arrangement row. Move the focus to the M column and press [ENTER/YES] to open the ROW MUTE window.
-
Page 78: Early Startup Menu
To enter this mode, press the first [TRIG] key. If you have any trouble with your Octatrack and suspect it may be due to a hardware problem, perform this self test. Everything should come up as shown below. If not, contact Elektron support or the retailer you bought the Octatrack from. -
Page 79: Send Upgrade
Press the fourth [TRIG] key on the Octatrack that is used to send the OS upgrade. This will start the transmission of the OS to the other Octatrack. For faster OS updates, utilize the speed of the Elektron TurboCharge protocol. You •... -
Page 80: Technical Information
TECHNICAL INFORMATION TECHNICAL INFORMATION SPECIFICATIONS THE SEQUENCER ELECTRICAL SPECIFICATIONS 8 internal tracks Impedance balanced audio outputs: 16 banks per project Headphones out level: +15 dBu 256 patterns per project Main/cue outputs level: +10 dBu 8 arrangements per project Ω Output impedance: 560 unbalanced 4 parts per bank S/N ratio: 102 dBFS (20-20.000 Hz) -
Page 81: Credits
Thomas Ekelund Jesper Kouthoofd FACTORY DEFAULT SOUND DESIGN Daniel Troberg USER’S MANUAL Thomas Ekelund Jon Mårtensson CONTACT INFORMATION ELEKTRON WEBSITE http://www.elektron.se DELIVERY ADDRESS Elektron Music Machines MAV AB Sockerbruket 9 SE-414 51 Gothenburg Sweden TELEPHONE +46 (0)31 743 744 0... - Page 82 CONTACT INFORMATION...
-
Page 83: Appendix A: Machine Reference
Appendix A: MACHINE REFERENCE In this appendix, the Octatrack machines are explained. The individual machine parameters are pre- sented for reference. THRU MACHINE Thru machines do not sample or play back sounds. They are utility machines, very handy in live setups when using the Octatrack to re-route and affect external audio signals. -
Page 84: Flex Machine
FLEX MACHINE Flex machines offer the most extensive sound manipulation possibilities. A sample used by a Flex machine is loaded to the RAM memory of the Octatrack. From there it can be twisted, stretched and reassembled in multiple ways. Flex machines are unbeatable sound processors. FLEX MAIN FLEX SETUP PTCH adjusts the pitch of the sample. -
Page 85: Static Machine
STATIC MACHINE Static machines are perfect for handling extremely large samples. Samples assigned to Static machines are streamed from the Compact Flash card, thus their size can be in the order of gigabytes. They can of course still be time stretched and pitch scaled as needed. STATIC MAIN STATIC SETUP PTCH adjusts the pitch of the sample. -
Page 86: Neighbor Machine
NEIGHBOR MACHINE Neighbor machines listen to the output of the preceding track. Multiple tracks with Neighbour machines can form extremely powerful effects chains. They turn the Octatrack into a deluxe effects device. NEIGHBOR MAIN NEIGHBOR SETUP No main parameters are available. No setup parameters are available. - Page 87 Appendix A: MACHINE REFERENCE...
- Page 88 Appendix A: MACHINE REFERENCE...
-
Page 89: Appendix B: Effects Reference
Appendix B: EFFECTS REFERENCE In this appendix, the Octatrack effects are explained. The individual effect parameters are presented for reference. NONE The none effect is a blank effect. Use it if you don’t want to affect the audio of the track what so ever. NONE MAIN NONE SETUP No main parameters are available. -
Page 90: 12/24Db Multi Mode Filter
12/24DB MULTI MODE FILTER The resonant 12/24dB lo/hi/band-pass filter gives control of both the low and high filter cutoffs. Its flexi- bility can make it function as a variable gap bandpass filter as well. MULTI MODE FILTER MAIN MULTI MODE FILTER SETUP BASE sets the base cutoff frequency of the fil- HP sets the high pass filter slope. -
Page 91: 2-Band Parametric Eq
2-BAND PARAMETRIC EQ The parametric EQ is useful for shaping the timbre of a sound. Two frequency bands can be attenuated or amplified. PARAMETRIC EQ MAIN PARAMETRIC EQ SETUP FRQ1 sets the center frequency the first band TYP1 sets how the first band of the filter will of the EQ will affect. -
Page 92: Dj Style Kill Eq
DJ STYLE KILL EQ This EQ variant is somewhat of a cross-breed between a filter and an EQ. It is a three band EQ, capa- ble of completely filtering out the bands. DJ EQ MAIN DJ EQ SETUP LS F sets the frequency of the low shelf filter. No setup parameters are available. -
Page 93: 2-10 Stage Phaser
2-10 STAGE PHASER The phaser applies sweeping effects to sounds. It can also be used to make sounds appear wider. PHASER MAIN PHASER SETUP CNTR selects the center phase of the phase NUM selects the number of stages that should modulation. -
Page 94: Flanger
FLANGER A flanger is a modulation effect sharing similarities with the phaser. The main difference is the notches being evenly spread out in the frequency spectrum. FLANGER MAIN FLANGER SETUP DEL controls the amount of delay of the No setup parameters are available. flanged signal. -
Page 95: 2-10 Tap Chorus
2-10 TAP CHORUS The variable tap stereo chorus is great for enhancing the stereo image of a sound and for making it appear softer and smoother. CHORUS MAIN CHORUS SETUP DEL controls the delay time of the taps. TAPS sets the number of chorus taps that should be used. -
Page 96: Dynamix Compressor
DYNAMIX COMPRESSOR The Dynamix processor can be used for increasing the overall sound level of a track or pattern. It can also be used to enhance or reduce transients. COMPRESSOR MAIN COMPRESSOR SETUP ATK sets the attack time from 0.5 ms to 100 RMS adjusts the way the compressor works. -
Page 97: Lo-Fi Collection
LO-FI COLLECTION The lo-fi collection consists of several effects dedicated to making sounds grittier and more abrasive. These effects are not for the faint-hearted! LO-FI MAIN LO-FI SETUP DIST controls the signal overload distortion. AMPH sets the start phase of the amplitude modulation. -
Page 98: Echo Freeze Delay
ECHO FREEZE DELAY The delay adds echoes to the affected signal. The special echo freeze functionality makes it possible to repeat a portion of a sound. DELAY MAIN DELAY SETUP TIME controls the delay time of the delay loop. X sets if the delay will act as a ping-pong delay The actual delay time is relative to the current or not. -
Page 99: Gatebox Plate Reverb
GATEBOX PLATE REVERB The Gatebox plate reverb has many uses thanks to the implemented gating possibilities. REVERB MAIN REVERB SETUP TIME controls the decay time, i.e. how long GVOL sets the volume of the gated signal. time the reverberated signal will stay around before dying out. - Page 100 A-12 Appendix B: EFFECTS REFERENCE...
- Page 101 INDEX LFO designer 43 LFOs LFO designer LFO main LFO setup Amp main Amp setup MACHINE TRIGGING 51 ARRANGER 64 MAIN OUTPUTS 46 AUDIO EDITOR 58 MICRO TIMING 54 Attribute MIXER 26 Operation MUTE TRACKS Slice Direct mute Trim Mixer mute AUDIO POOL 18 OS UPDATE BANKS 33...
- Page 102 Playback SAMPLE LOCKS 50 TRACK PARAMETERS 13 SAMPLING Cue level Manual sampling Parameter value skip Recorder trig sampling Quick parameter editing SCALE SETUP 55 Track level Normal TRACK RECORDERS 28 Per track TRACK TRIGGING 51 SCENES 34 TRACKS 37 Assigning scenes Direct mute Volume locking Effects...
Need help?
Do you have a question about the Octatrack DPS-1 and is the answer not in the manual?
Questions and answers