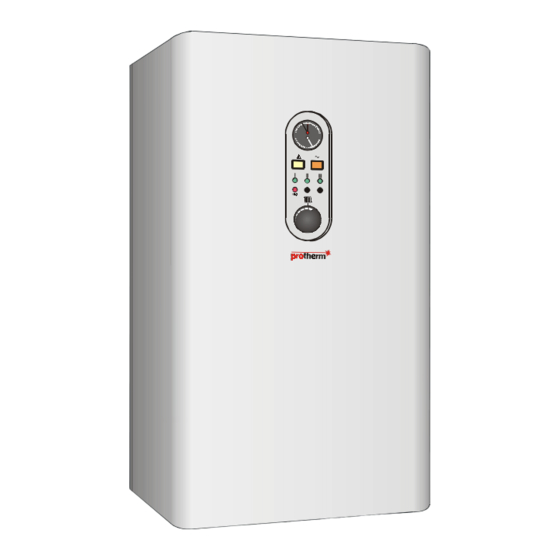
Summary of Contents for ProTerm RAY 9-24K
- Page 1 User and installation instructions for direct heating electric boiler RAY 9 - 24K Supplied By www.heating spares.co Tel. 0161 620 6677...
-
Page 2: Table Of Contents
Operation and installation instructions 1. Introduction..............................2 1.1. Quality assurance equipment and personal safety..............2 2. Boiler characteristics and equipment......................3 2.1. Characteristics........................... 3 2.2. Boiler equipment........................3 3. Control and signalling..........................4 4. Conditions for installation and operation....................5 5. Boiler connection dimensions and pump characteristics................6 6. -
Page 3: Introduction
DEAR CUSTOMER You have just become the owner of a direct heating electric boiler which was designed for central heating systems with a user friendly regulation option for thermal comfort. PROTHERM wants your electric boiler to serve you at a high level of efficiency. In order for it to do so, it is necessary to adhere to certain principles when installing and operating the boiler. -
Page 4: Boiler Characteristics And Equipment
2. BOILER CHARACTERISTIC AND EQUIPMENT 2.1. CHARACTERISTICS PROTHERM electric boilers are designed for usage in heating warm-water systems with forced water circulation. They serve as heaters of heating water, which is then pumped and distributed through central and level heating systems to heating bodies. -
Page 5: Control And Signalling
3. Control and signalling The electric boiler is designed for unmanned operation. After switching on of the main power supply switch there is a green signal light lit on the control panel (see the picture of the control panel) signalling, that the electric boiler is connected to the mains. -
Page 6: Conditions For Installation And Operation
water in the system. A pressure drop is also signalized by a yellow signal light. The type of failure can be identified according to the integrated pressure meter/thermometer reading. In order to achieve maximum operation efficiency (minimalized electricity costs) it is necessary to add an appropriate regulating mechanism to your heating system, which maintains the required temperature when you are at home and will lower the indoor temperature automatically at night or when nobody is at home. -
Page 7: Boiler Connection Dimensions And Pump Characteristics
5. Boiler connection dimensions and pump characteristics rear view bottom view Boiler connection description 1. a cable bushings 2. filling / draining 1/2” 3. a heating water inlet 3/4” 4. overflow of a safety valve 5. a heating water outlet 3/4” Supplied By www.heating spares.co Tel. -
Page 8: Mounting And Placement Of The Boiler
Available pressure (kPa) between heating supply and return lines 2000 1000 1200 1400 1600 1800 Flow rate through heating system (l/hod) 6. Mounting and placement of the boiler The mounting rail (is included) is recommended for mounting the boiler on the wall see Diagram 6. -
Page 9: Cascade Control
are located in the lower left corner of the bearing frame (frontal view). We also mount an external protective terminal (brass M6 screw). The paint has to be removed from the surface around the screw inside the case and on its outer side before fitting of the protective terminal. -
Page 10: Maintenance
8. Maintenance The electric boiler does not require maintenance. It is recommended, however, that a service company check the boiler once a year, preferably before the heating period (this is not included in the warranty). The skilled control should to tighten all the electric and water connections, to clear a pump, a safety and a deaeraling valve, to check safety components and in ending globally to attest a correct function of the boiler. -
Page 11: Technical Parameters
12. Technical parameters Voltage................V......3 x 400 + N + PE, 50 Hz Max. current (24kW)........... A......3 x 36 A Power input *............. kW..... 9, 12, 15, 18, 21, 24 Expansion tank............l......10l Min. operating boiler overpressure........ kPa....80 Max. operating boiler overpressure....... kPa....300 Electric protection..................IP 40 Heating water conection................G 3/4“... -
Page 12: Boiler Wiring Diagram
13. Boiler wiring diagram – pressure switch 0,8 Bar – over heat thermostat 100°C – operating thermostat max. 85°C PR1,PR2 – room thermostat 230 V / 0,1 A – ripple control S-HDO – RC contactor K1,K2 – cascade output (only 21 kW and 24 kW) Supplied By www.heating spares.co Tel. -
Page 13: Wiring Diagram Of Two Boilers Connected To Cascade
13.1. Wiring diagram of two boilers connected to cascade cascade connection – pressure switch 0,8 Bar – over heat thermostat 100°C – operating thermostat max. 85°C PR1,PR2 – room thermostat 230 V / 0,1 A – ripple control S-HDO – RC contactor K1,K2 –... - Page 14 to assurance a correct function of a preparation DHW itś necessary fill the switching relay with following parameters: switching contact current above 0,5 A / switching voltage 0-230 V, control voltage 230 AC at the interconnection the electric boiler with the DHW tank itś always necessary made it in accordance with conditions in user and installation instructions external wiring TS –...


Need help?
Do you have a question about the RAY 9-24K and is the answer not in the manual?
Questions and answers