Table of Contents
Advertisement
Advertisement
Table of Contents

Summary of Contents for Chariot Cheetah
- Page 1 USER GUIDE...
-
Page 2: Table Of Contents
CONTENTS IntroductIon use & features Thank You Setting the Parking Brake Manual Intended Use Using the Two-in One Cover Carrier Intended Use Adjusting the Padded Shoulder Harness 1.3 Specifications Child Placement and Seatbelt Using the Safety Wrist Strap Parts descrIPtIon Using the Sunshade Included in the box Storage... -
Page 3: Introduction
INTRODUCTION Thank you for choosing a Chariot Cheetah child carrier, This chassis is the key component of the world‘s premiere Child Transport System (CTS). Your new CTS carrier offers superior quality, safety features and comfort. PLEASE NOTE: All Chariot™ carriers are designed with the end consumer in mind and their desire for maximum flexibility & performance; in order to achieve this, the purchase of CTS conversion kit(s) is required allowing you to choose the activity you desire while also eliminating the need to purchase several dedicated child carriers. The five Chariot™ CTS... -
Page 4: Manual Intended Use
Luggage may also be carried in the storage bags risk of the user. intended for that purpose, provided the children in the carrier are not put at risk. 1.3 sPecIfIcatIons Cheetah 1 Cheetah 2 Maximum Load Carrying Capacity including passenger(s) 34Kg/75lb 45Kg /100lb... -
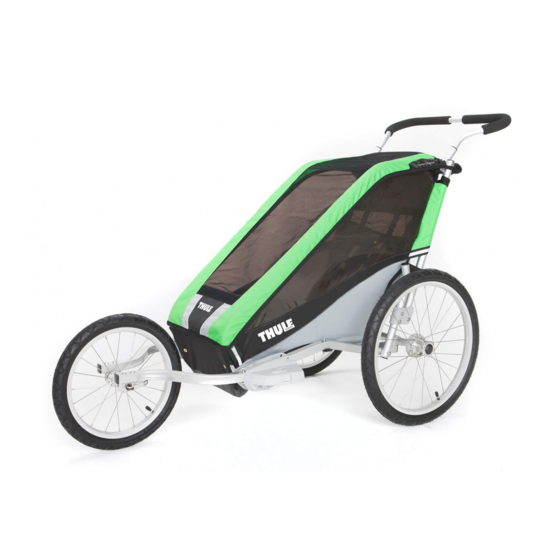
Page 5: Parts Description
PARTS DESCRIPTION Included Cheetah 1 or 2 chassis Adjustable Height Handlebar 2 - 20" Aluminum wheels 2 in 1 weather cover www.chariotcarriers.com 51100470... -
Page 6: Safety
SAFETY The safe use of this child carrier is vital to the enjoyment of it. For that reason it is extremely important that you familiarize yourself with the safety instructions in this manual and follow them whenever you use this child carrier. symBols and InstructIons 3.2 General safety InstructIons This owner’s manual uses warnings and notices... - Page 7 • Do not install a car seat or any other seating device not WARNING approved by Chariot Carriers Inc. on this child carrier. • Only use Chariot Carrier Inc. approved rack products This product is not suitable for running unless otherwise this child carrier will become unstable if any a CTS Jogging Kit is attached.
-
Page 8: Getting Started
GETTING STARTED 4.0 unPackInG your carrIer 4.1 Included comPonents Verify that your carrier was packaged with the following items: • Cheetah Chassis • Two-in-One Cover (on Chassis) • Handlebar • Two 20 inch Wheels • The Owner’s Manual NOTICE Store your carrier and its components in a safe dry place so that when they are needed, they are in the best possible condition. -
Page 9: Unfolding The Carrier
4.2 unfoldInG the carrIer 4.3 foldInG the carrIer With one hand, pull or release the auto-lock disc on one side of the back frame. With the other hand, push forwards on the bracket. Repeat for the back frame on the other side of the carrier. (See image 3) With one hand on the upper frame and the other hand on the carrier axle, push the two halves together. -
Page 10: Installing The Wheels
4.4 InstallInG the Wheels 4.5 removInG the Wheels Press and hold the wheel release button on the wheel. Press and hold the wheel release button on a wheel. (See image 1) (See image 2) Insert the wheel axle into the carrier axle. Pull the wheel out of the carrier axle. -
Page 11: Installing The Handlebar
4.6 InstallInG the handleBar 4.7 Install a cts™ conversIon kIt Select a CTS™ conversion kit from the following: • CTS Strolling Kit • CTS Jogging Kit • CTS Bicycle Trailer Kit • CTS Hiking Kit • CTS Cross-Country Ski Kit Install and use the selected kit according to the instructions included with the CTS™ Conversion Kits. With one hand on each side of the handlebar, press and hold the spring buttons on both ends of the handlebar. -
Page 12: Use & Features
USE & FEATURES 5.0 settInG the ParkInG Brake engage the disengage the parking brake parking brake Push in on the red foot pedal on the carrier axle to WARNING engage the parking brake. (See image 1) After engaging the brake always verify that the Never leave your child unattended in this parking brake is working –... -
Page 13: Using The Two-In One Cover
usInG the tWo-In one cover To improve the air flow inside the carrier; roll up the plastic window. Use the elastic rings at the top of the cover to keep the window up. (See image 1) To keep the elements out of the carrier; unroll the plastic window. Use the velcro at the bottom of the cover to keep the window closed. -
Page 14: Adjusting The Padded Shoulder Harness
Unbuckle the padded shoulder harness from the crotch strap and remove it from the carrier. Place the padded shoulder harness on your child’s chest so that the Chariot logo is positioned over their lower chest and the two upper straps are pointed up. -
Page 15: Child Placement And Seatbelt
Check that the seat unit attachment devices are correctly engaged before use. NOTICE When seating a single child in a Cheetah 2 always seat the child in the center position, use the center waist belt, remove one of the shoulder harnesses and fasten the remaining shoulder harness to the middle buckles. -
Page 16: Using The Safety Wrist Strap
5.4 usInG the safety WrIst straP 5.5 usInG the sunshade Loop the free end of the safety wrist strap around To shade inside the carrier; roll the sunscreen down. your wrist to prevent the child carrier from Use the velcro at the bottom of the sunscreen to becoming separated from you. -
Page 17: Storage
5.6 storaGe Your carrier is equipped with the following storage compartments: • One large mesh pocket on the upper back (See image 1) • One small pocket inside large mesh pocket • Two small mesh pockets inside the carrier at the front (See image 2) NOTICE The maximum load capacity of the cargo bag is 4 kg (8.8 pounds). The cargo rack accessory allows the carrier to carry an additional 2.3 kg (5 pounds) above the child compartment. -
Page 18: Additional Information
ADDITIONAL INFORMATION 6.0 accessorIes 6.1 servIce and care There are numerous accessories that are compatible Regularly inspect your child carrier, CTS™ Conversion with your Chariot: Kit(s) and accessories for damage and signs of wear. Metal Components • Hydration Cage • Chariot Cup Holder Check for any dents or cracks. -
Page 19: Storage
6.2 storaGe Store your child carrier, CTS conversion kit(s) and accessories in a dry area out of direct sunlight. If possible, hang the child carrier up off of the ground. Before storing your child carrier, it should be dry to prevent the growth of mold or bacteria. - Page 20 North America Contact: Thule Child Transport Systems Ltd. 105 - 5760 9th Street SE Calgary, AB T2H 1Z9 Canada Telephone: 1.800.262.8651 ask.us@chariotcarriers.com Europe Contact: chariot@thule.com...
Need help?
Do you have a question about the Cheetah and is the answer not in the manual?
Questions and answers