
Related Manuals for Toa EV-350R

Summary of Contents for Toa EV-350R
-
Page 1: Operating Instructions
OPERATING INSTRUCTIONS EV-350R DIGITAL ANNOUNCER Please follow the instructions in this manual to obtain the optimum results from this unit. We also recommend that you keep this manual handy for future reference. -
Page 2: Table Of Contents
TABLE OF CONTENTS 1. SAFETY PRECAUTIONS EQUIPMENT OUTLINE 2. BEFORE OPERATING THE UNIT 2.1. General Description 2.2. Features 2.3. Handling Precautions 2.4. About the Memory Card 2.4.1. Usable memory cards 2.4.2. Usable memory cards vs. maximum per-card recording time (hour:minute:second) 2.4.3. - Page 3 PLAYBACK FUNCTIONS AND OPERATION 7. PLAYBACK 7.1. Before Starting Playback 7.1.1. Single-source playback mode and dual-source playback mode 7.1.2. Output display 7.2. Manual Playback 7.2.1. Operating and connecting sections 7.2.2. Playback method 7.2.3. Playback operating procedure [Playback of the program set for output 1] [Playback of the program set for output 2] [Playback of the program set for outputs 1 and 2] 7.2.4.
- Page 4 8.5.3. Direct mode [Remote recording] [Remote erasure] [Remote playback] [Remote stop] 8.5.4. Binary mode [Remote recording] [Remote erasure] [Remote playback] [Remote stop] 8.5.5. Busy output and playback delay time settings (5-3 BUSY OUTPUT SETTING) [Busy output setting] [Playback delay time setting] 8.6.
- Page 5 9.6. Setting Operation (5. OPERATION SETTING) 9.6.1. Operation procedures (5-1 CONTROL FUNCTION SETTING and 5-2 ACTIVATION MODE SELECTION) 9.6.2. Operation procedures (5-3 BUSY OUTPUT SETTING) 9.7. Setting Operation (6. ENVIRONMENT SETTING) 9.7.1. Operation procedures (6-1 OPERATION BEEP, 6-2 RS-232C SETTING, 6-3 PASSWORD, 6-4 DIGITAL ANNOUNCER INITIALZATION, 6-5 KEYLOCK and 6-6 VERSION INDICATION) 9.8.
-
Page 6: Safety Precautions
Operating the unit with a damaged power supply cord may cause a fire or electric shock. • Contact your TOA dealer as to the cleaning. If dust is allowed to accumulate in the unit over a long • When moving the unit, be sure to remove its power period of time, a fire or damage to the unit may supply cord from the wall outlet. -
Page 7: Before Operating The Unit
2. BEFORE OPERATING THE UNIT 2.1. General Description Employing the memory cards as recording media, the unit is a programmable, maintenance-free digital announcer that permits both recording and playback. 2.2. Features LCD-displayed operation guides and handy selection dial facilitate recording and playback. Holds up to two memory cards. -
Page 8: Usable Memory Cards Vs
(TOA/M-A40M) Notes Contact your TOA dealer as for large-capacity cards of other makers. All the cards available for the EV-300R and EV-300P (our conventional models) can be used for this unit. Up to two memory cards can be installed in the unit. -
Page 9: Inserting And Ejecting The Memory Card
[Backup battery replacement (EV-F series excepted)] If the battery voltage drops below a marginal level, either of the following indications is displayed on the screen. Important. It is suggested that the battery be replaced immediately when the indication of [CARD A BAT. OUT] is displayed. -
Page 10: Nomenclature And Functions
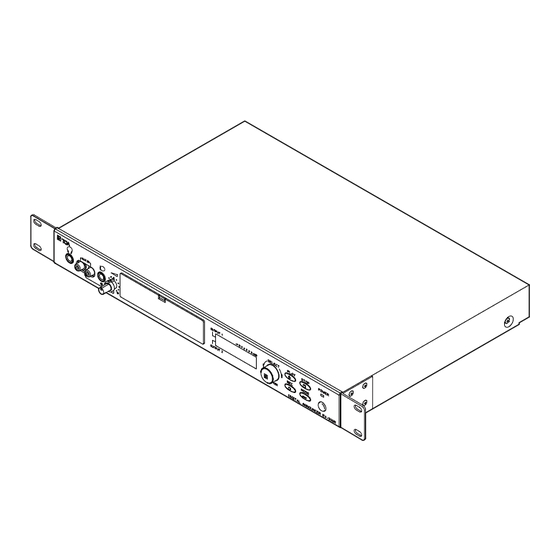
3. NOMENCLATURE AND FUNCTIONS [Front Panel] (Inside of cover) Power switch Display screen (LCD) Power is switched on and off with each Displays recording/playback status, setting depression of this switch. contents, etc. Eject keys [A, B] Power indicator lamp Eject the card inserted into memory card slots A Lights when the power is switched on. -
Page 11: [Rear Panel]
[Rear Panel] 0dB=1V (Terminals) Auxiliary input Activation control inputs 1-8 Connects to external musical equipment to be Short these inputs when playing back programs used for recording or broadcast. or when recording or erasing sentences. (See p. 40.) Output 1 Sends out the unit's playback signal, or signals Erasure control input from the microphone input or auxiliary input. -
Page 12: Outline Of Operational Functions
• Key or dial depression • Dial rotation SELECT PLAY SELECT This symbol is DIGITAL ANNOUNCER EV-350R the example of "PLAY" key depression. 1. Playback Key Used for playback operation. 2. Stop Key • Terminates playback or recording. -
Page 13: Whole Operation Flow (Playback, Recording, And Setting)
4.2. Whole Operation Flow (Playback, Recording, and Setting) [When the memory card is not formatted] Exection of memory F O R M A T C A R D A . card formatting. POWER-ON (p. 19) PLAY [Initial screen] [Playback screen] Playback operation (p. -
Page 14: Summarized Operational Functions (Recording, Playback, And Setting)
4.3. Summarized Operational Functions (Recording, Playback, and Setting) [Recording] Formatting the card erases all of the contents RECORDING CARD FORMATTING recorded on the card. (p. 19) Performs recording-related settings (sound RECORDING SETTING * quality, method, etc.). (p. 21, 22) Starts recording manually or by making the MANUAL START RECORDING rear panel-mounted recording control terminal (p. - Page 15 Continued from the previous page Selects the program playback mode: "Single- 4. OUTPUT/VOLUME SETTING * 4-1 DUAL-SOURCE PLAYBACK SELECTION source playback" or "Dual-source playback" mode. (p. 39, 67) Sets the overall program playback volume. 4-2 MASTER VOLUME (p. 39, 67) Selects the remote control method: "Direct"...
-
Page 16: Sentence
5. THE SENTENCE AND THE PROGRAM 5.1. Sentence The sentence is the minimum unit of recording data that the Digital Announcer handles. One sentence is created per recording. Every sound source, such as a message, chime tone and background music, can be recorded into the sentence. - Page 17 Up to 256 programs can be input using the unit (regardless of the number of cards to be used). Sentences to be used in the program can be read from either of the cards inserted into Card Slots A and B. Program (Up to 256 Programs) Sentence P001...
-
Page 18: Recording
6. RECORDING 6.1. Before Recording 6.1.1. Notes on recording There are some types of memory cards which cannot be used with the unit (refer to p. 7). If such an unusable card is installed, the screen will tell you to the effect that the card cannot be used. The same indication is also displayed if the card installed is broken even though it is of correct type. -
Page 19: Power On
6.1.3. Power on Insert the memory card (refer to p. 9), then switch on the power. The initial screen appears on the front- located display screen. [Initial screen] 6.1.4. Formatting the card (Initial formatting) The warning message is displayed when the card not formatted is installed in the unit. Cards not formatted cannot be used with the unit. -
Page 20: Recording Sound Quality
6.2. Recording Sound Quality Eight different types of recording sound quality are made available to the unit, so that you can select the sound quality best suited to given situation depending on the type of recording sound source, recording time, and type of memory card to use. -
Page 21: Manual Start Recording And Automatic Start Recording
6.3. Manual Start Recording and Automatic Start Recording 6.3.1. Recording method There are two different methods to start recording: manual start and automatic start. Manual start Recording starts instantly when the [REC] key is pressed or when the rear-mounted recording control terminals are shorted in recording standby mode. Automatic start Recording automatically starts when a recording input signal is input after switching the mode from recording standby to input waiting mode by pressing the [REC] key or... -
Page 22: Recording Setting Procedure
6.5. Recording Setting Procedure Perform necessary settings before recording. [Initial screen] P o w e r o n Sentence number selection (emergency, A001-A128) SELECT Selection of recording method Card remaining time (manual start/auto start) Recording sound quality selection MODE SELECT SELECT Normal SELECT... - Page 23 Selection of “Change” or “No change” [Initial screen] of the recording method. STOP SELECT Method is changed. Indicates the set SELECT recording method. Method is not changed. [Selection item] Recording Sound Quality Recording Method 32k Normal 44.1k Normal Manual start 44.1k Long 32k Long Auto start Level “High”...
-
Page 24: Auto Start Recording
6.6.2. Auto start recording Set the recording method for "Auto start." (Refer to p. 22.) Also, adjust the recording level to the appropriate level with the microphone and auxiliary input volume controls. P o w e r o n Step 1. Press the Recording key. - Page 25 Sentence title input (See p. 81 “Entering SELECT SELECT STOP Characters.”) Step 4. Press the Stop key to Step 5. Exit the sentence In this example, the title stop the recording. title screen. “A002” is not changed. The sentence title screen will appear.
-
Page 26: Playback
7. PLAYBACK Playback begins by designating the program. (Refer to p. 16.) Input the program before starting playback. (Refer to p. 33.) 7.1. Before Starting Playback 7.1.1. Single-source playback mode and dual-source playback mode The unit comes with two outputs, 1 and 2, which can be designated for individual programs. [Single-source playback mode] Programs are played back only from Output 1 regardless of output settings. -
Page 27: Manual Playback
7.2. Manual Playback For the remotely-controlled playback, refer to p. 40 “5-1 CONTROL FUNCTION SETTING” [Recording/ erasure, playback and stop]. 7.2.1. Operating and connecting sections [Front] [Rear] Loudspeaker Amplifier for broadcast of Output 1 Loudspeaker Supplied power cord. (Connect to the AC power supply.) Amplifier for broadcast of Output 2 7.2.2. -
Page 28: Playback Operating Procedure [Playback Of The Program Set For Output 1]
7.2.3. Playback operating procedure [Playback of the program set for output 1] [Initial screen] Playback standby status (Output 1) OUTPUT 1 POWER-ON PLAY OUTPUT 2 Program No. 2 SELECT Step 1. Press the Playback key. Step 2. Turn the Selection dial to select the program number. - Page 29 [Initial screen] Playback (Output 1) Playback standby status (Output 1) ] A N N O U N C 3 PLAY STOP STOP Program No. 2 (or end of playback) Step 3. Press the Playback key to Step 4. Press the Stop key to return to Step 5.
-
Page 30: Screen Display During Playback
7.2.4. Screen display during playback Display can be changed by turning the Selection Dial during playback. (This does not adversely affect the current playback output.) PLAY STOP Playback standby status Playback (Output1) (Output1) OUTPUT 1 (Ends automatically OUTPUT 2 or manually) Volume indication SELECT Remaining time... -
Page 31: Playback Program Information Diaplay
7.2.5. Playback program information diaplay Master volume settings can be changed while the unit is in playback standby mode or it is playing back. PLAY STOP Playback standby status (Output1) Playback (Output1) OUTPUT 1 (Ends automatically OUTPUT 2 or manually) MODE MODE Program title... -
Page 32: Emergency Playback (External Activation)
7.3. Emergency Playback (External Activation) By directly designating and activating a recorded emergency sentence, emergency playback can be achieved with no need to set programs. Even when the unit is in use for broadcast from the microphone or external equipment or it is playing back a program, the current broadcast is interrupted and the program playback stops, allowing the emergency broadcast to go through. -
Page 33: Setting Functions
8. SETTING FUNCTIONS 8.1. Setting Functions (1. PROGRAM SETTING) 8.1.1. Program input setting (1-1 PROGRAM INPUT) Refer to p. 54 for the operation procedures. [Playback sound data section and Control data section] Each of the programs (P001-P256) consists of the "Playback sound data section" and "Control data section," each of which is composed of input data. -
Page 34: Playback Method
8.1.2. Playback Method There are 4 different playback methods. Select one of them when making the setting. [Continuous program playback] Sentences and silent intervals registered into the program are consecutively played back in order of step number, and playback stops after the program is completed. This method (factory-preset) is used for program playback unless other method is especially selected. -
Page 35: [Repeat Playback]
[Repeat playback] Sentences and silent intervals registered into each program are repeatedly played back in order of step number at the preset repetition interval (i.e. the duration from the last sentence playback till the first sentence playback) and by the preset number of repetitions. When the program is played back for the set number of repetitions, the unit stops its operation and the initial screen is displayed. -
Page 36: [Endless Playback]
[Endless playback] This function plays back all the sentences recorded on Card A, being followed by Card B in order of sentence number. After the last sentence is completed, playback returns to the first sentence and continues. Playback intervals of 0-5 seconds can be inserted between sentences. To stop playback, press the [STOP] key or short the Stop terminal. -
Page 37: Step Input, Erasure And Insertion
8.1.3. Step input, evasare and insertion [Step input] Example when the Sentence No. A003 is input in Example when the Sentence No. A003 is the Step No.002 input in the Step No. 002 Step No. Sentence No. Step No. Sentence No. (or silent interval) (or silent interval) A002... -
Page 38: Setting The Program Output Level (1-2 Output Level)
8.1.4. Setting the program output level (1-2 OUTPUT LEVEL) Output levels can be set for each created program. Refer to p. 58 for the operation procedures. 8.1.5. Program verification (1-3 PROGRAM VERIFICATION) You can verify the program title, playback method, and content of the created program. Refer to p. -
Page 39: Setting Functions
8.3. Setting Functions (3. MONITORING THE SENTENCES AND PROGRAMS) You can monitor recorded sentences or created programs with a headphone. Note: Sounds can be played back only at the headphone output, and not at Output 1 or Output 2. 8.3.1. Monitoring the sentence (3-1 SENTENCE MONITORING) Recorded sentences can be monitored with a headphone. -
Page 40: Setting Functions (5. Operation Setting)
8.5. Setting Functions (5. OPERATION SETTING) 8.5.1. Remote control (5-1 CONTROL FUNCTION SETTING) [Recording/erasure, playback and stop] Using the control input terminals located on the rear panel, sentence recording and erasure, as well as program playback can be remotely controlled by external equipment. It is possible to remotely play back and stop the program set for Output 1 separately from the program set for Output 2. -
Page 41: [Activation Control Inputs 1-8 In Binary Mode]
[Activation control inputs 1-8 in binary mode] Rec/ Rec/ Rec/ Rec/ Activation Activation Activation Activation Erasure Play Play Play Play Erasure Erasure Erasure control terminal control terminal control terminal control terminal Sentence Program Sentence Program Sentence Program Sentence Program Note: [1] in the table stands for "make". -
Page 42: Activation Mode For Remote Control (5-2 Activation Mode Selection)
8.5.2. Activation mode for remote control (5-2 ACTIVATION MODE SELECTION) Activation mode can be set individually for remote recording, remote playback, and remote stop. Refer to p. 68 for the operation procedures. [Remote recording] (1) Recording activation mode 1 (one-shot pulse input activation)* (2) Recording activation mode 2 (level-operated input activation) [Remote playback] Direct mode... -
Page 43: [Remote Erasure]
[Remote erasure] To erase recording, short the Erasure Control input, then the Activation Control input. Erasure stops following completion. All front panel keys are disabled during erasure. Erasure Control input 50 ms more Activation Control input 2 Erasure of A002 Sentence erasure [Remote playback] Up to eight programs (P001-P008) can be remotely played back. - Page 44 (4) Playback Activation Mode 4 (one-shot activation, sequential storage and playback) Playback begins when the Activation Control input is shorted. All subsequent Activation Control inputs are Activation Control input sequentially stored and programs are played back in input order. Up to 16 inputs are stored for each output. Playback of P001 Playback of P002 Program Playback...
-
Page 45: [Remote Stop]
[Remote stop] You can set Stop mode when in one-shot-pulse-activated Playback Activation Mode (Playback Activation Mode 1-4). (1) Stop Activation Mode 1 (stop during playback) Playback stops immediately after the Stop Control Activation Control input 1 input is shorted (OFF ON). -
Page 46: [Remote Erasure]
[Remote erasure] Recording can be erased by shorting the Erasure Control input after the Activation Control input is shorted. Erasure stops following completion. All control inputs and front-panel keys are disabled Activation Control input A002 during erasure. 50 ms or more Erasure Control input Sentence erasure Erasure of A002... -
Page 47: [Remote Stop]
(4) Playback Activation Mode 4 (one-shot pulse input activation, sequential storage/playback) Playback begins by shorting the Playback Control input after the Activation Control input is shorted P002 OFF). Activation Control input All subsequent Activation Control inputs and P003 Playback Control inputs are sequentially stored and Playback Control played back in input order. -
Page 48: Busy Output And Playback Delay Time Settings (5-3 Busy Output Setting) [Busy Output Setting]
8.5.5. Busy output and playback delay time settings [5-3 BUSY OUTPUT SETTING] [Busy output setting] Perform the busy output ON/OFF setting at the time of program playback, sentence recording or erasure, system setting , and microphone announcement. Setting the playback busy output for ON sends out a contact signal from the busy output terminal corresponding to the output set for each program, whether in single-source or dual-source playback mode. -
Page 49: Initializing The Digital Announcer
8.6.4. Initializing the digital announcer (6-4 DIGITAL ANNOUNCER INITIALIZATION) All settings return to the initial values set by the factory. The setting contents are initialized in the setting menus; "RECORDING SETTING," "4. OUTPUT/VOLUME SETTING," "5. OPERATION SETTING," "6. ENVIRONMENT SETTING," and "9. AUTO-LEVEL SETTING." Refer to p. -
Page 50: Setting Functions (8. Copying The Program, Sentence And Card)
8.8. Setting Functions (8. COPYING THE PROGRAM, SENTENCE AND CARD) You can copy a created program or recorded sentence to the new program number or new sentence number over both cards. In addition, the whole content of one card can be copied to another card. 8.8.1. -
Page 51: Setting Functions (9. Auto-Level Setting)
8.9. Setting Functions (9. AUTO-LEVEL SETTING) 8.9.1. Automatic level adjustment (9-1 AUTOMATIC LEVEL ADJUSTMENT) Setting the automatic level adjustment function for ON allows the sentences recorded at different recording signal levels to be played back at the uniform level when playing back a program. Depending on the programs, the playback sound may not be smooth to the ears. -
Page 52: Setting Operation
9. SETTING OPERATION 9.1. An Example of Operation Procedures How to make settings is explained here referring to an example of the "1-1 PROGRAM INPUT" (See p. 33 and 54.). In this example, the sentence Nos. A001 and A005 are assigned to the program No. P001. Moreover the Playback method and Output channel are set as shown below. - Page 53 [Program Initial Setting Value] Playback Method Program Title Step No. Sentence No. Output Output 1 and Output 2 A001 for P001 Continuous Program P001-P256 001 only Playback (Same as program A128 for P128 numbers) B001 for P129 B128 for P256 (1 sentence only for each program) If the program input is not executed, the playback operates in accordance with the initial settings preset at the...
-
Page 54: Setting Operation (1. Program)
9.2. Setting Operation (1. PROGRAM) 9.2.1. Operation procedures (1-1 PROGRAM INPUT) [Initial screen] POWER-ON MODE Program input [Menu screen]* Program input Program number selection Continuous program playback I N P U T SELECT SELECT SELECT Program No. P001 SELECT SELECT SELECT Single program playback Same setting... - Page 55 Pressing the [STOP] key while the menu screen is displayed returns the display to the initial screen. Pressing the [STOP] key while the function setting screen is displayed returns the display to the previous menu screen. Note: When the function setting is completed, the screen returns to the menu screen. To terminate all setting operations, further press the [STOP] key to return to the initial screen.
- Page 56 Program input Select next Step No. (2 – 128) or END. [Sentence number setting for each Step] Selection of Input, Selection of sentence Step No. selection Erasure or Insertion (or silent section) ] [ A 0 0 1 ] ] [ A 0 0 1 ] ] [ A 0 0 1 ] SELECT SELECT...
- Page 57 Selection of "Register", Output setting "Do not register" or "Initial value" Select the next Program No. (P002 – P256) or END. 0 1 O U T H N G E P R O G Execution of change SELECT SELECT p. 54 SELECT SELECT The program is...
-
Page 58: (1-2 Output Level And 1-3 Program Verification)
9.2.2. Operation procedures (1-2 OUTPUT LEVEL and 1-3 PROGRAM VERIFICATION) [Initial screen] POWER-ON MODE [Menu screen]* Program input Output level I N P U T SELECT Output level Program number selection Output level setting 1 - 2 L E V E L S E T P 0 0 1 U T L E V E L SELECT SELECT... - Page 59 Pressing the [STOP] key while the menu screen is displayed returns the display to the initial screen. Pressing the [STOP] key while the function setting screen is displayed returns the display to the previous menu screen. Note: When the function setting is completed, the screen returns to the menu screen. To terminate all setting operations, further press the [STOP] key to return to the initial screen.
-
Page 60: (1-4 Program Initialization And 1-5 Program Title)
9.2.3. Operation procedures (1-4 PROGRAM INITIALIZATION and 1-5 PROGRAM TITLE) [Initial screen] P o w e r o n MODE Program Initialization* [Menu screen]* Program input Program number selection I N P U T SELECT SELECT All programs Program initialization Execute program initialization? T I A L I N I T I L Z... - Page 61 Pressing the [STOP] key while the menu screen is displayed returns the display to the initial screen. Pressing the [STOP] key while the function setting screen is displayed returns the display to the previous menu screen. Note: When the function setting is completed, the screen returns to the menu screen. To terminate all setting operations, further press the [STOP] key to return to the initial screen.
-
Page 62: Setting Operation (2. Editing The Sentences)
9.3. Setting Operation (2. EDITING THE SENTENCES) 9.3.1. Operation procedures (2-1 SENTENCE VERIFICATION and 2-2 SENTENCE ERASURE) [Initial screen] P o w e r o n MODE [Menu screen]* Program input SELECT Sentence verification * Sentence verification Selection of sentence numbers (or emergency sentences) SELECT SELECT SELECT... - Page 63 Pressing the [STOP] key while the menu screen is displayed returns the display to the initial screen. Pressing the [STOP] key while the function setting screen is displayed returns the display to the previous menu screen. Note: When the function setting is completed, the screen returns to the menu screen. To terminate all setting operations, further press the [STOP] key to return to the initial screen.
-
Page 64: (2-3 Sentence Title And 2-4 Interval Erasing)
9.3.2. Operation procedures (2-3 SENTENCE TITLE and 2-4 INTERVAL ERASING) [Initial screen] P o w e r o n MODE [Menu screen]* Program input Sentence title input (editing)* I N P U T SELECT Sentence title input Sentence number selection Sentence title input (editing) A 0 0 1 T I T E N D ]... - Page 65 Pressing the [STOP] key while the menu screen is displayed returns the display to the initial screen. Pressing the [STOP] key while the function setting screen is displayed returns the display to the previous menu screen. Note: When the function setting is completed, the screen returns to the menu screen. To terminate all setting operations, further press the [STOP] key to return to the initial screen.
-
Page 66: Setting Operation (3. Monitoring The Sentences And Programs)
9.4. Setting Operation (3. MONITORING THE SENTENCES AND PROGRAMS) 9.4.1. Operation procedures (3-1 SENTENCE MONITORING and 3-2 PROGRAM MONITORING) [Initial screen] P o w e r o n MODE [Menu screen]* Program input Sentence monitoring * Select the next sentence number (A002–A128 and B001–B128) or Emergency Sentence. SELECT Recording sound quality indication (p. -
Page 67: Setting Operation (4. Output/Volume Setting)
9.5. Setting Operation (4. OUTPUT/VOLUME SETTING) 9.5.1. Operation procedures (4-1 DUAL-SOURCE PLAYBACK SELECTION and 4-2 MASTER VOLUME) [Initial screen] P o w e r o n MODE [Menu screen]*1 Program input Single-source/Dual-source playback selection * SELECT Single-source/ Playback mode (single-/dual-source) Selection of Registration/ selection No registration/Initial value... -
Page 68: Setting Operation (5. Operation Setting)
9.6. Setting Operation (5. OPERATION SETTING) 9.6.1. Operation procedures (5-1 CONTROL FUNCTION SETTING and 5-2 ACTIVATION MODE SELECTION) [Initial screen] P o w e r o n MODE [Menu screen]* Program input I N P U T SELECT Control function setting (selection of “Direct” or “Binary” mode)* Selection of “Registration”, Control function setting... - Page 69 Pressing the [STOP] key while the menu screen is displayed returns the display to the initial screen. Pressing the [STOP] key while the function setting screen is displayed returns the display to the previous menu screen. Note: When the function setting is completed, the screen returns to the menu screen. To terminate all setting operations, further press the [STOP] key to return to the initial screen.
-
Page 70: Operation Procedures (5-3 Busy Output Setting)
9.6.2. Operation procedures (5-3 BUSY OUTPUT SETTING) [Initial screen] P o w e r o n MODE [Menu screen]* Busy output setting Program input SELECT Busy output setting Busy mode selection Busy output channel selection SELECT SELECT SELECT SELECT SELECT Playback busy Busy output 1 SELECT... - Page 71 Playback delay time setting Busy output on-off selection (0, 1, 2... 99 seconds) SELECT SELECT SELECT SELECT No delay 99-second delay Selection “Registration,” “No registration” or “Initial value” Execution of change SELECT SELECT Changed mode is registered. SELECT SELECT Not changed. Busy output on-off selection Initialization SELECT...
-
Page 72: Setting Operation (6. Environment Setting)
9.7. Setting Operation (6. ENVIRONMENT SETTING) 9.7.1. Operation procedures (6-1 OPERATION BEEP, 6-2 RS-232C SETTING, 6-3 PASSWORD, 6-4 DIGITAL ANNOUNCER INITIALZATION, 6-5 KEYLOCK and 6-6 VERSION INDICATION) [Initial screen] P o w e r o n Password setting MODE SELECT SELECT [Menu screen]* Program input... - Page 73 Password setting Selection of “Initial value,” Password on-off setting “Registration” or “No registration” SELECT SELECT SELECT SELECT No password is used. Character input (editing) (See p. 81 “Entering SELECT characters.”) SELECT Password is registered (changes). SELECT Display after password entry Original password is maintained.
-
Page 74: Setting Operation (7. Editing The Cards)
9.8. Setting Operation (7. EDITING THE CARDS) 9.8.1. Operation procedures (7-1 CARD NAME INPUT and 7-2 CARD REFORMATTING) [Initial screen] P o w e r o n MODE [Menu screen]* Card name input (editing)* Program input Card slot (A/B) selection SELECT SELECT SELECT... - Page 75 Pressing the [STOP] key while the menu screen is displayed returns the display to the initial screen. Pressing the [STOP] key while the function setting screen is displayed returns the display to the previous menu screen. Note: When the function setting is completed, the screen returns to the menu screen. To terminate all setting operations, further press the [STOP] key to return to the initial screen.
-
Page 76: Operation Procedures (7-3 Card Optimization And 7-4 Software Write Protect)
9.8.2. Operation procedures (7-3 CARD OPTIMIZATION and 7-4 SOFTWARE WRITE PROTECT) [Initial screen] P o w e r o n MODE [Menu screen]* Program input SELECT Card optimization Card optimization Selection of both card slots A/B Execute card optimization? SELECT SELECT SELECT SELECT... -
Page 77: Setting Operation (8. Copying The Program, Sentence And Card)
9.9. Setting Operation (8. COPYING THE PROGRAM, SENTENCE and CARD) 9.9.1. Operation procedures (8-1 PROGRAM COPYING) [Initial screen] MODE [Menu screen]* Program input Program copying SELECT Selection of the program number Selection of the program number (P001–P256) to be copied (P001–P256) to copy to Program copying SELECT... -
Page 78: Operation Procedures (8-2 Sentence Copying And 8-3 Card Copying)
9.9.2. Operation procedures (8-2 SENTENCE COPYING and 8-3 CARD COPYING) [Initial screen] P o w e r o n MODE [Menu screen]* Program input Sentence copying SELECT Selection of the sentence number Selection of the sentence number (A001-128, B001-128) to be copied (A001-128, B001-128) to copy to Sentence copying SELECT... - Page 79 Pressing the [STOP] key while the menu screen is displayed returns the display to the initial screen. Pressing the [STOP] key while the function setting screen is displayed returns the display to the previous menu screen. Note: When the function setting is completed, the screen returns to the menu screen. To terminate all setting operations, further press the [STOP] key to return to the initial screen.
-
Page 80: Setting Operation (9. Auto-Level Setting)
9.10. Setting Operation (9. AUTO-LEVEL SETTING) 9.10.1. Operation procedures (9-1 AUTOMATIC LEVEL ADJUSTMENT) [Initial screen] P o w e r o n MODE [Menu screen]* Program input Automatic level adjustment SELECT Selection of the program number or all programs Auto level adjustment on-off selection (P001-P256 or ALL PROGRAMS) Automatic level adjustment SELECT... -
Page 81: Entering Characters
9.11. Entering Characters The sentence title, program title, card name, and password can be input using up to eight alphanumeric characters. To do this, use the [SELECT] dial. 9.11.1. Usable characters and commands Characters Commands [END] Terminates the character input screen. [FORWD] Moves the cursor right one character. -
Page 82: Character Input Example
9.11.3. Character input example In this example, the misspelled word "DEY" has been entered, which is corrected to read as "DAY". SELECT Select D. SELECT Select [DEL]. SELECT Register D. SELECT Erase E. SELECT Select E. SELECT Select [INS]. SELECT Register E. -
Page 83: Microphone Announcements And Source Equipment Broadcast
10. MICROPHONE ANNOUNCEMENTS AND SOURCE EQUIPMENT BROADCAST This unit also permits broadcast from the microphone connected to the microphone input on the front panel, or from external musical equipment connected to the auxiliary input located on both the front and rear panels. Priorities are attached to broadcast as follows. -
Page 84: Installation
11. INSTALLATION 11.1. Connection Examples When connecting a cassette deck, CD player or other musical equipment or amplifier to the unit or when connecting the unit's power supply, make sure that the power to each equipment is switched off. 11.1.1. Front panel Headphone Musical equipment Microphone... -
Page 85: Terminal Block
11.1.3. Terminal block [Upper row] Error detection output terminal To timer or switching device To switching device To amplifier Outputs 1 and 2 of the terminal block provide the same signal as the phone jack outputs 1 and 2. Use the contact input under the condition of no-voltage make contact, 24 VDC for open voltage, 10 mA for short-circuit current, and 50 ms or more for short-circuit time. -
Page 86: Mounting The Unit In An Equipment Rack
11.2. Mounting the Unit in an Equipment Rack Fiber washer (accessory) Equipment rack Digital Announcer Rack mounting screw (accessory) 11.3. Attaching Rubber Feet When installing the unit on the desk, attach the supplied rubber feet to the unit's bottom surface. Attach over a round hole. -
Page 87: Specifications
12. SPECIFICATIONS Power Source AC mains, 50/60 Hz or 24 V DC 0.4 A Power Consumption 12 W Output Outputs 1, 2 : 0 dB*, 600 , unbalanced, phone jack/screw terminal Headphone output : 0 dB*, 100 , unbalanced, phone jack Input MIC : -55 dB*, 600 , unbalanced, phone jack... - Page 88 Printed in Japan 133-12-681-3A...
Need help?
Do you have a question about the EV-350R and is the answer not in the manual?
Questions and answers