Table of Contents
Advertisement
Quick Links
Advertisement
Table of Contents

Subscribe to Our Youtube Channel
Related Manuals for Bewator KC 5000

Summary of Contents for Bewator KC 5000
- Page 1 Code central KC 5000 Technical manual...
- Page 2 Copyright © February 2002 Bewator AB, Solna Sweden. Material from the KC5000 Technical manual may only be copied with the consent in writing of Bewator. Bewator reserves the right to alter both the content of the manual and the design of the product. Document number: 80728-2 Bewator AB is part of Bewator Group, which develops and markets a complete security product range that includes access control and alarm.
-
Page 3: Table Of Contents
KC5000 Technical manual — Contents Contents KC5000 THE INTELLIGENT CODE LOCK ..............4 How to use ..........................4 Printouts...........................4 System components .......................5 INSTALLATION ......................6 Placing and mounting......................6 Before starting to install the system ..................7 Connecting the KC5000......................8 PREPARATIONS ......................10 PROGRAMMING.......................14 Set time and date ........................15 Time zones..........................16 Codes .............................20 Doors ............................24... -
Page 4: Kc5000 The Intelligent Code Lock
KC5000 Technical manual — Introduction KC5000 the intelligent code lock KC 5000 is a code lock system for up to six doors. With a capacity of 99 codes and a built in timer with 99 time zones, which can be unique for different doors, enables to handle different access levels for different groups. -
Page 5: System Components
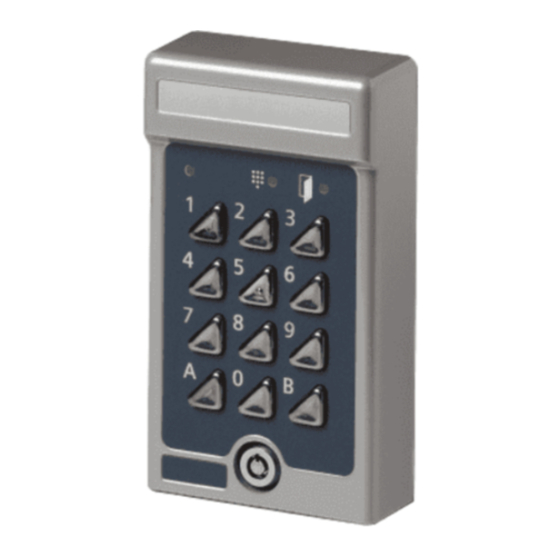
KC5000 Technical manual — Introduction System components KC5000 consists of the following equipment: • Central unit. In the central unit all data for the system is programmed and stored. • Keypad M65. Up to 6 keypads can be connected (one at each door). •... -
Page 6: Installation
KC5000 Technical manual — Installation Installation This chapter describes how to install KC 5000. Placing and mounting Central unit The central unit is designed for wall mounting (there are three screw holes in the back plate), in a secure room with normal temperature, e.g. the building’s power room. -
Page 7: Before Starting To Install The System
KC5000 Technical manual — Installation Before starting to install the system At the back of the manual are three charts. Make copies of the charts and ask the system manager to fill them in according to the instructions in the chapter Preparations. -
Page 8: Connecting The Kc5000
KC5000 Technical manual — Installation Connecting the KC5000 The diagram below shows how to connect the keypad to the central unit, the electric lock and the exit request button, and also where the power supply, telephone line and printer (if any) should be connected. LINE CARD LINE CARD PL 1... - Page 9 KC5000 Technical manual — Installation Connection between keypad M65 and the Background lighting on/off. central unit. Set the link to OFF if the background lighting Suitable cable: 4 x 0,5 mm². should be permanently shut off. For connection of remaining keypads, Connection of the electric lock.
-
Page 10: Preparations
KC5000 Technical manual — Preparations Preparations The person (the installer, caretaker or landlord) who is going to program the information to be used by the system needs a record. This means that you, being the purchaser, first have to think about how the system should be used in the building. - Page 11 KC5000 Technical manual — Preparations Time zones This is how to fill in the time zones you have chosen: 1. Take out the copy of the Time zones chart and write the number of the first time zone, i.e. 1, under the Time zone heading. 2.
- Page 12 KC5000 Technical manual — Preparations Doors When you have written down the time zones, it is time to complete the Doors chart. Proceed as follows: Under the Door heading, write the number of the first door, i.e. 1. Under the Lock activating time heading, enter the number of seconds for the door to be open after a correct access code has been entered.
- Page 13 KC5000 Technical manual — Preparations Codes Now it is time to fill in the access codes to be used at the doors: Take out a copy of the Codes chart and write the first code under the Code heading. Write also under the User heading, who should use the code.
-
Page 14: Programming
KC5000 Technical manual — Programming Programming In this chapter are instructions on how to program time zones, codes etc. All information is programmed with help of the keyboard in the central unit. The display shows prompts telling what to do next. Note! When programming the KC5000 all the codes works as normal, but the new information will not be updated until the next shift of minute. -
Page 15: Set Time And Date
KC5000 Technical manual — Programming Display In stand-by position, the following text is displayed: 01-06-10 15:40 PRESS Today’s date and time are displayed. Press . The main menu is displayed: 1) CODES 2) _ _ _ _ _ 3) DOORS 4) TIMES You can now choose what information to register, change or delete. -
Page 16: Time Zones
KC5000 Technical manual — Programming Enter the current time by typing hours and minutes in one sequence, e.g. 0935. If no change is to be made to the time, go straight to step 4. Press . The following text is displayed: ENTER DATE 01-06-30 Enter the current date by entering year, month and day in one sequence,... - Page 17 KC5000 Technical manual — Programming Press . The following text is displayed: ENTER VALID DAYS 0000-2359 [ Choose which days the time zone should be valid. 1=Monday, 2=Tuesday etc. If the time zone should be valid the whole week, press 1, 2, 3, 4, 5, 6 and 7. If it only should be valid on Saturdays and Sundays, press 6 and 7.
- Page 18 KC5000 Technical manual — Programming Enter the number of the desired time zone e.g. 2, or use the arrow keys to scroll to the desired time zone. Press . The following text is displayed: ENTER NEW TIME (02) The number of the time zone is displayed within brackets. Enter a new interval, or, to only change the days, leave the prompt unanswered.
- Page 19 KC5000 Technical manual — Programming Choose DELETE (3). The following text is displayed: WHICH TIMEZONE? (TIMEZONE Enter the number of the time zone to be deleted, or use the arrow keys to scroll forward or backwards to the desired time zone. Press .
-
Page 20: Codes
KC5000 Technical manual — Programming Codes This chapter describes how to program information about New Entry, Changing and Deleting codes New Entry of codes Take out the Codes chart and program the codes to be used in the doors: Choose CODES (press 1) on the main menu. The following text is displayed: 1) NEW 2) EDIT... - Page 21 KC5000 Technical manual — Programming If the wrong digit is entered by mistake, press and replace the incorrect value with the correct value. Press . The following text is displayed: ENTER NEW CODE Program any additional codes in the same way. Otherwise, press .
- Page 22 KC5000 Technical manual — Programming Press . The following text is displayed: WHICH DOORS? 1377 The numbers of the doors where the code is currently valid is displayed within the brackets. Enter at which doors the code should be valid, or leave the prompt unanswered.
- Page 23 KC5000 Technical manual — Programming Press . The following text is displayed: ARE YOU SURE? 1377 Press to interrupt the sequence without deleting the code. The main menu is displayed. Press to delete the code. If the code is deleted, the following text is displayed for a few seconds: DELETING CODE 1377! Then the main menu is displayed again.
-
Page 24: Doors
KC5000 Technical manual — Programming Doors This chapter describes how to program information about New Entry and Changing doors. Doors cannot be deleted from the system – only the information can be changed. However, the information can be changed for any programmed door using the Codes functions (see Changing codes). - Page 25 KC5000 Technical manual — Programming Enter the number of the time zone when the door should be unlocked. If the door should be locked 24 hours, keep the pre-set setting (0). Press . The following text is displayed: TIMEZONE OPEN BUTTON? (0=ALWAYS) (0) Enter the number of the time zone when the push button on the inside should work.
-
Page 26: Printouts
KC5000 Technical manual — Printouts Printouts If a printer is connected to the central unit, you have the possibility to have two types of printouts. • Programmed information. At any time you can print the information you have programmed about Time zones, Codes and Doors. The printout will give a good overview of the codes, time zones etc. - Page 27 KC5000 Technical manual — Printouts Press , to start the printout. Printing can be terminated by pressing When printing is complete, press to go back to stand-by position. Edit level of registration With the choice EDIT LEVEL OF REGISTRATION in the OPTION MENU, you can choose what type of transaction that is sent to the printer.
-
Page 28: Remote Programming
KC5000 Technical manual — Remote programming Remote programming One of the great advantages with the KC5000 is that the system can be remotely programmed. Using this feature, you don’t have to go to the central unit to maintain the information in the system – instead; you can call the KC5000 number and perform programming from an ordinary telephone. - Page 29 KC5000 Technical manual — Remote programming Press . The following text is displayed: ENTER PASSWORD Enter a six-digit password. Press . The code is now stored. The following text is displayed again: / TO STEP CHANGE PASSWORD Press to leave the Option menu and go back to stand-by position. General information about remote programming When you program your KC5000 from a telephone you should call the telephone number given to your KC5000 according to the subscription.
- Page 30 KC5000 Technical manual — Remote programming Points to remember When programming from the central unit, you always see the result of your key presses. However, when programming from a telephone you will get no confirmation. Therefore, it is important that you follow the instructions carefully and that you know what you are programming.
-
Page 31: Enter New Information
KC5000 Technical manual — Remote programming Enter new information Change time and date To change time and date, proceed as follows: ! ! ! ! ! ! ! ! Call up the KC5000 and enter password ! ! ! ! Press . - Page 32 KC5000 Technical manual — Remote programming Enter which days the time zone should be valid, e.g. 12345 for Monday ! ! ! ! to Friday. Finish with If programming was performed correctly, three rising tones are heard, otherwise four identical tones are heard. Proceed and program other information (start from step 2) or press to disconnect the call.
-
Page 33: Codes
KC5000 Technical manual — Remote programming Codes This describes how to remote program information about New Entry , Changing and Deleting codes. New Entry of codes This is how to program a new code: ! ! ! ! ! ! ! ! Call up the KC5000 and enter password ! ! ! ! - Page 34 KC5000 Technical manual — Remote programming Enter the number of the door/s where the code should be valid. ! ! ! ! Finish with Enter during which time zone/s the code should be valid. ! ! ! ! Finish with If programming was performed correctly, three rising tones are heard, otherwise four identical tones are heard.
-
Page 35: Doors
KC5000 Technical manual — Remote programming Doors This describes how to remote program information about Changing doors. Changing doors This is how to change information about doors: ! ! ! ! ! ! ! ! Call up the KC5000 and enter password ! ! ! ! Press... -
Page 36: Technical Information
KC5000 Technical manual — Technical information Technical information Central unit KC5000 • Code central for 6 doors. • 99 codes. • 99 time zones • Opening time 1-999 seconds. • Code blocked after 12 wrong attempts. • Lockable housing for wall mounting. •... - Page 37 KC5000 Technical manual — Charts Time zones Time zone From Days...
- Page 38 KC5000 Technical manual — Charts Codes User Code Door Time zones...
- Page 39 KC5000 Technical manual — Charts Doors Lock Time zone Time zone Time zone Door activating registration free access push button time...
-
Page 40: Templates For Remote Programming
KC5000 Technical manual — Templates remote programming Templates for remote programming Change time and date Date Time Time zones New Entry and Changing Time zone Start time Stop time Days Delete Time Same time zone zone... -
Page 41: Codes
KC5000 Technical manual — Templates remote programming Codes New Entry Code Door/s Time zone/s Changing Current code New code Door/s Time zone/s Delete Same code Code Doors Changing T. zone for pushbutton Lock act. time T. Zone for T. zone for free access registration Door... -
Page 42: Notes
KC5000 Technical manual — Templates remote programming Notes ___________________________________________________________________________ ___________________________________________________________________________ ___________________________________________________________________________ ___________________________________________________________________________ ___________________________________________________________________________ ___________________________________________________________________________ ___________________________________________________________________________ ___________________________________________________________________________ ___________________________________________________________________________ ___________________________________________________________________________ ___________________________________________________________________________ ___________________________________________________________________________ ___________________________________________________________________________ ___________________________________________________________________________ ___________________________________________________________________________ ___________________________________________________________________________ ___________________________________________________________________________ _________________________________________________________________________...
Need help?
Do you have a question about the KC 5000 and is the answer not in the manual?
Questions and answers