Table of Contents
Advertisement
Quick Links
Advertisement
Table of Contents

Summary of Contents for Grundig GSB 980
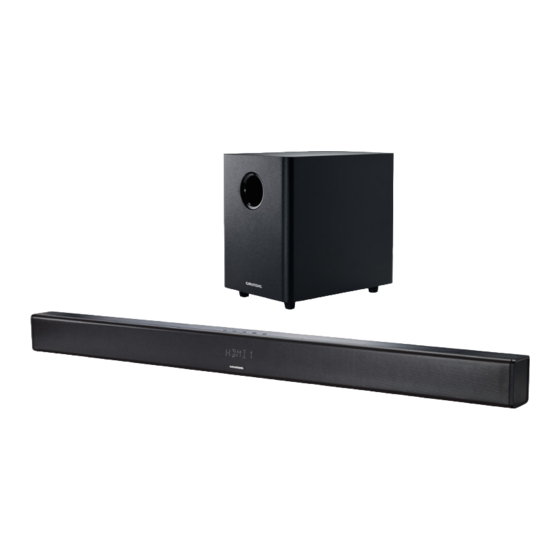
- Page 1 SOUNDBAR SYSTEM GSB 980...
-
Page 2: Table Of Contents
INHALT ------------------------------------------------------------------------------------------------------------------- SETUP-AND-SAFETY- Caution: high-frequency radiation OVERVIEW- B uttons on the remote control and the soundbar The displays on the soundbar Sockets on the back of the soundbar Control elements on the subwoofer PREPARATION/CONNECTING Preparation Connecting the LCD television Connecting an MP3 player Connecting external devices Connecting the soundbar mains adapter Connecting the subwoofer power cord 10- OPERATION- Switching on and off Automatic switch-off Selecting the input source Adjusting the volume Selecting sound settings Adjusting base Muting 11- BLUETOOTH-MODE- Compatible with the following devices Selecting the Bluetooth input source F inding and connecting a Bluetooth a uxiliary device P layback from the Bluetooth auxiliary device D eactivating the Bluetooth auxiliary device R eactivating a Bluetooth auxiliary d evice that is logged on... - Page 3 SETUP-AND-SAFETY ------------------------------------------------------------------------------ Please note the following instructions when set- Keep new and used batteries out of the reach ting up the system: of children. If the battery compartment can no longer be closed securely, stop using the de- The devices are designed for the playback of vice and keep out of the reach of children. audio signals. All other uses are expressly pro- Remove the battery when it is flat or when you hibited. know that the devices will not be used for Please ensure adequate ventilation. A space of a long period of time. The manufacturer ac- at least 10 cm must be maintained at all times cepts no liability for damage caused by leak- both to the side and above the soundbar and ing batteries.
-
Page 4: Overview
OVERVIEW -------------------------------------------------------------------------------------------------------- Buttons-on-the-remote-control-and-the-soundbar The-displays-on-the-soundbar O n /Off. 88888 D isplay for: -+-– A djusts the volume. – I nput sources, e.g. » ARC «; " –-+ A djusts the base. – Sound settings, e.g. » MUSIC «; S witches the sound to mute and back – Volume, e.g. » V 06 «; on again. – Base, e.g. » SWV 0 «; S elects the input sources »AUX«, – Sound off, » MUTE «. » A UDIO«, »BT«, »HDMI1«, »HDMI 2«, »ARC« or »OPT«. -
Page 5: Sockets On The Back Of The Soundbar
OVERVIEW -------------------------------------------------------------------------------------------------------- Sockets-on-the-back-of-the-soundbar HDMI OUT (ARC) DC-IN- S ocket for the mains adapter R-AUX-IN-L A nalogue audio input for con- cable. necting an LCD television. Note: LINE-IN A udio input (analogue audio The only way to completely signal, jack plug) for connecting disconnect the soundbar from an MP3 player. the mains supply is to pull out SERVICE O nly for servicing. the mains adapter. OPTICAL A udio signal input (digital audio signal, optical) for connecting an LCD television. HDMI-OUT H DMI output (digital (ARC) -
Page 6: Control Elements On The Subwoofer
OVERVIEW -------------------------------------------------------------------------------------------------------- Control-elements-on-the-subwoofer D isplay lights up red when the subwoofer is in standby mode; f lashes blue while Bluetooth logs on; l ights up blue following success- ful logging on. B utton for logging on the sub- woofer to the soundbar using Bluetooth. AC- ~ S ocket for power cord. Note: The only way to completely disconnect the subwoofer from the mains supply is to pull out the power plug. ENGLISH... -
Page 7: Preparation/Connecting
»PCM«. For a digital signal via the »HDMI- OUT- Connecting-the-LCD-television (ARC) socket, register the soundbar set us- Connecting-soundbar-to-the-LCD- ing the “digilink function” on the Grundig television-(digital-audio-signal) television and activate the “ARC function”. This connection enables the digital audio signal Switch off the television’s loudspeaker. to be played back from the television via the soundbar using HDMI cable (ARC – Audio Re- turn Channel) -
Page 8: Connecting An Mp3 Player
PREPARATION/CONNECTING - - --------------------------------------------- Connecting-soundbar-to-the-LCD- Connecting-an-MP3-player television-(digital-audio-signal) 1 Connect the USB interface of the MP3 player 1 Connect standard optical cable to the IN« socket of the device using to the »LINE- » PTICAL« socket of the soundbar. a standard adapter cable. 2 Connect the optical cable to the audio output Note: socket of the LCD television (optical, PCM To remove the MP3 player switch of the de- s ignal). vice and pull out the cable. Note: Connecting-external-devices The television audio output must be set to »PCM«. -
Page 9: Connecting The Soundbar Mains Adapter
PREPARATION/CONNECTING - - --------------------------------------------- Connecting-the-soundbar-mains- Connecting-the-subwoofer- adapter power-cord Notes: Note: Check whether the mains voltage stated on Check whether the mains voltage stated on the type plate (on the mains adapter) corre- the type plate (on the back of the subwoof- sponds to your local mains supply. If this is er) corresponds to your local mains supply. not the case, contact your specialist dealer. If this is not the case, contact your specialist dealer. All the other devices must be connected be- fore you connect the mains adapter. 1-Plug the power cord supplied into the »AC- ~ « socket of the device. 1-Plug the mains adapter cable into the »DC-IN« socket of the soundbar. 2 Plug the power cord into the wall socket. 2 Plug the power cord socket into the mains Caution: adapter. The subwoofer is connected to the mains via the power cord. Pull out the power plug if 3 Plug the power cord into the wall socket. - Page 10 PREPARATION/CONNECTING - - --------------------------------------------- Logging-the-subwoofer-on-to-the- soundbar When first starting up, you must log the subwoof- er on to the soundbar so that the audio signal can be transmitted wirelessly. Note: The maximum distance between the sound- bar and the subwoofer is 9 metres. 1 Connect the subwoofer to the mains supply. – T he display on the subwoofer lights up red. 2 Use » « to switch the soundbar on and out of standby. – T he red display in the soundbar goes out. 3 Press and hold the button » « on the sub- woofer for 3 seconds.
-
Page 11: Switching On And Off
OPERATION - - --------------------------------------------------------------------------------------------------- Switching-on-and-off Adjusting-base 1 Switch on the soundbar set by pressing » «. 1 Adjust base using » " –-+ « on the remote control – T he last input source used is automatically – D isplay: » SWV -8 « to » SWV + 8 «. selected. Muting 2-Switch the soundbar set to standby mode by You can switch the sound to and from mute with pressing » «. this function. Automatic-switch-off 1 Activate mute using » « on the remote control. -
Page 12: 11- Bluetooth-Mode
BLUETOOTH-MODE - - ------------------------------------------------------------------------------ Deactivating-the-Bluetooth- - a uxiliary-device 1 Deactivate the registered Bluetooth auxiliary Compatible-with-the-following- device on the auxiliary device or » « press devices and hold for 3 seconds. – t he blue display flashes. Your GSB 980 can be connected to any com- mercially available Bluetooth-compatible de- Reactivating-a-Bluetooth-auxiliary- vices that comply with the A2DP standard. This device-that-is-logged-on includes smartphones, laptops and tablet PCs, for example. -
Page 13: 13- Wall-Mounting
WALL-MOUNTING --------------------------------------------------------------------------------- 1 Place the brackets supplied on the back of the soundbar and attach using the 4 screws pro- vided. 2 Select the mounting site and mark the holes (distance 40 cm). Note: The subsurface must be strong enough to bear the weight. 3 Drill the holes (8 mm ∅), insert the wall plugs and screw in the screws. Note: Distance of screw head from the wall: 5 mm. 4 Carefully slide on the soundbar over the screw heads. ENGLISH... -
Page 14: Cleaning The Device
INFORMATION ------------------------------------------------------------------------------------------- Cleaning-the-device Technical-data Pull the power cord out of the mains socket. Clean This device is noise-sup- 2150 the appliance with a damp cloth and a mild de- pressed according to the tergent. Do not use any detergents containing applicable EU directives. alcohol, spirit, ammonia or scouring agent. This product fulfils the European directives 2004/108/EC, 2006/95/EC, 2009/125/ EC Environmental-note and 2011/65/EU. These products have been The type plate is located on the rear/underside made from high-quality parts of the devices. - Page 15 Grundig Intermedia GmbH Beuthener Strasse 41 90471 Nürnberg, Germany www.grundig.com 72011 412 5100 14/44...
Need help?
Do you have a question about the GSB 980 and is the answer not in the manual?
Questions and answers