
Summary of Contents for Arlec AEC008
- Page 1 CPIN002474 Instruction Manual Model AEC008 Important! Please read these instructions carefully...
- Page 2 SAFTEY INSTRUCTIONS • Keep the chiller bottles (supplied) away from children as they contain chemical based crystals. • DO NOT use this unit for functions other than those described in this instruction manual • DO NOT tilt the unit. Always keep in upright. Position on a flat and stable surface, where it cannot be easily knocked over. Take extra care when operating • DO NOT cover or obstruct the air filter inlet or outlet grilles • DO NOT use the unit in a wet room, such as a bathroom or laundry • DO NOT sit or place articles on the unit • DO NOT touch the unit with wet hands or bare feet • DO NOT let chemical substances come into contact with the unit • DO NOT use the unit in the presence of inflammable substances or vapour such as alcohol, insecticides, petrol etc. • DO NOT use the mains plug to start and stop the unit • DO NOT pull the supply cord or place it near a heat source. Always unwind the cord completely to avoid overheating. If the supply cord is damaged it must be replaced by the service agent or a similarly qualified person, in order to avoid a hazard • DO NOT allow children to play with this appliance. This appliance is not intended for use by children or infirm persons without supervision. • DO NOT conduct repairs on this unit. It has been built in accordance with relevant safety and performance standards. An electrical specialist must carry out all repairs. • If the power cord is damaged, it must be replaced by a qualified electrician • DO NOT use the unit without the filter fitted • DO NOT allow objects to enter any ventilation or exhaust other than ice or water as specified in these instructions • This unit is intended for indoor use only.
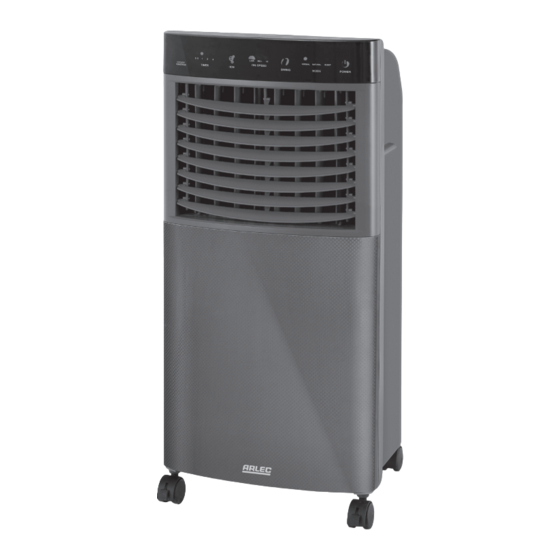
- Page 3 I DENTIFICATION 1. Control Panel 2. Display Panel 3. Horizontal & Vertical louvres 4. Front body 5. Caster Wheels 6. Carry Handle 7. Remote control 8. Mains Cord Holder 9. Air Inlet 1 0. Honey comb evaporative cooling pad 11. Dust Filter 1 2. Water Tank Remote Control...
- Page 4 Control Panel & Display Panel 4. ON/SPEED Button 5. Swing Button 1. COOLER/HUMIDIFIER Button 6. Mode Selection Button 2. TIMER Button 7. OFF Button 3. ANION Generator Button OPERATION:- Make sure your read all the safety warning before you operate this unit for the first time. ON / Speed Button Plug the unit to a standard mains socket and turn on the mains switch. The unit will beep twice and will be in a stand-by status with the Power ON indicator flashing until the ON button is pressed. Press the ON/ Speed button to start the unit. Each time the unit is turned on it will be in Normal Mode of operation with the wind speed setting on medium. The wind speed setting will stay on medium speed for 3 sec and will switch back to low (Lo) speed setting automatically unless changed to a different setting. The unit is programmed in such a way that each time the unit is turned on the anion generator is turned on and the corresponding anion generator LED will glow on the display panel. Press the ON / Speed button repeatedly to change the fan speed – Low, Medium and High and the corresponding speed indicator LED will glow on the display panel. Off Button To turn the unit off press this button once and the unit will be turned off. Swing Button Press this button and the vertical louvres will swing sideways and swing indicator LED will glow on the display panel. Press this button again and the unit will stop oscillating. To control the air flow direction via the horizontal louvres adjust louvres manually (louvres interlocked).
- Page 5 the unit will shut off automatically and will stay in a standby mode. 0.5h→1h→1.5h→2h……→7.5h→0→back to 0.5h Cool / Humidifier Button Press this button and the unit will beep once and will start its cooler / humidifier function and the corresponding indicator LED will glow on the display panel. This function is recommended for higher/ efficient cooling effect under any mode. Warning: Make sure there is enough water in the tank before pressing the cool/ humidifier button. In an event where there is not enough water and the cool /humidifier button is pressed, the unit will beep twice and will automatically come out of cool / humidifier function. This is done so as to prevent the pump motor from permanent damage. The unit will keep running in the selected mode but without the cool / humidifier function. Fill the water tank and then press the cool / humidifier button. Mode Button Change the mode to the desired type (Normal, Natural and Sleep) by pressing the Mode button repeatedly. Normal Mode:- When the unit is turned ON it will stay in Normal mode and the corresponding LED will glow on the display panel. Under this mode the fan speed remains constant at set speed (Low/Medium/High). This mode is recommended for normal operation Natural Mode:- In this mode the unit will operate in a preset program which varies the speed of the fan between Low, Medium, High & Off giving a natural breeze effect. Press the mode button until the LED corresponding to Natural mode glows on the display panel. In this mode each speed setting has its own preset program which will vary the speed of the fan accordingly. If the unit is set at high speed it will operate in Hi Natural model which varies the speed between Hi, Medium, Low & Off. If the fan speed is set at medium the fan will operate in Medium Natural mode which varies the speed between Medium, Low & Off. If the fan speed is set at low the fan will operate in Low Natural mode which varies the fan speed between Low, Medium & Off. Sleep Mode:- Press the Mode button until the LED corresponding to the Sleep mode glows on the display panel. Under this mode the speed switches between High, Medium & Low natural mode thus saving energy during night.
- Page 6 Anion Generator Button Press this button to and the built is negative ion generator will start to release negative ions. When this function is used the corresponding LED indicator will be on. Under this mode negative Ions are blown throughout the room by the fan to neutralize the positive charge in the particles of smoke and dust that float in the air, thereby losing their energy & will no longer remain in the air. The combination of negative ions on bacteria may deter the bacteria growth or even kill the bacteria. Negative ions are effective in creating a cleaner and more sterile environment leading to a healthier lifestyle. Remote Control The remote controller requires 1 x CR2032 3V Lithium battery (Button cell). To install the batteries remove the battery covers as per the marking shown on the battery cover. Insert the battery with the + marking on the battery facing up. Put the battery cover back before use. The remote controller has all the same functions as the buttons on the control panel of the air cooler. To use the remote control make sure that the air cooler unit is plugged into the mains supply, then point the remote to the sensor located at the display panel and press the desired button. The remote control operating range is 6 metres. Make sure there is no obstacle between the remote and the sensor. Storage and Drainage Sufficient water needs to be stored in the storage tank (located at the bottom of the unit) to ensure supply of cool air. Before storing water in the unit, switch the unit off and unplug from the mains supply. Water is poured into the storage tank by unlocking the storage tank lock by turning it in anti clockwise direction and pulling the tank halfway out from the rear of the unit. Make sure the water storage tank is refilled once it runs out. To drain the water when the unit is not in use 1. Position a water tray flat on the floor beneath the drain hole. 2. Unscrew the drain cap at the bottom of the unit and then remove the water plug from the drain hole allowing the water to drain out. (Refer to the figure below). 3. When the drain tray is almost full replace the water plug into hole and empty the tray. Drain Cap Location...
- Page 7 Chiller Bottle Each unit comes with one chiller bottle which helps to keep the water in the tank cool ( 8˚C less than the ambient temperature) Use of Chiller bottle:- 1) Keep the chiller bottles (supplied) away from the children as they contain chemical based crystals. 2) Put the chiller bottle inside the freezer until they are completely frozen. 3) Place the bottle inside the storage tank and then fill the tank. Cleaning and Maintenance Always switch off and unplug from the mains supply before attempting any kind of cleaning and maintenance. After extended period of use, replace the water in the tank with fresh water. The air filter (only) at the inlet at the rear of the unit can be cleaned if required. The filter should be cleaned in a mild soapy solution then left to dry before replacing. External enclosure can be cleaned with a damp cloth. Specifications:- Model No AEC008 Rated Voltage 220-240Vac Rated Frequency 50Hz Current 0.3A Rated Power 65 watt Water Capacity 8 litres Operational Time Setting 0.5 – 7.5hrs Air Flow 315 m...
- Page 8 The Warranty is in addition to other rights and remedies you may have under a law in relation to the product to which the Warranty relates. Our goods come with guarantees that cannot be excluded under the Australian Consumer Law. You are entitled to a replacement or refund for a major failure and for compensation for any other reasonably foreseeable loss or damage. You are also entitled to have the goods repaired or replaced if the goods fail to be of acceptable quality and the failure does not amount to a major failure. Arlec Australia Pty. Ltd. ACN 009 322 105 (“Arlec”) gives the Warranty. Arlec’s telephone number, address and email address are: Customer Service: (03) 9982 5111 Building 3, 31 – 41 Joseph Street, Blackburn North, Victoria, 3130 Blackburn North LPO, P.O.
Need help?
Do you have a question about the AEC008 and is the answer not in the manual?
Questions and answers