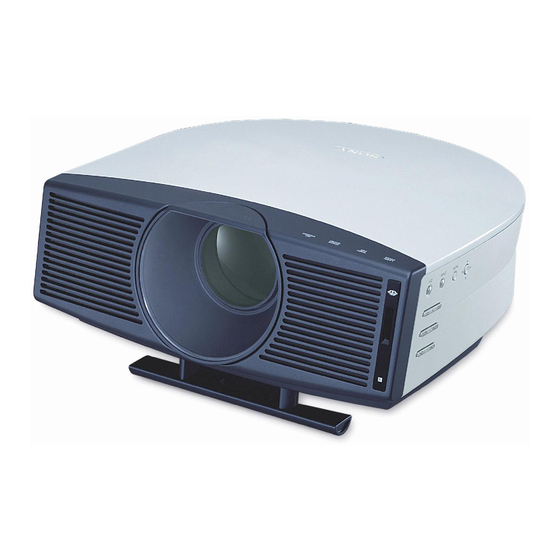
Sony VPL-HS10 Manual
Hide thumbs
Also See for VPL-HS10:
- Operating instructions manual (208 pages) ,
- Service manual (128 pages) ,
- Product information (2 pages)
Table of Contents
Advertisement
Advertisement
Table of Contents

Related Manuals for Sony VPL-HS10


Summary of Contents for Sony VPL-HS10
- Page 1 4-091-754-13(1) Video Projector VPL-HS10 © 2002 Sony Corporation...
- Page 2 Declaration of Conformity verwerkt worden. Trade Name: SONY Model No.: VPL-HS10 Responsible Party: Sony Electronics Inc. Address: 680 Kinderkamack Road, Oradell NJ 07649 U.S.A. Telephone No.: 201-930-6972 This device complies with Part 15 of the FCC Rules.
-
Page 3: Table Of Contents
Using the Menus Table of Contents Operation through the Menus ....25 Menu Lists ..........27 Menu Configurations ........27 Menu Items ............27 About the Preset Memory No......30 Adjusting Picture Quality of a Signal from the Precautions ..........5 Computer ............ - Page 4 Others Troubleshooting ........51 Replacing the Lamp ......... 53 Replacing the Air Filter ......54 Specifications .......... 55 Location of Controls ........ 63 Front ..............63 Rear ..............64 Remote Control ..........65 Index ............66...
-
Page 5: Precautions
Precautions On safety • Check that the operating voltage of your unit is identical with the voltage of your local power supply. • Should any liquid or solid object fall into the cabinet, unplug the unit and have it checked by qualified personnel before operating it further. -
Page 6: Connections And Preparations
Connections Unpacking Preparations Check the carton to make sure it contains the following items: This section describes how to install the Remote control (1), projector and screen, how to connect the Size AA (R6) equipment from which you want to project batteries (2) the picture, etc. -
Page 7: Step 1: Installing The Projector
Watching sports, etc. with your company Step 1: Installing the Projector You can obtain good picture quality even when you project the picture from the side of the screen (“Side Shot”) (1 page 10). You can enjoy home entertainment with this projector in various situations. Enjoying home theater Viewing images, recorded by a digital camera and stored in the “Memory Stick,”... - Page 8 Highly heated and humid Using the supplied Cinema Filter The Cinema Filter is supplied with the projector, allowing you to receive higher contrast color and emphasized black color by attaching or removing. Use it according to preference. To attach the Cinema Filter 1 Detach the lens hood stopper to remove the lens hood.
-
Page 9: Using The Optional Conversion Lens
projector to keep the Lens from contact with the floor or a Using the Optional desk top. Otherwise, the Lens may malfunction if it receives too much pressure from the weight of the Conversion Lens projector. 6 Fasten the end of the safety wire of the You can install the following two types of lenses Conversion Lens to the bottom of the (optional) on the projector. -
Page 10: Installing The Projector And A Screen - Floor Installation
To remove the installed Conversion Lens b: Maximum projection distance between the screen and the center of the projector’s lens 1 Remove the end of the safety wire of the when you place the projector on the side, or installed Lens from the bottom of the when you place the projector with the center projector by removing the screw. - Page 11 When projecting from the center The tables show the distances when projecting the You can change the projection angle using the conventional video and 1080i format signals. Distances adjuster. (1 page 18) used for projecting a 720p format signal, computer’s signal Position the projector with the lens end within and data stored in the “Memory Stick”...
-
Page 12: Installing The Projector And A Screen - Ceiling Installation
When using the 4:3 aspect ratio screen Installing the Projector and a Unit: mm (inches) Screen — Ceiling Installation SS (inches) 3741 4692 5642 7067 Use the PSS-610 Projector Suspension Support when Minimum (147 (184 (222 (278 you install the projector on a ceiling. 4508 5648 6789... -
Page 13: Step 2: Connecting The Projector
Installation diagram Step 2: Top view Align the center of the lens with the center of the screen. Connecting the 62.1 216.6 Front of the cabinet 134.2 Projector Center of the unit Center of the screen When making connections, be sure to do the Center of the lens following: Upper ceiling... -
Page 14: Connecting With Video Equipment
Rear of the projector VIDEO S VIDEO VIDEO S VIDEO PJ MULTI (FOR SERVICE USE) PJ MULTI INPUT (FOR SERVICE USE) INPUT with SONY logo upside Active speakers Signal interface S video or cable (supplied) video cable Audio (not supplied) Active... -
Page 15: Connecting A Computer
Connecting a Computer Connecting Using the Optional Interface Unit When connecting to an analog connector To hear the sound from a computer, use the speakers Using the optional interface unit allows you to built in the computer or connect the active speakers to connect various video equipment, and to select the the computer. -
Page 16: Step 3: Adjusting The Picture Size And Position
Step 3: Adjusting Plug the AC power cord into a wall outlet. the Picture Size The ON/STANDBY indicator lights in red and the projector goes into standby mode. and Position Lights in red. STANDBY Press the [/1 (on/standby) Rear remote control switch to turn on the projector. - Page 17 SIDE SHOT Adjust the size and position of the picture to fit the screen. When projecting using both “Side Shot” and “V Keystone” adjustments 1 Use the adjuster to adjust the vertical position. If you set “V Keystone” in the INSTALL SETTING menu to “Auto”...
-
Page 18: Step 4: Selecting The Menu Language
When projecting from the center When you press FOCUS +/– or ZOOM +/– in steps 5 to 7, the built-in signal pattern is projected on the screen. If you Adjust so that both the position and size of want to adjust the focus and picture size using the current the bottom side of the picture fit those of the input signal, set “Test Pattern”... -
Page 19: Press Menu
Press M or m to select Plug the AC power cord into a wall outlet. “Language”, and press , or ENTER. The ON/STANDBY indicator lights in red and the projector goes into standby mode. MENU SETTING Input A S t a t u s : L a n g u ag e : Press the [/1 (on/standby) M e nu Po s i t i o n :... -
Page 20: Projecting
Projecting Projecting the Picture on the This section describes how to operate the projector to view the picture from the Screen equipment connected to the projector. It also describes how to select the wide screen mode or the quality of the picture to suit your taste. - Page 21 Press INPUT to To view the picture from display Plug the AC power cord into a Video equipment connected to Video 1 wall outlet. VIDEO INPUT on the projector The ON/STANDBY indicator lights in red and Video equipment connected to S S-Video 1 the projector goes into standby mode.
-
Page 22: Selecting The Wide Screen Mode
Selecting the Wide Press FOCUS +/– to adjust the focus. Screen Mode Adjust to obtain sharp focus. You can enjoy various wide screen mode according to the video signal received. You can also select it using the menu. (1 page 28) FOCUS +/–... - Page 23 Full Subtitle A 16:9 squeezed picture is displayed with the The subtitle area is compressed and displayed in correct aspect ratio. A 4:3 picture is enlarged the lower part of the screen. Use this mode to horizontally to fit the 16:9 screen. view a movie with subtitles.
-
Page 24: Selecting The Picture Viewing Mode
Press one of the PICTURE Selecting the MODE buttons (DYNAMIC, STANDARD, CINEMA and Picture Viewing USER 1, 2 and 3). Mode DYNAMIC Select for enhanced picture contrast and sharpness. You can select the picture viewing mode that best STANDARD suits the type of program or room condition. Recommended for normal viewing condition in your home. -
Page 25: Using The Menus
Using the Display items Input signal indicator Menus V i d e o 1 NTSC 3.58 Input signal setting indicator Picture adjustment menu This section describes how to make C o n t ra s t various adjustments and settings using the menus. - Page 26 Press MENU. Make the setting or adjustment on an item. The menu appears. The menu presently selected is shown as a When changing the adjustment level yellow button. To increase the value, press M or ,. SET SETTING Input A To decrease the value, press m or <.
-
Page 27: Menu Lists
Menu Items Menu Lists Adjustable items are limited according to the input signals. Items that cannot be adjusted are not displayed in the menu. (1 page 61) PICTURE SETTING Item Description Picture Mode You can select picture viewing mode that best suits the type of picture or the Menu Configurations environment. - Page 28 Item Description Item Description Black Level Emphasizes black color to produce a Wide Mode You can select the 4:3 aspect ratio picture Adj (Adjust) bolder “dynamic” picture. Set according mode, “Normal” and “Normal Through,” to the input signal source. and 16:9 aspect ratio picture mode, High: Gives higher emphasis to the black “Full,”...
-
Page 29: Menu Setting
SET SETTING Item Description Menu Position Selects the display position from Top Item Description Left, Bottom Left, Center, Top Right Smart APA With this item set to On, the APA function and Bottom Right. works automatically for a signal input from Menu Color Selects the tone of the menu display from a computer so that the picture can be seen... -
Page 30: About The Preset Memory No
About the Preset Memory Adjusting Picture Quality of a Signal from the Computer This projector has 34 types of preset data for input You can automatically adjust to obtain the clearest signals (the preset memory). When the preset signal is picture when projecting a signal from the computer. -
Page 31: Using A "Memory Stick
Using a Types of “Memory Stick” “Memory Stick” is available in the following three types to meet various requirements in functions. • “Memory Stick” “Memory Stores any type of data except copyright-protected data that requires the MagicGate copyright protection technology. Stick”... - Page 32 • Use a sharp object, such as a ballpoint pen, to move • To prevent data loss, make backups of data the “Memory Stick Duo” erasure prevention switch. frequently. In no event will Sony be liable for any • Data may be damaged if: loss of data.
-
Page 33: Preparing For Viewing The Picture Files Stored In A "Memory Stick
Displaying the Desired Pictures Preparing for Viewing in Digital Camera Mode the Picture Files Stored in a “Memory Stick” INPUT button LIGHT INPUT DYNAMIC STANDARD CINEMA Inserting a “Memory Stick” PICTURE MODE USER 1 USER 2 USER 3 Insert the “Memory Stick” into the “Memory Stick” M/m/</,/ENTER ENTER slot on the front of the projector. - Page 34 • For a picture file recorded with the Voice Memo function of the Index menu Appears when a file is Sony digital camera, only the still picture file is displayed. protected. • If you delete a picture file with the relative file mark ( Memory Stick Home its relative picture file will also be deleted.
- Page 35 Index screen of a movie file Movie Player Appears when the Picture setting menu displayed picture of a movie file is a movie. Appears when a file Index menu is protected. Prev. NEXT Memory Stick Home Slide Show Information Option Filter : Still Movie Player Audio Select...
-
Page 36: Viewing The Pictures
Viewing the Press M or m to select “Slide Show,” and press ENTER. Pictures The slide show settintg menu appears. Slide show setting menu Memory Stick Home Slide Show Start Option Filter : Still Effect Select Folder Viewing the Pictures in Advan. -
Page 37: Displaying A Picture On The Full Screen - Full Screen
Displaying a Picture on the After setting all the items, Full Screen — Full Screen press M or m to select “Start” and press ENTER. You can project one of the index pictures on the full When you set “Advan. Slds.” to “Auto,” the slide screen. -
Page 38: Playing Movie Pictures
Playing Movie Pictures Press M or m to select “Full Screen,” and press ENTER. You can play back a movie of MPEG1 format recorded with the Sony MPEG MOVIE, etc. The selected picture is projected to fit the screen. LIGHT... - Page 39 3 Press VOLUME + or – to adjust the sound. Note The projector can play back a MPEG1 movie recorded by the Sony MPEG MOVIE, etc. (Movies may occasionally skip when you watch them.) Usable MPEG1 movies are MPEG MOVIE AD/EX/HQ/HQX/CV, MPEG1 of VAIO Giga pocket (equivalent to a video CD).
-
Page 40: Selecting The Folder Containing The Desired Picture
To turn off the Digital Camera Mode Selecting the Folder 1 Display the Memory Stick Home. Containing the Desired Picture 2 Press M or m to select “Select Folder,” and 1 Display the Memory Stick Home. press ENTER. Note 3 Press M or m to select “Digi. Camera Set “Digi. -
Page 41: Rotating A Still Picture
Rotating a Still Press M or m to select “Rotate,” and press ENTER. Picture Press M or m to select the direction of rotation, (clockwise) or (counterclockwise), and press You can rotate a thumbnail picture or full-screen still ENTER. picture clockwise or counterclockwise in 90º steps. The picture rotates 90°... -
Page 42: Protecting An Important Picture
When you select a movie picture in the index screen, “Rotate” and Protecting an “Startup” are not available. Important Picture Press M or m to select “Protect,” and press ENTER. Press M or m to select “On” or You can protect a still picture to prevent it from accidental erasure. -
Page 43: Projecting A Selected Picture When The Power Is Turned On - Startup
Protecting a movie picture in the Movie Player Projecting a Selected 1 Perform steps 1 to 3 in “Playing Movie Picture When the Power Pictures” (1 page 38) to display the Movie Player on the screen. Is Turned On — Startup 2 Press M or m to select “Menu,”... -
Page 44: Setting The Startup Picture
The index menu of a still picture appears. Setting the Startup Picture Index menu of a still picture Memory Stick Home Slide Show Option Filter : Still Full Screen Select Folder Slide Show Protect Rotate LIGHT INPUT Startup Digi.Camera Mode Delete DYNAMIC STANDARD... -
Page 45: Deleting A Picture
Deleting a Picture Press M or m to select the item used for startup picture, and press ENTER. Memory Stick Home Slide Show Option File Startup Filter : Still Original Setup Original Select Folder Custom Memory Stick You can delete unnecessary picture from the “Memory Stick.”... - Page 46 4 Press to select the desired item, and press ENTER. When “Selected file deleted. Press M or m to select OK?” is displayed, select “Yes,” then “Delete,” and press ENTER. press ENTER. Note If you delete a file with “Digi. Camera Mode” set to “On,” other Press M or m to select the item files may be deleted.
-
Page 47: Sorting The Pictures
Sorting the Press M or m to select “Option,” and press ENTER. Pictures The option setting menu appears, and “File” is selected. Memory Stick Home Slide Show Option Sort File Filter : Still Name Order Setup Select Folder Filter Memory Stick You can sort the pictures stored in the “Memory Stick”... -
Page 48: Displaying Either Of The Still Pictures Or Movie Pictures
The option setting menu appears, and “File” is selected. Displaying Either of Memory Stick Home Slide Show the Still Pictures or Option Sort File Filter : Still Name Order Setup Select Folder Filter Memory Stick Movie Pictures You can choose and display the still pictures only or Close movie pictures only stored in a “Memory Stick.”... -
Page 49: Displaying The "Memory Stick" Information
Displaying the Press M or m to select “Memory Stick.” “Memory Stick” The information on the “Memory Stick” in use is displayed. Information Memory Stick Home Slide Show Option File Filter : Still Type : Setup Select Folder Capacity : 123.3MB Memory Stick Used : 30.8MB You can display the type and the used and remaining... -
Page 50: Initializing A "Memory Stick" - Format
Initializing a Press ENTER again. “Memory Stick” Memory Stick Home Slide Show Option File Filter : Still Type : Setup Select Folder — Format Capacity : 123.3MB Memory Stick Used : 30.8MB Remaining : 92.5MB All files deleted. OK? Digi.Camera Mode Format When a “Memory Stick”... -
Page 51: Troubleshooting
Others The picture from the PJ c Select “Computer”, MULTI connector is “Component” or “Video GBR” colored strange. for “Input-A Signal Sel” in the SET SETTING menu according to the input signal. This section describes how to solve the (1 page 29) problems, how to replace a lamp and air c Adjust the picture in the “Adjust Color balance is... -
Page 52: Warning Messages
“Filter” is set to “Movie” in the “Option” menu. LAMP/COVER c The electrical system breaks down. and TEMP/FAN Consult with qualified Sony No still file c No still picture files are contained in the light up. personnel. currently selected folder although “Filter”... -
Page 53: Replacing The Lamp
Caution displays while you are using Cannot play c The MS SLIDE button has been pressed the “Memory Stick” while no movie picture files are contained in the selected folder. Slide If a picture file has some problem, the following show will not start. -
Page 54: Replacing The Air Filter
2 Press the adjuster adjustment button to 8 Turn the projector back over. raise the adjuster. 9 Connect the power cord and set the 3 Open the lamp cover by loosening a screw projector to standby mode. with the Philips screwdriver. 10 Press the following buttons on the remote control in the following order for less than five seconds each: RESET, <, ,, ENTER. -
Page 55: Specifications
2 Open the filter cover while pushing the Specifications filter lock knobs inward. System Projection system 3 LCD panels, 1 lens, projection system LCD panel 0.87-inch TFT LCD panel, 3,276,504 pixels (1,092,168 pixels × 3) Lens 1.3 times zoom lens (powered) f33.6 - 42 mm/F1.85 - 2.2 3 Remove the air filter from the projector by Lamp... -
Page 56: Optional Accessories
DVI (TMDS) Digital RGB Air filter (for replacement) (1) PJ MULTI 32-pin multi connector Cinema Filter (1) Composite video: 1 Vp-p±2 dB sync Operating Instructions (1) negative (75 ohms terminated) S video: Y/C Design and specifications are subject to change Y (luminance): 1 Vp-p±2 dB sync without notice. - Page 57 When projecting using both “Side Shot” and When projecting using “Side Shot” “V Keystone” adjustments adjustment only For a 720p format signal, computer’s signal or data For a 1080i format signal stored in a “Memory Stick” Unit: m (feet) Screen Unit: m (feet) size Screen...
-
Page 58: Floor Installation
Projection Distances When Installing the Optional Conversion Lens a: Distance between the screen and the center of the lens Floor installation example b: Distance from the floor to the center of the lens c: Distance from the floor to the bottom of the projector x: Free Distance from the front of the cabinet to the center of the... -
Page 59: Ceiling Installation
When using the VPLL-CW10 Short Focused Conversion Lens Use the 60 to 300-inch screens. Distance from the front of the cabinet to the center of the conversion lens 5.9 mm ( inches) When using the VPLL-CW10 Conversion Lens For 16:9 aspect ratio screens Unit: mm (inches) SS (inches) 1786... - Page 60 For 16:9 aspect ratio screens Unit: mm (inches) SS (inches) a (standard values) 4717 (185 5950 (234 b+502 (19 b+628 (24 When using the PSS-610, adjustable with 243/268/293/ 343/368/393 mm To calculate the installation measurements (SS: Screen size) a = {(SS × 54.15/0.8788) – 211.9761} x = b –...
-
Page 61: Warning On Power Connection
Warning on power connection Use a proper power cord for your local power supply. The United States, Continental Australlia Japan Canada Europe Plug type YP-11 YP-21 SP-61 YP-13 Female end YC-13L YC-13L YC-13L C7-2 YC-13L Cord type SPT-2 H03VVH2-F H03VVH2-F H03VVH2-F VCTFK Rated Voltage &... -
Page 62: Preset Signals
Preset Signals Memory No. Preset signal fH (kHz) fV (Hz) Sync H size Video 60 Hz 15.734 59.940 –– –– Video 50 Hz 15.625 50.000 –– –– 480/60i (DTV) 15.734 59.940 SonG/Y or Composite Sync –– 575/50i (DTV) 15.625 50.000 SonG/Y or Composite sync/ ––... -
Page 63: Location Of Controls
Location of Controls Front You can use the buttons on the control panel with the same names as those on the remote control to operate the projector. [/1 (on/standby) switch (1 page 16) ON/STANDBY indicator INPUT button (1 page 21) (1 page 16) MENU button (1 page 19) POWER SAVING indicator... -
Page 64: Rear
Rear Lamp cover (bottom) (1 page 53) Rear remote control detector Air filter cover (bottom) (1 page 54) Ventilation hole (intake) (1 page 8) ~ AC IN socket DVI (digital input) VIDEO ~ AC IN S VIDEO connector (1 page 14) PJ MULTI (FOR SERVICE USE) INPUT... -
Page 65: Remote Control
Remote Control Infrared transmitter INPUT button (1 page 21) [/1 (on/standby) switch LIGHT button LIGHT INPUT (1 page 21) Illuminates the buttons on the remote control. DYNAMIC STANDARD CINEMA PICTURE MODE buttons PICTURE MODE (1 page 24) USER 1 USER 2 USER 3 M/m/</,/ENTER buttons ENTER... -
Page 66: Index
............. Index Optional accesories ......Image Flip ......... Indicator Picture Mode ........LAMP/COVER ......Cinema ......... TEMP/FAN ......... Dynamic ........Adjust Picture… ....... INFORMATION menu ....Standard ........Adjuster ..........INPUT SETTING menu ....User 1, 2 and 3 ......Adjusting Input-A Signal Sel.
Need help?
Do you have a question about the VPL-HS10 and is the answer not in the manual?
Questions and answers