T+A Caruso User Manual
Hide thumbs
Also See for Caruso:
- Service information (6 pages) ,
- User manual (76 pages) ,
- User manual (88 pages)

Related Manuals for T+A Caruso


Summary of Contents for T+A Caruso
- Page 1 USER MANUAL Software Version V 1.3 / 2.3 Bestellnummer / Order No. 9103-0386...
- Page 2 Welcome. We are delighted that you have decided to purchase a product. With your new you have acquired a top- quality piece of equipment which has been designed and developed with the wishes of the audiophile music lover as absolute top priority.
-
Page 3: Table Of Contents
Contents Operation Front panel controls ......................4 Remote Control ......................7 Basic Functions of the ..................10 Source switching ......................10 Volume control ....................... 10 Tone settings (Tone menu) ................... 10 System Settings (System Configuration menu) ............. 12 Network Settings ...................... -
Page 4: Front Panel Controls
Multi-Source System The Controls All the important functions of the can be operated using the buttons on the front panel of the machine. Direct- access buttons are provided for the essential functions such as source select and track select, whereas less frequently required functions are controlled by means of menus which are called up using the ... - Page 5 Menu functions Opens the 'System Configuration' menu (see Chapter Brief press: 'System Settings (System Configuration menu) ') While the Streaming Client Function is selected: Opens the 'Source Select' menu, in which you can select the Brief press: desired listening source...
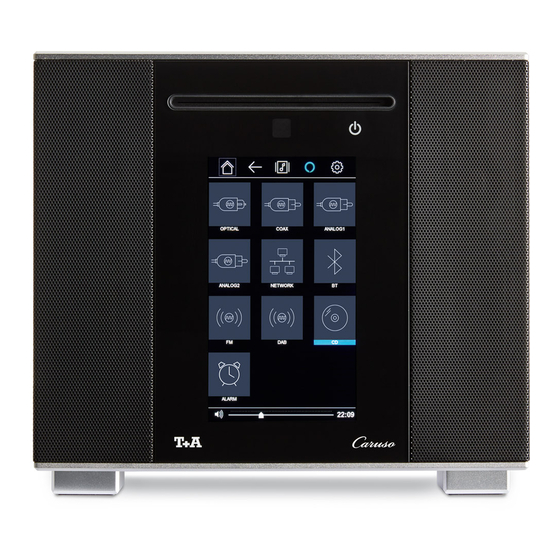
- Page 6 Screen All information relating to machine status, the current music track and list navigation is displayed on the graphic screen of the . The display is context-sensitive, and in part varies according to the capabilities and facilities of the service to which you are currently listening.
-
Page 7: Remote Control
Remote Control Introduction In general terms the function of the buttons on the remote control handset are the same as the corresponding buttons on the front panel of the machine. The infra-red remote control handset is located in the screen area of the ... - Page 8 Radio Streaming Client Disc Player iPod Navigation buttons Return to previous point Return to previous point Cursor movement to the Return to previous point left During alpha-numeric character input the button can be ...
- Page 9 Radio Streaming Client Disc Player iPod Menu functions Opens the System Configuration menu (e.g. adjusting screen brightness) Brief press: Opens the Favourites Brief press: Opens the Disc menu menu when the Switches to main menu...
-
Page 10: Basic Functions Of The
Center -15 ... 0 ... +15 This menu point allows you to alter the balance between the loudspeakers of the (This menu point only appears if the menu point Caruso + External external... - Page 11 Loudness off / on The amplifier features a volume-dependent tone control (LOUDNESS) which compen-sates for the frequency-dependent sensitivity of the human ear, and therefore of human hearing, at very low volume levels. This set-up option is used to switch loudness on or off.
-
Page 12: System Settings (System Configuration Menu)
Activating this menu point calls up additional on-screen menu points which Loudspeakers relate to the loudspeakers. (Loudspeaker menu) Sub-point Choosing the menu point Caruso + External selects a 3.x configuration; in this Loudspeakers mode the should be set up as the Centre speaker. -
Page 13: Network Settings
Network Settings The method of using this menu and its settings are described in detail in the Chapter Installation / Using the system for the first time, Network configuration. Calling up the menu • The menu is called up using the ... -
Page 14: Alarm Timer
Alarm Timer The machine features an integral Timer module which is capable of switching the on with a selectable source at a programmable time (alarm clock). Selecting an alarm timer in the Alarm Timer menu switches the function on and activates it. -
Page 15: Slumber Function
Menu point Selects the source which is to be switched on at the alarm time point. Set Alarm Source If you select the menu point Radio, you can use the / buttons to select a radio station from the Favourites list. -
Page 16: Operating The Source Devices In Detail
Operating the source devices in detail Operating the Radio First select the radio as source by pressing the button. Device display in Radio mode a) When you are listening to a radio station in radio mode, the message 'Radio' appears in the top line of the screen. - Page 17 Favourites List The Favourites list allows the user to store preferred radio stations, i.e. those frequently selected. Creating the Favourites list When you have called up the Favourites list by pressing the button , you can press the ...
-
Page 18: Operating The Disc Player
Operating the Disc player Basic functions For all the functions described in this section the Disc Player must be selected as listening source. The first step is to switch the to Disc Player mode by pressing the ... - Page 19 Special functions Repeat function The button on the remote control handset cycles through the repeat function options of the . Press the button repeatedly if required until the repeat mode you wish to use appears on the screen. The following repeat modes are available, according to disc format: Display Function...
- Page 20 Playing MP3 / JPEG / Picture CDs The is able to play MP3 music discs, JPEG discs and Picture Discs. These discs are generally controlled using the optional TV / video monitor. Limited control of MP3 CDs is also possible without a TV or video monitor (see ‘MP3 playback without screen’).
- Page 21 Compatible formats The is able to play the following formats: Audio formats CD-Audio (CDDA, CD-R, CD-RW) MP-3 CD (MP3: see the info box below) Video formats DVD-Video (DVD, DVD-R, DVD-RW) VideoCD (VCD, S-VCD) JPEG Picture CD Requirements regarding MP3 discs ...
-
Page 22: Setup Menu (Dvd Player Configuration)
Setup Menu (DVD Player configuration) If a TV or monitor is not present in the system, no adjustments need to be made in the DVD Player Setup menu. DVD Player Setup Menu The DVD player in the ... - Page 23 DVD Player Setup Menu...
- Page 24 General Setup Menu Disc lock Not all discs are categorised or coded by the manufacturer regarding their suitability for young persons. You can prevent playback of specific DVDs by blocking them, or alternatively release the DVD for viewing, disregarding its category.
- Page 25 Video Setup TV Type This menu contains the options for selecting the TV norm, which must be set to match your monitor or television screen. Select this setting if the picture output is to be reproduced on a PAL TV set. At this setting, DVDs in NTSC format will be converted to the PAL format by the ...
- Page 26 Progressive In progressive scan mode the machine generates full-frame images from the ‘half-frames’ stored on the DVD; this reduces picture flicker, and therefore gives improved picture reproduction with monitors and TV screens which are capable of reproducing progressive images. Progressive pictures are generated in the form of a YUV component signal, so the ...
-
Page 27: Basic Settings
Basic settings Adjustment facility AUDIO DEUTSCH further languages ENGLISH SUBTITLE ENGLISH DEUTSCH further languages DISC MENU ENGLISH DEUTSCH further languages PARENTAL 1 KID SAFE 7 NC 17 MP3/JPEG-NAV WITH MENU PASSWORD CHANGE DEFAULT Audio You can select your preferred menu and synchronous language in the sub- Subtitle menus Audio, Sub-titles and Disc Menu. -
Page 28: Operating The Streaming Client
Operating the Streaming Client General Information on The includes what is known as a 'Streaming Client'. This is a new the Streaming Client class of playback devices for media content, providing a means of playing music which is stored on a vast variety of sources. -
Page 29: Access To Media Content Via The Main Menu (Home Menu)
Access to Media Content via the Main Menu (Home Menu) Main Menu When you call up the Streaming Client by pressing the button on the (Home-Menu) front panel or the remote control, the front panel screen displays a list of accessible media sources: Internet Radio UPnP-AV Server (Media server) in the local network *) -
Page 30: Accessing Media Content Using The Favourites List
Accessing Media Content using the Favourites List The Favourites List The Favourites list can be used to store your preferred Internet radio stations and the paths to your preferred music tracks. At any subsequent time you can then very quickly access these stations and tracks using the 'Favorites' entry in the Home Menu. -
Page 31: Operating The Ipod
Operating an iPod You can connect an iPod to the by means of the iPod Docking Station which is built into the machine’s top cover. Its basic functions can then be controlled using the buttons on the remote control handset or the front panel. While the iPod is in use, its integral screen provides information on the track currently playing, and the iPod’s operating status. - Page 32 iPod Dock Using an iPod adapter The iPod Dock is located in the top cover of the , and is sealed by a cover plate in its default state. If you wish to connect an iPod, please remove the cover plate by gently levering it up using a small pointed instrument such as a screwdriver;...
-
Page 33: Using The System For The First Time
Installation Using the system for the first time Safety notes This section describes all those matters which are of fundamental importance when setting up and first using the equipment. This information is not relevant in daily use, but you should nevertheless read and note it before using the equipment for the first time. -
Page 34: Back Panel Connections
Connections Mains input and The mains lead is plugged into this socket. Mains switch For information on correct mains connections please refer to the notes in the Chapters 'Using the system for the first time', 'Wiring' and 'Safety Notes'. The mains input socket is fitted with a mains switch. - Page 35 A1 IN Universal analogue stereo sound input A2 IN Universal analogue stereo sound input If you wish to connect a television to the , please use this input. ...
-
Page 36: Installation And Wiring
Installation and wiring Carefully unpack the and store the original packing materials carefully. The carton and packing are specially designed for this unit and will be needed again if you wish to move the equipment at any time. Please be sure to read the safety notes in these instructions. - Page 37 Loudspeaker and signal Loudspeaker cables and signal cables (inter-connects) have a significant influence on the overall reproduction quality of your sound system, and their cables importance should not be under-estimated. For this reason recommends the use of high-quality cables and connectors. Our accessory range includes a series of excellent cables and connectors whose properties are carefully matched to our speakers and electronic units, and which harmonise outstandingly well with them.
-
Page 38: Safety Notes
Safety notes All the components in this device fulfil the currently valid German and European safety norms and standards. We ensure that our products are of consistently high quality, and meet all specifications, by checking all materials rigorously for quality, using meticulous production methods and subjecting each unit to a fully automatic computer- controlled final inspection. -
Page 39: Fcc Information To The User
Approved usage This device is designed exclusively for reproducing sound and/or pictures in the domestic environment. It is to be used in a dry indoor room which meets all the recommendations stated in these instructions. Where the equipment is to be used for other purposes, especially in the medical field or any field in which safety is an issue, it is essential to establish the unit’s suitability for this purpose with the manufacturer, and to obtain prior written approval for this usage. -
Page 40: Network Configuration
Network Configuration General Information The can be operated in wired LAN networks (Ethernet LAN or Powerline LAN) or in wireless networks (WLAN). If you wish to use your in your home network, you must first enter the ... - Page 41 Opening the Network First select the Streaming Client function by pressing the button. Configuration Menu Open the configuration menu with a long press on the button on the F100 / FM100 remote control handset.
- Page 42 The Configuration for a Wired Ethernet LAN or Power-Line LAN connection Setting the Parameters • Connect the to an operational network or Power-Line modem using the for a Wired Network LAN socket on the back panel. •...
- Page 43 The Configuration for a WLAN connection Setting the Parameters • Connect the WLAN aerial (supplied) to the WLAN aerial socket, and for a Radio Network ensure that no cable is attached to the ...
- Page 44 Special case: The automatically searches for accessible radio networks, and lists them Manual Network Entry when you call up the menu point 'WLAN Configuration'. However, the can only locate networks which broadcast their SSID network identity. For security reasons many radio networks do not transmit the SSID (if you are not sure about this, ask your network administrator).
-
Page 45: The Vtuner Premium Service
The vTuner Premium Service The list of radio stations displayed by your is prepared by an Internet Service Provider, and transferred to your machine by data transfer. You can expand and edit the 'Favourite Groups' and 'Added Stations' list to suit your preferences via the Internet portal of your service provider, using the main menu point 'Internet Radio'. -
Page 46: General
Setting up new Internet On the vTuner Internet site you can also set up new stations which are not (yet) included in the Select lists. This is accomplished by registering with vTuner and Radio Stations logging on. Click on the point 'My Added Stations'. An input mask appears in which you can enter the data for your station. -
Page 47: Trouble-Shooting
Trouble shooting Many problems have a simple cause and a correspondingly simple solution. The following section describes a few difficulties you may encounter, and the measures you need to take to cure them. If you find it impossible to solve a problem with the help of these notes please disconnect the unit from the mains and ask your authorised ... - Page 48 Streaming Client The streaming client can Cause 1 (cable LAN): not connect to a network. Network cable not properly connected Remedy: On the display the Connect network cable, check connection to router indication 'SCL Connecting...' Cause 2 (wireless LAN): is displayed. WLAN antenna not connected or placed in a location with bad reception quality Remedy: Connect WLAN antenna properly and find a location with good reception...
- Page 49 Transmission interruptions Cause 1: occur when listening to The capacity of the internet radio station‘s server is at it‘s limit. internet radio stations. Remedy: Choose a different station. Cause 2: Network problems occurred. Remedy: Check your netwerk (see above). Some internet radio stations Cause: can not be received The internet radio station has been switched off, it transmits only at certain...
-
Page 50: Network Terms
NETWORK TERMINOLOGY General information The Switch ensures that the individual components within a network are connected correctly. This is only possible if it can identify each device within the network unambiguously; this is the reason why every component is assigned a form of “house number”... - Page 51 Network storage facility. This is generally a very large-capacity (> 200 GB) storage device to which other devices have access. If the NAS server includes (Network Attached Storage) a UPnP-AV server service, then the has access to media files stored on ...
-
Page 53: Appendix
Anhang Appendix... -
Page 54: Wiring Diagram
Anhang / Appendix A Anschluss-Schema / Wiring diagram Attention! A properly set up home network with router must be installed and in operation to use the Music Player. For the use of internet radio a DSL access to the internet is needed. For questions regarding setting up your network and internet connection please ask your system administrator or any network specialist. -
Page 55: Specification
Anhang / Appendix B Technische Daten / Specification Formate / Formats DVD-Player CD, CD-R, CD/RW, MP3, DVD-Video, DVD-R, DVD-RW, DVD+R, DVD+RW, VCD, S-VCD, JPEG Picture CD Videoausgang / Video output YUV (Component), Composite (FBAS) Streaming Client MP3, WMA, AAC, FLAC, OGG-Vorbis, LPCM, WAV Medienserver / Media server UPnP AV, Media Player 10 (WMDRM10), vTuner Internet Radio Service, DLNA compatible servers... - Page 56 elektroakustik GmbH & Co. KG Herford Deutschland Germany...
Need help?
Do you have a question about the Caruso and is the answer not in the manual?
Questions and answers