
Related Manuals for Akai ACAC112B

Summary of Contents for Akai ACAC112B
- Page 1 Operator’s manual www.akai.com CAR AUDIO - MP3 / CD RECEIVER ACAC112B Operator’s manual (GB) Gebruiksaanwijzing (NL) 8-15 Manuel de l’utilisateur (FR) 16-23 Οδηγίες χρήσης (GR) 24-31 Manual del Usuario (ES) 32-39...
-
Page 2: Table Of Contents
TABLE OF CONTENTS LOCATIONS OF CONTROLS INSTALLATION TO SUPPORT THE UNIT DETACHING THE FRONT PANEL ATTACHING THE FRONT PANEL WIRE CONNECTION OPERATING INSTRUCTIONS USING THE RDS FUNCTION CD/MP3/WMA CONTROL LOCATION OF PARTS 10. HOW TO SELECT MP3/WMA FILES 11. HOW TO USE BLUETOOTH FUNCTION 12. -
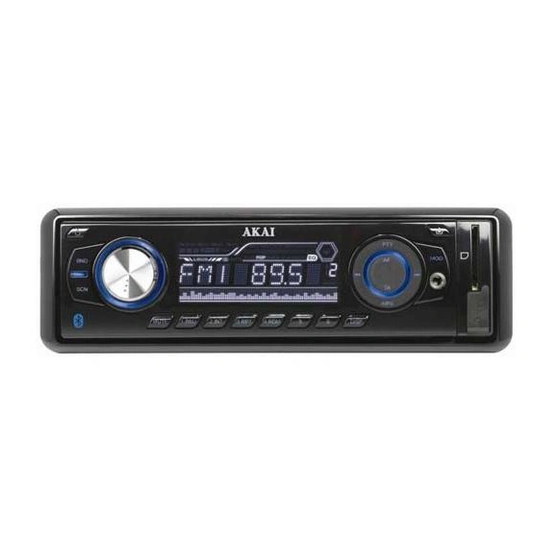
Page 3: Locations Of Controls
LOCATIONS OF CONTROLS DISP DISP 6 32 (1-6) (1-6) POWER ON / OFF ( FUNCTION SELECT BUTTON: BASS / TREBLE / BALANCE / FADER / ADJ / TA VOL / EON / DSP DISP VOL UP / VOL DOWN FOR BASS / TREBLE / BALANCE / FADER PRESET STATIONS (1,2,3,4,5,6) ‘AF’... -
Page 4: Installation
INSTALLATION PRECAUTIONS • Choose the mounting location carefully so that the unit will not interfere with the normal driving functions of the driver. • Avoid installing the unit where it would be subject to high temperatures, such as from direct sunlight or hot air from the heater, or where it would be subject to dust, dirt or excessive vibration. -
Page 5: Wire Connection
Notes: • Do not press the front panel hard against the unit when attaching it. It can be easily attached by pressing it lightly against the unit. • When you carry the front panel with you, put it in the supplied front panel case. •... -
Page 6: Using The Rds Function
Press and hold VOL knob to adjust INIT VOL /ADJ/TA VOL/EON ON/DSP IN VOL: Can adjust Initial Volume level using this mode. ADJ: Can adjust clock time. Turn VOL knob clockwise to set hours and counter clockwise to set minutes. TA VOL: Can adjust TA Volume (The volume level when Traffic announcement is transmitted). -
Page 7: Cd/Mp3/Wma Control Location Of Parts
15. EQUALIZER (DSP) Press DSP to select between (Classic, Rock, POP, Flat) equalizer modes. 16. LCD DISPLAY The Liquid Crystal Display will display the current state of the unit. 17. OPEN FRONT PANEL BUTTON Press button and the front panel will be open. CD/MP3/WMA CONTROL LOCATION OF PARTS TRACK/SEARCH BUTTON (11) FORWARD AND REVERSE TRACK SEARCH (or changing songs) -
Page 8: 11. How To Use Bluetooth Function
For more detailed information about recycling of this product, please contact your local city office, your household waste disposal service or the shop where you purchased the product. For more information and warranty conditions, please visit : www.akai.eu...
Need help?
Do you have a question about the ACAC112B and is the answer not in the manual?
Questions and answers