Table of Contents
Advertisement
PEDICURE SPA USER MANUAL
Before Operating the unit, please read this manual thoroughly and retain it for future reference
RECEIVING AND INSPECTION:
PLEASE TAKE NOTE! Thoroughly inspect each shipment immediately upon arrival. It is
important that you notify the driver and insist on a notation of the damage. Make this
notation directly on the freight company's waybill or bill of lading. Failure to note damage on
the waybill or bill of lading may impede and/or prevent any claims that you may have
against the freight carrier.
If missing parts or damage is found. Please notify the carrier at once and request an
inspection. DO NOT DISCARD THE SHIPPING BOX. If you give the carrier a clear receipt
for goods that have been damaged in transit, you do so at your own risk and expense.
TRADEMARK DISCLAIMER
Infinity, Sani-Drain, PureFlo, Pioneering "SMART" Pedi-Spa, Auto-Fill, AutoClean, and Tru-Touch are the registered trademarks of Lexor, Inc.
Reproduction or reuse of part or all of trademarks are expressly prohibited without written permission from Lexor, Inc. Due to limitation of the printing
process, product colors shown might look different from actual colors. Lexor will not be responsible for any misprint of this advertisement. Lexor's footspa
specification and prices may change without prior notice. Pedicure Spas are intended for professional used only, always follow your State Board's sanitation
and disinfectant guideline.
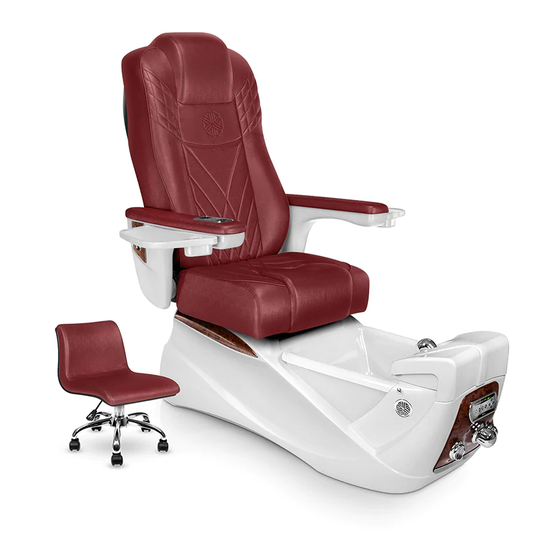
Pioneering "Smart" Pedi-Spas
INFINITY
Design and Specifications are subject to change without notice
™
.
Advertisement
Table of Contents

Summary of Contents for Infinity Pedicure Spa
-
Page 1: Receiving And Inspection
TRADEMARK DISCLAIMER Infinity, Sani-Drain, PureFlo, Pioneering “SMART” Pedi-Spa, Auto-Fill, AutoClean, and Tru-Touch are the registered trademarks of Lexor, Inc. Reproduction or reuse of part or all of trademarks are expressly prohibited without written permission from Lexor, Inc. Due to limitation of the printing process, product colors shown might look different from actual colors. -
Page 2: Table Of Contents
Plumbing Flow Pattern for Gravity Drain: ..............11 Hot and Cold Water Supply Lines ................. 11 SPA SPECIFICATION Electrical and Pedicure Spa Component Specification ............ 13 OPERATION AND CARE Auto-Fill™ Models: ............. Error! Bookmark not defined. Auto-Fill™ & AutoDrain™ Models: ........Error! Bookmark not defined. -
Page 3: Safety Precautions
3. DO NOT STEP/ STAND IN FOOT BASIN. 4. Always enter and exit the Pedicure Spa slowly and carefully. 5. NEVER bring and / or operate any electrical devices into or near the Pedicure Spa. 6. Maximum load in spa chair is 250lbs (114kg). -
Page 4: Identifying Parts For Infinity Model
Identifying Parts __________________________________________________________ ™ Identifying Parts for INFINITY Model Pedicure Whirlpool with Massage System Figure 1 Identifying Parts for Infinity™ 1. Head Rest 9. Hot/Cold Water Mixer 16. Water Level Sensors 2. Chair Cushion with Valve 17. Pure-Flo™ Jet Massage 10. -
Page 5: Installation
Installation _______________________________________________________________ WALL CLEARANCE: Fig.2 SPA to SPA RECOMMENDED CLEARANCE Fig. 3 *Auto-Fill, SaniDrain knobs and DAS control panel may differ depending on the model purchased. Please refer to Identifying Parts section for a detailed view... -
Page 6: Manicure Tray/ Armrest
Installation _______________________________________________________________________ MANICURE TRAY/ ARMREST Fig. 4 > Insert the manicure trays and attach the purse hook. (1 Supplied) *Auto-Fill, SaniDrain knobs and DAS control panel may differ depending on the model purchased. Please refer to Identifying Parts section for a detailed view... -
Page 7: Back Rest
Installation ______________________________________________________________ BACK REST Fig. 5 1. To set backrest up: Lift up the backrest until a “Click” is heard. 2. To fold down backrest: Lift up latch handle located on the left side / bottom of Chair... -
Page 8: Plumbing Connections
Hot and Cold Mixer. To clean, drain a good amount of water from water hoses to bucket before connecting them to the pedicure spa. Failure to do so may void your Warranty. 2. Hooking up a used Hot/Cold flex hose is not recommended since debris from broken rubber seal might clog water mixer. -
Page 9: Gravity Drain (Under Ground)
Installation _______________________________________________________________ Gravity Drain (Under Ground): Fig. 7... -
Page 10: Plumbing Flow Pattern For Power Drain
Plumbing Flow Pattern for Power Drain:... -
Page 11: Plumbing Flow Pattern For Gravity Drain
Installation _______________________________________________________________ Plumbing Flow Pattern for Gravity Drain: HOT AND COLD WATER SUPPLY LINES Carefully connect ½” ID supply hoses (not provided) to fresh water sources. Shut-off valves (not provided) should be utilized. Valves should be placed outside the tub for easy access. Before water line connections, please follow below: Determine if your spa chair is used for a new construction of a salon or a replacement spa chair. - Page 12 Installation _____________________________________________________________ CONNECT DRAIN WITH POWER DRAIN (PUMP) OR GRAVITY DRAIN (NO PUMP) Using ¾” schedule 40 PVC (Power Drain) or 1 ¼” flex tube (Gravity Drain) and appropriate traps. Connect drain to meet local plumbing codes. Rubber connection to the drain should be removable for easy service and should not be permanent to prevent damages.
-
Page 13: Spa Specification
Electrical and Building Codes. A 110V-50/60 Hz, 15 Amp, GFCI protected grounded circuit MUST be used to supply power to the Pedicure Spa. A dedicated circuit must be used with a GFCI. All wiring must conform to National & Local Electrical Codes WARNING: IT IS EXTREMELY IMPORTANT THAT THE FOOT SPA OPERATES WITH GFCI PROTECTION VERY IMPORTANT Both back of chair and seat are adjustable. -
Page 14: Operation And Care
Operation and Care _______________________________________________________ AUTO OPERATION (Auto-Fill™ Models): Auto-Fill™ Models: Panel Functional Switches & Operating Instructions: Hot/Cold water faucet located at the center of the front panel. 1.1 Use faucet knob to adjust optimal water temperature at “H” (Left) or “C” (Right) directory. 1.2 Pull out and tilt down faucet knob to shut off water any time during the automatic or manual operational cycle. -
Page 15: Operation And Care
Operation and Care _______________________________________________________ Manual conversion: Auto-Fill™ option can be simply reset to normal manual mode as a contingent system when automatic operation becomes unavailable. Please call our Customer care for step by step instructions. Auto-Fill™ / Jet Switch: (Dual-functional momentary switch located on the right side of the front panel) 1. - Page 16 Operation and Care ______________________________________________________ Auto-Fill™ & Auto-Drain™ with D.A.S Models: Auto-fill can be operated by either Auto-fill /Jet Knob or Digital Automated System (DAS) 1.1 Use faucet knob to adjust optimal water temperature at “H” or “C” directory. 1.2 Pull out and tilt down faucet knob to shut off water any time during the automatic or manual. Faucet Knob must be used to shut off water supply to basin when spa chair is left unattended and overnight Auto-Fill™...
-
Page 17: Operation And Care
Operation and Care _______________________________________________________ DAS Front Panel Functional & Operating Instructions: DIGITAL AUTOMATED FUNCTION 1. Auto-Fill : Press to turn water on or off. Water will fill up to reach the sensor level and activate the whirlpool jet. The switch can be activated to turn on or turn off water any time during the Auto- Fill™... -
Page 18: Jet Cover Removal & Installation
Operation and Care ________________________________________________________ JET COVER REMOVAL & INSTALLATION: 1. Turn Counterclockwise to remove. Turn Clockwise to install. -
Page 19: Jet Housing Removal & Installation
Operation and Care ______________________________________________________ JET HOUSING REMOVAL & INSTALLATION 1. Turn clockwise to remove motor. Turn counterclockwise to install motor. -
Page 20: Massage System & Remote Controller
Operation and Care _______________________________________________________ MASSAGE SYSTEM & REMOTE CONTROLLER: Fig 14 1. Press Auto Button to start Auto mode. Press again to turn off massage. Auto and Manual mode will run for duration of 20min. 2. Press any button (Rolling/Spot, Kneading, Tapping, Combine) to enter Manual mode. 3. - Page 21 Operation and Care _______________________________________________________ NOTE : If the Massage Chair is not provided, then the end-user will need to install a UL listed and cUL/CSA certified massage chair with a suitable Class 2 Power Supply. TOP MASSAGE CHAIR BASIC INSTALLATION INSTRUCTIONS: Fig.2 Fig.1 Install seat cushion with 2 screw-Knobs...
-
Page 22: Safety Requirements For Pedicure Spas
Overnight soaking with overdosed Chlorine may damage rubber part in basin CLEANING PROCEDURE IS REQUIRED BY STATE BOARDS Note: *** A cleaning log should be kept with each pedicure spa *** Each State will have slight differences in cleaning policies, please check with your state’s Bureau of Barbering and Cosmetology or Regulatory Authority for specific details. -
Page 23: Lexor Limited Factory Warranty
Mishandling, damages from shipping, expenses from returning eligible defectives to factory, improper installation, abuse, misuse, neglect, accidental events, freight damages, damage resulting from a person standing in the Pedicure Spa’s basin or other similar stress to that basin, normal wear and tear on upholstery, or natural disaster. - Page 24 WARNING PROPER INSTALLATION ACCORDING TO THIS MANUAL IS REQUIRED. FAILURE TO DO SO MAY RESULT IN SERIOUS INJURY AND/OR WARRANTY WILL BE NULL. YOU MUST HAVE A QUALIFIED LICENSED PLUMBER TO CONNECT THE SPA IN PLACE SAFELY. 2012 All Rights reserved. Design and Specifications are subject to change without notice VERSION 100912...