Advertisement
Advertisement
Table of Contents

Subscribe to Our Youtube Channel
Summary of Contents for Topeak Dual-Touch bike stand
- Page 1 User's Guide Art no. TW004...
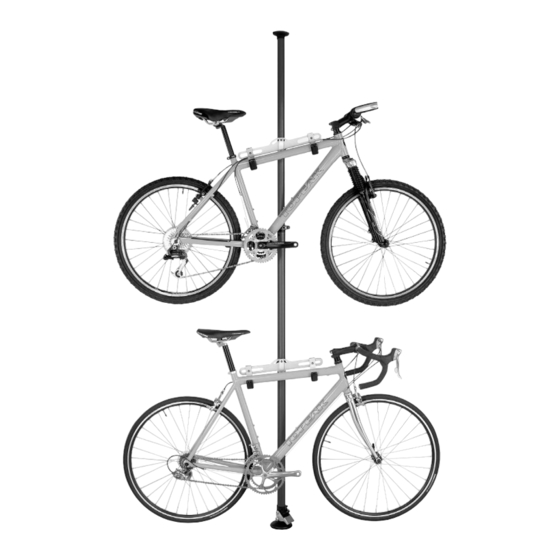
- Page 2 TABLE OF CONTENTS DETAILED PARTS DESCRIPTION ....P. 2 FIRST TIME INSTALLATION ....P. 3~5 REMOVAL/MOVEMENT ......P. 6 REINSTALLATION ........P. 7 10-3 10-1 10-2 10-5 10-5 10-4 DETAILED PARTS DESCRIPTION NAME Q'TY Ceiling Rubber Top Extension Tube Hook Unit Adaptor (ø38.1 mm) 3-1 Hook Unit Mounting Device 3-2 Adjusting Knob QR Clamp Lever...
- Page 3 5. Never use for any other purpose than the storage of bicycles. 6. Up to two additional Third Hook bicycle holders may be added to the Dual-Touch bike stand. Additional Third Hooks are sold separately. Read the manufacturer's instructions prior to installation.
-
Page 4: First Time Installation
FIRST TIME INSTALLATION SETING UP MAIN UNIT Slightly touch the ceiling Solid Area Note: Install Dual-Touch bike stand against solid ceiling construction. Have ceiling rubber top slightly touch ceiling by releasing QR clamp lever to extend extension tube. Max. Height Release Lock 3.2 m... -
Page 5: Hook
FIRST TIME INSTALLATION ASSEMBLING HOOK UNIT TO HOOK UNIT ADAPTOR M6 x 20L M6 x 20L M6 x 20L Allen Key Allen Key Repair & storage solutions... -
Page 6: First Time Installation
FIRST TIME INSTALLATION ADJUSTING HOOK UNIT TO ADJUST HOOK POSITION Allen key TO ADJUST HOOK ANGLE 30˚ Allen key TO ADJUST HEIGHT Loosen Tighten WARNING Please read installation instructions carefully prior to 360˚ ROTATION installing stand. Before using the stand, thoroughly test the fully-weighted stand (with equipment in place) to ensure the stand has been installed... - Page 7 REMOVAL/REPOSITION Hold down the extension tube by releasing QR clamp lever and lock it when rubber ceiling top dis-attaches from ceiling. Unlock Dual-Touch bike stand by pushing unlock button forward and pulling up foot stepper. UNLOCK FOOT STEPPER Unlock Button...
-
Page 8: Reinstallation
REINSTALLATION Slightly touch the ceiling Note: Install Dual-Touch bike stand against solid ceiling construction. Have ceiling rubber top slightly touch ceiling by releasing QR clamp lever to extend extension tube. Release Lock Recommended Torque Note: Use 5mm Allen key to tighten 3 Nm or 26.5 in-lbs... - Page 9 To obtain warranty service, you must have your original sales receipt. Items returned without a sales receipt will assume that the warranty begins on the date of manufacture. All warranties will be void if Dual-Touch bike stand is damaged due to user crash, abuse, system alteration, modification, or used in any way not intended as described in this operating manual.
Need help?
Do you have a question about the Dual-Touch bike stand and is the answer not in the manual?
Questions and answers