Table of Contents
Advertisement
Quick Links
Advertisement
Table of Contents

Related Manuals for CICLOSPORT HAC5

Summary of Contents for CICLOSPORT HAC5
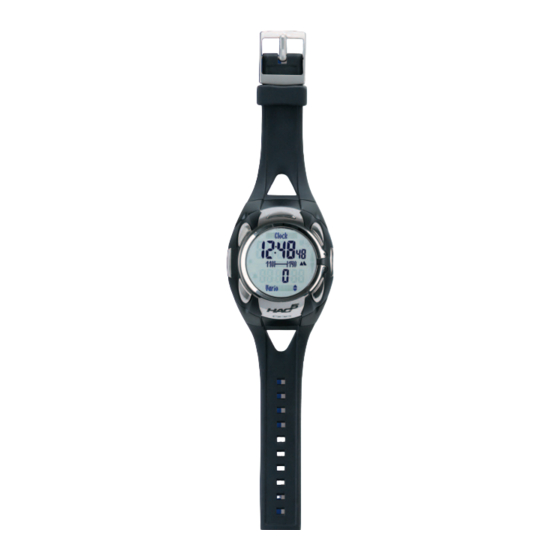
- Page 1 Instruction manual...
-
Page 2: Table Of Contents
............4 Attaching the HAC5 to the wrist band and the handlebar bracket ....4 Inserting the batteries . -
Page 3: Content
(see also chap- ter 8.6). The HAC5 can show three functions at once in its display. And if that isn’t enough for you, you can use the function 'autoscroll' in the lower display. With this the functions in the lower dis- play are changing automatically every three seconds, so this disposes of the manual swit- ching between the functions in the lower display. -
Page 4: Attention
Attaching the HAC5 to the wrist band and To take the HAC5 out of the wrist band or the handlebar holder, turn it 90° to the left, then remove. the handlebar bracket To insert into the wrist band or handlebar bracket, insert at a 90° angle to the left, then turn to right until it engages. -
Page 5: Putting On The Breast Belt
2.5 Putting on the breast belt Putting on the breast belt Hang the transmitter belt in the elastic breast belt and then put the breast belt around your (naked) up- per torso. The transmitter (plastic part with inscription) should be placed above the middle of your up- Electrodes per stomach region, slightly below the breast and the inscription on the transmitter (when seen from the front) must be legible (pictured). -
Page 6: Using The Buttons - Special Function Of The Buttons
3.1 Using the buttons The display if the HAC5 is separated into 3 areas: an upper, a middle and a lower. Each area dis- plays one function, so that there are three functions displayed simultaneously at all times. This means that the possible functions can be combined to personal taste. -
Page 7: Special Button Functions In Setting Mode
Choose setting mode: Press MR-button for three seconds Turn on light (for five seconds): Press LR-button for three seconds Turn on light manager (for 5 hours): Press LR-button for 6 seconds Choose profile: Shortly press UR- and LR-button simultaneously Display measuring units: Shortly press LR- and LL-button simultaneously 3.3 Special button functions in setting mode Special button functions... -
Page 8: Usage
Transmitter search – digital system In order for the HAC5 to display speed or heart rate or similar, the according transmitter has to be fo- und first. The search begins automatically when a recording is started (UL- and LL-buttons pressed simulta- neously for three seconds), and manually by pressing the LL-button for three seconds (in both cases, the active profile is shown for 10 seconds). - Page 9 In this case, the transmitter search must be started again (by pressing the LL button for three se- conds). If the display shows “Speed Bike2”, for example, this means that the speed transmitter for bike 2 is ac- Speed Bike2 tivated (for example by turning the wheel) and was found.
-
Page 10: Examples
5. Examples Through the selection process, the settings of the HAC5 are relatively easy to do (as most displays are self-explaining). Thus we are showing you two short examples: 5.1 First settings (for example time, date) First settings (for example time, date) Press MR-button three seconds to enter the main setting mode. -
Page 11: Initializing The Transmitters
Initializing the 5.2 Initializing the transmitters transmitters In order for the HAC5 to be able to show heart rate, speed and cadence, the concerning transmitters have to be initialized first. Please do as follows: Put on the transmitter belt and do the following: Press the MR-button for three seconds Select “Prof.Bike”... - Page 12 If the initialization is not successful, the percentage runs up to 100 % and the HAC5 shows “Iniscan Error retry cancel“ afterwards. Activate transmitter once again after this and start initialization once again by selecting “retry” (LR-but- ton, confirm with MR-button).
-
Page 13: Main Setting Mode
6. Main setting mode By pressing the MR-Button for 3 sec. the main setting mode will be selected. By pressing the MR- Button again for 3 sec. the setting mode can be left from any area (except during the PC transmission, display “PC-Connect“). - Page 14 If the speed measurement is switched on, the display for initialization appears on the display after pres- sing the MR-Button (for saving the setting). Before initializing the RDS II must be switched on to transmit a signal which the HAC5 can receive. By pressing the MR-Button shortly you confirm (please only after activating the transmitter).
- Page 15 The display now shows briefly a percentage number and will go back after successful initialization to the options menu (display shows ”HEART“ highlighted). Iniscan Error – If the initialization is not successful, the percentage number goes to 100% and the HAC5 will display 12 % Fehler bei der Initialisierung “Iniscan Error“.
-
Page 16: Hr-Interval
Here the function “calorie use“ can be switched on or off. Select with MR-Button, the function can then be switched on or off with the UR-/LR-Button-Button. By pressing the MR- Button again the set value will be saved and the setting menu reappears. Here the function “fat burning“... - Page 17 On display appears now in the upper display the heart rate upper limit 1 (blinking) and can be set with the UR-/LR-Button. Parameters: 20 – 250 bpm (=beats per minute) HR-High 1 Default setting: 100 bpm – Confirm with MR-Button, in the lower display the heart rate lower limit 1 is now blinking and can be set as well with the UR-/LR-Button.
-
Page 18: Cad-Interval
rate is within the set limits of the particular interval. If the heart rate is above or below, the countdown will stop and returns once the current heart rate is within the set limits. INT-Counter INT-Counter Select “INT-Counter” with LR-Button. Here a counter can be set, which defines how many times the interval will be repeated. - Page 19 On display appears now on the upper display the pedal frequency upper limit 2 (blinking) and can be set with the LR- / UR-Button. Parameters: 20 – 250 rpm CAD-High 2 Default setting: 80 rpm – Confirm with MR-Button, in the lower display the pedal frequency lower limit 2 is now blinking and can be set as well with the LR- / UR-Button.
-
Page 20: Basic Settings
Basic settings 6.5 Basic settings Set Altitude Set Units Basic settings can be made here which apply to all profiles. Set Time Set Perso. Set Totals Back Exit 6.5.1 Set altitude Set altitude After having selected this function the current altitude is indicated in the upper display and the current air pressure (reduced to sea level) in the lower display. -
Page 21: Set Personal Values
I I n n Zone ® means the transmitter belt must be worn and the transmitter search must be started so that the HAC5 can receive signals from the transmitter belt. Choose a resting position (sitting is best) during the calcu- lation. -
Page 22: Set Total Values
Stay seated calmly and relaxed during these 5 minutes. Confirm the value with the MR-button. The display indicates the selection menu again (the ‚ was calculated internally and can be called up under “HR Target”). I I n n Zone ICLO ®... -
Page 23: Pc-Connection
Powerdown Really? The HAC5 can be switched to the powerdown-mode here, e.g. before a battery change or when not using it for a long time. After switching on the powerdown-mode, the HAC5 can be switched on again by pressing any button. -
Page 24: Function Indications Of The Upper Display
There are no sub-functions of these functions. Important: In order that the HAC5 calculates and displays all values (and saves them for the PC eva- luation), a recording needs to be started (see also chapter 8.1). This happens by simultaneous pressing of both left buttons for 3 seconds (the present profile is indicated in the display for 10 seconds and the “REC”-symbol flashes on top of the display as a sign for a running recording). - Page 25 Training time below Training time below the lower limit set for heart rate Time % the lower limit set for Sub-function of the current heart rate function. 31.5 heart rate HR-Target Indicates the training time (in percentage and in time) during which the heart rate dropped below the lo- 17:00 wer limit set.
- Page 26 UM-button shortly. Start of the countdown After the start, the HAC5 counts the indicated time of the countdown backwards until zero is reached and an alarm signal can be heart. Then the countdown stays at zero. When using the heart rate interval or the cadence interval (with or without the time manager), the count- down 2 is automatically counted backwards after the alarm signal.
-
Page 27: Function Indications Of The Medium Display
The countdown function is also used when the heart rate or cadence time manager (see chapter 8.2) is operated. Temperature Temperature Indicates the current temperature. When the HAC5 is worn on the wrist, the measured temperature can have deviations due to the body heat. Minimum and Minimum and maximum temperature Max. -
Page 28: Functions Displayed In The Lower Display
Value range: 20 - 250 bpm (beats per minute) Note: The HAC5 can only display a heart rate if the appendant transmitter belt is applied and the func- tion is activated for this profile. The heart rate functions comprise a power down mode: the heart rate receiver (in the HAC5) switches off automatically if there is no impulse received for approx. - Page 29 Current distance Current distance Indicates the currently covered (daily) distance within the particular profile. Value range: 0,00 – 999999 km (up to 10.000 km the distance is displayed with 2 decimal places, distances above are only displayed in complete kilometers) Total distance Total distance Subfunction of “current distance”...
- Page 30 Value range: 0 - 1000 Note: The HAC5 counts the number of climbs/ sinks of altitude differences from 50 m, resp. 164 ft since this function was primarily thought to be used in downhill skiing and biking (= users of lift).
- Page 31 The countdown (or the heart rate or cadence time manager, if they are switched on) can be activated by pressing the UM-button shortly. Activating the countdowns Press UM-button After the activation, the HAC5 counts the time of the countdown backwards until zero is reached and an alarm is heard. The countdown remains at zero then.
-
Page 32: Basic Functions
Your HAC5 can be switch to power down mode which means it doesn’t display anything but keeps all data stored (except for date and time). This is useful e.g. for battery change but also when the HAC5 is not used for a longer period. -
Page 33: Special Functions
(This data can be transferred to a PC via interface and be displayed as graph or in table form and for print). Your HAC5 has a loop recording, i.e. when memory is exhausted (depending on recording interval up to 120 hours) the oldest data will be replaced by the ne- west one. -
Page 34: Recovery Heart Rate
8.5 Set markers Your HAC5 allows you to set any number of markers (at a 20 seconds interval with a 2 minutes time-lag between 2 markers at least). That makes it easier for later PC analysis to find certain orientation points, e.g. -
Page 35: Installation Of The Interface
ID-Code Now attach the interface clamp to the HAC5 in such a way that the contacts of the clamp are sitting on the contacts of the backside of the HAC5, afterwards put down the HAC5 with the clamp in such a way, that the display points upwards. -
Page 36: Update The Hac5 Firmware
HAC5: Unscrew the battery cap on the back of the HAC5 to the left with the aid of a coin. Remove old battery and insert new 3V-Lithium battery type CR2032 with the plus pole facing up, please make sure that the contacts lie on the battery. -
Page 37: Guarantee
Repair: If your HAC5 is sent in for repair (or battery change) or if a guarantee claim is not valid, repairs up to EUR 35.- will be carried out automatically. In case of higher repair costs you will be notified. The repaired device will be sent back COD. -
Page 38: Guarantee Certificate
15. Guarantee Certificate Sender: Name, First name Street, No. Code / Location Telephone (during the day) E-mail Reason for sending in: After expiration of the guarantee: Repairs should be carried out up to a value of Euro: Disposal of Old Electrical & Electronic Equipment (Applicable in the European Union and other European countries with separate collection systems) This symbol on the product or on its packaging indicates that this product shall not be treated as hou- sehold waste.
Need help?
Do you have a question about the HAC5 and is the answer not in the manual?
Questions and answers