
Subscribe to Our Youtube Channel
Related Manuals for Lanier 5622


Summary of Contents for Lanier 5622
- Page 1 Operator Guide 5622/5627 5622/5627 5622/5627 5622/5627 you r docu ment m an a ge m ent pa r tne r Scanner Reference...
- Page 2 Introduction This manual contains detailed instructions on the operation and maintenance of this machine. To get maximum versatility from this machine all operators should carefully read and follow the instructions in this manual. Please keep this manual in a handy place near the machine. Please read the Safety Information in the Copy Reference before using this machine.
-
Page 3: Manuals For This Machine
❖ ❖ ❖ ❖ System Settings Describes the settings of basic items to use this machine by connecting to a network. The machine must be connected to a network to use scanner func- tions. See this manual to set up necessary items. - Page 4 ❖ ❖ ❖ ❖ Manuals for ScanRouter V2 Lite Note ❒ ScanRouter V2 Lite is software included on the CD-ROM labeled "Scanner Driver & Document Management Utilities" for this machine. For informa- tion about ScanRouter V2 Lite, see p.2 “Network Delivery Scanner”, p.30 “ScanRouter V2 Lite”.
- Page 5 Important When the machine is connected to a network, observe the following points when setting up the machine or changing settings. For more details, see the documentation and Help for ScanRouter V2 Lite/Pro- fessional and DeskTopBinder V2 Lite/Professional. ❖ ❖ ❖ ❖ When a dial-up router is connected in a network environment The settings for the delivery server to be connected must be made appropri- ately for the machine with ScanRouter V2 Link, or DeskTopBinder V2 Lite/ Professional.
-
Page 6: How To Read This Manual
Names of Major Options Major options of this machine are referred to as follows in this documentation. • Printer/Scanner Controller Type 1027 → printer/scanner controller • Hard Disk Drive Option Type 1027 → HDD For other options, see the respective documentation. -
Page 7: Table Of Contents
Placing the Original in the Automatic Document Feeder (ADF) ... 35 Placing the Divided Original in the Automatic Document Feeder (SADF) ... 36 Original Orientation and Scan Area Setting... 37 For a Network Delivery Scanner and Document Server ... 37 For a Network TWAIN Scanner... 38... - Page 8 List Displays of Destinations and Senders... 43 Delivery Procedure... 45 Checking the Delivery Result ... 49 Using the Network Delivery Scanner with the Document Server ... 50 Simultaneous Delivery and Storage ... 50 Delivering Stored Files ... 51 6. Using the Document Server Storing Data ...
-
Page 9: Network Scanner
Document Server. Network TWAIN Scanner The scanner of this machine is used from the computer via a network. The orig- inals can be read in the same operation as for SCSI and USB-connected scanners. -
Page 10: Network Delivery Scanner
Network Scanner Network Delivery Scanner The machine is used as the delivery scanner with ScanRouter V2 Lite/Profes- sional. The originals scanned by the machine is stored in the delivery server and delivered to the folder of the computer on the same network. For more informa- tion, see p.43 “Delivering Stored Scan Data by the Network Delivery Scanner”. -
Page 11: Document Server
For more information, see p.53 “Using the Document Server”. Limitation ❒ The optional HDD is required to use this function. This machine The originals scanned by the scanner is stored. Reference For more information about DeskTopBinder V2 Lite, see the DeskTopBinder V2 Lite manual. -
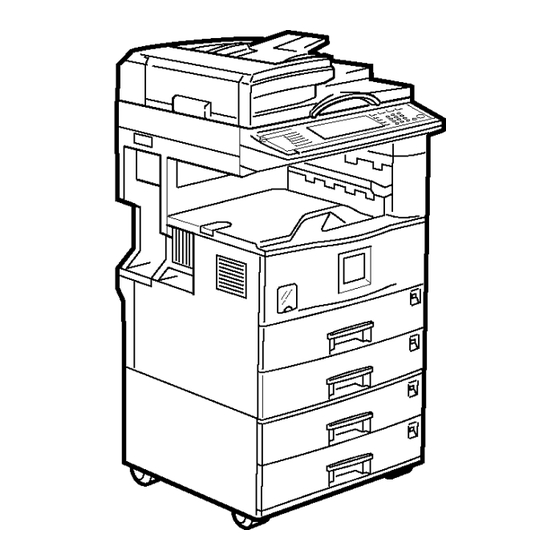
Page 12: Names And Functions Of Components
Pressing this key again while in warm-up mode cancels warm-up. Note ❒ This key is inactive while scanning or setting scanner default values. Main power indicator Lights up when the main power switch is set to On. Operation Switch Pressing this switch turns the machine on. -
Page 13: Display Contents
❒ Selected or specified items are highlighted like Using as a network TWAIN scanner When using the machine as a network TWAIN scanner, it is not necessary to se- lect {Scanner} on the control panel. When the TWAIN driver becomes active on a client computer, the display automatically switches to the following screen. - Page 14 Network Scanner Using as a network delivery scanner Press {Scanner} to display the network delivery scanner screen. If the network TWAIN scanner screen is displayed, press [Cancel]. Using the Document Server Press {Scanner} to display the Document Server screen. If the network TWAIN scanner screen is displayed, press [Cancel].
-
Page 15: Common Key Operations
Common Key Operations The following keys are common for all screens. ❖ ❖ ❖ ❖ Key list [OK] Confirms the selected function or entered value, and returns to the pre- vious screen. [Cancel] Cancels the selected function or entered value, and returns to the pre- vious screen. - Page 16 Network Scanner...
-
Page 17: Preparations For Use As A Network Scanner
2. Preparations for Use as a To use the machine as a network scanner, you must make settings required for use as a scanner, as well as basic settings for use in a network. First, see the System Settings manual for details about how to make basic set- tings, and then make scanner settings. -
Page 18: Using As A Network Delivery Scanner
Check the network settings in System Settings, and change if re- quired. ⇒System Settings manual Make settings for the network delivery scanner, such as the set- tings of the scanning feature and subject information. ⇒ p.12 “Initial Scanner Setup” Install the software required for using the network delivery scanner functions, such as ScanRouter V2 Lite on the delivery server. -
Page 19: Using The Document Server
Using the Document Server If the Document Server is used with the network delivery scanner, perform steps C to E on p.10 “Using as a Network Delivery Scanner” after performing the steps below. Connect the machine to the network with an Ethernet cable. -
Page 20: Initial Scanner Setup
This section explains all required settings and procedures for using the machine as a network scanner. Default Settings Settings to use the functions of the machine as a network scanner are listed be- low. Make correct setting of necessary items. Important ❒... - Page 21 ❖ ❖ ❖ ❖ Scanner settings Explanation of scanner settings are provided in this manual. Settings Scanner Features Resolution ⇒ p.14 Scan Size Scan type Image Density Scanner Settings Function Priority ⇒ p.18 Delivery/Store Con- nection Time out Compression (Black & White)
-
Page 22: Setting Scanner Features
Preparations for Use as a Network Scanner Setting Scanner Features Various Scanner Features (resolution, scan size, scan type, image density) can be set here. When using the same type of original repeatedly, storing the optimum settings in advance makes them easy to select whenever you deliver or store scan data. - Page 23 Setting Procedure Press the {User Tools/Counter/Inquiry} key. The User Tools/Counter/Inquiry screen appears. Press [Scanner Features]. The Scanner Features screen ap- pears. Verify that the [Basic Settings] tab is shown. Verify that [Program/Change] is se- lected, and then select the scan setting you want to program.
-
Page 24: Number Keys
Preparations for Use as a Network Scanner When all settings have been made, press [Exit]. The display returns to the Scanner Features screen. Press [Exit]. The main menu is shown again. Selecting a custom size When "Custom Size" is selected as the scan size, follow the procedure be- low. - Page 25 (X3) Start point, vertical (X2) ZEKY040E The User Tools/Counter/Inquiry screen appears. Press [Scanner Features]. The Scanner Features screen ap- pears. Verify that the [Basic Settings] tab is shown. Press [Delete]. Select the setting you want to de- lete. A confirmation message appears.
-
Page 26: Making Scanner Settings
Preparations for Use as a Network Scanner Press [Yes]. The selected scan setting is delet- Press [Exit]. The display returns to the Scanner Features screen. Press [Exit]. The main menu is shown again. Making Scanner Settings This section explains how to switch... - Page 27 When the "Delivery Option" set- ting is "On", make sure that "Deliv- ery IP Address" in System Settings is set. Initial Scanner Setup ❖ ❖ ❖ ❖ Original Setting Set the initial value for original type and orientation. When the...
- Page 28 Preparations for Use as a Network Scanner • If set to "On", enter the number of seconds (3 - 99) of the SADF auto reset time with the number k eys. W h en the original is placed within this time, it is scanned as one document.
-
Page 29: Making Scan Data Subject Settings
System Settings manual. Note ❒ If an item is selected for which a subject is already programmed, the subject can be edited. Press [OK]. To program more subjects, repeat steps Press [Exit]. The display returns to the Scanner Features screen. - Page 30 Preparations for Use as a Network Scanner Press [Exit]. The main menu is shown again. Deleting programmed subject settings Press the {User Tools/Counter/Inquiry} key. The User Tools/Counter/Inquiry screen appears. Press [Scanner Features]. The Scanner Features screen ap- pears. Press the [Subject Settings] tab.
-
Page 31: Installing Software
The machine comes with two CD-ROMs containing various software. The CD-ROM labeled "Scanner Driver & Document Management Utilities" con- tains the necessary software to use the machine as a network scanner. The CD- ROM labeled "Printer Driver & Utilities" contains the necessary software to use the machine as a printer. - Page 32 Preparations for Use as a Network Scanner The installing sequence using Auto Run is as follows: Installation Sequence Insert the CD-ROM. The installer starts up. Select the software. installation complete message is displayed. Restart your PC. For information about the outline of the software that can be installed by Auto Run, see p.28 “Software Supplied on CD-ROM”.
-
Page 33: Software For Using A Network Twain Scanner
Software for using a Network TWAIN Scanner To use the machine as a network TWAIN scanner, it is essential to install the TWAIN driver. If you do not have applications that work with TWAIN, it is necessary to also install the DeskTopBinder V2 Lite. For information about the installation of DeskTopBinder V2 Lite, see p.27 “DeskTopBinder V2 Lite”. -
Page 34: Software For Using A Network Delivery Scanner
Preparations for Use as a Network Scanner Software for using a Network Delivery Scanner To use the machine as a network delivery scanner, it is essential to install Scan- Router V2 Lite on the delivery server. To check an in-tray or auto-receive the documents, it is necessary to install DeskTopBinder V2 Lite on the client compu- ter. -
Page 35: Software Required To Use The Document Server
Before installing, check the operating environment for DeskTopBinder V2 Lite. ⇒ p.29 “DeskTopBinder V2 Lite” Verify that Windows is running. Insert the supplied CD-ROM labeled "Scanner Driver & Document Management Utilities" into the CD-ROM drive of the computer. The choose setup language screen appears. -
Page 36: Software Supplied On Cd-Rom
Type1027 TWAIN Driver This driver is required to scan an original on the machine. To use the machine as a network TWAIN scanner, the driver must be installed. ❖ ❖ ❖ ❖ File storage folder Files on the CD-ROM are contained in the following folder. - Page 37 The software allows you to use view documents in in-trays of the delivery server. This software can be used to the machine as a network TWAIN scanner. Also, the documents stored in the Document Server can be viewed.
- Page 38 Preparations for Use as a Network Scanner ❖ ❖ ❖ ❖ Software installed with DeskTopBinder V2 Lite • ScanRouter V2 Link ScanRouter V2 Link on the client computer monitors in-trays of the deliv- ery server regularly. In addition, the documents delivered to in-trays are auto-received or a notification of document arrival can be received at the client computer with this software.
- Page 39 • Hard disk space Minimum free space required for installing: 200 MB Note ❒ In addition to the space required for installation, the hard disk should have at least 500 MB of free space for files. • Network protocol TCP/IP ❖...
- Page 40 Preparations for Use as a Network Scanner...
-
Page 41: Setting Originals
If the actual original size changes, a combination of original orientation and the orienta- tion specified on the control panel or scanner driver does not change. Scanned original Select the placement method. -
Page 42: Placing The Original On The Exposure Glass
B Place the original so that the top edge touches the top left of the exposure glass. When using the machine as a network TWAIN scanner, this orientation is standard setting in the TWAIN driver. Normal- ly, use this orientation for set- ting. -
Page 43: Placing The Original In The Automatic Document Feeder (Adf)
Place such originals directly on the exposure glass. Important ❒ When using the scanner func- tion, the following originals also cannot be placed in the ADF, in addition to the restrictions that apply when using the copier function. -
Page 44: Placing The Divided Original In The Automatic Document Feeder (Sadf)
If there is no more page, press {#} key. Note ❒ To use this function, settings must be made in the Initial Scanner Set- up. ⇒ p.19 “SADF Auto Reset Timer” ❒ Originals are scanned in order. Place them from the first page. -
Page 45: Original Orientation And Scan Area Setting
When using the network delivery scanner and Document Server, set- tings are made on the control panel of the machine. When using the ma- chine as a network TWAIN scanner, settings are made on the TWAIN driver. For a Network Delivery... -
Page 46: For A Network Twain Scanner
Setting Originals Press [OK]. Note ❒ The current settings are displayed with characters and icons. For a Network TWAIN Scanner Open the Scanner Control dialog box. Reference ⇒ p.40 “Scanning Originals” Select the position from the drop- down menu of the [Document:] box in the [Document] group. -
Page 47: Scanning Originals Using Network Twain Scanner
4. Scanning Originals Using Network TWAIN Scanner This chapter describes the operations for scanning originals with the network TWAIN scanner using DeskTopBinder V2 Lite. In addition, some functions of the TWAIN driver are introduced. Flow of Operations When using DeskTopBinder V2 Lite for scanning, the basic flow of operations is as follows: Start up DeskTopBinder V2 Lite and select the scanner. -
Page 48: Scanning Originals
This section explains the method for scanning a single original following p.39 “Flow of Operations”. Start up DeskTopBinder V2 Lite and select the driver of the scanner. A Click [Start], point to [Program], and then [DeskTopBinder V2] from [DeskTop- Binder V2]. - Page 49 B Depending on the type of original or the objective for scanning, select the icon in [Mode]. • [Standard] is suitable for scanning standard originals that comprise mainly of text. • [Photo] is suitable for scanning originals that include photos, shaded il- lustrations, etc.
-
Page 50: Functions Of The Twain Driver
Scanning Originals Using Network TWAIN Scanner Click [Scan]. The original is scanned. A message asking whether there is another page ap- pears. When there is another page to scan, place the original, and then click [Continue]. When there are no more pages, click [Complete]. -
Page 51: Delivering Stored Scan Data By The Network Delivery Scanner
Network Delivery Scanner Stored scan data can be sent to a specified destination using the network deliv- ery scanner function. This chapter explains the various display screens, delivery procedures, and checking of the delivery result when this function is used. - Page 52 Delivering Stored Scan Data by the Network Delivery Scanner Destination List Displays the list of destinations pro- grammed in the delivery server. Note ❒ When the entire list does not fit on one screen, [U U U U ] or [T T T T ] can be used to scroll the display.
-
Page 53: Delivery Procedure
[#]. The Scanner Function screen ap- pears. Note ❒ If the network TWAIN scanner screen is displayed, press [Can- cel]. This screen is displayed if "Function Priority" in the Scan- ner Initial Setup is set to net- work TWAIN scanner mode. - Page 54 Delivering Stored Scan Data by the Network Delivery Scanner B Select the desired resolution, original size, and other items to change the settings. The way to make scan settings is the same way as programing scan settings. See p.14 “Setting Scanner Features”.
- Page 55 Note ❒ To deselect a destination, press the destination once more, or press [U U U U Prev.] or [T T T T Next] to bring up the desti- nation in the destination field, and then press [Clear]. D To select more destinations, re- peat step C.
- Page 56 Delivering Stored Scan Data by the Network Delivery Scanner B Select the sender. • Selecting a sender from the title category is done by us- ing the same procedure as when selecting a destination. See step • To select a sender using a...
-
Page 57: Checking The Delivery Result
• Status Indicates whether delivery was successful or resulted in an er- ror. Press [Delivered Files Status] on the network delivery scanner screen. The delivery status is displayed. Checking the Delivery Result Check the displayed results. Note ❒ One screen shows the results for six delivery operations. -
Page 58: Using The Network Delivery Scanner With The Document Server
Delivering Stored Scan Data by the Network Delivery Scanner Using the Network Delivery Scanner with the Document Server You can use the network delivery scanner with the Document Server. Simultaneous Delivery and Storage Scanned data is stored in the Docu- ment Server when the data is deliv- ered. -
Page 59: Delivering Stored Files
After you have entered the correct password and pressed [OK], the file will be selected. Using the Network Delivery Scanner with the Document Server To select multiple files, repeat step Note ❒ You can select up to 30 files for one operation. - Page 60 Delivering Stored Scan Data by the Network Delivery Scanner...
-
Page 61: Using The Document Server
❒ The maximum number of pages per scan data file is 500. ❒ Documents scanned in the scanner function cannot be printed from the con- trol panel. Print the documents using DeskTopBinder V2 Lite/Professional... -
Page 62: Storage Procedure
[#]. The Scanner Function screen ap- pears. Note ❒ If the network TWAIN scanner screen is displayed, press [Can- cel]. This screen is displayed if "Function Priority" in the Scan- ner Initial Setup is set to net- work TWAIN scanner mode. - Page 63 When not using the network deliv- ery scanner function, this step is not required. Go to step A Press [Store File]. The screen for setting storage parameters for scanned data ap- pears.
- Page 64 With DeskTopBinder V2 Lite/ Professional installed on a client com- puter, you can view the entire string. When using the network delivery scanner function, display the File Information screen. A Press [Store File]. B Press [File Information]. The File Information screen ap- pears.
- Page 65 The password is applied. Important ❒ Do not forget the password. If you forget it, contact the key operators in charge of this machine. When using the network delivery scanner function, press [OK] twice to return to the original screen. Storing Data...
-
Page 66: Viewing A List Of Stored Files
Press the {Scanner} key. The Scanner Function screen ap- pears. Note ❒ If the network TWAIN scanner screen is displayed, press [Can- cel]. This screen is displayed if "Function Priority" in the Scan- ner Initial Setup is set to net- work TWAIN scanner mode. -
Page 67: Viewing The List
Viewing the List The list displayed scanned data files that are stored, has the following elements. ❖ ❖ ❖ ❖ When using the network delivery scanner ❖ ❖ ❖ ❖ When using the Document Server only Keys for searching files... - Page 68 User name Displays only the files stored with the same user name specified in the connect- ed device properties. The files stored from the scanner are shown on the "Scan- ner" folder. All users Displays all files stored in the connected...
-
Page 69: Searching For Files
Searching for Files You can search for desired files from the stored files, using the user name or file name as a key. Searching by user name On the list of displayed files, press [Search by User Name]. The User Name Search screen ap- pears. -
Page 70: Deleting Stored Files
Using the Document Server Deleting Stored Files You can delete files that are longer needed. Limitation ❒ Delivery standby files cannot be deleted. Display the list of stored files. Reference ⇒ p.58 “View ing a List of Stored Files” Select the file to be deleted. Note ❒... -
Page 71: Changing File Information
Changing File Information The information about files stored in the Document Server (user name, file name, password) can be changed. Limitation ❒ Information about delivery stand- by files cannot be changed. Display the list of stored files. Reference ⇒ p.58 “View ing a List of Stored Files”... - Page 72 Using the Document Server Changing the file name A Press [Change File Name]. The screen for changing the file name appears. B Enter the new file name. Reference For information about how to enter characters, see the System Settings manual. C Press [OK].
-
Page 73: Appendix
Reference For information about the relationship between the resolution and the scan- ning area when the machine is used as the network TWAIN scanner, see the TWAIN driver help. ❖ ❖ ❖ ❖ When the "Text", "Text/Photo", or "Photo" is selected as the Scan Type All combinations up to A3/11"x17"... -
Page 74: Troubleshooting
This section contains advice on what to do if you have problems scanning an original or if the network delivery scanner function does not work. Various mes- sages that may appear on the control panel or computer are listed, along with causes and suitable countermeasures. -
Page 75: When The Error Message Is Displayed On The Control Panel
When the Error Message Is Displayed on the Control Panel Note ❒ If an error message that is not contained in this section appears, turn off the main power switch of the machine, and then turn it on again. If the message is still shown, note the content of the message and the error number (if listed in the table), and contact your service representative. - Page 76 Appendix Message Exceeded max. number of pages (500 pages) per file. Do you want to store the scanned pages as 1 file? Exceeded max. number of stand-by files. Try again after the data transmission is com- pleted. Exceeded max. page capacity per file. Only the scanned data will be transmitted.
- Page 77 Do you want to stored the scanned data? Original misfeed. Scanning has been cancelled. Press [Transmit] to transmit the scanned data. To delete the data, press [Cancel]. Scanner is currently in use for another function Cannot scan. Selected file is currently in use. Cannot change file name.
-
Page 78: When The Error Message Is Displayed On The Computer
Access Mask settings in User Tools.] [Cannot detect the paper size of the original. Specify the scanning size.] [Cannot find the scanner. Check if the scanner main power is on.] [Cannot find the scanner used for the previous scan. Another scanner will be used instead.]... - Page 79 [No User Code is registered. Consult your system administrator.] [Please call your service representative.] [Scanner is in use for other function. Please wait.] [Scanner is in use by other user. Please wait.] [Scanner is not available. Check the scanner connec- tion status.]...
- Page 80 Appendix Message [Scanner is not ready. Check the scanner and the op- tions.] [The name is already in use. Check the registered names] [The scanner power is off.] Cause and Action Check whether the ADF cover is closed. You try to register the name that is already in use.
-
Page 81: Powering Off The Machine
Powering Off the Machine Peripheral devices such as the HDD and memory are used by a variety of functions. Correct power-off proce- dures must be observed in order to avoid damaging these peripherals. Also, remember that powering off the machine may result in loss of any scan data that is awaiting transmis- sion. - Page 82 Appendix Make sure that the power indica- tor goes off. Turn off the main power switch to make the main power indicator go off.
-
Page 83: Specifications
Ethernet interface (10BASE-T or 100BASE-TX) A3/11"x17" (297mm×432mm) 600dpi ❖ ❖ ❖ ❖ When placed on the exposure glass • When used as network TWAIN scanner Setting range: 100dpi - 2400dpi • When used as network delivery scanner Setting range: 100dpi, 200dpi, 300dpi, 400dpi, 600dpi ❖... -
Page 84: Index
DeskTopBinder V2 Lite , 27 , 29 , 39 Display , 4 Display Contents Document Server , 6 Network Delivery Scanner , 6 Network TWAIN Scanner , 5 Document Server , 3 {#} Enter key , 5 Function keys , 5... - Page 85 ScanRouter V2 Lite , 30 Scan size , 14 Scan type , 14 Selecting a custom size , 16 Setting Scanner Features , 14 Software supplied on CD-ROM , 28 {Start} key , 5 Status indicators , 4 Store data , 53...
- Page 86 USA B453...
- Page 87 In accordance with IEC 60417, this machine uses the following symbols for the main power switch: a means POWER ON. c means STAND BY. Note to users in the United States of America Notice: This equipment has been tested and found to comply with the limits for a Class B digital device, pursu- ant to Part 15 of the FCC Rules.
- Page 88 UE USA B453-8607...
Need help?
Do you have a question about the 5622 and is the answer not in the manual?
Questions and answers