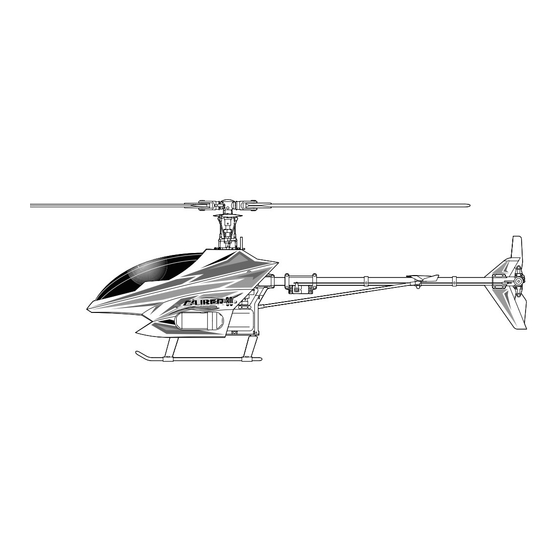
Kyosho Caliber 30 Instruction Manual
Radio controlled engine powered helicopter
Hide thumbs
Also See for Caliber 30:
- Installation and operating manual (39 pages) ,
- Instruction manual (38 pages)
Advertisement
Before beginning assembly, please read these instructions thoroughly.
INSTRUCTION MANUAL
For Advanced Flyers
INDEX
RADIO PREPARATION
BEFORE YOU BEGIN
ASSEMBLY
OPERATING YOUR MODEL SAFELY
PARTS LIST
EXPLODED VIEW
© 2002 KYOSHO CORPORATION
RADIO CONTROLLED ENGINE POWERED HELICOPTER
REQUIRED FOR OPERATION
SETTINGS ¥ FLIGHT LESSONS ¥ MAINTENANCE
SPARE & OPTIONAL PARTS
SPECIFICATIONS ARE SUBJECT TO CHANGE WITHOUT NOTICE.
UNDER SAFETY PRECAUTIONS
This radio control model is not a toy.
This is a kind of machine including a rotor which rotates with
high speed and has a possibility to be dangerous. You are
responsible for this model's assembly, safe operation (place
to fly, frequency) check and adjustment of the model.
Assemble this kit only in places out of children's reach!
Take enough safety precaution before and after operation.
After every flight, inspect screws and nuts for looseness, and
parts for wear. Any damaged parts should be immediately
replaced, repaired or adjusted for safe operation.
Use only Kyosho genuine parts for replacement.
Failing to do so will result in accidents or malfunction of the
model. Kyosho do not take responsibilities for the accidents
and crashes if using the parts which are not Kyosho genuine
ones.
Always keep this instruction manual ready at hand for quick
reference, even after completing the assembly.
R
THE FINEST RADIO CONTROL MODELS
30
2
3 ~ 4
5 ~ 6
7 ~ 18
19
19 ~ 29
30
31 ~ 35
36 ~ 37
No. 21135/21137
Advertisement
Table of Contents

Related Manuals for Kyosho Caliber 30


Summary of Contents for Kyosho Caliber 30
- Page 1 Failing to do so will result in accidents or malfunction of the model. Kyosho do not take responsibilities for the accidents and crashes if using the parts which are not Kyosho genuine ones. Always keep this instruction manual ready at hand for quick reference, even after completing the assembly.
-
Page 2: Required For Operation
REQUIRED FOR OPERATION (1) SUITABLE SERVOS CAUTION: Only use a radio for R/C heli- copters! (Any other radio is prohibited!) 33~38mm Radio for engine-powered R/C helicopters, 39~41mm and dry batteries 19~20mm AA-size Batteries This kit requires system radio for engine- (for transmitter) powered R/C helicopters with 5 servos and 1 gyro. -
Page 3: Futaba Radio
RADIO PREPARATION Futaba Radio Aileron Servo Receiver ONVERSION PULSE CODE MODULATION 9 CHANNEL RECEIVER Rudder Servo Ni-cd Battery Pitch Servo Receiver Switch Terminal to charge AUX 3 JR Radio Ni-cd Battery AUX 2 AUX 1 Pitch Servo Receiver Switch Terminal to charge GEAR BATT AUX 4... - Page 4 Futaba Radio JR Radio Aileron Throttle Elevator Aileron Throttle Elevator Rudder Rudder Pitch Pitch AILE AILE ELEV ELEV PITCH PITCH Reverse Switch Aileron Normal Elevator Normal Throttle Reverse Rudder Normal Pitch Reverse Reverse Switch JR.G410T,G460T Some transmitter also require Aileron Reverse Gyro Direction Setting.
-
Page 5: Before You Begin
Read through the manual before you begin, so you will have an overall idea of what to do. Check all parts. If you find any defective or missing parts, contact your local dealer or our Kyosho Distributor. How to read the instruction manual:... - Page 6 BEFORE YOU BEGIN (2) CAUTION: Inside the kit, you will find assemblies, i.e. sections that are pre-assembled and hence consist of more than one part. To make sure these assemblies are safely assembled, check among others their screws for looseness. Only then, build in the assemblies.
- Page 7 No.21135= No.21136= This instruction is for both Pre Assembled without Engine (#21135) and Pre Assembled with Engine (#21136) version. Please follow right step as follows. No.21135= No.21136= Engine, Engine Mount Tighten the fan securely with screws. Reversed Screw 3x6mm No need. Hex Wrench (6mm) 3 x 15mm 3x15mm...
- Page 8 3x6mm Engine 3x14mm 3x6mm 3 x 6mm Cap Screw 3x14mm 3 x 14mm Screw Muffler, Silicone Tube 3x28mm 100mm Silicone Tube (100mm) 3x28mm 3 x 28mm Screw 100mm Silicone Tube (100mm) Apply threadlocker (screw cement).
-
Page 9: Tail Rotor
821A Tail Rotor Tighten the screws ensuring 821A can still move. Note the direction. 3x15mm 821A 3 x 15mm Cap Screw 821A Nylon Nut 821A Tail Pipe CAUTION: Note the direction for twisting. 3 x 28mm Screw Do not fold belt. Pull Tail Pipe 3x28mm 3x28mm... - Page 10 Tail Support Pipe 2 x 8mm Screw 3x14mm 3 x 10mm 3x10mm Screw 3 x 14mm Screw Nylon Nut 3x10mm 2x8mm 2x8mm 3x14mm Gyro Battery Installing Gyro, Receiver, Battery, Switch Gyro Amp Receiver Gyro Battery Double-sided Tape Switch Receiver Double-sided Tape Refer Instruction Manual included radio set to prevent vibration.
- Page 11 Rudder Servo Select the hole by servo size you use. 3x10mm In case of long In case of short 3x10mm 10~14mm Rudder Control Servo 2x8mm 2 x 8mm TP Screw approx. 5mm 2.6mm Linkage Ball 2.6x10mm 3 x 10mm 2.6x10mm Screw 2.6mm Choose by which servo you use for smooth linkage.
- Page 12 2x8mmTP Rudder Servo, Tail Linkage Guide Tighten 2x8 TP screws of Rod guide in the directed position. 180mm 80mm 2x8mm 2x8mm < > < Neutral > Top View < > must be on the groove. < Neutral > Throttle Servo 2.6 x 10mm TP Screw 2.6mm...
- Page 13 Throttle Servo 52mm 2 x 8mm Screw 10~11mm 52mm Fixed Rod (52mm) Linkage Ball 2x8mm Move all sticks neutral (center) position. (When throttle curve 50%) A = A' Adjust the throttle servo operation range of a transmitter according to the range of operation of a carburetor.
- Page 14 For EMS (Move to P15 for MMS) Pitch Servo Elevator Control Servo Aileron Servo Linkage (EMS) 2x8mm 2x8mm 2x8mm 2 x 8mm Screw approx. 10~11mm Linkage Ball 2.6x10mm 2x8mmTP 2.6x10mm 2.6 x 10mm 914 3x5x4mm TP Screw Collar 2 x 8mm 714 3x7x3mm TP Screw Ball Bearing...
- Page 15 For MMS approx. 10~11mm Pitch Servo Aileron Servo Elevator Control Servo Linkage (MMS) 2x8mm 2 x 8mm 2x8mm Screw 2x8mm 2x8mm 20~22mm approx. 20~22mm Linkage Ball 2.6x10mm 2x8mmTP 2.6 x 10mm 914 3x5x4mm TP Screw Collar 2.6x10mm Note is movable for MMS. 2 x 8mm Cord must be long enough.
- Page 16 Make swash plate horizontal by adjust sub trims of the transmitter. Pitch Curve Adjustment Swash plate In this state adjust the amount Horizontal of the maximum operation of aileron lever and elevator lever, unite with swash plate moving. < > P16- <...
-
Page 17: Body Shell
Body Shell Cut away only inside. Position of Switch holes. 15mm 15mm 100mm 25mm Apply the decals to the positions Decals indicated in numerical order. The decal numbers between brackets are only for the opposite side. 23 24 21 22 16 15 17 18 Top View... -
Page 18: Main Rotor
Body Shell 3 x 15mm 3 x 15mm Body Shell Cap Screw No.21137 Body Mount Washer No.21135 Grommet Grommet 3 x 15mm Body Shell No.21137 No.21135 Grommet Main Rotor Decal Grip Main Rotor Tracking Tape Drag Bolt Tighten the drag bolt ensuring main rotors can still move. - Page 19 OPERATING YOUR MODEL SAFELY WARNING: Do NOT operate the helicopter in the following places and situations: (Non-observance may lead to accidents!) Always check the radio batteries! If the radio batteries get weaker, transmission and reception decrease. You may lose control of your model when opera- ting it under such conditions.
- Page 20 CALIBER 30 Control Reactions Below are listed the reactions of the CALIBER 30 according to your inputs. HELICOPTER RESPONSE HELICOPTER RESPONSE CONTROL STICK POSITION (MODE 1) Throttle High Engine rpm and the main rotor pitch increase. As a Engine rpm and the main rotor pitch decrease. As a result, the helicopter lifts up.
- Page 21 Checklist before flying With , the main rotor pitch becomes smaller. With , the main rotor pitch becomes bigger. With , the swashplate tilts right. With , the swashplate tilts left. With , the swashplate tilts back. With , the swashplate tilts fore. With , the slide ring moves left.
-
Page 22: Engine Stopping
STARTING THE ENGINE ( ) When the engine starts, take hold of the rotor head so the rotor blades will not rotate. Plug Heating Always check the dry batteries used in the plug heater. Engine Starting Ensure the engine starter is rotating into the direction illustrated. (If rotating into the opposite direction, reverse the clips.) Engine Stopping... -
Page 23: Trim Adjustment
Trim Adjustment NOTICE: Adjust and practice flying only when there is a weak wind or no wind. Correct any yawing, rolling or pitching of the helicopter during take offs with the trims. As the engine speed increases and the helicopter is close to taking off, the following tendencies may be noticed for the helicopter to yaw ), to roll ( ) or to pitch (... - Page 24 Hover-Lesson 2 Headwind Hovering necessitates constant control. Repeat practicing the hover until your fingers get used to doing the controls on the transmitter. 10m away Direct the helicopter into the wind. Stand behind the helicopter. Raise the throttle control stick a little, making the helicopter hover at a height of 5 ~ 10 cm.
- Page 25 High Altitude Flight In the beginning , do not fly too fast when practicing banking at high altitude. With right banking: 10m away Tilt the helicopter to the right side using the aileron control stick. Pull up the elevator control stick and move the rudder control stick right.
-
Page 26: Maintenance
Failing to do so will inevitably result in accidents such as crashs! Wipe off any dirt or oil deposits from your helicopter. Wearing Parts WARNING: Please use only genuine Kyosho brand parts. Ball End / Linkage Ball Swashplate Gear Replace gears with stripped teeth. -
Page 27: Parts Replacement
Parts Replacement (1) The position which fixes the slide block Fix the stabilizer blade 4x4mm Phase Adjustment 4x4mm < > 71mm 4x4mm < Parallel > approx. 171mm Adjust the radius block phase to make 71mm stabilizer bar in line with the balls of swash approx. - Page 28 Parts Replacement (2) Fix the mast stopper Clutch lining replacement Tighten the screw of mast stopper, raising mast stopper upwards while pressing down main rotor head by hand downward Mast Stopper Check the Spindle shaft and replacement Thrust bearing replacement <...
-
Page 29: Troubleshooting
Troubleshooting Problem Cause Remedy Engine will not start. Engine Weak starter battery. Recharge. Too much fuel inside engine. Remove plug. Using starter, eject excess starter will not spin. (It is “overchoked”!) fuel. Weak plug heater battery. Recharge or replace. Defect plug. Replace. -
Page 30: Parts List
Tail Center Hub Spindle Shaft 714 3x7x3mm 3x7x3mm Bearing Rotor Grip M 4.8 Ball End (4.8¿) 6x10x1.0 Collar (6x10x1.0 Body (CALIBER 30) L=550 Main Blade (L=550 Decal (Body/CALIBER 30) Root Cover A Decal (Canopy/CALIBER 30) Root Cover B 3x5x4 Collar (3x5x4) - Page 31 < EXPLODED VIEW (1) > CA3075 CA3075 CA3075 CA3075 CA3073 CA3075 CA3075 4x10mm CA3011A 4x10mm 1192 CA3073 CA3005 Z8017 96888 3x6mm 2x8mmTP 96895 2x8mmTP CA3012 Z8017 883A 96888 CA3011A 4x4mm CA3002 CA3006 CA3009 CA3011A-01 3x6mm CA3008 3x6mm 3x6mm CA3010 3x6mm 96894 96894 CA3004...
- Page 32 < EXPLODED VIEW (2) > 3x14mm Z8017 2x8mmTP CA3046 CA3070 Z8017 CA3076 2x8mmTP 2.6x10mmTP CA3026 96894 CA3071 96894 3x6mm 3x10mm CA3039 96891 BS16 96996 2.6x10mmTP CA3069 CA3025 BS16 Z8017 3x28mm 2x8mmTP 3x28mm 3x28mm 3x10mm CA3070 CA3070 CA3076 CA3076 CA3047 2x8mmTP CA3046 96894 Z8017...
- Page 33 < EXPLODED VIEW (3) > CA3054 CA3021 CA3035 CA3072 2.6x8mm BS16 3x20mm 96694 CA3023 CA3017 CA3020 BS16 CA3022 CA3018 4x4mm 3x6mm 3x6mm 3x14mm CA3019 96891 3x14mm CA3024 CA3016 3x20mm CA3027 CA3016-01 3x14mm 96891 CA3069 CA3015 CA3014 CA3069 3x28mm CA3069 CA3027 3x14mm 3x15mm CA3034-01...
- Page 34 < EXPLODED VIEW (4) > CA3032 CA3076 CA3070 CA3031 CA3076 CA3070 CA3076 CA3033 CA3076 CA3076 CA3070 CA3026 CA3076 CA3070 96894 96894 CA3025 96894 96894 3x10mm CA3044 3x10mm CA3045 2.6x10mmTP CA3043 CA3043 2.6x10mmTP CA3069 3x10mm CA3043 CA3069 CA3030 CA3043 CA3069 4x4mm CA3074 CA3074 CA3030...
- Page 35 < EXPLODED VIEW (5) > 111A CA3067 821A CA3068 3x15mm 2x8mm 112A CA3067 2x8mm Z8017 2x8mmTP 3x15mm 3x6mm 96996 260C CA3066 CA3065 4x4mm 2x8mmTP 107A 2x8mm 106A 2x8mm 107A H3048 3x6mm CA3064 3x15mm H3048 3x15mm 940A CA3060A 3x6mm CA3064 Z8017 CA3061 CA3063 CA3054...
-
Page 36: Spare Parts
950 951 x 4 CA3070 Body Mount Skid 3x5x4 914 x 5 CA3031 898 x 1 2600 CA3071 Body (CALIBER 30) Collar (3x5x4) 8x12x3.0 953 x 1 CA3032 899 x 1 CA3072 Decal (Body/CALIBER 30) Collar (8x12x3.0) 955 956 957 x 2... -
Page 37: Optional Parts
SPARE PARTS FOR JAPANESE MARKET ONLY. Part Names Quantity Part Names Quantity 8x16x5mm 20x32x7.0 16 x 2 963 x 1 BS16 96695 8x16x5mm Ball Bearing Bearing (20x32x7.0) 6x10x3mm 6x13x5mm 105 x 2 713 x 2 H3048 1000 96888 6x10x3mm Ball Bearing 6x13x5mm Ball Bearing 10x19x5mm 954 x 5... - Page 38 SCREW NUT etc. FOR JAPANESE MARKET ONLY. Size (mm) QUANTITY Size (mm) QUANTITY QUANTITY Round Head Self-Tapping Screw Round Head Screw 1101 2x6 2x8 2x10 2x15 5 each 1132 2x4 2x6 2x8 2x10 5 each 1171 2mm 2.6mm 10 each 1102 2.6x8 2.6x10 2.6x12 2.6x14 5 each...
Need help?
Do you have a question about the Caliber 30 and is the answer not in the manual?
Questions and answers