Table of Contents
Advertisement
Advertisement
Table of Contents

Subscribe to Our Youtube Channel
Related Manuals for Jazz HDV146

Summary of Contents for Jazz HDV146
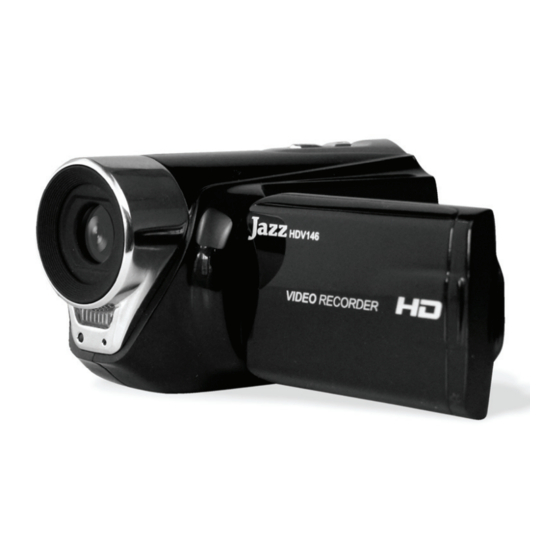
- Page 1 High Definition Video Recorder with Camera HDV146 User Manual...
- Page 2 FCC statement This device complies with part 15 of FCC rules. Operation is subject to the following two conditions: (1) this device may not cause harmful interference, and (2) this device must accept any interference received, including interference that may cause undesired operation.
-
Page 3: Table Of Contents
CONTENTS 1. Parts of the video recorder..............5 2. Preparing for using ................6 Installing the Battery................6 Inserting the Memory Card..............7 Format the memory card ..............8 Setting the Language................9 Setting the date and time..............10 Screen display ..................11 3. Using your video recorder..............14 Turning the recorder ON and OFF ............14 Change the MODE of the recorder............14 Recording video clip ................15... - Page 4 4. Using the Menu in recording mode...........18 Menu in Video mode ................18 Menu in capture mode ...............19 Setup menu / Internal setting ............21 5. Playback....................24 Playing back still images..............24 Playing back movie clips ..............24 Other functions in Playback mode ...........25 6.
- Page 5 Thank you for purchasing this video recorder with camera. Please read these operating instructions carefully in order to know your camera and verify the performance. Keep this Manual booklet handy for later when you may need to review the instructions if necessary. Precautions Before using the video camera, please ensure that you carefully read and understand the safety precautions described below.
-
Page 6: Parts Of The Video Recorder
1. Parts of the video recorder 1. Lens 2. Microphone 3. LED Light 4. Self-Timer LED 5. Speaker 6. Power button 7. T/Zoom in button 8. W/Zoom out button Left button/Self-timer 10. Shutter button Up button/Display 12. USB jack 13. AV out jack Right button/LED ON/OFF Down button... -
Page 7: Preparing For Using
16. MENU button 17. OK button 18. Mode button 19. LCD screen 20. Tripod socket 21. SD card slot 22. Battery cover 2. Preparing for using Installing the Battery Open latch and remove the battery door. Insert three fresh AAA-size batteries with the positive (+) and negative (-) terminals matching the indicators inside the battery compartment. -
Page 8: Inserting The Memory Card
POWER button for 2 to 3 seconds to turn ON video recorder. Inserting the Memory Card Camera requires SD Memory Card inserted to record & store video clips or images. 1. Turn OFF recorder (if recorder is activated) by pressing Power button before inserting or removing SD card. -
Page 9: Format The Memory Card
4. To remove; press SD card down, then it will pop up and can be easily removed. • Do not insert any other object except the SD/SDHC memory card into the camera SD card slot. • Keep the camera turned OFF while inserting or removing the SD card. •... -
Page 10: Setting The Language
Press the UP or DOWN button to locate [Format.] then press the OK or RIGHT button to launch the submenu. Press the UP or DOWN button to select the item [YES] and then press the OK button to execute formatting the card. Setting the Language You have an option to select from choice of seven the Language used for displayed commands and information;... -
Page 11: Setting The Date And Time
Setting the date and time 1: Turn the power ON, press the MENU button to display the menu, and press the RIGHT button to select [Setup] menu. 2: Press the UP or DOWN button to locate [Date & Time…] then press the OK or RIGHT button to launch the submenu. -
Page 12: Screen Display
Screen display Video mode... - Page 13 Capture mode...
- Page 14 Playback mode Up Button/Display (part 11) – Press this display button once in video mode or Capture mode to display live image (no icons will be visible), press button again to blank the screen and then press again to restore original bright screen with icons.
-
Page 15: Using Your Video Recorder
3. Using your video recorder Turning the recorder ON and OFF Press the POWER button for 2 to 3 seconds to turn ON video recorder. Press the POWER button again to turn OFF the recorder. To save battery power, the recorder automatically turns off after a short period of time if no button has been activated. -
Page 16: Recording Video Clip
still pictures. Press it again to select the Playback Mode. The icons – displayed on the LCD screen – will identify selected Mode. Display Title Description Video mode Recording video clips. Capture mode Taking still photos. Playback mode Preview photos and video clips. Recording video clip Turn on the video recorder and set it to Video recording mode. -
Page 17: Taking Still Images
• The LCD monitor will display the elapsed time of recorded video. Taking still images Turn ON the video recorder. Set the video recorder to capture mode, the icon appears on the LCD screen. Use the LCD screen to frame your subject. Hold the video recorder steady and press the SHUTTER button to take a picture. -
Page 18: Using The Self-Timer And Burst Snapshot
Using the Self-timer and Burst snapshot When the Self-timer is set and activated, the camera will auto-take a picture after the selected delay time. Use the burst snapshot to take pictures continuously. Turn the power ON, and set the video camera to the Capture mode. 2: Press the LEFT button to select sequentially Self-Timer options;... -
Page 19: Using The Zoom Function
Using the Zoom Function This camera has a Digital Zoom function that allows you to zoom in (Tele) or zoom out (Wide) subjects or recorded scene. 1: Turn the camera ON and set it to Video Recording or Capture mode. 2: Press the T or W buttons to compose the scene as required. -
Page 20: Menu In Capture Mode
to choice desired menu item. Press the OK or RIGHT button to enter the sub-menu. Use the UP or DOWN button to select the desired setting. Press the OK button to confirm the setting. Press the MENU button to close the menu. Menu item Function Movie... - Page 21 2: Press the MENU button to display the menu. 3: Use the UP or DOWN button to choose desired menu item. 4: Press the OK or RIGHT button to enter the submenu. 5: Use the UP or DOWN button to select the desired item. 6: Press the OK button to confirm the setting.
-
Page 22: Setup Menu / Internal Setting
[Spot]: The exposure will be metered based only on the spot in the center of the scene White Adjust the white balance to suit different light sources. Balance There are five items to choose: [Auto] / [Daylight] / [Cloudy] / [Fluorescent] / [Bulb]. Exposure In unusual ambient conditions such as indirect indoor lighting, dark backgrounds, and strong backlighting you can set the... - Page 23 MENU button to display the menu. Press the RIGHT button to select [Setup]. Use the UP or DOWN button to locate an item. Press the OK or RIGHT button to enter the submenu. Use the UP or DOWN button to select the desired item. Press the right button to choose On or Off and OK button to confirm the setting.
- Page 24 Power Power (also Light) Frequency should be set to 60Hz or Frequency 50Hz to match local power supply. [50Hz] / [60Hz]. Power Save To save power the recorder turns off automatically after selected time period: [1min.] / [3min.] / [5min.]. Date &...
-
Page 25: Playback
5. Playback Playing back still images Turn ON the recorder and set to playback mode. The latest recorded file will show on LCD screen. If there are no images stored, a message [No File] appears. Press the LEFT or RIGHT buttons to browse the previous or next images. -
Page 26: Other Functions In Playback Mode
pause and press again to continue. Press the RIGHT button to fast forward and press the LEFT button to rewind. Other functions in Playback mode Viewing Thumbnail size files Press the W/Zoom out button to view the file in thumbnail mode. Use the UP, DOWN, LEFT, RIGHT button to select a file. - Page 27 Using UP or DOWN button to select the item [Yes]. Press the OK button to lock/ unlock the current file or all files. Press the MENU button as necessary to exit. • The “key” icon will display on the LCD screen if the file has been locked.
- Page 28 Playing Slide Show of still images Press the MENU button in playback mode. Press the UP or DOWN button to locate the item [Slide Show]. Press the OK or RIGHT button to enter the submenu. [Start]: Select this item to start slide show mode. [Interval]: Set the interval time by pressing the LEFT or RIGHT button.
- Page 29 Press the OK or RIGHT button to enter the submenu: [B&W], [Sepia], [Negative], [Red], [Green], [Blue], [Binarize], [Sunset], [Warm], [Cold], [Contrast]. Press the UP or DOWN button to select an effect changing color tone of the image. Press the OK button to confirm the setting. A duplicate photo with the desired color tone will be created and stored in SD card.
- Page 30 Resize Select an image you want to resize in playback mode. Press the MENU button to display the menu. Press the UP or DOWN button to select the item [Resize]. Press the OK or RIGHT button to launch the submenu: 2048x1536/ 1280x960/ 640x480.
-
Page 31: Making Connections
the OK or SHUTTER button to start recording voice memo. Press the SHUTTER button to end the recording. To playback voice memory please first select desired photo with microphone icon and then press the OK/SHUTTER button. • To delete the Voice Memo please follow above steps 2, 3, 4 and when the dialog box appears select “Delete”... -
Page 32: Connecting The Video Recorder To A Pc Using Usb Cable
you wish to record on the TV screen. In Playback mode, all the pictures and video clips stored in the camera can be reviewed and played back on the TV screen. When the TV is connected, the cameras LCD screen becomes blank and TV screen becomes the monitor for your camera. - Page 33 stored video and still images files. Review and copy photos or video files into your computer. Download video and still images to your computer before playing back. Alternatively insert the memory card into a card reader to download files. Using a Card Reader Eject the memory card from the recorder and insert into a card reader connected to a computer.
-
Page 34: Software Installation
7. Software Installation Installing the Software Supplied installation CD contains bundled Arcsoft MediaImpression program and the Driver for the camera. Driver is necessary to use your camera as PC/ webcam. • Installed • Installed Arcsoft Mediaimpression program is useful for editing pictures and recorded video clips. -
Page 35: How To Use The Pc Camera Function
Click the selected items in the autorun menu to install the software. If the autorun menu does not appear automatically, open the CD-ROM in [My Computer] or [Windows Explorer] and double-click the file named [autorun.exe] to start the program. You can also click [Run] in the Windows Startup menu, enter "D:\autorun.exe"... - Page 36 in Setup Menu and then select [PCCAM] option to set the camera to PC CAM mode. Connect the recorder to the computer with the USB connector. Run the program Amcap on the desktop. When using this function for the first time please select <Preview> as shown on illustration. Now you can use your recorder as the PC camera function.
-
Page 37: Troubleshooting
8. Troubleshooting Power does not turn ON. 1.Batteries are inserted in wrong ★Reinstall batteries in the correct direction. direction. 2.Battery power insufficient ★Reinstall new batteries. Camera does not take pictures. 1. Memory is full. ★Insert a new memory card. 2. Memory card is not formatted. ★Format card or use new card. -
Page 38: Technical Specifications
9. Technical Specifications Video Res HD 1280x720, VGA 640x480, QVGA 320x240 pixels 8MP(3264x2448);5MP(2592x1944);3MP(2048x1536); Still pictures 1.3MP(1280x960);VGA(640x480);pixels Display 2.0" TFT Color LCD, 270° twist & flip screen Focus range 5 feet (1.5M)~ infinity Aperture F3.0, f=7.0mm. Fixed Focus Shutter Auto Electronic Shutter: 1/2000 ~ 1/2sec. White balance Auto / Daylight / Cloudy / Fluorescent / Bulb Digital zoom... - Page 39 TV system NTSC / PAL selectable Power Supply Three (3) AAA alkaline 1.5V batteries (not supplied) Ambient Operating: 0° C to 40° C temperature Storage: -20 to 60° C Microphone Built-in Speaker Built-in Dimensions 4.0 x 1.8 x 2.3 inches (102 x 46 x 58mm) Weight Approx.
Need help?
Do you have a question about the HDV146 and is the answer not in the manual?
Questions and answers