Table of Contents
Advertisement
Quick Links
WARNING: Read
this Manual, and
any Supplements
Carefully
Before Operating
Vehicle.
· Assembly
· Operation
· Maintenance
THIS VEHICLE IS
NOT DESIGNED
FOR USE ON
RENTAL TRACKS
OR RACING
BEFORE OPERATING THIS VEHICLE, THE OWNER AND EACH
OPERATOR MUST HAVE READ AND HAVE AN UNDERSTANDING OF
ALL THE INSTRUCTIONS FOR PROPER ASSEMBLY AND SAFE
OPERATION, AS WELL AS THE INSTRUCTIONS CONCERNING THE
ENGINE AND ALL OTHER PORTIONS OF VEHICLE.
Create PDF with GO2PDF for free, if you wish to remove this line, click here to buy Virtual PDF Printer
OWNER'S MANUAL
EPA 2x4
FA-D300
Advertisement
Table of Contents

Related Manuals for Buyang FA-D300

Summary of Contents for Buyang FA-D300
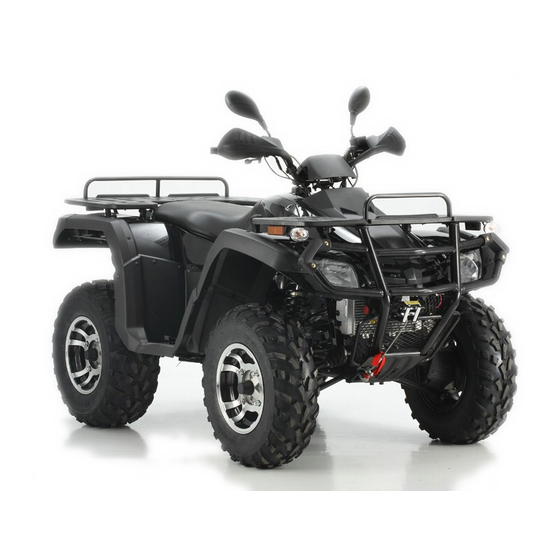
- Page 1 THIS VEHICLE IS EPA 2x4 NOT DESIGNED FOR USE ON RENTAL TRACKS FA-D300 OR RACING BEFORE OPERATING THIS VEHICLE, THE OWNER AND EACH OPERATOR MUST HAVE READ AND HAVE AN UNDERSTANDING OF ALL THE INSTRUCTIONS FOR PROPER ASSEMBLY AND SAFE OPERATION, AS WELL AS THE INSTRUCTIONS CONCERNING THE ENGINE AND ALL OTHER PORTIONS OF VEHICLE.
-
Page 2: Table Of Contents
CONTENTS 1. INTRODUCTION------------------------------------------------------ 2 2. UNDERSTANDING WARNING-------------------------------------7 3. SAFETY WARNING-------------------------------------------------- 9 4. DAILY PRE-RIDE INSPECTION---------------------------------- 15 5. OPERATION WARNINGS-------------------------------------------16 6. V.I.N--------------------------------------------------------------------- 32 7. CONTROL AND PARTS FUNCTIONS--------------------------- 33 8. STARTING THE ENGINE------------------------------------------- 46 9. VEHICLE BREAK-IN PERIOD------------------------------------ 47 10. RIDING GEAR------------------------------------------------------ 48 11. -
Page 3: Introduction
1. INTRODUCTION Congratulations on the purchase of your ALL Terrain Vehicle (ATV). We take pride in offering you this product engineered and manufactured to the highest performance and quality standards. We are sure that you will enjoy superior levels of performance, reliability, riding comfort, and safety. - Page 4 Practice Responsible ATV Riding Make sure that you understand and follow all local, state/province, and federal/national riding laws and requirements. Remember……Respect your vehicle, respect the environment and respect the property of others. You are responsible for your safety and the safety of others around you when you ride! Create PDF with GO2PDF for free, if you wish to remove this line, click here to buy Virtual PDF Printer...
- Page 5 AN ATV CAN BE HAZARDOUS TO OPERATE. An ATV handles differently from other vehicles including motorcycles and cars. A collision rollover can occur quickly, even during routine maneuvers such as turning and driving on hills or over obstacles, if you fail to take proper precautions. SERIOUS INJURY OR DEATH can result if you do not follow these instructions.
- Page 6 excessive speeds. · Always have the ATV checked by an authorized dealer if it has been involved in an accident. · Never operate ATV on hills too steep for the ATV or for your abilities. Practice on smaller hills before attempting larger hills. ·...
- Page 7 make sudden turns or stops, and do not make sudden throttle changes. · Wet brakes may have reduced stopping ability. Test your brakes after leaving water. If necessary, apply them lightly several times to let friction dry out the pads. ·...
-
Page 8: Understanding Warnings
2. UNDERSTANDING WARNINGS ATTENTION: This is an ADULT VEHICLE ONLY: not a toy. READ AND UNDERSTAND WARNINGS AND OWNER’S MANUAL BEFORE OPERATION. KNOW YOUR VEHI CLE BEF ORE YOU BEGI N RI DI NG! Read this manual thoroughly referring to the various areas which are being discussed on your machine. -
Page 9: Safety Alert
SAFETY ALERT WARNINGS identify special instructions or procedures which, if not correctly followed, could result in personal injury, or loss of life. Read all WARNINGS in this manual care fully. Follow their instructions to remain safe. The following precautionary signal words are used throughout this manual to convey the following messages: This is the safety alert symbol. -
Page 10: Safety Warning
3. SAFETY WARNING NOTE£º Warning decals have been placed on the vehicle for your protection. Read and follow the instructions on each decal carefully. In the event any decal becomes illegible or comes off, contact your dealer for a replacement. Create PDF with GO2PDF for free, if you wish to remove this line, click here to buy Virtual PDF Printer... - Page 11 Create PDF with GO2PDF for free, if you wish to remove this line, click here to buy Virtual PDF Printer...
- Page 12 Create PDF with GO2PDF for free, if you wish to remove this line, click here to buy Virtual PDF Printer...
- Page 13 Create PDF with GO2PDF for free, if you wish to remove this line, click here to buy Virtual PDF Printer...
- Page 14 Create PDF with GO2PDF for free, if you wish to remove this line, click here to buy Virtual PDF Printer...
- Page 15 Create PDF with GO2PDF for free, if you wish to remove this line, click here to buy Virtual PDF Printer...
-
Page 16: Daily Pre-Ride Inspection
4. DAILY PRE-RIDE INSPECTION WARNING You must inspect your ATV each time before riding to ensure it is in proper working order. If proper inspection is not done, severe injury or death could result. Use the following checklist to verify your machine is in proper working order each time you ride. -
Page 17: Operation Warnings
5. OPERATION WARNINGS WARNING POTENTIAL HAZARD Carrying a passenger on this ATV. WHAT CAN HAPPEN Greatly reduces your ability to balance and control this ATV. Could cause an accident, resulting in harm to you and/or your passenger. HOW TO AVOID THE HAZARD Never carry a passenger. - Page 18 WARNING POTENTIAL HAZARD Operating this ATV without proper instruction. WHAT CAN HAPPEN The risk of an accident is greatly increased if the operator does not know how to operate the ATV properly in different situations and on different types of terrain. HOW TO AVOID THE HAZARD Beginning and inexperienced operators should complete the certified training course.
- Page 19 WARNING POTENTIAL HAZARD Operating this ATV on paved surfaces, including sidewalks, paths, parking lots, and driveways. WHAT CAN HAPPEN Paved surfaces may seriously affect the handling and control of the ATV, and may cause the vehicle to go out of control. HOW TO AVOID THE HAZARD Avoid operating the ATV on pavement.
- Page 20 WARNING POTENTIAL HAZARD Operating this ATV after consuming alcohol or drugs. WHAT CAN HAPPEN Could seriously affect your judgment. Could cause you to react more slowly. Could affect your balance and perception. Could result in an accident. HOW TO AVOID THE HAZARD Never consume alcohol or drugs before or while driving this ATV.
- Page 21 WARNING POTENTIAL HAZARD Attempting wheelies, jumps and other stunts. WHAT CAN HAPPEN Increases the chance of an accident, including an overturn. HOW TO AVOID THE HAZARD Never attempt stunts, such as wheelies or jumps. Create PDF with GO2PDF for free, if you wish to remove this line, click here to buy Virtual PDF Printer...
- Page 22 WARNING POTENTIAL HAZARD Failure to inspect the ATV before operating. WHAT CAN HAPPEN Increases the possibility of an accident or equipment damage. HOW TO AVOID THE HAZARD Always inspect your ATV each time you use it to make sure the ATV is in safe operating condition.
- Page 23 WARNING POTENTIAL HAZARD Failure to use extra care when operating this ATV on unfamiliar terrain. WHAT CAN HAPPEN You can come upon hidden rocks, bumps, or holes, without enough time to react. Could result in the ATV overturning or going out of control. HOW TO AVOID THE HAZARD Go slowly and be extra careful when operating on unfamiliar terrain.
- Page 24 WARNING POTENTIAL HAZARD Failure to use extra care when operating on excessively rough, slippery or loose terrain. WHAT CAN HAPPEN Could cause loss of traction or vehicle control, which could result in an accident, including an overturn. HOW TO AVOID THE HAZARD Do not operate on excessively rough, slippery or loose terrain until you have learned and practiced the skills necessary to control the ATV on such terrain.
- Page 25 WARNING POTENTIAL HAZARD Turning improperly. WHAT CAN HAPPEN ATV could go out of control, causing a collision or overturn. HOW TO AVOID THE HAZARD Always follow proper procedures for turning as described in the Owner’s Manual. WARNING POTENTIAL HAZARD Operating on excessively steep hills. WHAT CAN HAPPEN The vehicle can overturn more easily on extremely steep hills than on level surfaces or small hills.
- Page 26 WARNING POTENTIAL HAZARD Going down a hill improperly. WHAT CAN HAPPEN Could cause loss of control or cause ATV to overturn. HOW TO AVOID THE HAZARD Always follow proper procedures for going down hills as described in the Owner’s Manual. NOTE: A special technique is required when braking as you go downhill.
- Page 27 WARNING POTENTIAL HAZARD Stalling, rolling backwards or improperly dismounting while climbing a hill. WHAT CAN HAPPEN Could result in ATV overturning. HOW TO AVOID THE HAZARD Maintain steady speed when climbing a hill. If you lose all forward speed: Keep your weight uphill. Apply the brakes.
- Page 28 WARNING POTENTIAL HAZARD Improperly operating over obstacles. WHAT CAN HAPPEN Could cause loss of control or a collision. Could cause the ATV to overturn. HOW TO AVOID THE HAZARD Before operating in a new area, check for obstacles. Use extreme caution when riding over large obstacles, such as large rocks or fallen trees.
- Page 29 WARNING POTENTIAL HAZARD Operating this ATV through deep or fast-flowing water. WHAT CAN HAPPEN Tires may float, causing loss of traction and loss of control, which could lead to an accident. HOW TO AVOID THE HAZARD Never operating the ATV through water which exceeds the recommended maximum depth in this manual.
- Page 30 WARNING POTENTIAL HAZARD Operating this ATV with improper tires, or with improper or uneven tire pressure. WHAT CAN HAPPEN Use of improper tires on this ATV, or operation of this ATV with improper or uneven tire pressure, may cause loss of control, and increases the risk of an accident. HOW TO AVOID THE HAZARD Always use the size and type of tires specified in the Owner’s Manual for this vehicle.
- Page 31 WARNING POTENTIAL HAZARD Overloading this ATV or carrying or towing cargo improperly. WHAT CAN HAPPEN Could cause changes in vehicle handling, which could lead to an accident. HOW TO AVOID THE HAZARD Never exceed the stated load capacity for this ATV. Cargo should be properly distributed and securely attached.
- Page 32 WARNING After a rollover or an accident, have a qualified service dealer check the complete machine including, but not limited to, brakes, throttle and steering for possible damage. WARNING Safe operation of this ride active vehicle requires good judgment and physical skills. Persons with cognitive or physical disabilities who operate this vehicle have an increased risk of overturns and loss of control which could result in severe injury or death.
-
Page 33: V.i.n
6. V.I.N Record these numbers from your ATV in the spaces provided. 1. Frame VIN (found on the high tight side of the frame tube) 2. Engine Serial Number (Left front side of engine crankcase) Remove the spare key and store in a safe place. Your key can be duplicated only by obtaining a key blank and having it cut by mating it with your existing key. -
Page 34: Control And Parts Functions
7. CONTROL AND PARTS FUNCTIONS Electrical Switches 1. Main Switch-This key switch must be turned clockwise to the “on” position to start the engine. 2. Engine Start Button-To start the engine. Create PDF with GO2PDF for free, if you wish to remove this line, click here to buy Virtual PDF Printer... - Page 35 Light Switches and Indicator Lights WARNING This ATV is not equipped with highway approved lighting. This ATV is designed for off-road use only and must not be ridden on streets or highways. Use caution and drive at reduced speeds in conditions of reduced visibility such as fog, rain and darkness.
- Page 36 Throttle WARNING Do not start or operate an ATV with sticking or improperly operating throttle controls. A sticking or improperly operating throttle could cause an accident resulting in severe injury or death. Always contact your dealer for service repairs whenever throttle problems arise. Failure to check or maintain proper operation of the throttle system can result in the throttle lever sticking during riding and cause an accident.
- Page 37 Front and Rear Brakes The brake fluid level should be checked before each ride. The reservoir is located under the seat. The fluid should be kept between the maximum and minimum marks. CAUTION Once a bottle of brake fluid is opened, use what is necessary and discard the rest. Do not store or use a partial bottle of brake fluid.
- Page 38 WARNING Never operate the ATV with a spongy-feeling brake lever. Operating the ATV with a spongy brake lever can result in loss of braking. Loss of braking could cause an accident. Setting the Parking Brake 1. Squeeze the left hand brake lever two or three times and hold it. 2.
-
Page 39: Auxiliary Brake
Important Safeguards · The parking brake may relax when left on for a long period of time. This could cause an accident. · Do not leave the vehicle on a hill depending on the parking brake for more than five minutes. ·... - Page 40 Your ATV has an auxiliary brake provided brake provided as a safety feature. It is located on the left handlebar and is operated by the left hand. It is intended as a backup to the main brake system, especially if the main system becomes inoperative. If the rear wheels slide, apply the rear brake with the left hand to some extent.
- Page 41 Automatic Transmission Gear Selector Operation The transmission gear selector is located on the right side of the vehicle. The transmission selector lever has four positions: high forward, reverse, neutral, and low forward. NOTE: To extend belt life, use low forward gear in heavy pulling situations and in situations when you are operating below 7 mph (11 km/h) for extended periods of time.
- Page 42 Engine Cooling System Coolant Level The recovery bottle, located under the seat, must be maintained between the minimum and levels indicated on the recovery bottle. The engine coolant level is controlled or maintained by the recovery system. The recovery system components are the recovery bottle, radiator filler neck, radiator pressure cap and connecting hose.
- Page 43 Cooling System WARNING Never remove the pressure cap when the engine is warm or hot. Escaping steam can cause severe burns. The engine must be cool before removing the pressure cap. Radiator Coolant Level Inspection NOTE: This procedure is only required if the cooling system has been drained for maintenance and/or repair.
- Page 44 Fuel and Oil system WARNING Gasoline is highly flammable and explosive under certain conditions. · Always exercise extreme caution whenever handling gasoline. · Always refuel with the engine stopped, and outdoors or in a well ventilated area. · Do not smoke or allow open flames or sparks in or near the area where refueling is performed or where gasoline is stored.
- Page 45 Fuel and Oil System Fuel System The fuel tank filler cap (1) is located directly behind the handlebar. Refer to your owner’s manual for tank capacity. Use regular unleaded gasoline. The fuel valve is located on the left side of the front fender and has three positions: OFF: For vehicle storage and whenever transporting.
- Page 46 Oil System The oil tank is located on the right side of the engine. To check the oil: 1. Set machine on a level surface. 2. Start the engine and let it idle for 20-30 seconds. 3. Stop the engine, remove dipstick (1) and wipe dry with a clean cloth.
-
Page 47: Starting The Engine
8. STARTING THE ENGINE Procedure for Starting a Cold Engine WARNING Never run an engine in an enclosed area. Carbon monoxide exhaust gas is poisonous and can cause severe injury or death. Always start engines outdoors. CAUTION You must allow your vehicle adequate warm up time before operating or engine damage could result. -
Page 48: Vehicle Break-In Period
9. VEHICLE BREAK-IN PERIOD The break-in period for your new ATV is defined as the first 50 hours of operation. No single action on your part is as important as a proper break-in period. Careful treatment of a new engine will result in more efficient performance and longer life for the engine. -
Page 49: Riding Gear
10. RIDING GEAR Safe Riding Gear Always wear clothing suited to the type of riding you are doing. ATV riding requires special protective clothing which will make you feel more comfortable and reduce chances of injury. 1. Helmet Your helmet is the most important piece of protective gear for safe riding. A helmet can prevent a severe head injury. -
Page 50: Carrying Loads
11. CARRYING LOADS Your ATV has been designed to carry a certain amount of load. CARGO WEIGHT should be evenly distributed (1/3 on the front and 2/3 on the rear) and mounted as low as possible. When operating over rough or hilly terrain, reduce speed and cargo weight to maintain stable driving conditions. - Page 51 Important Safeguards To reduce risk of injury or machine damage when carrying loads, read and follow the warnings listed below: · REDUCE SPEED AND ALLOW GREATER DISTANCES FOR BRAKING WHEN CARRYING CARGO. · CARGO WEIGHT DISTRIBUTION should be 1/3 on the front rack and 2/3 on the rear rack.
-
Page 52: Riding
12. RIDING WARNING You must inspect your ATV each time before riding to ensure it is in proper working order. If proper inspection is not done, severe injury or death could result. See “4. DAILY PRE-RIDE INSPECTION” 1. Sit upright with both feet on footrests and both hands on the handlebars. 2. - Page 53 Making turns Practice making turns at slow speeds This ATV is equipped with a solid rear axle which drives both rear wheels equally at all times. This means that the wheel on the outside of the turn must travel a greater distance than the inside wheels when turning and the inside tire must slip traction slightly.
- Page 54 Riding on slippery surfaces Whenever riding on slippery surfaces such as wet trails or loose gravel, or during cold freezing weather, special attention must be paid to prevent vehicle turnover. Always: 1. Slow down when entering slippery areas. 2. Maintain a high level of alertness, reading the trail and avoiding quick, sharp turns, which can cause skids.
- Page 55 Traveling Uphill WARNING Exercise extreme caution when traveling in hilly terrain. Braking and handling are greatly affected. Loss of vehicle control or overturning of the ATV could occur causing severe injury or death. Whenever traveling uphill always travel straight uphill and: 1.
- Page 56 Side hilling Side hilling is one of the most dangerous types of riding your ATV and should be avoided. If you do enter into a situation where side hilling is necessary, always: 1. Slow down. 2. Lean into the hill, transferring your upper body weight toward the hill while keeping your feet on the footrests.
- Page 57 Traveling Downhill Whenever descending a hill, always: 1. Drive directly downhill. 2. Transfer your weight to the rear of the vehicle. 3. Slow down. 4. Apply the brakes slightly to aid in slowing. Familiarize yourself with the auxiliary rear brake pedal and its use in the event loss of normal service brakes occurs.
- Page 58 Turning Around on a Hill If the ATV stalls while climbing a hill, never back it down the hill! One maneuver which can be used when it is necessary to turn around while climbing a hill is the K-turn. 1. Stop and lock the parking brake while maintaining body weight uphill. 2.
- Page 59 Crossing Streams Your ATV can operate through water up to a maximum recommended depth (8 in.). Before fording streams always: 1. Determine water depths and current. 2. Choose a crossing where both banks have gradual inclines. 3. Proceed slowly, avoiding rocks and obstacles if possible. 4.
- Page 60 CAUTION If your ATV becomes immersed, take it to your dealer before starting the engine. Major engine damage can result if the maching is not thoroughly inspected. If it is impossible to take it to a dealer before starting, follow these steps outlined below.
- Page 61 Trail Obstacles Keep Alert! Look ahead and learn to read the trail as you ride.Stay on the right side of the trail, if possible, and be constantly alert for hazards such as logs, rocks and low hanging branches. WARNING Not all obstacles are visible. Travel with caution on trails. Severe injury or death can occur when vehicle comes in contact with a hidden obstacle.
- Page 62 WARNING Backing your ATV can be dangerous! You should hit an obstacle or a person behind you; or the vehicle could tip over rearward on a steep incline causing severe injury or death. Backing up 1. Avoid backing up on steep inclines. 2.
- Page 63 Parking on an incline Whenever the vehicle is parked 1. Turn the engine off. 2. Place the transmission in gear. 3. Set the parking brake. 4. Shut off fuel supply. 5. Avoid parking on an incline. If it is necessary to park on an incline, always block the rear wheels on the downhill side as shown above.
-
Page 64: Cvt System
13. CVT SYSTEM CVT System WARNING The CVT system rotates at high speeds, creating large amounts of force on clutch components. However, as the owner you have the following responsibilities to make sure this system remains safe: · Do not modify any component of the CVT system. Doing so may reduce its strength so that a failure may occur at high speeds. - Page 65 CVT System On this ATV, the approximate gear ratio difference between high and low range is 1:2.05. This difference in gearing affects the operation of the CVT, especially at speeds less than 7 MPH, due to the system’s dependence on engine speed. By switching to low range while operating at low ground speeds, the air temperature in the clutch will be reduced.
- Page 66 When To Use Low Range The following lists provide a guideline for when to use low range rather than high. Low Range: · Basic operation at speeds less than 7 MPH (11 km/h) · Heavy pulling · Riding through rough terrain (swamps, mountains, etc.) at low ground speeds High Range: ·...
-
Page 67: Battery
14. BATTERY Battery WARNING Whenever removing the battery, disconnect the negative (black) cable first. When reinstalling the battery, connect the negative (black) cable last or explosive situation could result causing serious injury or death. WARNING Battery electrolyte is poisonous. It contains sulfuric acid. Serious burns can result from contact with skin, eyes or clothing. - Page 68 Battery Removal 1. Disconnect the hold-down strap holding the electrical box and battery in position, and remove battery cover. 2. Remove the battery vent tube from the battery. 3. Disconnect the black (negative) battery cable first. 4. Disconnect the red (positive) battery cable next. 5.
- Page 69 1. Set the battery in its holder. 2. Install the battery vent tube. It must be free of obstructions and securely installed. If not, battery gases could accumulate and cause an explosion. The tube should be routed away from the frame and body to prevent corrosion. Avoid skin contact with electrolyte, severe burns could result.
-
Page 70: Exhaust System
15. EXHAUST SYSTEM SYSTEM REGULATION TAMPERING WITH NOISE CONTROL SYSTEM PROHIBITED! CAUTION: Exhaust system components are very hot during and after use of ATV. · Do not tough exhaust system components. Serious burns can result. · Be especially careful when traveling through tall grass. The potential for fire exists. Spark Arrester The exhaust pipe must be periodically purged of accumulated carbon as follows: 1. -
Page 71: Maintenance
16. MAINTENANCE CAUTION Due to the nature of the adjustments marked with a D on the following chart, it is recommended that service be performed by an authorized dealer. · More often under severe use, such as dirty or wet conditions to purge water or dirt contamination from grease fittings and other critical components. - Page 72 Item Hours When Remarks Brake System Pre-ride Pre-ride Pre-ride inspection item Auxiliary Brake Pre-ride Pre-ride Pre-ride inspection item Tires Pre-ride Pre-ride Inspect daily, pre-ride inspection item Wheels Pre-ride Pre-ride Pre-ride inspection item Frame nuts, bolts fasteners Pre-ride Pre-ride Pre-ride inspection item Air Filter Pre-Cleaner Daily Daily...
- Page 73 Item Hours When Remarks Engine Oil-Level/ 30 hrs 3 months Check Level Daily; Break in Service at Change 1 month. Change oil more often in cold weather use. Oil Filter 50 hrs 6 months Inspect-clean Engine Breather 100 hrs 6 months Inspect Hose Carburetor...
- Page 74 Item Hours When Remarks Radiator 100 hrs 12 months Inspect/clean external surface Cooling System 50 hrs 6 months Inspect/replace if necessary Hoses Spark Arrester 10 hrs monthly Clean out-replace if necessary Clutches (drive and 25 hrs 3 months Inspect, clean Driven) Engine Mounts 25 hrs...
- Page 75 Lubrication Recommendations Item Lube Rec Method Frequency 1. Engine Oil Add to proper level on Check level daily 15W/40SG dipstick 2. Brake Fluid DOT 3 Only Maintain level between As required; change fill lines. every two years or See “7. CONTROL” 200 hours 3.
-
Page 76: Lubrication Recommendations
Lubrication Recommendations Item Lube Rec Method Frequency 6. Front A-arm Grease Locate fitting on pivot shaft Every3monthsor50 Pivot Shaft and grease with grease gun hours 7. Steering Grease Locate fitting on pivot shaft Every3monthsor50 Post Bushings and grease with grease gun hours 8. - Page 77 NOTE: 1. More often under severe use, such as wet or dusty conditions. 2. Grease: Light weight lithium-soap grease. 3. Grease M: molybdenum disulfide (MoS ) grease (water resistant). 4. *When suspension action becomes stiff or after washing. 5. Hours are based on 10 mph (16 Km/h) average. Create PDF with GO2PDF for free, if you wish to remove this line, click here to buy Virtual PDF Printer...
- Page 78 Periodic Maintenance Record Use the following chart to record periodic maintenance work£º Maintenance Servicing Date Servicing Dealer or Remark Interval Performed Person First 5 Hrs 10 Hrs 15 Hrs 20 Hrs 25 Hrs 50 Hrs 75 Hrs 100 Hrs Create PDF with GO2PDF for free, if you wish to remove this line, click here to buy Virtual PDF Printer...
- Page 79 WARNING Improper adjustment of the handlebars or incorrect torquing of the adjuster block tightening bolts can cause limited steering or loosening of the handlebars, resulting in loss of control and possible serious personal injury or death. Handlebar Adjustment Your ATV has handlebars which can be adjusted for your personal fit.
- Page 80 The following items should be checked occasionally for tightness; or if they have been loosened for maintenance service. Wheel Nut Torque Specifications Bolt Size Specification Front M10x1.25 27.4 ft. lbs. 37 Nm Rear M10x1.25 27.4 ft. lbs. 37 Nm NOTE: All nuts that have a cotter pin installed must be serviced by an authorized Dealer.
- Page 81 Rear Spring Adjustment The rear shock absorber spring is adjusted by rotating the adjuster (1) either clockwise or counterclockwise to increase or decrease spring tension. Air Filter Service 1. Remove seat. 2. Release clips and remove cover. 3. Loosen clamp and remove filter. 4.
- Page 82 Steering Inspection The steering assembly of the machine should be checked periodically for loose nuts and bolts. If loose nuts and bolts are found, have your dealer tighten them before riding your vehicle. Camber and Caster The camber and caster are non-adjustable. WARNING Do not attempt to adjust the tie rod for toe alignment.
-
Page 83: Front Brake
Front Brake WARNING Once a bottle of brake fluid is opened, use what is necessary and discard the rest. Do not store or use a partial bottle fluid. Brake fluid is hygroscopic, meaning it rapidly absorbs moisture from the air. This causes the boiling temperature of the brake fluid to drop, which can lead to early brake fade and the possibility of serious injury. - Page 84 Rear and Auxiliary Brake Rear Brake The rear brake is a hydraulic disc type brake which is activated by the same pedal which activates the front brake system is self adjusting and requires no maintenance other than periodic checks of the pads for wear.
- Page 85 Carburetor/Engine Idle RPM Adjustment If the engine idle speed is not satisfactory, and all other conditions are favorable, the carburetor can be adjusted as follows: 1. Warm up the engine by running the vehicle approximately five minutes. 2. Place the transmission in gear with the parking brake applied. 3.
- Page 86 Spark Plugs Inspect: · Insulator ¢Ù Abnormal color: Replace. Normal color is a medium- to-light tan color. · Electrode ¢Ú Wear/damage: Replace. Clean: · Spark plug Standard spark plug (with spark plug cleaner or wire brush) DR8EA ( N G K ) Measure: ¢Û...
- Page 87 Oil and Filter Change The recommended oil change interval is 30 hours, or every 3 months, whichever comes first. Suggested break in oil change is at 20 hours, or one month, whichever comes first. Severe use operation requires more frequent service. Severe use includes continuous duty in dusty or wet conditions, and cold weather riding.
- Page 88 Front Gear Case Oil Always check and change the front gear case oil at the intervals outlined in “16. Maintenance”. Maintain the oil level even with the bottom of the fill hole threads (1). The correct gear case lubricant to use is SAE 15W/40SG. Use of other oils may result in improper operation of components.
- Page 89 Transmission Lubrication The transmission fill plug is located on the right side of the machine. The transmission lubricant level should be checked monthly or 20 hours, whichever comes first. Transmission oil should be changed annually. With the ATV on a level surface, remove fill plug (1) and check the lubricant level.
- Page 90 Transmission Oil Changing Procedure 1. Remove the four screws on the footwall and gently pull outward for access. 2. Remove fill plug. 3. Remove transmission drain plug located on the bottom left hand side and drain the oil. Catch and discard used oil properly. 4.
- Page 91 Rear Gear Case Oil The rear gear case has two fill plugs. The rear fill plug is located on the rear of the gear case and is not easily accessible. The side fill plug (1) is located on the left side of the gear case.
- Page 92 WARNING Operating your ATV with worn tires, improperly inflated tires, non-standard tires or improperly installed tire will affect vehicle handling which could cause an accident resulting in serious injury or death. Follow the safeguards listed below to prevent this type of situation. Important Safeguards Maintain proper tire pressure according to charts below.
- Page 93 Wheel Installation 1. With the transmission in gear and the parking brake locked, place the wheel in the correct position on the wheel hub. Be sure the valve stem is toward the outside and rotation arrows on the tire point toward rotation. 2.
- Page 94 Headlight Lamp Replacement WARNING Keep your headlights and taillights clean. Poor light while riding can result in an accident causing severe injury or death. CAUTION Do not service while headlight is hot. Serious burns may result. Do not touch a halogen lamp with bare fingers. Oil from your skin leaves a residue, causing a hot spot which will shorten the life of the lamp.
- Page 95 Taillight/Brakelight Lamp Replacement If the taillight/brake light does not work, the lamp may need to be replaced. 1. Remove the lens. 2. Remove lamp and replace it with recommended lamp. 3. Test the taillight/brake light to see that it’s working. 4.
-
Page 96: Cleaning Your Atv
Cleaning Your ATV Keeping your ATV clean will extend the life of various components. Washing Never use a high pressure type car wash system, it can damage the wheel bearings, transmission seals, body panels, brakes and warning labels, and water might enter the engine or exhaust system. - Page 97 Cleaning—Clean the ATV thoroughly. Fuel—Turn the fuel valve to “OFF” and drain the carburetor bowl completely. Oil Add and Filter Change—Warm the engine and change oil and filter. Air Filter/Air Box—Inspect and clean or replace the pre-cleaner and air filter. Clean the air box and drain the sediment tube.
-
Page 98: Trouble Shooting
17. TROUBLE SHOOTING Issues of Improper Operation Belt Burning Possible Causes Solutions Loading the ATV into a pickup Shift transmission to low range during loading of the ATV to or tall trailer when in high range. prevent belt burning. Starting out going up a steep When starting out on an incline, use low range, or dismount incline. - Page 99 Battery Wane Possible Causes Solutions Starting a faulty engine for a See “8. STARTING THE ENGINE” and check the long time. fuel/air/ignition/compression system. Let the main switch (key) on When stopping the engine, turn off the main switch while parking the ATV. (key) off at once.
- Page 100 COMPRESSION SYSTEM Cylinder and cylinder head Valve system · Loose spark plug · Improperly adjusted valve · Loose cylinder head clearance · Broken cylinder head gasket · Improperly sealed valve · Broken cylinder gasket · Improperly contacted · Worn, damaged or seized cylinder valve and valve seat Piston and cylinder head ·...
- Page 101 POOR MEDIUM AND HIGH SPEED PERFORMANCE Carburetor Air cleaner · Improperly adjusted fuel level · Clogged air cleaner element · Clogged main nozzle · Clogged or loose pilot jet POOR SPEED PERFORMANCE Ignition system Compression system · Dirty spark plug ·...
- Page 102 Compression system · Heavy carbon deposit build-up · Improperly adjusted valve timing · Improperly adjusted valve clearance Engine oil · Incorrect engine oil level · Improper engine oil quality (high viscosity) · Low engine oil quality Brakes · Dragging brake Cooling system ·...
- Page 103 POORSTARTING FAULTY BRAKE POOR BRAKING EFFECT PERFORMANCE V-belt · Worn front hub bearing · Slipping/Oily V-belt · Worn brake pad · Worn brake disc Primary sliding sheave · Air in brake fluid · Improper operation · Leaking brake fluid · Damage ·...
-
Page 104: Tools
18. Tool Create PDF with GO2PDF for free, if you wish to remove this line, click here to buy Virtual PDF Printer... -
Page 105: Specification
19. SPECIFICATION Capacities Fuel capacity 14.5 L Engine Oil Capacity 1.6 L Ground Clearance 183 mm Height 1237 mm Length 2016 mm Width 1180 mm Seat height 895 mm Wheel Base 1280 mm Turn Radius 3280 mm Dry Weight 292 kg Front Rack 18 kg Rear Rack... - Page 106 Engine Engine Type FS1P73MN 4 Stroke, Single Cylinder, SOHC Bore x Stroke 72.5 mmx66.8 mm Displacement 276cc Starter System Electric Starter Engine Cooling Liquid-Cooled Lubrication System Wet Sump Carburetor CVK052 Ignitions T.C.I Spark Plug Type DR8EA£¨ NGK£© Electrical Equipment Battery 12V 14AH Head Light 35W/35W...
-
Page 107: Wiring Diagram
20. WIRING DIAGRAM Create PDF with GO2PDF for free, if you wish to remove this line, click here to buy Virtual PDF Printer...
Need help?
Do you have a question about the FA-D300 and is the answer not in the manual?
Questions and answers
Schéma zapalování
The specific ignition diagram for the Buyang FA-D300 is not provided in the context.
This answer is automatically generated