Table of Contents
Advertisement
Quick Links
Basic Operating Instructions
Please read these instructions carefully before using this product,
and save this manual for future use.
This document explains basic operations
of the unit. For more detailed explanation,
please refer to "Operating Instructions
(PDF format)" which is recorded in the
enclosed CD-ROM.
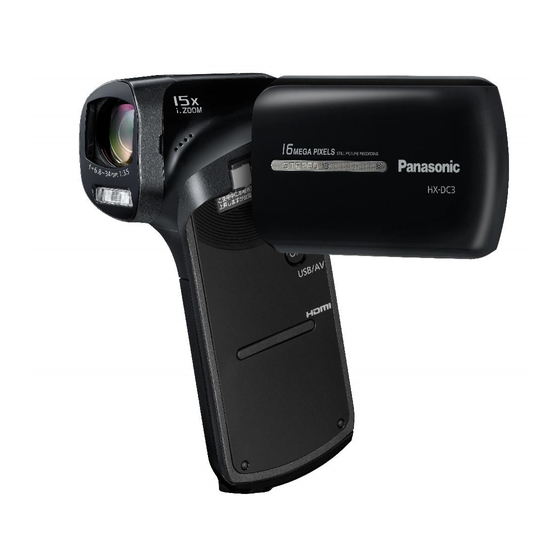
Dual Camera
HX-DC3
Model No.
VQT4U81
1AG6P1P6613--(S)
Advertisement
Table of Contents

Related Manuals for Panasonic HX-DC3


Summary of Contents for Panasonic HX-DC3
- Page 1 Basic Operating Instructions Dual Camera HX-DC3 Model No. Please read these instructions carefully before using this product, and save this manual for future use. This document explains basic operations of the unit. For more detailed explanation, please refer to “Operating Instructions (PDF format)”...
-
Page 2: Information For Your Safety
Information for Your Safety WARNING: To reduce the risk of fire, electric shock or product damage, ≥ Do not expose this unit to rain, moisture, dripping or splashing. ≥ Do not place objects filled with liquids, such as vases, on this unit. ≥... - Page 3 ∫ Product identification marking Product Location Dual Camera Battery holder -If you see this symbol- Information on Disposal in other Countries outside the European Union This symbol is only valid in the European Union. If you wish to discard this product, please contact your local authorities or dealer and ask for the correct method of disposal.
-
Page 4: Cautions For Use
≥ Do not use any other USB cables except the supplied one. About connecting to a TV ≥ Do not use any other AV cables except the supplied one. ≥ Always use a genuine Panasonic HDMI mini cable (RP-CDHM15, RP-CDHM30: optional). ∫ About recording formats and compatibility of the unit ≥... - Page 5 edited content, and does not guarantee any content if recording or editing does not work properly. Likewise, the above also applies in a case where any type of repair is made to the unit (including any other non-built-in memory related component). ∫...
-
Page 6: Table Of Contents
Contents ∫ How to open the Operating Instructions (PDF format) When you insert the CD-ROM and open the [INDEX.pdf] in the CD- ROM, the Operating Instructions list will be displayed. Click the document name of the Operating Instructions you would like to open. ≥... -
Page 7: Accessories
Accessories Check the accessories before using this unit. Product numbers correct as of Dec. 2012. These may be subject to change. Lens cap* Battery pack VFC4701 VW-VBX070 Lens cap strap VFC4702 Handstrap* AC adaptor VFC4627 (GA) VSK0751 (GC) VSK0752 (GN) VSK0753 AV cable CD-ROM... -
Page 8: Preparation
To ensure that safe products are used we would recommend that a genuine Panasonic battery pack is used. Inserting/removing the battery ≥ Press the power button to turn off the unit. (l 15) Open the battery/card cover. -
Page 9: Removing The Battery
Insert the battery, taking care to match up the terminal markings. A terminal markings ≥ Insert the battery so that the terminal markings face up. It is possible to mistakenly Insert the battery upside down, so be sure to check the orientation carefully. Close the battery/card cover. -
Page 10: Charging The Battery
Charging the battery When this unit is purchased, the battery is not charged. Charge the battery fully before using this unit for the first time. The unit is in the standby condition when the AC adaptor is connected. The primary circuit is always “live” as long as the AC adaptor is connected to an electrical outlet. - Page 11 ≥ Do not use any other AC adaptors except the supplied one. ≥ Do not use any other USB cables except the supplied one. ≥ We recommend using Panasonic batteries (l 7, 12). ≥ If you use other batteries, we cannot guarantee the quality of this product.
-
Page 12: Charging And Recording Time
Charging and recording time ∫ Charging/Recording time ≥ Temperature: 25 oC/humidity: 60%RH (When using AC adaptor) Battery model Maximum Actual number Charging Recording continuously recordable [Voltage/Capacity time mode recordable time (minimum)] time 50 min 30 min 55 min 35 min Supplied battery/ 50 min 30 min... -
Page 13: Recording To A Card
≥ Keep the Memory Card out of reach of children to prevent swallowing. Inserting/removing an SD card When using an SD card not from Panasonic, or one previously used on other equipment, for the first time on this unit, format the SD card. (l 24) When the SD card is formatted, all of the recorded data is deleted. - Page 14 Insert (remove) the SD card into (from) the card slot. ≥ Face the label side B in the direction shown in the illustration and press it straight in as far as it will go. ≥ Press the centre of the SD card and then pull it straight out. Close the battery/card cover.
-
Page 15: Turning The Unit On/Off
Preparation Turning the unit on/off Open the LCD monitor and press the power button to turn on the unit. The LCD monitor turns on. To turn off the unit Hold down the power button until the LCD monitor goes off. ≥... -
Page 16: 6 Vqt4U81
(When [DATE] or [TIME] is selected) Tilt the SET button to the left or right to select the desired item and then up and down to set the numerical values. e.g.: When [DATE] is selected ≥ The year can be set between 2000 and 2039. (When [DISP] is selected) Select the date format display method using the SET button. -
Page 17: Basic
Basic Recording motion pictures ≥ Before turning on the unit, remove the lens cap. ≥ Motion pictures are recorded to the SD card if one is inserted. If no SD card is inserted, the motion pictures are recorded to the built-in memory. -
Page 18: Recording Still Pictures
Basic Recording still pictures ≥ Before turning on the unit, remove the lens cap. ≥ Still pictures are recorded to SD card if one is inserted. If no SD card is inserted, the still pictures are recorded to the built-in memory. Open the LCD monitor. -
Page 19: Recording Audio
Basic Recording audio ≥ Audio is recorded to the SD card if one is inserted. If no SD card is inserted, the audio is recorded to the built-in memory. Open the LCD monitor. Press the REC/ button to change to recording mode. Select the menu. -
Page 20: Motion Picture/Still Picture/Audio Playback
Basic Motion picture/Still picture/Audio playback Press the REC/ button to change to playback mode. Select the file to play back using the SET button and press the SET button. Thumbnail display A The information for the file in the yellow frame is displayed. ≥... -
Page 21: Watching Video/Pictures On Your Tv
Watching Video/Pictures on your TV Connect the unit to a TV using the AV cable (supplied) or a HDMI mini cable (optional). A HDMI mini connector B USB/AV connector ≥ Connecting the AV cable in the wrong direction may cause damage to the USB/AV connector of the unit. -
Page 22: Using The Menu Screen
Basic Using the menu screen Press the MENU button. Tilt the SET button to the left. Select tab A using the SET button, and tilt the SET button to the right or press the SET button. Select from menu items B using the SET button, and tilt the SET button to the right, or press the SET button. - Page 23 Select the setting content using the SET button and press the SET button to set. ∫ About applicable mode indicator In the recording menu, the recording mode that reflects the currently displayed setting is displayed. C Applicable mode indicator : Setting is applied to still picture and motion picture recording.
-
Page 24: Language Selection
Language selection You can select the language on the screen display and the menu screen. # [LANGUAGE] [MENU]: Formatting Please be aware that if a medium is formatted, then all the data recorded on the medium will be erased and cannot be restored. Back up important data on a PC, disc etc. -
Page 25: Double Range Zoom
Double range zoom The enlarged size will be approximately double size (double range zoom). Press again to return to normal size. Press the REC/ button to change to recording mode. Press the zoom range button. ≥ On the normal zoom recording screen, the icon is displayed. -
Page 26: Others
Others About copyright ∫ Carefully observe copyright laws Recording of pre-recorded tapes or discs or other published or broadcast material for purposes other than your own private use may infringe copyright laws. Even for the purpose of private use, recording of certain material may be restricted. ∫... -
Page 27: Specifications
Others Specifications Dual Camera Information for your safety Power source: DC 5.0 V (When using AC adaptor) DC 3.7 V (When using battery) Power consumption: Recording; Charging; 4.0 W 3.3 W Recording format: MPEG-4 AVC files format standard (.MP4) Motion picture compression: MPEG-4 AVC/H.264, iFrame Audio compression: AAC (2 ch) - Page 28 Image sensor: 1/2.33 type (1/2.33z) 1MOS image sensor Total; Approx. 14400 K Effective pixels; Motion picture; 14300 K (4:3), 11900 K (16:9) Still picture; 14300 K (4:3), 11900 K (16:9) Lens: Auto iris F3.5 to F3.7 Focal length; 6.8 mm to 34.0 mm 35 mm equivalent;...
- Page 29 HDMI mini connector video output level: ™ HDMI 1080i/720p/480p USB/AV connector audio output level (Line): 155 mV, 220 h, 2 ch HDMI mini connector audio output level: Linear PCM USB: Reader function SD card; Read only (No copyright protection support) Built-in memory;...
- Page 30 AC adaptor Information for your safety Power source: AC 100 V to 240 V, 50/60 Hz Power consumption: DC output: DC 5.0 V, 1.0 A (GA) VSK0751 Dimensions: 48.9 mm (W)k32.8 mm (H)k95.1 mm (D) Mass: Approx. 58 (GC) VSK0752 Dimensions: 49.7 mm (W)k49.0 mm (H)k80.9 mm (D) Mass:...
-
Page 31: Limited Warranty (Only For Australia)
Panasonic Customer Care Centre. If the failure in the product is not a major failure then Panasonic may choose to repair or replace the product and will do so in a reasonable period of time from receiving notice from you. - Page 32 Panasonic Corporation VQT4U81 Web site: http://panasonic.net 1AG6P1P6613--(S) © Panasonic Corporation 2012 F1212AS0...
Need help?
Do you have a question about the HX-DC3 and is the answer not in the manual?
Questions and answers