Insignia NS-DSC1112 Quick Setup Manual
Lacie digital camera user manual
Hide thumbs
Also See for NS-DSC1112:
- User manual (36 pages) ,
- Quick setup manual (9 pages) ,
- User manual (34 pages)
Table of Contents
Advertisement
Quick Links
Download this manual
See also:
User Manual
Congratulations on your purchase
of a high-quality Insignia product.
Your Insignia digital camera is
designed for reliable and trouble-
free performance. Use this guide for
initial setup of your camera. If you
have questions, see your User Guide
for more information.
NS-DSC1112/NS-DSC1112P/NS-DSC1112-CN
Quick Setup Guide
Package contents
Digital camera
Wrist strap
USB cable
2 AA alkaline batteries
Quick Setup Guide
CD with User Guide
1
Advertisement
Table of Contents

Related Manuals for Insignia NS-DSC1112


Summary of Contents for Insignia NS-DSC1112
- Page 1 Use this guide for initial setup of your camera. If you have questions, see your User Guide for more information. NS-DSC1112/NS-DSC1112P/NS-DSC1112-CN Package contents Digital camera Wrist strap USB cable 2 AA alkaline batteries...
-
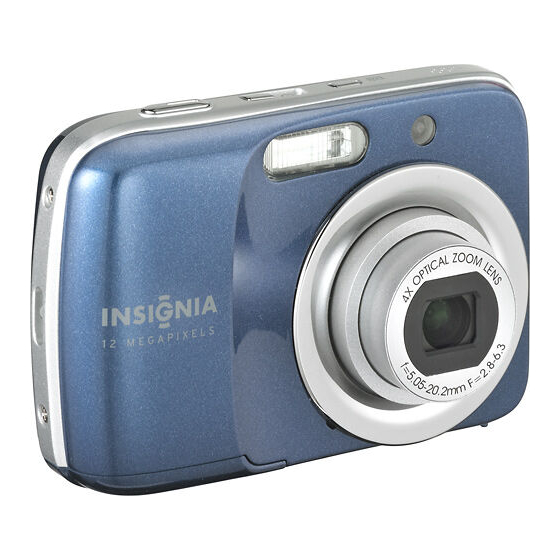
Page 2: Getting To Know Your Camera
Getting to know your camera Front view Back view Top view Bottom view 1 Flash 2 Self-timer / focus assist LED: lights when the focus assist function is being used. Flashes to indicate that the self-timer is activated. 3 Microphone 4 Lens 5 LCD 6 Zoom button... -
Page 3: Installing Batteries
Installing batteries 1 Make sure that your camera is turned off . 2 Slide the cover in the direction of the arrow, then lift the cover away from the battery compartment 3 Insert two AA batteries (included) into the battery compartment. Make sure that the + and –... -
Page 4: Power Saving Function
Power-saving function To save battery power, turn the power saving function ON so that your camera automatically turns off two minutes after the last control has been accessed. You can change the power save setting in the Setup menu. The power save feature will not activate while you are: •... -
Page 5: Initial Settings
Initial settings When you turn on your camera for the fi rst time, you need to choose a menu language and set the date and time. 1 Turn on your camera. The Select Language screen opens. 2 Press or to select a language, then press OK/DISP. -
Page 6: Recording Video
Recording video 1 Slide the MODE switch to switch to Video mode. 2 Focus your camera on the subject that you want to record. 3 Press the shutter button to start recording. 4 Press the Zoom button T to zoom in or the zoom W button to zoom out. -
Page 7: Using Menus
Using menus Use the 4-way navigation control and OK/DISP to make menu selections. To use the menus 1 Slide the MODE switch to switch to Photo or Record mode. 2 Press MENU. The menu opens. 3 Press the Navigation control left or right Record Setup... -
Page 8: Connecting The Camera To A Computer
- OR - • Visit the Insignia website at www.insigniaproducts.com and click on the Digital Camera link under Products. © 2010 BBY Solutions, Inc. All rights reserved. INSIGNIA is a trademark of BBY Solutions, Inc. Registered in some countries. All other products and brand names are trademarks of their respective owners.
Need help?
Do you have a question about the NS-DSC1112 and is the answer not in the manual?
Questions and answers