Table of Contents
Advertisement
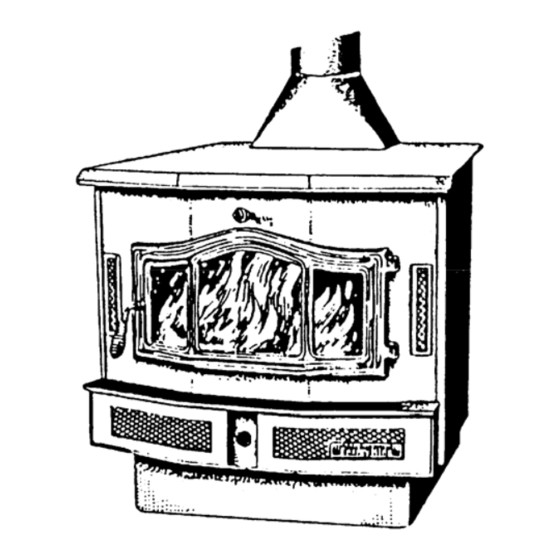
Bay 2000C Fireplace Insert & Freestanding Stove
Installation, Operation and Maintenance Instructions
Fireplace Inserts
Freestanding Stoves
Safety and emissions tested at Intertek Testing Services, Middleton, Wisconsin, to the appropriate standards for the
U.S. – to UL 127 for inserts and UL 1482 for freestanding models.
RJM Manufacturing, Inc.
PO Box 27 ♦ 1875 Olson Drive
Chippewa Falls, WI 54729
(715) 720-1794 ♦ Fax (715) 720-1797
Advertisement
Table of Contents
Troubleshooting

Related Manuals for ENERGY KING 2000C


Summary of Contents for ENERGY KING 2000C
- Page 1 Bay 2000C Fireplace Insert & Freestanding Stove Installation, Operation and Maintenance Instructions Fireplace Inserts Freestanding Stoves Safety and emissions tested at Intertek Testing Services, Middleton, Wisconsin, to the appropriate standards for the U.S. – to UL 127 for inserts and UL 1482 for freestanding models.
-
Page 2: Table Of Contents
Congratulations on your purchase of an Energy King solid fuel appliance. Your stove or insert is designed for a lifetime of durable, reliable performance and easy operation. This manual describes the installation and operation of the Energy King Bay 2000C freestanding stove and fireplace insert models. - Page 3 ......................19 SING ATALYTIC OODSTOVE ..................20 ROUBLESHOOTING ATALYTIC OMBUSTOR ....................21 EPLACING ATALYTIC OMBUSTOR BURNING YOUR ENERGY KING STOVE ....................22 OPERATING THE CIRCULATING BLOWER....................23 WOOD.................................24 MAINTAINING YOUR ENERGY KING .......................24 ............................24 ISPOSAL OF SHES – F ..................25 REOSOTE ORMATION AND EED FOR EMOVAL ...............................25...
-
Page 4: Safety Notes - Important
14. Build the fire directly on the firebrick. Do not elevate the fire by using rates or andirons. 15. You will need to cure the painted surfaces of your Energy King. For the first few fires, adjust the air control to a medium fire after ignition. This will allow the paint to cure in an even manner. -
Page 5: Components
Familiarize yourself with the components of your stove before installation and operation. This owner’s manual has been designed to assist you in installing, operating and maintaining your Energy King stove efficiently and safely. Keep it in a safe place for future reference. -
Page 6: Installation Materials Needed For Your Safety
Insert. Use a listed floor protector or material having a thermo conductivity of K-O.84 BTU – inches per foot square – hour – Fahrenheit degrees; or equivalent to 3/8” non-asbestos millboard. Fireplace Insert Installation Specifications – Model Bay 2000C Height 23 ¾”... -
Page 7: Clearances To Combustibles
Clearances to Combustibles Model Bay 2000C Fireplace Insert To Mantle 18” To Side Trim 9” To Top Trim 14” To Sidewall 16” Hearth Pad Extension to front 16” Hearth Pad Extension to Side 8” Refer to NFPA 211 for clearance reduction methods. -
Page 8: Venting System
Venting System Proper draft must be provided for your Energy King unit. Draft is the force that moves air from the stove up through the chimney. The amount of draft in your chimney depends on the length of the chimney, local geography, nearby obstructions, and other factors. Too little draft may cause backpuffing into the room and plugging of the chimney or catalyst. -
Page 9: Connection To A Masonry Fireplace
COMBUSTIBLE MATERIAL. FIREPLACE INSERT FLOOR PROTECTOR MUST EXTEND AT LEAST 8 INCHES TO EACH SIDE OF UNIT AND 16 INCHES IN FRONT. The Bay 2000C will insert into any masonry fireplace that is at least (A) 32” wide, (B) 24” high, and (C) 16”... -
Page 10: Mount Trim Panels
Mount Trim Panels 5. Measure from back of the unit to the front and mark on the sides the location of the support angle. 6. Place the angle on the side of the unit and mark the holes for the locking screws. Drill three 3/16” holes and bolt in place on both sides of the unit. -
Page 11: Freestanding Stove Installation
Freestanding Stove Installation The Bay 2000C Freestanding Stove must be connected to a listed high temperature (2100 degrees F) residential type and building heating appliance chimney per US 103 or ULC S629 or an approved masonry chimney with a flue liner. -
Page 12: Base Assembly
Base Assembly To assemble as a stove, you need to bolt the base to the bottom of the unit using five ¼” self-tapping screws. Remove door, brick and grate. Set unit on its back to mount the base. Place base with slotted holes towards the unit and line up with punched holes on the bottom of the unit. -
Page 13: Clearances To Combustibles
Clearances to Combustibles Model Bay 2000C Freestanding Stove Unit to Sidewall 16” Unit to Backwall 18” Chimney Connector to Sidewall 29” Chimney Connector to Backwall 18” Chimney Connector to Ceiling 18” When locating your stove, consider safety, convenience, traffic flow, and the fact that the stove will need a chimney and chimney connector. -
Page 14: Venting System
Proper draft must be provided for your Energy King unit. Draft is the force that moves air from the stove up through the chimney. The amount of draft in your chimney depends on the length of the chimney, local geography, nearby obstructions, and other factors. - Page 15 1. For proper operation and safety, the chimney must be at least 3 feet higher than the highest point where it passes through the roof, and at least 2 feet higher than the highest part of the roof or structure that is within 10 feet of the chimney, measured horizontally. 2.
-
Page 16: Firestopping
Firestopping Remember that insulation must not contact the chimney. There must be air space around the chimney. Insulation must be 2 inches or more from the chimney. DO NOT PASS CHIMNEY CONNECTOR THROUGH COMBUSTIBLE WALL OR CEILING. SEE LOCAL BUILDING CODE AND MANUFACTURER’S INSTRUCTIONS FOR PRECAUTIONS REQUIRED FOR PASSING THROUGH COMBUSTIBLE WALL OR CEILINGS. -
Page 17: Thimble
Thimble When installation entails connection from the stove through a combustible wall to a masonry chimney, a thimble must be used. Two of several methods of connection through a combustible wall are illustrated below. For alternatives, consult your local building authority or NFPA 211. Listed prefabricated metal thimbles can be bought for use with woodstoves. -
Page 18: Brick Chimney Thimble Assembly
Brick Chimney Thimble Assembly Construction of the brick thimble assembly requires 12 inches of brick around a fire clay liner. Be sure the point of penetration allows an 18” clearance from the connector to the ceiling. An opening of 32 inches (for a 6-inch chimney connector) must be cut in the wall to maintain the required 12 inches of brick separation from combustibles. - Page 19 Install an attic insulation shield to maintain the specified clearance to insulation. Insulation in this air space will cause a heat buildup that may ignite the ceiling joists. This method of installation requires at a minimum a ceiling support package, an insulation shield and roof flashing.
- Page 20 This method of installation requires at a minimum a wall pass through device, a wall support package and insulated “T” section and roof flashing...
-
Page 21: Warnings
Warnings This heater is designed to burn natural wood only. Higher efficiencies and lower emissions generally result when burning air dried, seasoned hardwood, as compared to softwood or green or freshly cut hardwoods. DO NOT BURN Treated wood Colored paper Garbage Cardboard Solvents... -
Page 22: Operating Your Energy King
2” to the left of the bypass pull rod. Your Energy King stove is equipped with a bypass mechanism, located above the door. The bypass allows you to “bypass” the smoke around the combustor when you do not have the necessary 500 degrees to start catalytic activity or when you are reloading your stove. -
Page 23: Troubleshooting Your Catalytic Combustor
Troubleshooting Your Catalytic Combustor Problem: Creosote accumulation or dirty smoke from the chimney Possible causes Solution(s) You are not getting light off in the combustor Make sure you have achieved 500 degrees F. (necessary for light off) before engaging the combustor. -
Page 24: Replacing Your Catalytic Combustor
Applied Ceramics Combustors. (See Applied Ceramics Warranty for information on replacement) The Energy King fireplace has two catalytic combustors. To replace combustors, look up inside the stove and locate the catalytic combustor retainer plate with holes across its surface. Remove the bolts on each side of the plate and remove the plate. -
Page 25: Burning Your Energy King Stove
8. Close the air control half way for maximum fuel efficiency and burn time. 9. When fueling your Energy King, open the bypass and air control all the way and wait a short time before opening the door. This will eliminate the risk of flame and smoke spillage. -
Page 26: Operating The Circulating Blower
Operating the Circulating Blower Blower Motor Rating: 115VAC/1.8 AMPS / 60HZ Location: Behind cover door on right side of unit front. WARNING: ROUTE POWER SUPPLY CORD AWAY FROM UNIT. NEVER COVER AIR INLETS ON THE TWO COVER DOORS – Unit front. The circulating blower operates on 110V., must be plugged into a three prong grounded plug. -
Page 27: Wood
Wood should be stored in a well sheltered, ventilated area to allow proper drying during the year to come. Maintaining Your Energy King At the end of each heating season, clean the chimney. Vacuum out any ash accumulation. Replace any worn gaskets or broken firebrick. -
Page 28: Creosote - Formation And Need For Removal
Care of Glass Your Energy King is equipped with a super heat resistant glass, available through your Energy King retailer. The glass can only be broken by impact or misuse. Never slam the door or impact the glass. -
Page 29: Gasket Replacement
Gasket Replacement Door and glass gaskets need to be replaced on an annual basis to insure that the stove remains airtight. Failure of the door or glass gaskets will allow additional air to enter the stove and drastically decrease the burn time of your fuel. To check for gasket failure, start a fire in the stove. -
Page 30: Troubleshooting Guide
Troubleshooting Guide Unit does not burn properly 1. Check the wood; it must be dry. If moisture is sizzling out the end, the wood is too wet. 2. Test the draft. It should be .05/.06 (inches of water column). 3. Check to maker sure the flue is not obstructed. Also check the baffle area in the unit for excessive ash buildup. -
Page 31: Unit Is Making Noise/Distribution Blower Is Vibrating
Unit is making noise/distribution blower is vibrating With electrical power disconnected, check the following: 1. Check for loose parts. 2. Is the blower wheel contacting the housing? If so, realign or replace as required. 3. Is foreign material inside the housing? 4. -
Page 32: Use And Maintenance Of A Catalyst
Use and Maintenance of a Catalyst 1. Do not “Hot Fire” the stove. For many years, retailers and installers have advised customers to build an extra hot fire to burn the creosote deposits in the flue system. This advice may be acceptable for non-cat stoves, but can be death to a catalyst. -
Page 33: Frequently Asked Questions
Frequently asked questions Q. “How can I tell if I am operating my woodstove properly?” R. Check the exhaust coming out of your woodstove chimney. The smoke is your operational barometer. If your fire is burning properly, you should only see the white transparent steam of evaporating water, darker and opaque smoke will only be slightly visible. - Page 34 Q. “Is it important to season wood before burning it?” R. The seasoning, or drying, process allows most of the natural moisture found in wood to evaporate, making it easier to burn. A properly seasoned log will have 20%-30% moisture content.
- Page 35 ARRANTY Who is covered? You are covered under this warranty if you are the original purchaser of a new ENERGY KING solid-fuel heating appliance and your purchase was made through an authorized distributor/dealer of the ENERGY KING solid-fuel heating appliance.
- Page 36 If warranty service is needed during the warranty period, notify your authorized ENERGY KING dealer. If there is no ENERGY KING dealer in your area, contact RJM Manufacturing, Inc. directly. Provide your name, address, phone number, serial number and model number of the Fireplace, date of purchase, name and address of installer and a description of the problem.
- Page 37 PPLIED ERAMICS ERSAGRID ATALYTIC ONVERTER IMITED IFETIME ARRANTY APPLIED CERAMICS warrants to the consumer who purchases a Versagrid Catalytic Converter as a component in an E.P.A. certified solid fuel appliance, to replace at no charge to the consumer the Versagrid Catalytic Converter that ceases to function within three (3) years from the date of purchase by the original consumer, provided that the following conditions are met: 1.
Need help?
Do you have a question about the 2000C and is the answer not in the manual?
Questions and answers