Table of Contents
Advertisement
Quick Links
Advertisement
Table of Contents

Subscribe to Our Youtube Channel
Related Manuals for Hobie Bravo


Summary of Contents for Hobie Bravo
- Page 1 HOBIE CAT COMPANY 4925 Oceanside Blvd. Oceanside, CA 92056 Phone (760) 758-9100 Fax (760) 758-1841 info@hobiecat.com http://www.hobiecat.com For your nearest HOBIE dealer for help and information call: 1 (800) HOBIE - 49 or visit us as www.hobiecat.com Revised 5/05 #93450010...
- Page 2 We offer this manual as a guide to increased safety and enjoyment of your new boat. The purpose of this publication is to provide easy, simple, accurate instructions on how to get your Hobie Bravo ready for the water and use it safely. Please read them carefully and familiarize yourself with your boat and all her parts.
-
Page 3: Table Of Contents
If wheel the Hobie Bravo or parts. If in doubt, check with the Installing the Mainsheet ........10 bearings are always dunked, waterproof bearings and manufacturer. -
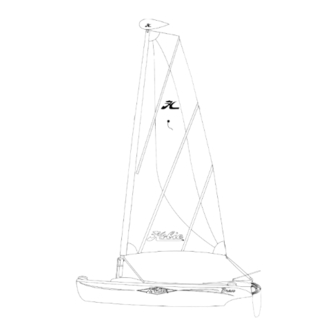
Page 4: Hobie Bravo Terminology
HULL The Bravo hull is constructed from Super Linear II Polyethylene. The polyethylene provides an extremely durable hull that is quite resistant to dings and scratches. -
Page 5: List Of Parts
If you stall pointing into the wind and When opening your new Hobie Bravo, make sure to you cannot steer the boat, refer back to the sail power check that all of the parts are present and that the description concerning getting stuck in irons. - Page 6 The red switch on the side OPTIONAL A-FRAME GATE SCREW of the mainsheet block Inside the bag of small screws is a screw that can controls the pulley wheel. replace the knob on the A-Frame. It will require a Having the switch pointing Phillips head screwdriver to lower or raise the mast.
-
Page 7: Sailing Basics
RUDDER OPERATION RUDDER UP-KEEP AND PRECAUTIONS The Hobie Bravo is now equipped with the new EZ Lock Rudder System. The rudder housing is made out of 1. When in use, make sure that the rudder is locked in engineering-grade reinforced nylon making it virtually the “down”... -
Page 8: Mast And Sail
6. Mast and Sail Assembly 1. Position the sail so that the bottom of the sail is at 8. Now you’re ready to sail at the Hobie Bravo’s top the top of the mast. 5. Tie a small figure 8 knot in the end of the line to performance. - Page 9 Installing the Boom (optional) of the sail. Reefing the sail is typically done during high wind The Hobie Bravo was designed for sailing without a 3. Gently slide the remainder of the mast into the sail conditions, docking, and beaching. Reduction of sail boom, but one can be used if desired.
-
Page 10: Mast Float
1. Notice that there is about 8” of extra sail and mast extending above the actual sail. This is designated for the mast float. TIP: If you are trailering the Hobie Bravo long distances, it is a good idea to unclip It is always recommended that you check and remove the mast float from the sail. -
Page 11: Raising The Mast
FATAL! 2. Orient the boat so NOTE: Before attempting to raise the that wind Sail your Hobie Bravo mast, be sure that you can lift it coming comfortably. Ask for help if you think degree angle to the in 3 Steps... -
Page 12: Sailing Your Hobie Bravo
Once the sail is fully furled, cleat the 8. Unwrap the furling line from the A-Frame. Take the One of the great things about the Hobie Bravo is that for furling line in the cleat on the A-Frame.
Need help?
Do you have a question about the Bravo and is the answer not in the manual?
Questions and answers