
Summary of Contents for DEGEN DE1126
-
Page 1: Operation Manual
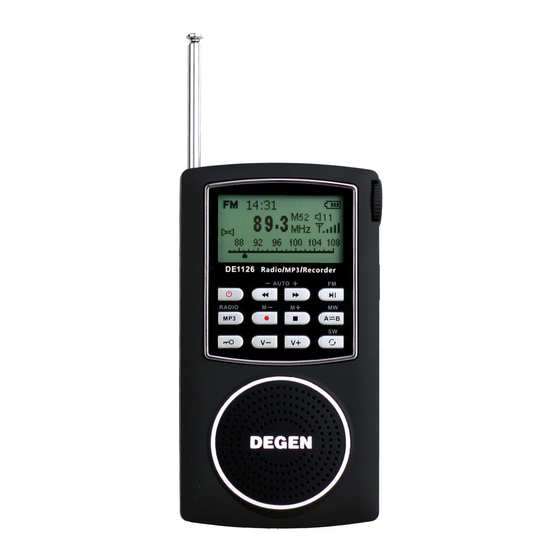
DE1126 FM STEREO · MW (AM) · SW DSP RECEIVER / MP3 PLAYER / DIGITAL RECORDER Operation Manual... -
Page 2: Charging The Battery
POWER SUPPLY INSTALLING THE BATTERY 1. Turn off the unit and open the battery cover. 2. Install the provided lithium battery according to the battery polarity. 3. Close the battery cover. CHARGING THE BATTERY After installing the lithium battery, connect the unit with the provided USB adaptor to charge the battery. -
Page 3: Battery Consumption Indication
BATTERY CONSUMPTION INDICATION 1. Full 2. Medium 3. Low 4. Exhausted Require to charge The unit will turn off the battery. automatically Note: Please fully charge and drain the battery for the first three times in order to extend the battery's life. HOW TO TURN ON/OFF THE UNIT Press the [ ] button to turn on the unit;... - Page 4 MAIN MENU The radio will directly enter the “Main Menu” when you turn it on, you can rotate the [TUNING] knob to select either of the below function and then press the [MENU] button to enter your selection. FM Radio: FM/MW/SW radio After FM Radio selection, you can press either the FM/MW/SW button to select your desired band Music: MP3 music play mode...
-
Page 5: System Setting
SYSTEM SETTING In “Main Menu” mode, rotate the [TUNING] knob to select [Sys Set], press the [MENU] button to enter below settings: Note: Operation time for each step is about 5 seconds. Sys Set (system setting): Time Date Calendar Info Alarm Backlight Language... - Page 6 TIME SET 1. Select [Time] in [Sys Set] mode by rotating the [TUNING] knob 2. Press the [MENU] button; while the hours indicator flashes; rotate the [TUNING] knob to adjust the hour, 3. Press the [MENU] button; while the minutes indicators flashes, rotate the [TUNING] knob to adjust the minute 4.
-
Page 7: Alarm Set
ALARM SET Select [Alarm] in [Sys Set] mode and press the [MENU] button. Now [New] appears on the display. Press the [MENU] button again to enter a new alarm setting; [Normal Alarm / Power Off / Power on] appears. Rotate the [TUNING] knob to select [Normal Alarm] and press the [MENU] button. -
Page 8: Language Selection
BACKLIGHT (Lighting timer) Select [Backlight] in [Sys Set] mode and press the [MENU] button to enter, then rotate the [TUNING] knob to adjust the lighting timer from 5~30 seconds. Press the [MENU] button again or wait for about 8 seconds to confirm and exit. LANGUAGE SELECTION Select [Language] in [Sys Set] mode, press the [MENU] button and then rotate the [TUNING] knob to select your... -
Page 9: Power Off
POWER OFF Select [Power off] in [Sys Set] mode, press the [MENU] button and then rotate the [TUNING] knob to adjust the auto turn off timer from 5 ~ 90 minutes. REPLAY MODE Select [Replay mode] in [Sys Set] mode and press the [MENU] button. -
Page 10: Firmware Upgrade
FIRMWARE UPGRADE Download the upgrade firmware from our website to a computer. Use the provided USB cable to connect the unit to the computer and transfer the data to the unit. Turn on the unit and select [Firmware upgrade] in system setting mode Press the [MENU] button and select [Local folder] to enter firmware upgrade software. -
Page 11: Listening To Radio
RADIO OPERATION USING ANTENNA 1. While listening to the FM and SW station, fully extend the telescopic antenna to get the best reception. 2. While listening to the MW (AM) station, rotate the radio to find the position which gives the best reception, as the built-in ferrite bar is located inside the unit and it is strongly affected by the direction of placing your unit. -
Page 12: Volume Adjust
1~50 Record: Select 129K / 96K BPS direct radio recording Delete: Delete single memory Delete all: Delete all stored memory ATS: Auto tunes and store all stations into memory Normal Band: 87~108 MHz Japan Band: 76~90 MHz School Band: 64~87 MHz MW Spacing Switch: Repeatedly press to select 9K/10K tuning step and direct enter MW listening... -
Page 13: Working With Station Memories
until the stereo symbol appears; press and hold again to deactivate it. WORKING WITH STATION MEMORIES This unit can store 248 stations with the following memory location: MEMORY LOCATIONS FM/SW (ATS): M51~M99 MW (ATS): M26 ~ M50 FM/SW (manual storage): M1 ~ M50 MW (manual storage): M26 ~ M50 Note: 1. - Page 14 within the memories. LISTENING TO STORED MEMORY After storing stations into memory, press the [M- / M+] with the memory address [M01~99] displays next to the frequency to select your desired station memory. DELETE SINGLE/ALL MEMORY Press the [MENU] button in radio mode, then rotate the [TUNING] knob to select either [Delete] or [Delete all] and press the [MENU] button again to delete single memory or all memory.
-
Page 15: Mic Recording
WORKING WITH RECORDING MIC RECORDING Press and hold the [MENU] button to enter the “Main Menu”, then rotate the [TUNING] knob to select [RECORD], press the [MENU] button again to go into MIC recording function. Adjust the volume by pressing on the [V-] or [V+] button Press the [MENU] button to select [REC] type: Long Rec (Long time recording –... - Page 16 96k BPS (40Kbps MP3 format, file stored in [MUSIC] folder Press the [MENU] button again to confirm your selection and start recording. The timer on the top of the display starts increasing Press the [ ] button to stop and auto store the recorded file into the memory.
- Page 17 selection: Radio (Listening to the last radio station) Music (Playing the last music file) Mic Record (Recording via Mic) Radio Record (Listening to & recording the last radio station) To select above setting, rotate the [TUNING] knob, then press [MENU] button to confirm your setting. Note: Please also set the [Power off] timer following the same steps as [Power on] timer.
- Page 18 WORKING WITH MP3 LISTENING TO MP3 FILE Use the provided USB cable to connect the unit to the computer and transfer your selected music files. Turn on the unit and select [MUSIC] from the “Main Menu”, then press the [MENU] button to enter. Press the [ ] button to play, press it again to pause;...
- Page 19 WORKING WITH EBOOK Select Ebook from the “Main Menu”, press the [MENU] button to enter. Select your desired file by rotating the [TUNING] knob, then press the [MENU] to enter below settings: - Local File: Select play file - Play set: Manual play or Auto Play (1~10 seconds – page changing time) - Delete file: Delete a single file by rotating the [TUNING] knob to select [YES] to delete;...
-
Page 20: Specifications
Note: Before using Ebook function, please first format your file to “.txt” in the computer, then copy to the unit. SPECIFICATIONS... - Page 21 Specifications for Radio 1. Frequency Range 87.0 - 108.0 MHz MW (AM) 522 - 1710 KHz/ 520 - 1710KHz 2.30 - 23.00 MHz 2. Preset Memories: FM 99; MW 50; SW 99 (total 248) 3. Noise Limit Sensitivity μ ≤ MW (AM) ≤...
Need help?
Do you have a question about the DE1126 and is the answer not in the manual?
Questions and answers