
Summary of Contents for Triton Luxury Body Dryer
- Page 1 Luxury body dryer Installation and operating instructions NSTALLERS PLEASE NOTE THESE INSTRUCTIONS ARE TO BE LEFT WITH THE USER 2180514G June 2008...
- Page 2 the nation’s favourite PLUMBING & HEATING SUPPLIES FREE SHIPPING SECURE PAYMENTS on all orders over £100 to mainland UK shop online with confidence FINANCE AVAILABLE PRICE MATCH spread the cost with low interest rates always get the best deals available we have H U G E R E D U C T I O N S...
-
Page 3: Table Of Contents
Cleaning ..............16 Servicing ..............16 Spare parts ..............17 Guarantee, service policy, etc......... rear cover To check the product suitability for commercial and multiple installations, please contact Triton’s specification advisory service before installation. Telephone: 0870 067 3767 Facsimile:... -
Page 4: Important Safety Information
AFETY NFORMATION Products manufactured by Triton are safe and without risk provided they are installed, used and maintained in good working order in accordance with our instructions and recommendations. All required safety features have been designed and built into the product for your complete protection. -
Page 5: Introduction
ADVICE TO USERS This book contains all the necessary fitting and The following points will help you understand operating instructions for your Triton Luxury how the Body Dryer operates: Body Dryer. Please read them carefully. a. The unit consists of a high powered two The Body Dryer installation must be carried speed fan and 2 x 4.5kW heater elements... -
Page 6: Fault Finding
FAULT FINDING Fig.1 Follow the instructions for commissioning. If findings do not match expectations contact Triton Customer Service. If the green LED is on but the unit does not operate then the hand-held controller or its battery should be suspected. -
Page 7: Electrical Requirements
Body dryer ELECTRICAL REQUIREMENTS The body dryer must be connected to its own independent electrical circuit as determined by the IEE regulations but it WARNING! can share the same supply as an electric WHEN USED INDEPENDENTLY OR IN shower providing the wiring connections follow that of the wiring schematic shown TANDEM WITH AN ELECTRIC SHOWER in the electrical connections section. - Page 8 Body dryer The earth continuity conductor of the 11.2 It is also necessary to satisfy the electrical installation must be effectively disconnection time and thermal connected electrically to all exposed metal constraints, which means that for any parts of other appliances and services in given combination of current demand, the room in which the body dryer and voltage drop and cable size, there is a...
-
Page 9: Siting
Body dryer SITING Fig.3 Beyond defined Areas Body dryer Shower Isolating unit switch 2.2 - 2.5 metres Consumer unit Fig.4 Typical system layout The dryer has been designed for use in a WARNING! bathroom or shower room for the purpose of personal body drying and will heat a bathroom The dryer must NOT be positioned rapidly. - Page 10 (not supplied). Contact Triton Customer Service for further details. Fig.7 Once installed, care should be taken to ensure...
-
Page 11: Fitting The Body Dryer
Body dryer FITTING OF THE DRYER Fig.8 Before installation check the parts for any signs of obvious damage. Read, understand and follow the installation safety guidelines that come with this product. The dryer has been designed for use in a bathroom or shower room for the purpose of personal body drying. - Page 12 Body dryer Tip: Remember, sound advice is to measure Fig.11 twice, cut once. Note: The cut-outs in the template are not symmetrical about the centre of the template. When positioning the template make sure to use the correct aspect. Place the template supplied in the selected position in the roof space and push a bradawl or thin screwdriver through the plasterboard to mark the four corners of the rectangular cut out,...
-
Page 13: Electrical Connections
Body dryer ELECTRICAL CONNECTIONS Fig.15 SWITCH OFF THE ELECTRICITY SUPPLY AT THE MAINS. Fig.15 shows a schematic wiring diagram. Fig.16 shows a connection diagram which must be followed without deviation. This is particularly important where a body dryer and shower combination are using the same feed cable. - Page 14 Body dryer DO NOT switch on the electricity supply until all Fig.18 safety covers have been correctly fitted. Replace the wiring safety cover (fig.17). Pull cord Connecting the body dryer to a shower isolation switch Where a shower is to share the same electrical Body dryer unit supply the wiring should be routed as shown in...
-
Page 15: Replacing The Cover
Body dryer REPLACING THE COVER Fig.18 Place the cover up to unit and align with the outlet nozzle. Mark the position of the four cover screw holes (fig.18). Remove the cover and screw the four plasterboard rawl plugs into the positions marked on the ceiling. Connect up the multiway cable to the PCB unit within the ceiling cover (fig.19). -
Page 16: Commissioning
If the reason for overheating is not obvious button. then switch off the unit at the mains supply and contact Triton Customer Service for advice. Table C DO NOT attempt any repairs as there are no user serviceable parts in the unit. -
Page 17: Operating Functions
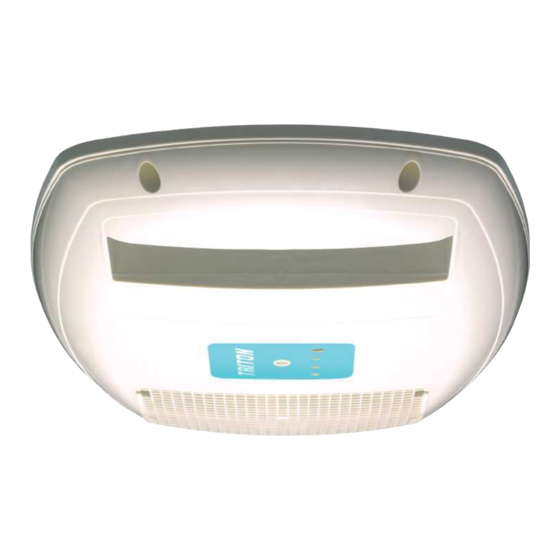
Body dryer OPERATING FUNCTIONS Fig.21 Normal use The dryer has been designed for use in a bathroom or shower room for the purpose of personal body drying. The dryer MUST NOT be Fan only Stop used for any other purpose. The body dryer is designed to give maximum comfort and drying satisfaction. -
Page 18: Overheat Cut Out
Body dryer activated then the reselection of a function on FUNCTION EFFECT the remote controller will be required to restart Press the Fan Fan will start up in slow mode the dryer. only button on (one bleep). the hand-held Air output from the unit will OVERHEAT CUT OUT controller. -
Page 19: Cleaning
Use a vacuum cleaner at regular intervals to remove dust or fluff. SERVICING Should any servicing or maintenance be required then contact Triton Customer Service or a suitably qualified and competent electrician or service engineer. -
Page 20: Spare Parts
Body dryer SPARE PARTS Ref. Description Spares No. Complete unit – Airobe model DR-103 version 1.1 Main PCB 83309590 Heater element – single 83309600 Fan motor 83309610 Run capacitor 83309620 Cover, including: 83309630 Filter Handset 83309640 Communication cord 83309650 Optional –... - Page 21 Triton is a division of Norcros Group (Holdings) Limited E mail: technical@tritonshowers.co.uk Extended Warranty AVAILABLE NOW. Call 0870 067 3333 for more details. TRITON reserve the right to change product specification without prior notice. E&OA. © TRITON SHOWERS 2008...
Need help?
Do you have a question about the Luxury Body Dryer and is the answer not in the manual?
Questions and answers