Advertisement
Quick Links
Advertisement

Summary of Contents for flying eagle Fys-13
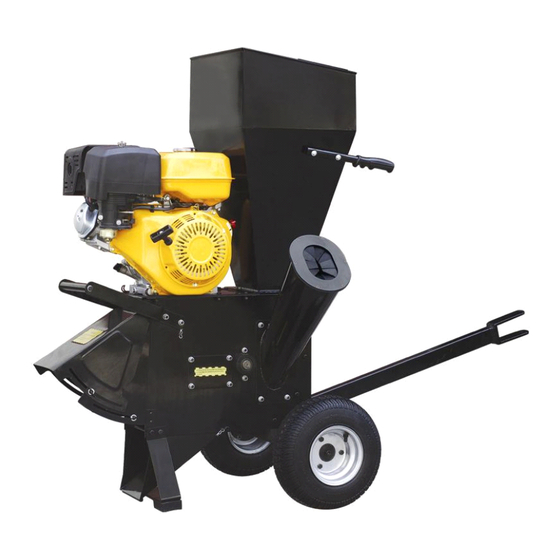
- Page 1 FYS-13 FYS-13L POWERFUL SHREDDER OWNER’S MANUAL...
- Page 2 To operator: Thank you for buying Shredder Fys-13 and Fys-13 L. This owner’s manual is considered a part of shredder and should be always with the shredder. Please make sure to read and follow all instructions in this manual before attempting to operate this machine.
- Page 3 Unpack and check contents. Remove all the items from the box. If any part are missing, contact your place of purchase at once. Assembly should be done on a clean, level surface with a helper. Take out the body from the box and place it on a wood shelf. figure 1 2.
- Page 4 2.2. Fasten the bolt 1 with washer 2,gasket 3 and nut 4.See figure 2. 2.3. Pull the discharge hopper out of the parts box and align the holes 1,2. 2.4. Attach front foot 5, to the sideboard of the parts box and align the mounting holes with holes 1,2.
- Page 5 Then screw the nut tight in 6 place. 4. Attaching the chipper tube to the basic machine. Note: The short chipping chute refers to Fys-13 and the long chipping chute refers to Fys-13L. figure 4 4.1. Put the chipper tube 2 in place on the side of the basic machine. Align the three mounting holes in the flange with three holes around place 1.
- Page 6 5.2. Put lower part of the grid outside of lower axis in the discharge opening. Tighten the screws M5*15 on the left and right side of discharge opening to fix the grid. 6. Mounting the two handles 7. Safety instructions for machine with bagging attachments. Cover the discharge opening with the nylon bag and tighten the tie.
- Page 7 figure 6 9.4. Refer to “starting the engine” for the instruction of adding fuel. III. III. Safety Safety Instruction Instruction Instructions s s s III. III. Safety Safety Instruction i. Training Make sure you fully understand the owner’s manual before attempting to operate the machine.
- Page 8 ---Never add fuel to the machine indoors. ---Do not smoke while adding fuel. ---Never refuel or store the machine in a place where there is open flame, spark or other ignition object. ---Do not attempt to start the power source if fuel is spilled. Wipe away the spillage and put it far away from the area before starting the machine.
- Page 9 4. Do not allow hands or any other parts of the body or clothing inside the feed hopper, discharge chute, or other rotating parts. 5. Be aware of the hot muffler, when the machine is in operation touching the muffler will cause burns. 6.
- Page 10 13. Make sure the opening of the chipping tube is always covered while not at work in case children place their hands into the tube. 14. To move the machine, firmly hold the handle with both hands, step on the shaft on the rear wheel with one foot, lift the front of machine, pay attention to center of gravity of machine, walk slowly forward, backward or turn around.
- Page 11 discharge opening with a fabric bag and tighten the cord in the mouth of the bag. When the machine is working, all the chips are collected in the bag. You may take another way to deal with the chips. Wood Shredder operation VI.
- Page 12 of discharge while machine is on operation. 10. Set back the cover to the side tube once finishing chipping. VII. VII. Leaves Leaves Grass Grass Shredding Shredding VII. VII. Leaves Leaves and and Grass Grass Shredding Shredding 1. Leaves and short stalk (bean plants), cobs, sod and similar material should be fed into the hopper and chipped in 16 interlaced chipping lots.
- Page 13 VIII. VIII. VIII. VIII. Sharpen Sharpen Sharpen Sharpen the the blade blade blade blade The cutting blade is made of special material and the blade is very sharp after heat treatment. It may be dull after being used for some time. Judgment for dull blade: when the chipping sound becomes very ponderous and the belt always skids while it is not loose, or feeding speed gets slow, please remove the blade and check if it is dull.
- Page 14 differ. 5. Position the blade in its location and tighten the nuts. 6. Replace the board covering the blade. 7. Replace the discharge screen. 8. Close the outlet of the discharge. Adjusting Adjusting belt. belt. IX. Adjusting Adjusting the the belt. belt.
- Page 15 affiliated pulley beside the blade tray. 4. The new belt is tighter than the old. To assemble the new one is not as easily as to remove the old. When you hold the belt into the slot, do not put your finger between the pulley and belt, which may result in injury.
- Page 16 12. Replace the board covering the blade. 13. Close the outlet of the discharge. Specification of shredder chipper...
- Page 17 ITEM: Shredder chipper FYS-13, FYS-13L Type of engine: DJ390D5 Carburetor type: Single cylinder,4 stroke Displacement: 389cc Max. engine speed: 3600r/min ENGINE: Rated input power: 7.7kw/3600r/min Max. engine power: 8.5kw/3600r/min Starting mode: Recoil starter Fuel tank capacity: 2.6L Lubricating oil tank 1.4L...
- Page 18 Description Description rubber foot spacer(right) impeller flat washer many hex nut many rear board lock washer many engine seat hex bolt tool box discharge chute rubber gasket movable door hopper tube handles screen hook many side door plate hex bolt hitch pin burn-proof net door axle...
Need help?
Do you have a question about the Fys-13 and is the answer not in the manual?
Questions and answers