
Subscribe to Our Youtube Channel
Summary of Contents for Shimadzu BX32KS
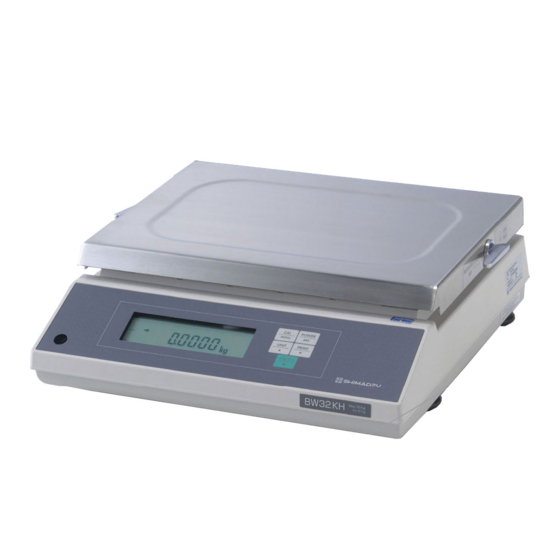
- Page 1 Instruction Manual Medium-Sized Electronic Balance BX-K series BX32KS, BX52KS, BX12KH, BX22KH, BX32KH BW-K series BW32KS, BW52KS, BW12KH, BW22KH, BW32KH SHIMADZU CORPORATION Kyoto,JAPAN...
- Page 3 Notation Conventions This instruction manual uses the following notation conventions to indicate Safety Precautions. CAUTION Indicates a potentially hazardous situation that may result in injury to personnel or equipment damage. Provides additional information needed to properly use the balance. Note: Other conventions used in this manual include: ITEM DESCRIPTION...
-
Page 4: Safety Precautions
• Handle the balance carefully. The balance is a precision instrument of solid design. • Do not connect peripheral devices other than those recommended by Shimadzu. The balance may not operate properly if peripheral devices other than those specified in this manual are used. The specifications for the RS-232C/AUX connector are described in Section 3.2 "Personal Computer - RS-232C". -
Page 5: Table Of Contents
BASIC OPERATION..................7 Balance Components ....................7 1.1.1 Operations of the Keys on the Main Unit ..............9 1.1.2 Symbol Display......................10 Installation......................11 1.2.1 Choosing the Installation Site...................11 1.2.2 Balance Installation ....................11 Turning the Power ON ...................13 Adjusting the Built-in Clock ..................14 Span Calibration ....................14 Weighing ........................14 1.6.1 Changing the Unit Display...................15 1.6.2 Changing the Minimum Display Digit... - Page 6 2.7.5 Level Mode ...................36 2.7.6 No Graphic Display ..............36 Environment Menu ............... 37 2.8.1 Overview.........................37 2.8.2 Averaging ..................37 2.8.3 Stability Detection Band ..............37 2.8.4 Tracking ....................38 2.8.5 Pretaring Value ................38 2.8.6 Whole Lighting Mode ...............39 2.8.7 Taring/Printing ...............39 Application Menu ..............
- Page 7 3.2.2 Data Format........................56 3.2.3 Using Command Codes....................57 3.2.4 Windows® Direct Function..................63 3.2.5 Multi-Connection Mode....................65 Optional AKB-301 Application Keyboard..............67 3.3.1 Basic Information......................69 3.3.2 Example of Use......................70 Foot Switches ......................72 Hook for Below-Balance Weighing ................73 APPENDIX ....................74 Part List........................74 4.1.1 Standard Accessories and Maintenance Parts ............74 4.1.2 Options..........................74 Table of Unit Conversion Constants...............75 Specifications for the RS-232C/AUX Connector ............75...
- Page 8 Thank you for purchasing this medium-sized electronic balance, the Shimadzu BX-K/ BW-K series. In addition to its ability to make rapid mass measurements, the BX-K/ BW-K series is also well-equipped with a four-mode analog display, clock function, various application measurement functions and a unit conversion function.
-
Page 9: Basic Operation
1. BASIC OPERATION 1.1 Balance Components Open the package and sure following items are included. Balance body, pan, AC adaptor, Balance cover, adhesive tape, Instruction manual, inspection certificate, <BW-K only> Internal weight, Fix screw of the internal weight, cover of the internal weight Fix of the screw of the internal cover [ Notes ] [ Appearance ]... - Page 10 Calibration lever (2 places, on the left and on the right) (BW-K series only) Balance unit Level Level screws Display panel Key switch KEY Connector RS-232C DATA I/O DCIN Connector Connector Connector Position of the calibration lever (BW-K series only) Front of balance Rear of balance Measurement...
-
Page 11: Operations Of The Keys On The Main Unit
1.1.1 Operations of the Keys on the Main Unit The functions of the keys found on the front of the balance are described in the table below. During Weighing During Menu Selection ( 1) Pressing Once Pressing Pressing Once Pressing and Releasing Holding and Releasing... -
Page 12: Symbol Display
1.1.2 Symbol Display Unit display Graphic display An example of “whole lighting” display. Display Name Description Stability symbol Indicates that the balance is stable. (*1) Tare symbol Indicates that a Pretare value has been set. Zero symbol Indicates that Auto Zero is ON for the Application Measurement function. -
Page 13: Installation
Installation 1.2.1 Choosing the Installation Site Power supply CAUTION • Select an installation site that is near a power source to ensure that the attached AC adapter is used properly. If this is not possible, an optional battery pack is available as a special accessory. - Page 14 stage of the procedure. Refer to “Fitting the Vinyl Cover”, mentioned later. 3) Fix the calibration weight cover (1) with the calibration mass cover setscrew (2). Note Steps (3) to (5) are only required with the BW-K series. 4) Put the built-in calibration weight (3) in place and tighten the calibration weight stopper screw (4).
-
Page 15: Turning The Power On
3) Fit the pan. 4) Place a weight onto the pan which is close to the weighing capacity to check that the pan and vinyl cover are not touching. Accurate measurements cannot be made if there is contact between the two items. If this is the case, re-fix the vinyl cover. (Note) The vinyl cover (1) is folded up when it is in the packaging. -
Page 16: Adjusting The Built-In Clock
Adjusting the Built-in Clock The BX-K and BX series of balances have a built-in battery driven clock. After unpacking and installing the balance, adjust this clock to the appropriate date and time. Refer to Section 2.11.1 “Date for the Built in Clock.” Refer to Section 2.11.2 “Time for the Built-in Clock.”... -
Page 17: Changing The Unit Display
1.6.1 Changing the Unit Display Every time the key is pressed, the unit display changes sequentially among those registered in the UNIT REGISTRATION menu. Before a unit can be displayed it must be registered in the UNIT REGISTRATION Note: menu. Refer to “2.10 Unit Registration Menu and Unit Change” for information on how to register units. -
Page 18: Specifications
Standard Weighing Linearity Minimum the External Deviation Type Capacity Display (g) Calibration (kg) Weight (kg) BX32KS BW32KS BX52KS BW52KS BX12KH BW12KH BX22KH BW22KH BX32KH 0.12 BW32KH The BX-K series is not equipped with a built-in calibration weight. The BW-K series is equipped with a built-in calibration weight. -
Page 19: Memu Item Selection
MEMU ITEM SELECTION Introduction The BX-W and BW-K series balance has many functions that can be selected to meet the requirements of the user. Menu Item selection is used to program these functions. symbol is displayed during Menu Item selection. Once the menu items have been set based on the installation environment and weighing purpose, it is not necessary to select the menu items each time the balance is used. - Page 20 Symbols in the Display Press the key when the following symbols are blinking to enter the associated menu. (Calibration) = Enters menu related span calibration. (Graphic display) = Enters the menu related to the graphic display, target and checkweighing. (Environment) = Enters the menu related to the installation environment and general operation of the balance.
-
Page 21: Menu Map
Menu Map To enter the Menu Map: Turn the balance on. Press the key during mass display. (This menu CAN NOT be entered from %, PCS, , and displays.) The selected span calibration type is displayed. The possible displays are: # (BW only) (BW only) # (BX or BW) - Page 22 Calibration Menu symbol blinks. Sets type of span calibration. blinking Sets I-CAL. (Span calibration using the built-in weight) # blinking Sets I-TEST. (Calibration check using the built-in weight) blinking Sets I-CAL. (Span calibration using the external weight) # blinking Sets I-TEST. (Calibration check using the external weight) blinking Executes calibration of the built-in...
- Page 23 Graphic Display Menu Graphic display blinking blinking Full Scale mode # [11] blinking Target mode [12] Target value [13] Limit value [14] blinking Group mode [15] Upper threshold [16] Lower threshold [17] blinking Level mode [18] Upper threshold [19] Lower threshold [20] blinking No graphic display...
- Page 24 Environment Menu blinking blinking Averaging Auto # [22] Pouring [23] Standard [24] Anti-vibration [25] Anti-wind [26] blinking Stability detection band 1 count # [27] 2 count [28] 4 count [29] 8 count [30] 16 count [31] 32 count [32] 64 count [33] blinking Tracking...
- Page 25 Applications Menu blinking symbol blinking Auto Zero On/Off [41] symbol blinking Auto Print at + value [42] at - value and + value [43] at 0 and + value [44] [45] at - value, 0, and + value Continuous Output [46] Stability with GO [47]...
- Page 26 Unit Registration Menu blinking Gram [54] Miligram (mg) [55] Percent # (% ) [56] Number # (PC) [57] Carat (CT) [58] Momne (MO) [59] [60] Immersion liq. density Solid density(DS) density(DL) [61] Reference wt. volume Liquid Pound [61a] Ounce [61b] Troy Ounce [61c] Hong Kong’s tael...
- Page 27 System Setting Menu blinking blinking Current date setting [63] blinking Current time setting [64] blinking Display during standby setting Time [65] Data [66] No display # [67] blinking Report and control setting CAL report creating Create [68] Not create # [69] Balance ID [70]...
- Page 28 Communication Settings Menu blinking blinking Handshaking No handshake [73] Software [74] Hardware [75] Timer # [76] blinking Data Format EB type # [77] Old EB type [78] PR type [79] IPS type [80] blinking Baud Rate (Bits/sec) 300 bps [81] 600 bps [82] 1200 bps #...
-
Page 29: General Menu Operations
General Menu Operations 2.4.1 Setting Numeric Values Numeric values may be used to set the threshold of the comparator with the BX-K and BW-K series balances. Use the optional AKB-301 Application Keyboard to easily set these values. The values may also be set using only the balance keys. -
Page 30: Last Menu Recall
The menu lock is toggled ON and OFF by pressing the key during display that appears after power is supplied to the balance. is displayed when the menu is locked. is displayed when the menu lock is turned off. Menu lock is on. Menu lock is off. - Page 31 4) Press the key to display (" " means "?"). 5) Press the key again. is displayed to indicate menu reset completion. 6) Press the key several times (or hold it for approximately 3 seconds) to return to the mass display.
-
Page 32: Calibration Execution Menu
Calibration Execution Menu 2.5.1 Calibration Calibration is required to accurately weigh items with an electronic balance. Calibration should be performed: • When the location of the balance is changed, even within the same room. • When the room temperature changes considerably. •... -
Page 33: Calibration Check Using The Built-In Weight
3) Press the key. When is displayed, and the stability mark ( ) illuminates on the left in the display unit, turn both of the calibration levers on the left and right of the pan to the back until they stop. At this point the stability mark will temporarily disappear. 4) Press the key when the stability mark lights up again. -
Page 34: Span Calibration Using External Weights
Changing the value to zero is equivalent to performing span calibration. Note: is displayed, indicating the completion of the calibration check. Examples for interpreting the results of a Calibration Check: Note: Value Actual Mass Displayed Mass -0.0003 30kg 29.9997 (32kg/0.1g balance) +0.21 400g 400.21 (420g/0.01g balance) -
Page 35: Calibration Check Using External Weights
2.5.5 Calibration Check Using External Weights 1) Verify that the balance is in mass display and unload the sample from the pan. 2) Press the key once to display is not displayed, select Menu Map item [4].) 3) Press the key. -
Page 36: Pcal - Calibration Of The Built-In Weight
Menu Map item [4] blinking Selects "Calibration check using external weights." 2.6.2 PCAL - Calibration of the Built-in Weight PCAL is used to calibrate the built-in weight to a standard calibration weight that is correctly adjusted, traceable and/or certified. CAUTION Use a correctly controlled, precise calibration mass for this procedure. -
Page 37: Graphic Display Menu
is displayed during the process. Leave the balance in a stable Note: state until the mass display appears as in step 6. • In PCAL, the value of the "weight to be loaded" cannot be changed. • Set the PCAL password using Menu Map item [71]. Graphic Display Menu 2.7.1 Overview The BX-K and BW-K series balance has a bar graph located on the left side of the display. -
Page 38: Group Mode
Menu Map item [13] sets the value, which corresponds to the center line of the graphic display. Menu Map item [14] sets the value, which corresponds to the distance between the center line and upper or lower triangles. 2.7.4 Group Mode This is the best mode to determine pass or failure judgment based on the sample weight. -
Page 39: Environment Menu
Environment Menu 2.8.1 Overview Settings on the balance can be changed to compensate for the installation environment such as the degree of vibration etc. or for the purpose of weighing a solid, liquid or powder. 2.8.2 Averaging It is possible to match the stability of the display and the degree of response with the requirements of specific applications. -
Page 40: Tracking
only when the Auto Print function is used and it is Note: therefore required that the sensitivity to vibration be reduced to allow the balance to be regarded as stable and print the measurement value. The balance may not operate properly if these settings are selected under normal use conditions and environment. -
Page 41: Whole Lighting Mode
To set a pretare value using the optional AKB-301 Application Keyboard, press the [Pretare value] and the key at the same time. Use the AKB-301 if you have to change the Pretare value frequently. 2.8.6 Whole Lighting Mode Press the key to switch from the standby mode to the mass display. - Page 42 Once the key is pressed, data is not output until the and symbol has illuminated and the balance is stable. Data is output only after the stability symbol is lit.
-
Page 43: Application Menu
Application Menu 2.9.1 Overview The Application Measurement function is the generic name of the functions used to perform measurement work using the balance in more efficient ways. Only one Application Measurement function can be used at a time. When the power is turned ON, the balance will begin in the function mode that was last set. -
Page 44: Auto Zero
2.9.3 Auto Zero Select Menu Map item [41]. When the displayed value is within the Zero Range and the stability symbol has illuminated, zeroing occurs automatically. The symbol appears in the display when the Auto Zero function is active. Other keys function as expected with the Auto Zero function activated. 2.9.4 Auto Print Auto Print function allows output of the data automatically without pressing the key for each sample. -
Page 45: Peak Hold
Menu Map item [44] (on positive load and on zero) Load the sample when the value displayed is within the Zero Range. When the stability symbol has illuminated and the positive displayed value is more than 5 times the Zero Range, data is automatically output. Unload the sample or press the key. -
Page 46: Interval Timer
In the peak detection standby state with the symbols illuminated, press the key to tare the display. Press the key. symbol disappears and peak value detection starts. and * are simultaneously displayed after the peak value is detected, and the data is output. This display will not change regardless of the load on the pan. -
Page 47: Auto-Memory And Zeroing
• Pressing the key while in the interval timer standby state causes the power supply standby state to be initiated. • To release the interval timer function, keep pressing the key. This does not reset the interval timer function to zero. •... -
Page 48: Animal Weighing
• When the key is pressed and the displayed value is five times the Zero Range, zeroing occur after data output. (Manual loading) • When the key is pressed in the Auto-Memory and Zeroing standby state, the power supply standby state is initiated. 2.9.8 Animal Weighing Set with Menu Map item [53]. -
Page 49: Unit Registration Menu And Unit Change
2.10. Unit Registration Menu and Unit Change 2.10.1 Unit Registration Menu Press the key in mass display to sequentially change the registered units. It is possible to display units other than "kg" with the BX-K and BW-K series of balances. Before weighing, set the display units to be used with the unit setting menu [54] to [62]. -
Page 50: Piece Counting
The weight of subsequent samples are displayed as a percentage of the reference sample weight. 2.10.3 Piece Counting 1) Register the PCS unit with Menu Map item [57]. (The PCS unit is registered before shipment.) 2) Press the key several times in the mass display until the PCS unit is displayed. -
Page 51: Solid Specific Gravity Measurement
2.10.4 Solid Specific Gravity Measurement Solid specific gravity measurement refers to the measurement of the sample (solid) weight in the air and in a liquid of known density and the calculation of the sample density. The ▼d symbol is used to represent the solid density unit in this balance. The data output unit is DS. -
Page 52: Liquid Specific Gravity Measurement
2.10.5 Liquid Specific Gravity Measurement Liquid specific gravity measurement refers to the measurement of the weight of a reference solid of a known volume in air and in the sample liquid. Specific gravity for the liquid is calculated from these two values of. The display unit for liquid specific gravity is "d."... -
Page 53: System Setting Menu
2.11 System Setting Menu The SYSTEM SETTING menu is used to set the items that pertain to or are controlled by the balance. 2.11.1 Date for the Built-in Clock Select Menu Map item [63]. Press the key. Set the last two figures of the year, month and day, using the keys. -
Page 54: Measurement Control System
Convenient Functions of Time Display The following functions are available when the time is displayed during standby. Seconds display function: Press the key to enable the display/non-display of the seconds value. 2.11.4 Measurement Control System Items related to the calibration of the balance and those set by the administrator are summarized in this menu. -
Page 55: Handshaking
In this format, the number of the lowest place of Menu Map item [70] Note: assigned to identify the balance. Menu Map item [79] Compatible format for the PR and SR series of Shimadzu electronic balances. Available commands, functions and responses are limited. -
Page 56: Communication Speed
2.12.4 Communication Speed Select the communication speed (300, 600, 1200, 2400, 4800, 9600, 19200, or 38400 bps). Number of xxx shows bps (bits/second). Baud rate and bps are the same value. Set with Menu Map items [81] to [88]. 2.12.5 Parity / Bit Length Select the parity and bit length. -
Page 57: Connecting Peripheral Instruments
Connecting Peripheral Instruments A variety of peripheral instruments are available for use with the BW and BX series balance, such as an electronic printer, keyboard or personal computer. This chapter describes how to connect and use peripheral instruments. EP-60A Electronic Printer 1) Use the default communication settings for the balance listed below. -
Page 58: Data Format
IBM PC/AT and its compatible personal computers (D-sub 9-pin) Personal computer side Balance side FRAME SHIELD FRAME (This wiring cable is not always necessary.) IEEE Standard (D-sub 25-pin) 3.2.2 Data Format The following explanation is applied when is selected. For other formats, refer to the data corresponding to the compatible machine. ... -
Page 59: Using Command Codes
instead of that described above. (2) For of ٱٱٱٱٱOL ٱٱٱٱ <Delimiter> - ٱٱٱٱOL ٱٱٱٱ <Delimiter> 3.2.3 Using Command Codes If communication conditions are incorrectly set, a communication error Note: is displayed. (1) Commands that end with a number, character, or symbol other than [=]: Transmit to the balance with a delimiter for each command code. - Page 60 If there is 0 in the four-digit number, the setting is complete at that point and menu Note: selection is ended. The result of this command varies depending on the type of the balance. Example 6: #=2.56 <CR> Example 7: #=12.345.67 <CR>...
- Page 61 TARE Equivalent to the Equivalent to the RANGE Equivalent to the Equivalent to the UNIT Equivalent to the PRINT Equivalent to the POWER+ Equivalent to holding the key for approximately 3 seconds. MENU+ Equivalent to holding the key for approximately 3 seconds.
- Page 62 (iv) Commands related to unit conversion Switches to "g" unit Registration of "kg" unit and switching Registration of "mg" unit and switching PERCENT Registration of "%" unit and switching Sets 100% when display is in "%" unit. kg <- -> % switching Registration of "PCS"...
- Page 63 P.TARE= Sets Pretare value. ZRNG= Sets Zero Range value. Sets unit weight. USER= Sets user unit conversion coefficient. VOL= Sets volume of reference weight. SDENSE= Sets surrounding liquid density. I.TIME= Sets interval timer value. DATE= Sets the date. TIME= Sets the time. TARGET= Sets the target value.
- Page 64 Zero setting (same as immediate taring) (6) Compatible command with Sartorius® Electronic Balances <ESC>P One time output <ESC>T Taring <ESC> indicates escape code (1BH). Note:...
-
Page 65: Windows® Direct Function
3.2.4 Windows® Direct Function For Windows®95 Version 4.00.950B, see page 69 “Compatibility Notification Note: ® ® Regarding Linking of “Windows Direct” Function with Windows 95 Version 4.00.950B.” The BX-K and BW-K series balance can transfer data directly to a personal computer running Lotus 1-2-3, Excel, or other applications of Windows®*. - Page 66 • Shimadzu is not liable for any direct or indirect problems caused by this function. It is recommended that important data or programs on your PC be backed-up before using this function. For the operation of Windows®* or the PC, refer to commercial tutorials or the appropriate instruction manual.
-
Page 67: Multi-Connection Mode
• Change the settings of COM 1 to 4. Re-start Windows®* after the changes are complete. • Verify that the correct RS-232C cable is being used. Windows®* = Windows 95, Windows 98, Windows Me, Windows 2000 When the Function Intermittently Malfunctions: •... - Page 68 Assignment of Identification Name In this example (10 balances connected to one computer), assign the identification name in lower-case alphabets. Since 10th character of alphabet is "j," assign "j" to the balance closest to the personal computer, "i" to next closest balance, and so on, back to "a." Setting to Multi-Connection Mode 1) Adjust the communication menu settings of all the balances to the specification of the personal computer, and then, turn off the power to all balances.
-
Page 69: Optional Akb-301 Application Keyboard
[α]UNIT Same as the operation of pressing the key of the balance "α." [α]RANGE Same as the operation of pressing the key of the balance "α."(Valid only for D-type) [α]CAL Same operation as sending the CAL command to the balance "α." [α]UNIT+ Same as the state of holding down the key of the balance... - Page 70 as, piece count and threshold value of graphic display (comparator), as if you were operating a pocket calculator. Use of the AKB-301 Application Keyboard is recommended for performing piece count and pass or failure judgment in daily operation.
-
Page 71: Basic Information
3.3.1 Basic Information 3.3.1.1 Connection Disconnect the power to the balance. Connect the AKB-301 cable to the KEY connector on the back of the balance. Turn on the power to the balance. 3.3.1.2 Overview of Use To set numeric values Press a function keys after the number keys. -
Page 72: Example Of Use
*3 When a comparator is used in Group or Level mode, is the target value. is the target value in the Target mode. is displayed for other modes. *4 This operation is performed only in Target mode. is displayed for other modes. - Page 73 The lower limit value is set to 10000. Checking the upper limit value Press the [UPPER] key to display the set value. Checking the lower limit value Press the [LOWER] key to display the set value. After checking, press the g/PCS key to return to the mass display. 3.3.2.2 Piece Counting Use the [g/PCS], [UNITWT], and [RECALC] keys.
-
Page 74: Foot Switches
If not correct, is displayed. Example: To cancel the Pretare value for a balance with three decimal places: X wrong example: 0 [TARE] Ο correct example: 0.00 [TARE] Checking the Pretare value Press and hold the [TARE] key for approximately 3 seconds. Press the [TARE] key again to return to the mass display. -
Page 75: Hook For Below-Balance Weighing
3.5 Hook for Below-Balance Weighing This hook is useful for conducting measurements with the sample suspended beneath the balance, such as in specific gravity measurement. Attachment method Attach the below-balance weighing fitting by screwing the supplied screws into the screw holes for the transportation screws on the bottom of the balance (2 places), as shown in the diagram on the right, until the screws... -
Page 76: Appendix
APPENDIX Part List 4.1.1 Standard Accessories and Maintenance Parts Pan ASSY KW 321-41074 For the BW-K Pan ASSY 321-40919-01 For the BX-K Pan support cap 321-40965-04 Vinyl cover 321-40924 Double-sided tape for fixing 320-02138 the vinyl cover Calibration weight stopper 321-41046 For the BW-K screw... -
Page 77: Table Of Unit Conversion Constants
• It is not guaranteed that RS-232C cable will conform to all computers. Table of Unit Conversion Constants Conversion SCROLL coefficient Note ORDER MENU UNIT (g=) (display) [54] U-kg [55] U-mg 1000 [56] [57] U-pcs [58] U-ct [59] U-mom 0.266667 [60] U- d [61]... - Page 78 Handshake (receiving) Signal grounding Handshake (receiving) NC= No connection within the balance. Note:...
-
Page 79: Error Display List
Error Display List 4.4.1 General Display Display Description of message Wait for next display. Minimum display resolution is decreased by one decimal place. Minimum display digit is returned to original state. Date and time are being output. Operation was aborted. Application Measurement was released. - Page 80 Release menu lock. key was pressed during menu lock. Check graphic display Mode for operation is different. mode. Cannot be stored, as the supply Check the supply voltage. voltage is abnormal. *Contact your Shimadzu representative.
Need help?
Do you have a question about the BX32KS and is the answer not in the manual?
Questions and answers